Spider plants (Chlorophytum comosum) are beloved by plant enthusiasts worldwide for their charming, arching leaves and easy-care nature. What makes them even more popular is how incredibly simple it is to propagate them. If you’re a beginner looking to multiply your plant collection or share your green babies with family and friends, spider plant propagation is one of the easiest ways to start.
In this detailed guide, we’ll walk you through spider plant propagation for beginners — covering different propagation methods, ideal care for new plants, troubleshooting tips, and answers to common questions. By the end of this article, you’ll feel confident and ready to grow new plants from your existing spider plant.
Why Propagate a Spider Plant?

Before we jump into the how-to, let’s look at why you might want to propagate your spider plant:
- Create new plants for free
- Gift plant babies to loved ones
- Rejuvenate overgrown or root-bound plants
- Learn essential plant propagation skills
- Keep your home fresh with natural air-purifying plants
Thanks to their easy-growing pups, or “spiderettes,” spider plants make propagation fun and rewarding even for total beginners.

When’s the Best Time to Propagate Spider Plants?
You can technically propagate spider plants year-round, especially indoors. But the best results typically happen during their active growing season — spring through early summer. Warm temperatures and longer daylight hours help new plants establish roots faster.
What You’ll Need
Here’s a list of supplies to have on hand before starting your propagation:
- A healthy, mature spider plant
- Clean, sharp scissors or pruning shears
- Glass jars (for water propagation)
- Small pots with drainage holes
- Fresh, well-draining potting soil
- Clean, room-temperature water
3 Simple Ways to Propagate a Spider Plant
The good news is — spider plants are one of the easiest houseplants to propagate, and there are three simple, beginner-friendly methods to choose from:
- Water propagation (using pups)
- Soil propagation (using pups)
- Division (splitting an overgrown plant)
Let’s explore these step-by-step:

Propagating Spider Plant Pups in Water
Water propagation is a favorite for beginners because it’s easy to monitor root development and requires minimal equipment.
Steps:
- Identify a healthy pup (spiderette): Look for a baby plant with at least a few small leaves and, ideally, tiny starter roots.
- Cut the pup: Using clean scissors, snip the runner (stolon) connecting the baby plant to the mother plant.
- Place in water: Fill a small jar with clean, room-temperature water. Submerge only the base of the pup, keeping the leaves above the waterline.
- Position in indirect sunlight: Place the jar near a bright window but avoid direct sun, which can overheat the water.
- Change water every 3–5 days: This prevents bacteria buildup and keeps oxygen levels high.
- Wait for roots: In 7–14 days, you’ll notice tiny white roots developing. Once they reach about 1–2 inches long, your pup is ready to plant in soil.
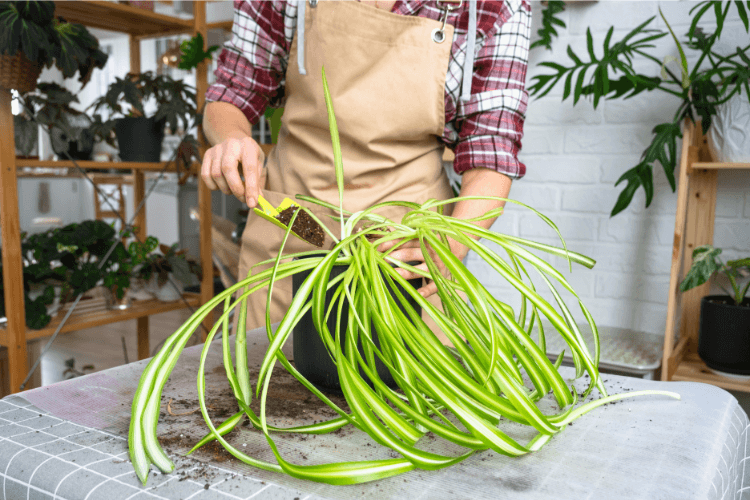
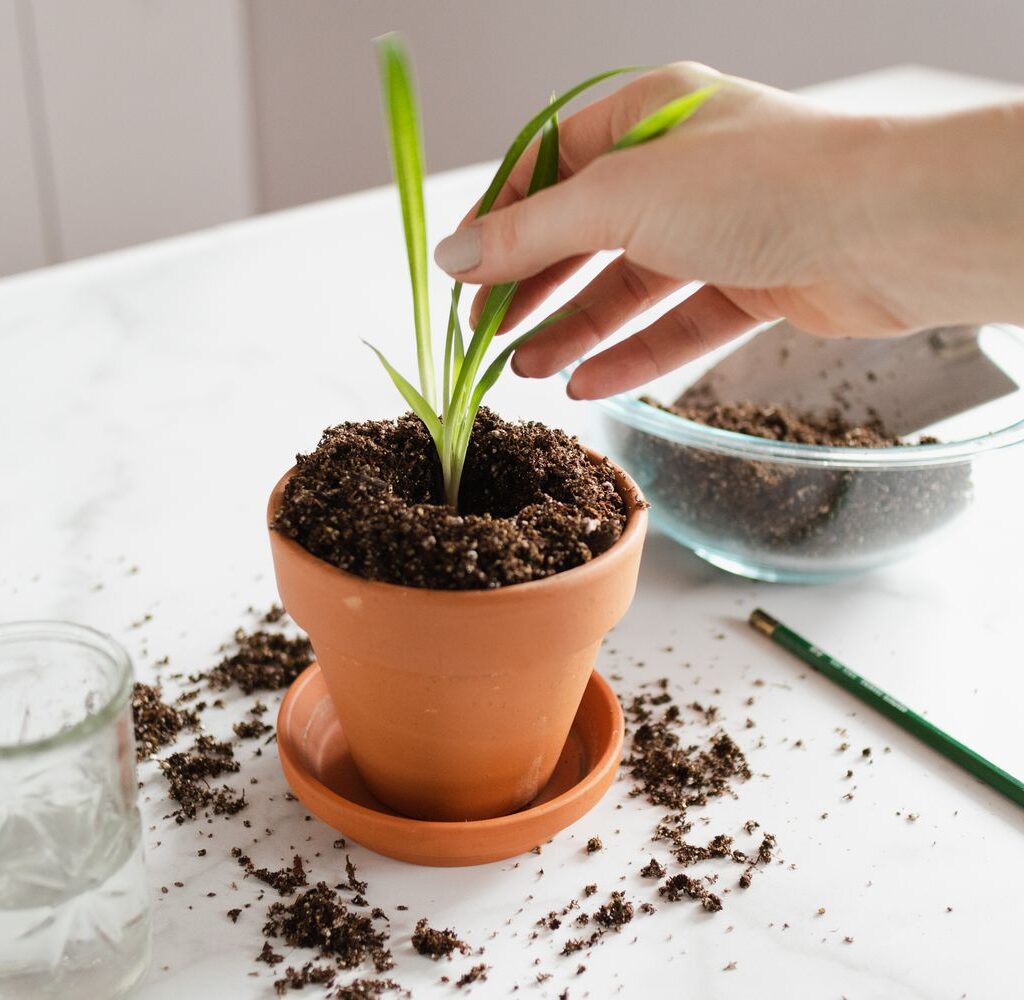
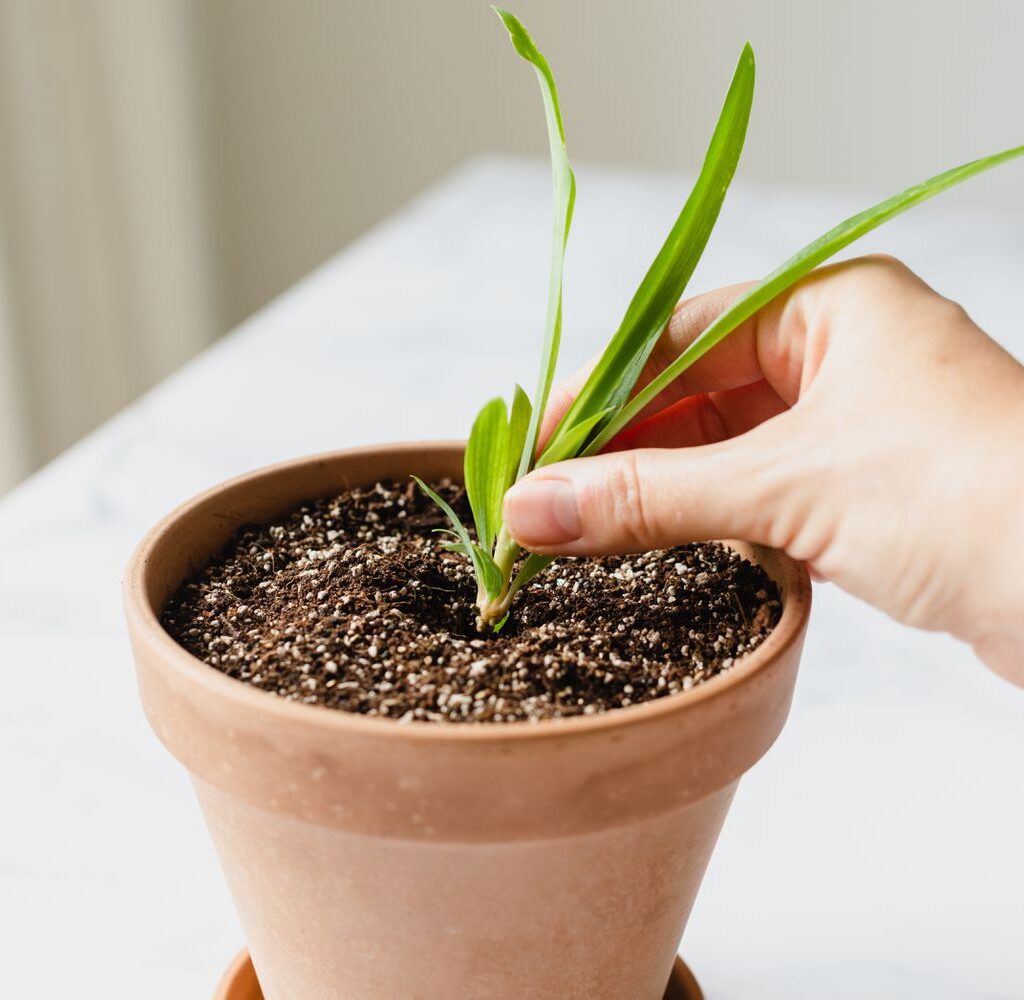
Propagating Spider Plant Pups in Soil
Soil propagation skips the water step and allows roots to develop directly in their growing medium.
Steps:
- Choose a healthy pup: Similar to the water method.
- Trim the runner: Snip the stem just above where the baby plant connects to the mother.
- Prepare a small pot: Fill a pot with fresh, well-draining potting soil.
- Plant the pup: Bury the base of the spiderette about 1 inch into the soil.
- Water lightly: Moisten the soil without soaking it.
- Place in bright, indirect light: Avoid harsh direct sun.
- Care for it like a mature plant: Water when the top inch of soil dries out. In 2–3 weeks, the plant will establish roots and start growing.
Pro Tip: If your spiderette already has visible tiny roots, soil propagation becomes even easier and faster.
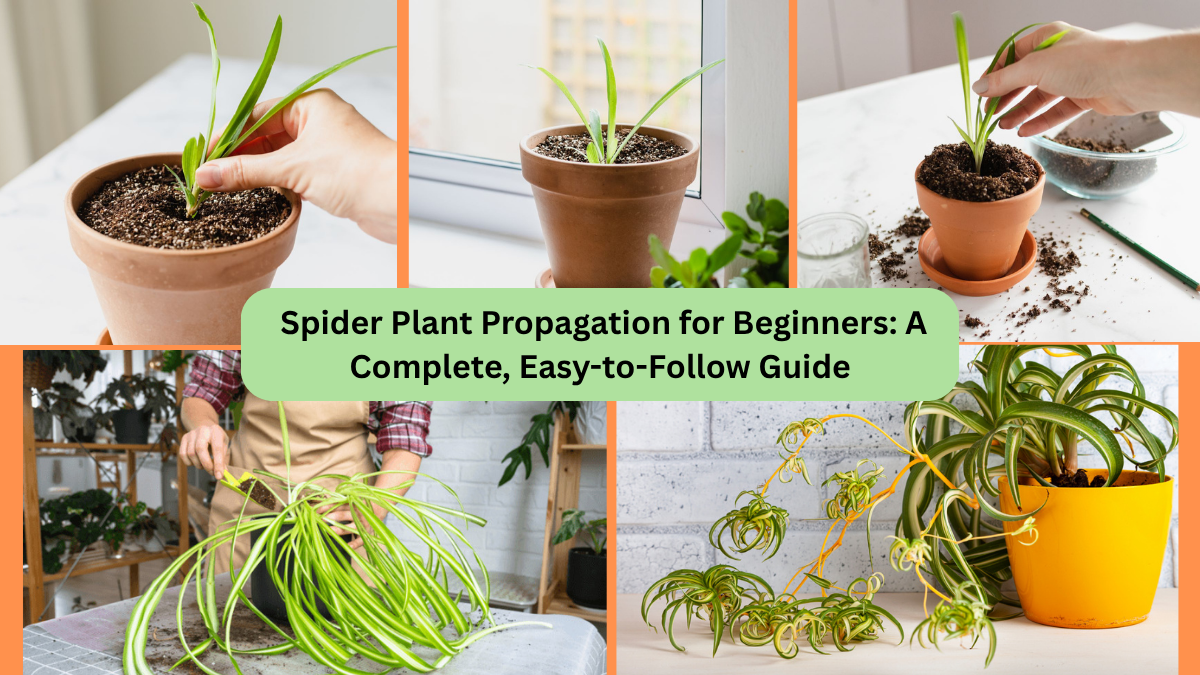
Propagating by Division
If your spider plant is root-bound or overgrown, division is a practical method to create new, mature plants instantly.

Steps:
- Remove the plant from its pot: Gently loosen the soil and slide the plant out.
- Separate the roots: Using your hands or a clean knife, split the root system into two or more sections. Each should have healthy leaves and roots attached.
- Repot each section: Place each new plant in its own pot with fresh soil.
- Water thoroughly: Water each new plant lightly.
- Provide indirect light: Place them in a bright, indirect light location.
Bonus: Dividing your plant gives you mature spider plants immediately, without waiting for pups to grow.
Comparing Propagation Methods
| Method | Time for Rooting | Difficulty | Ideal for Beginners? |
|---|---|---|---|
| Water Propagation | 1–2 weeks | Very Easy | |
| Soil Propagation | 2–3 weeks | Easy | |
| Division | Immediate | Easy |
Ideal Conditions for Successful Propagation
For the best results, give your new spider plants these conditions:
- Light: Bright, indirect sunlight
- Temperature: 65–85°F (18–29°C)
- Water: Keep water fresh for water propagation; lightly water soil when dry
- Humidity: Average indoor humidity is perfect
Common Problems and Quick Fixes
Even though spider plants are hardy, new cuttings and pups can sometimes face minor issues. Here’s how to tackle them:
| Problem | Cause | Solution |
|---|---|---|
| Brown, mushy leaves | Overwatering or stale water | Change water, trim affected areas |
| No root growth in water | Insufficient light or cold room | Move to brighter, warmer spot |
| Wilting in soil | Over or under-watering | Adjust watering routine |
| Algae in water jars | Too much sunlight or stale water | Change water, move to indirect light |
How Long Does Spider Plant Propagation Take?
- Water Propagation: Roots in 1–2 weeks
- Soil Propagation: Roots in 2–3 weeks
- Division: Immediate new plants
Patience is key — spider plant pups grow fast, but visible new leaves might take a few weeks after rooting.

Care Tips for New Spider Plant Babies
- Use room-temperature, filtered water for water propagation.
- Avoid overwatering new soil-planted pups.
- Gradually increase sun exposure as plants mature.
- Prune off any brown or damaged leaves to promote healthy growth.
- Wait until roots are well established before fertilizing.
Final Thoughts
Propagating spider plants is one of the easiest, most rewarding plant care activities you can do — especially for beginners. Whether you prefer water propagation, planting directly in soil, or dividing an overgrown plant, the process is simple, low-risk, and a great way to multiply your indoor garden.
In just a few short weeks, you’ll have thriving new spider plants adding life and fresh, clean air to your home. So grab those scissors, pick your favorite method, and start growing your spider plant family today!