
Growing an avocado tree from a pit is one of the most satisfying and educational gardening experiences—especially for beginners and houseplant lovers. With just a bit of patience, some water, and sunlight, you can turn that leftover avocado seed into a lush, vibrant plant. While it may take years for a homegrown avocado tree to bear fruit (if at all), the process of nurturing it from seed is rewarding, fun, and incredibly simple.
This complete manage guide walks you through every step, from selecting the right pit to sprouting, transplanting, and long-term care for your avocado plant.
Step 1: Choosing and Cleaning the Avocado Pit
Start with a fresh, ripe avocado—preferably organic. Once you’ve enjoyed the fruit:
- Gently remove the pit without cutting or damaging it.
- Rinse it under cool water, removing all the flesh. Use a soft brush or cloth, but don’t peel off the brown skin—that’s the seed’s protective layer.
- Inspect the pit for cracks or soft spots. Choose a firm, intact pit for best results.
This first step is critical because any damage or mold on the pit can prevent successful germination.

Step 2: Identify Top and Bottom of the Seed
Avocado pits have a rounded base (where the roots will sprout) and a slightly pointier top (where the stem and leaves will emerge). It’s important to plant the seed with the bottom in water or soil and the top exposed to air.
Step 3: Sprouting the Pit (Water Method)
The most popular method for sprouting an avocado seed is in water using the toothpick method. Here’s how:
You’ll Need:
- A clean glass or jar
- 3–4 toothpicks
- Fresh water
Instructions:
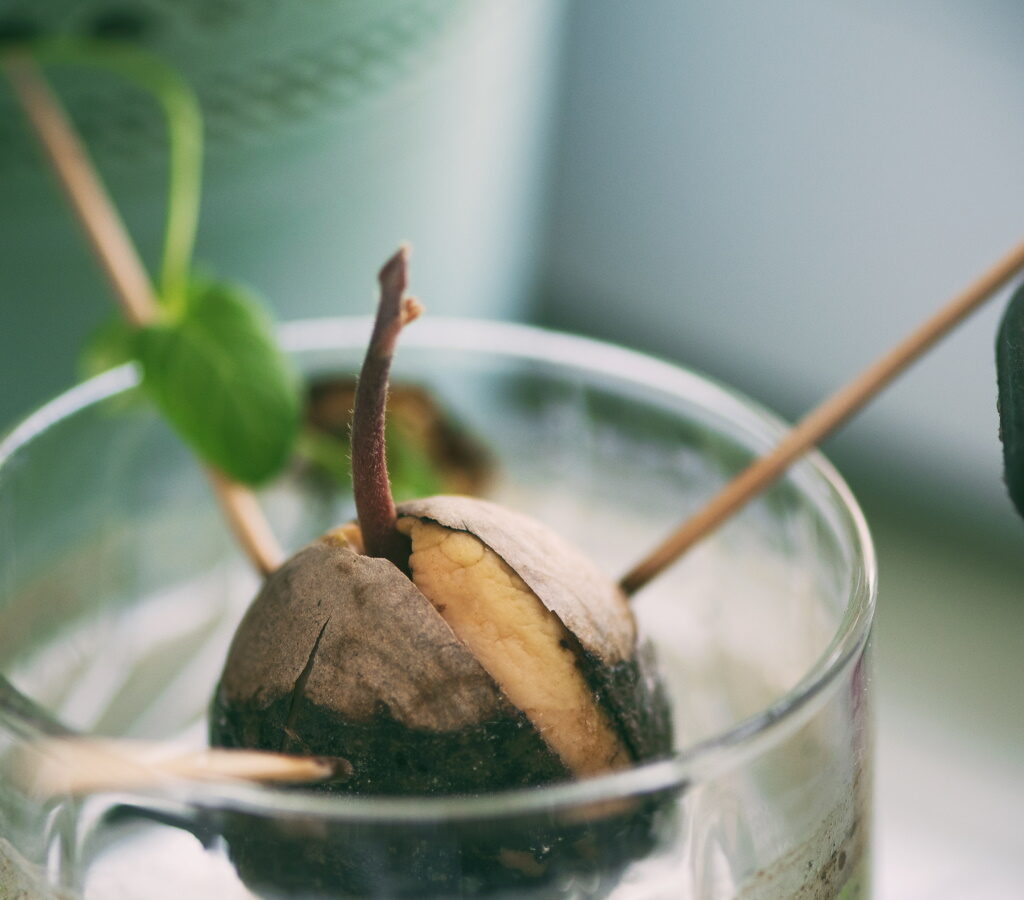
- Insert 3–4 toothpicks around the middle of the pit at a slight angle. This allows the pit to rest half-submerged in water.
- Suspend the pit over a glass of water, with the flat end in the water and the top pointing up.
- Place the glass in a bright, warm location, but out of direct sunlight.
- Change the water every 3–4 days to prevent mold and bacteria.
Germination Timeline:
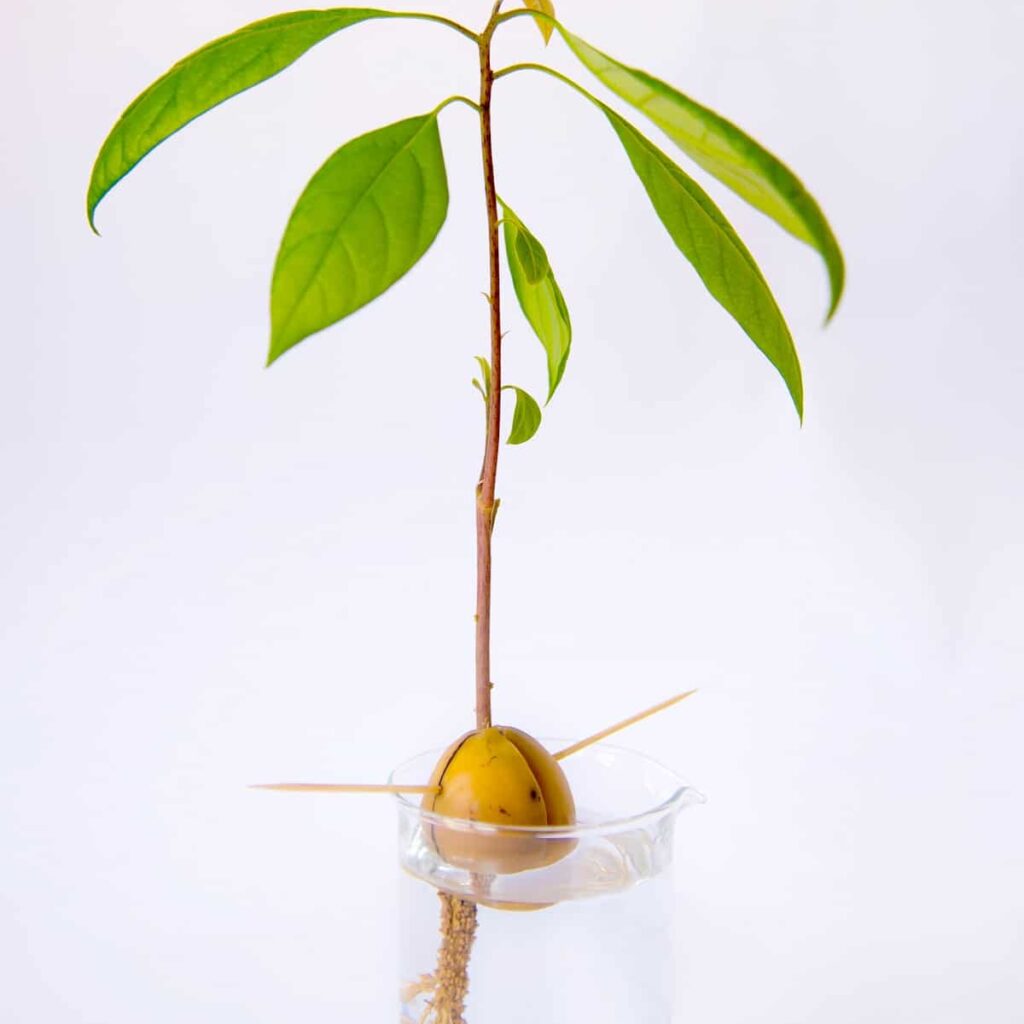
- After 2–6 weeks, the pit will split open, and a taproot will emerge from the bottom.
- Soon after, a small stem will push up through the top.
- Once the stem is 6–8 inches tall, it’s ready for planting in soil.
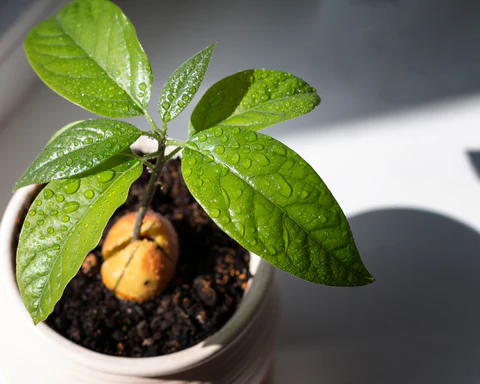
Step 4: Transplanting to Soil
When your avocado sprout has a healthy root system and visible leaves, it’s time to move it into a pot.
Choosing the Right Pot and Soil:
- Use a 6–8 inch diameter pot with good drainage.
- Choose a well-draining potting mix—a cactus or citrus mix works well.
- Add a layer of gravel or broken pot shards to the bottom for added drainage.
How to Plant:
- Fill the pot about halfway with soil.
- Place the sprouted pit root-side down, keeping the top half of the seed above the soil.
- Fill in around the seed with soil, gently pressing to stabilize it.
- Water thoroughly until it drains from the bottom.
Step 5: Providing Optimal Growing Conditions
Now that your avocado pit is planted, it needs consistent care to grow into a healthy plant.

Light:
- Place your plant near a sunny window or bright indirect light.
- Avocados need at least 6 hours of sunlight per day.
Watering:
- Keep the soil evenly moist but never soggy.
- Water when the top inch of soil feels dry.
- Overwatering is a common issue—make sure the pot drains well.
Temperature:
- Avocados thrive in warm temperatures (60–85°F or 16–29°C).
- Keep it away from drafts or cold windows during winter.
Step 6: Encouraging Growth
To encourage your avocado to become bushy and full instead of tall and spindly, regular pruning is essential.
Pruning Tips:
- Once the plant reaches about 12 inches tall, pinch off the top 2 sets of leaves to encourage side growth.
- Repeat this process as it continues to grow to keep a fuller shape.
This helps the plant direct energy into lateral growth, resulting in a healthier, more attractive appearance.
Step 7: Fertilizing and Nutrient Care
After 4–6 weeks in soil, your avocado plant will benefit from regular feeding.
Fertilizer Tips:
- Use a balanced, slow-release fertilizer (10-10-10 or similar) every 4–6 weeks during active growth (spring and summer).
- Reduce feeding during the fall and winter months when growth slows.
Organic options like compost tea or fish emulsion also work well and improve overall soil health.

Step 8: Repotting as It Grows
As your plant grows, it will eventually outgrow its pot.
Repotting Guide:
- Repot once the roots start circling the inside of the pot or poking out of drainage holes.
- Move to a pot 1–2 inches larger in diameter than the current one.
- Use fresh soil to provide new nutrients.
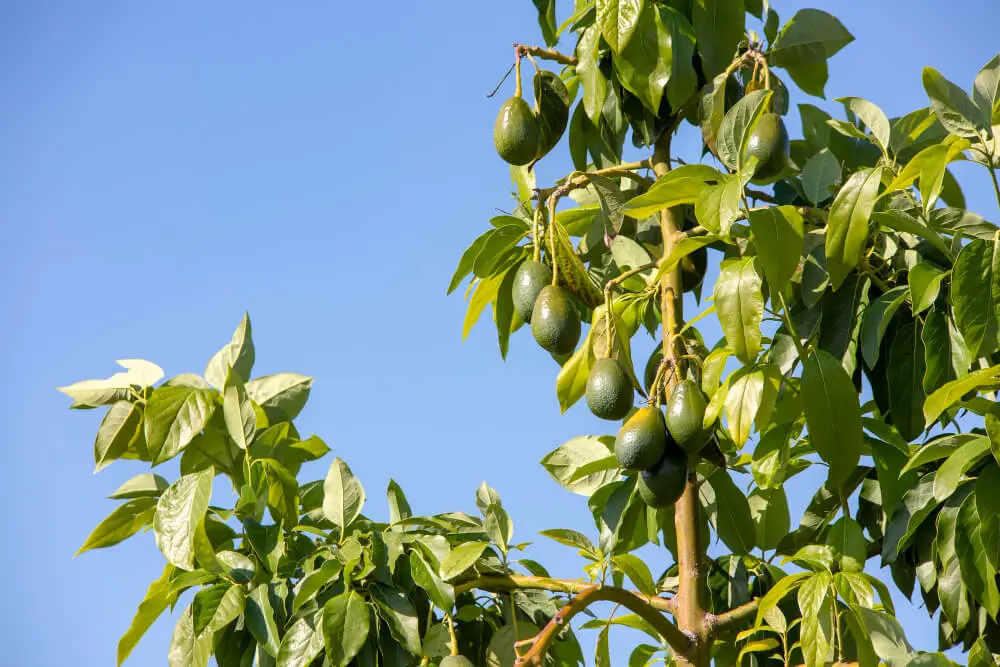
Avocados can grow up to several feet tall indoors, so plan ahead for upward growth or prune regularly to maintain size.
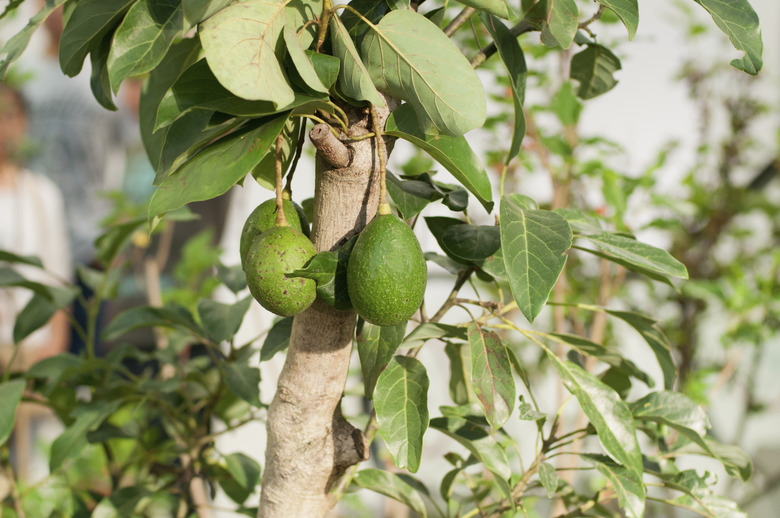
Will It Ever Bear Fruit?
Here’s the truth: while it’s possible, avocado trees grown from seed take 5–13 years to bear fruit, and there’s no guarantee it will happen—especially indoors.
Factors That Affect Fruiting:
- Climate: Avocados need warm, stable conditions to flower and fruit.
- Pollination: They are self-fertile but may require cross-pollination to increase fruiting.
- Type: Avocados grown from seed often differ from the parent fruit in taste, size, or yield.
For fruit, you’ll likely need to grow your tree outdoors in USDA zones 9–11 or graft it with a known cultivar. But even without fruit, the plant is a beautiful tropical houseplant with glossy green leaves.

Common Issues and How to Manage Them
Yellowing Leaves:
Often a sign of overwatering or poor drainage. Let the soil dry and reduce watering frequency.
Pest Problems:
Watch for spider mites or aphids. Use neem oil or insecticidal soap to manage outbreaks.
Drooping Stem:
May occur after transplanting. Provide support with a stake and ensure the plant is getting enough light.
Conclusion
Planting an avocado pit is more than just a fun experiment—it’s a long-term project full of learning and joy. From the moment the seed cracks to when leaves unfurl into a leafy canopy, watching your avocado plant grow is a journey that connects you with nature in a personal way.

Even if it never produces fruit, you’ll have a lush, tropical houseplant as a living symbol of your patience and care. With the tips in this guide, you’ll be well on your way to managing your avocado plant like a pro from pit to sprout—and beyond.