Growing peas at home is one of the most rewarding gardening experiences. These cool-season crops are not only easy to grow but also add nutrition and sweetness to your meals. Whether you enjoy them fresh, stir-fried, or added to soups, peas deliver both flavor and health benefits. For beginners and experienced gardeners alike, homegrown peas are an excellent choice because they thrive in small spaces, grow quickly, and enrich the soil with nitrogen.
This guide provides step-by-step instructions, tips, and detailed information on how to grow peas at home for consistent and fresh harvests.
Benefits of Growing Peas at Home
- Nutritional Value
Peas are rich in fiber, protein, vitamin C, and vitamin K. Eating them fresh ensures you get maximum nutrients that may be lost in store-bought, frozen versions. - Soil Health Improvement
Peas are legumes, which means they naturally fix nitrogen in the soil. This makes the soil more fertile for future crops. - Easy and Low-Maintenance
Peas are simple to grow and don’t require excessive care, making them perfect for beginners. - Cost-Effective
A small packet of seeds can produce several weeks of fresh harvest, saving money compared to buying from markets.
Choosing the Right Type of Peas
There are three main types of peas you can grow at home:

- Garden Peas (English Peas)
These peas need to be shelled before eating. They’re sweet and perfect for fresh eating or cooking. - Snow Peas
Snow peas have flat, edible pods and are often used in stir-fries. They’re harvested before the seeds fully develop. - Snap Peas
A cross between snow peas and garden peas, snap peas are crunchy and sweet, with edible pods. They’re great eaten raw or lightly cooked.
Best Time to Plant Peas
- Cool Weather Crop: Peas grow best in cool seasons, typically between 45–70°F (7–21°C).
- Spring Planting: Sow seeds 4–6 weeks before the last expected frost.
- Fall Planting: In warmer regions, peas can also be planted in late summer for a fall harvest.
Preparing the Soil
- Soil Type
- Loose, well-drained soil with a pH between 6.0 and 7.5 is ideal.
- Avoid heavy clay soil, which holds too much water and causes root rot.
- Soil Preparation
- Work in compost or well-rotted manure to improve fertility and drainage.
- Because peas fix nitrogen, avoid adding too much nitrogen-rich fertilizer, as it will encourage leaf growth rather than pod development.
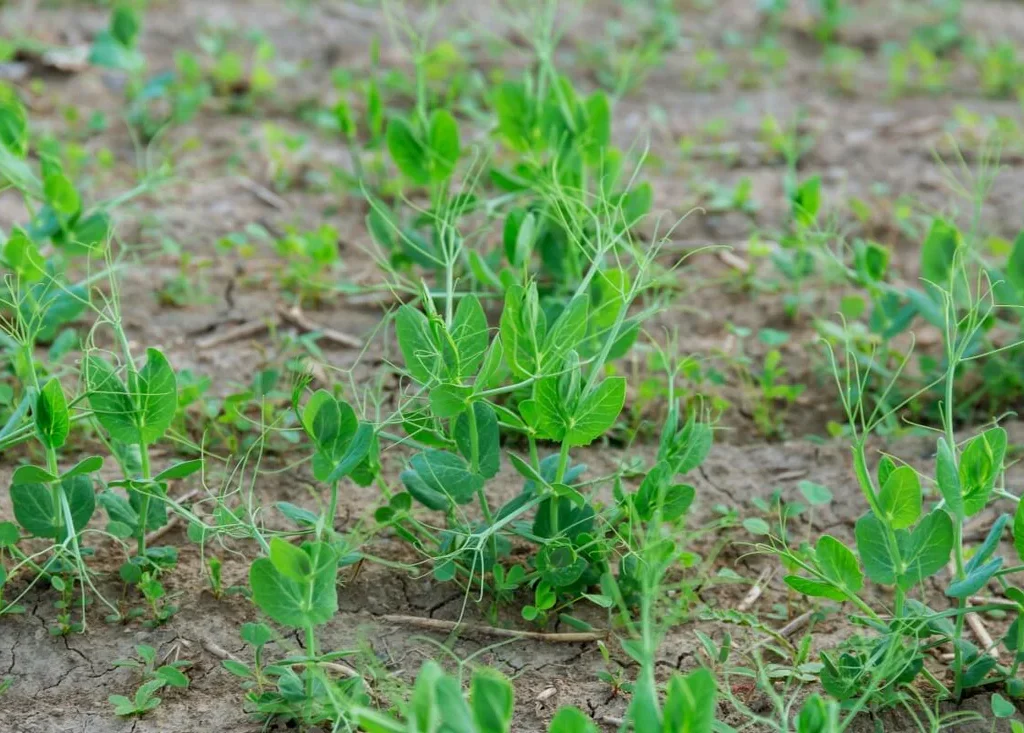
Planting Peas from Seeds
- Seed Preparation
- Soak seeds in water for 6–8 hours before planting to speed up germination.
- Inoculating seeds with rhizobia (beneficial bacteria) can help peas fix more nitrogen.
- Spacing and Depth
- Plant seeds 1–2 inches apart and about 1 inch deep.
- Space rows about 18–24 inches apart.
- Trellis Support
- Most pea varieties climb and need a trellis or support.
- Install stakes, netting, or a wooden trellis before planting to avoid disturbing roots later.
Watering and Care
- Watering
- Keep soil evenly moist but not soggy.
- Water deeply once or twice a week, depending on rainfall.
- Avoid overhead watering to prevent fungal diseases.
- Mulching
- Apply a thin layer of straw or compost mulch to retain moisture and suppress weeds.
- Weeding
- Hand-weed carefully around plants, as pea roots are shallow and sensitive.
Fertilization
- Peas don’t need heavy feeding because they fix their own nitrogen.
- Use a balanced fertilizer (like 10-10-10) sparingly if soil is poor.
- Avoid high-nitrogen fertilizers, which lead to excessive foliage.
Managing Pests and Diseases
- Common Pests
- Aphids: Can cause stunted growth. Spray with neem oil or insecticidal soap.
- Pea Weevils: They chew leaves. Use row covers to protect young plants.
- Diseases
- Powdery Mildew: White powdery coating on leaves. Improve air circulation and avoid wetting foliage.
- Root Rot: Caused by poor drainage. Ensure soil drains well.
- Prevention
- Rotate crops each year to avoid soil-borne diseases.
- Plant resistant pea varieties if available.
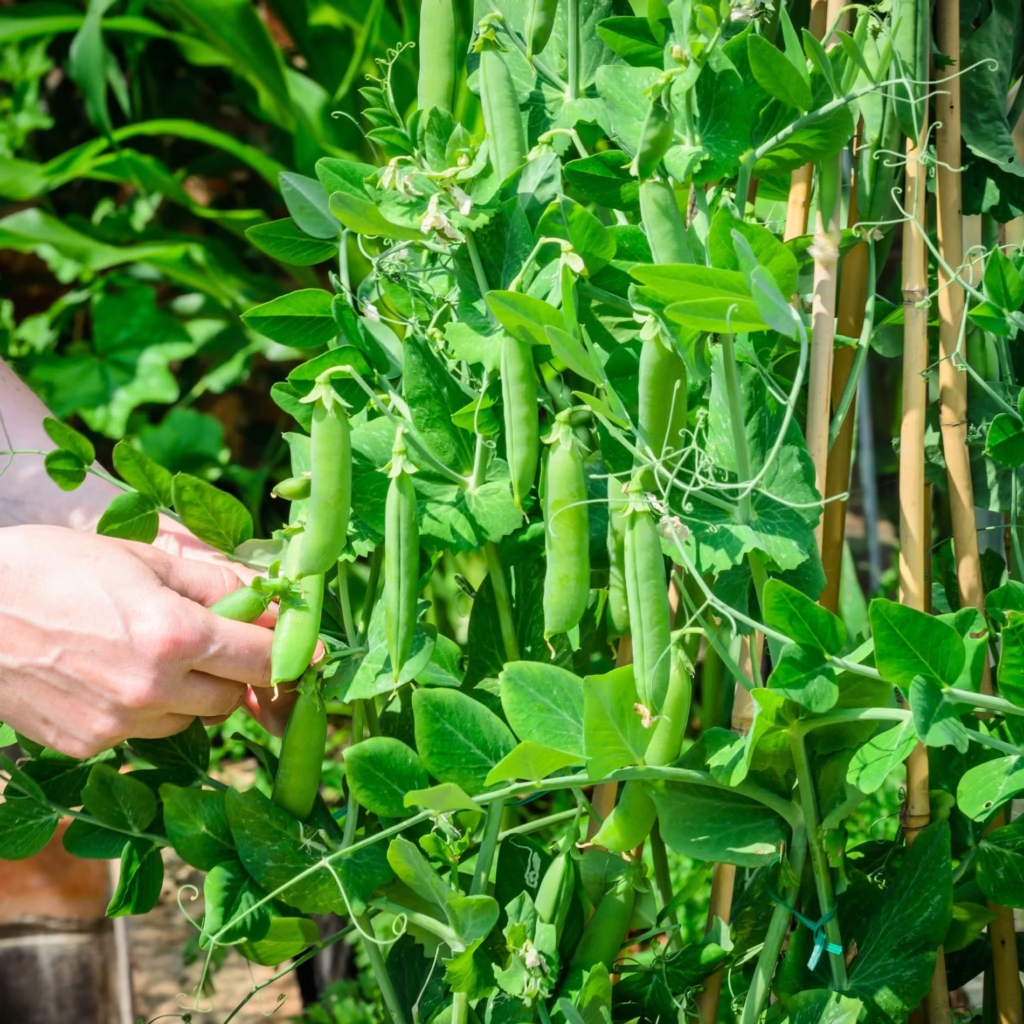
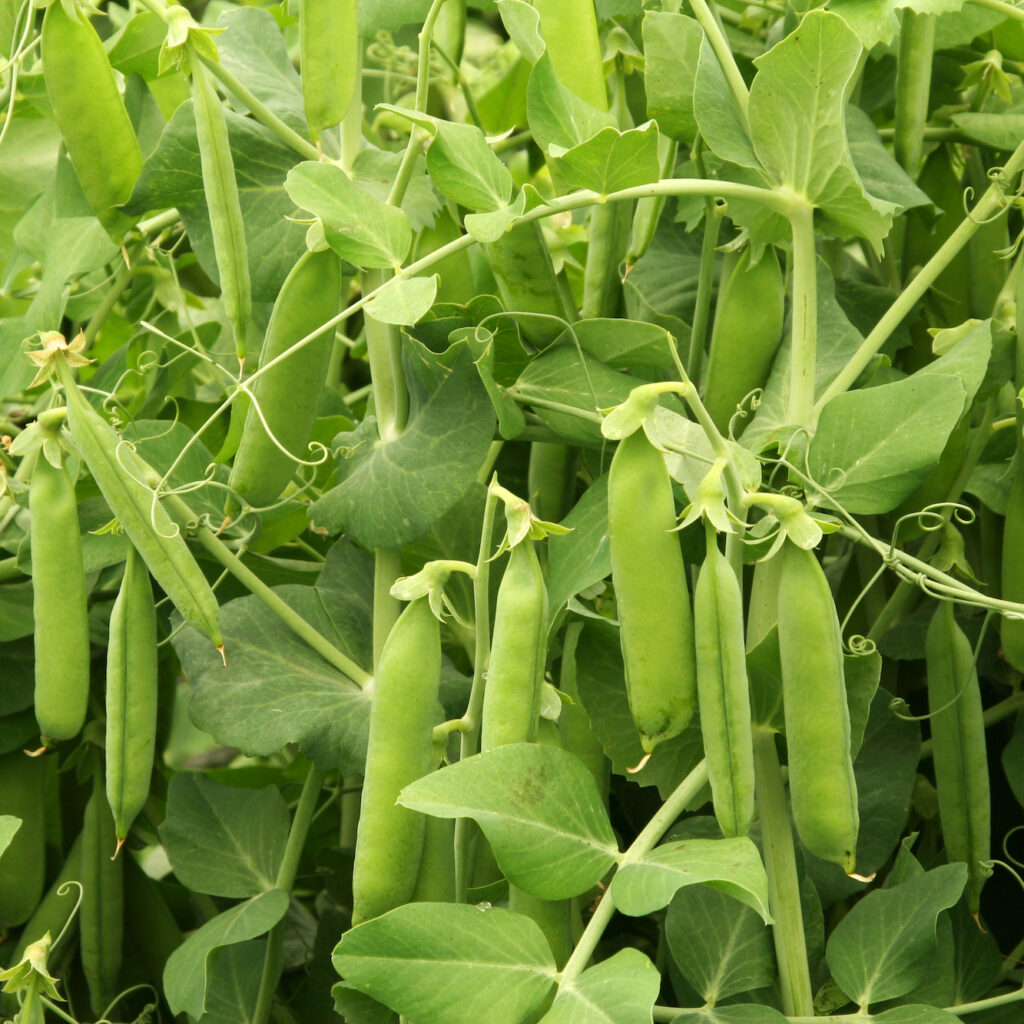
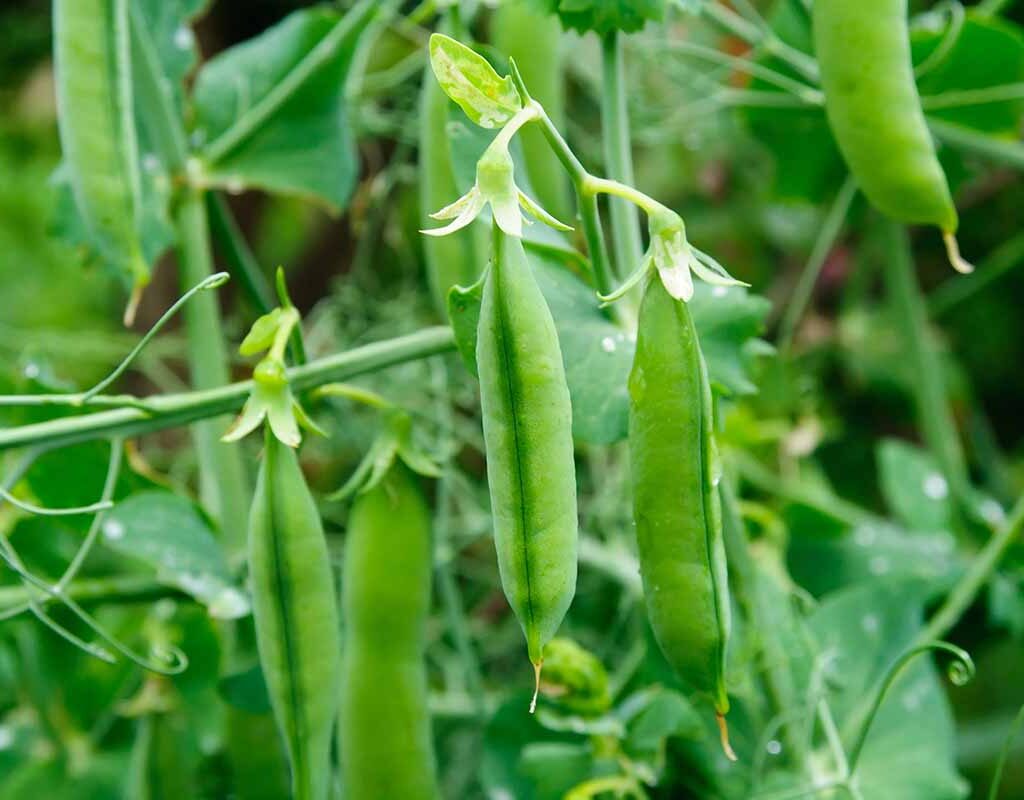
Harvesting Peas
- When to Harvest
- Garden peas: Harvest when pods are plump and full but still tender.
- Snow peas: Pick when pods are flat and before seeds swell.
- Snap peas: Harvest when pods are full but still crisp.
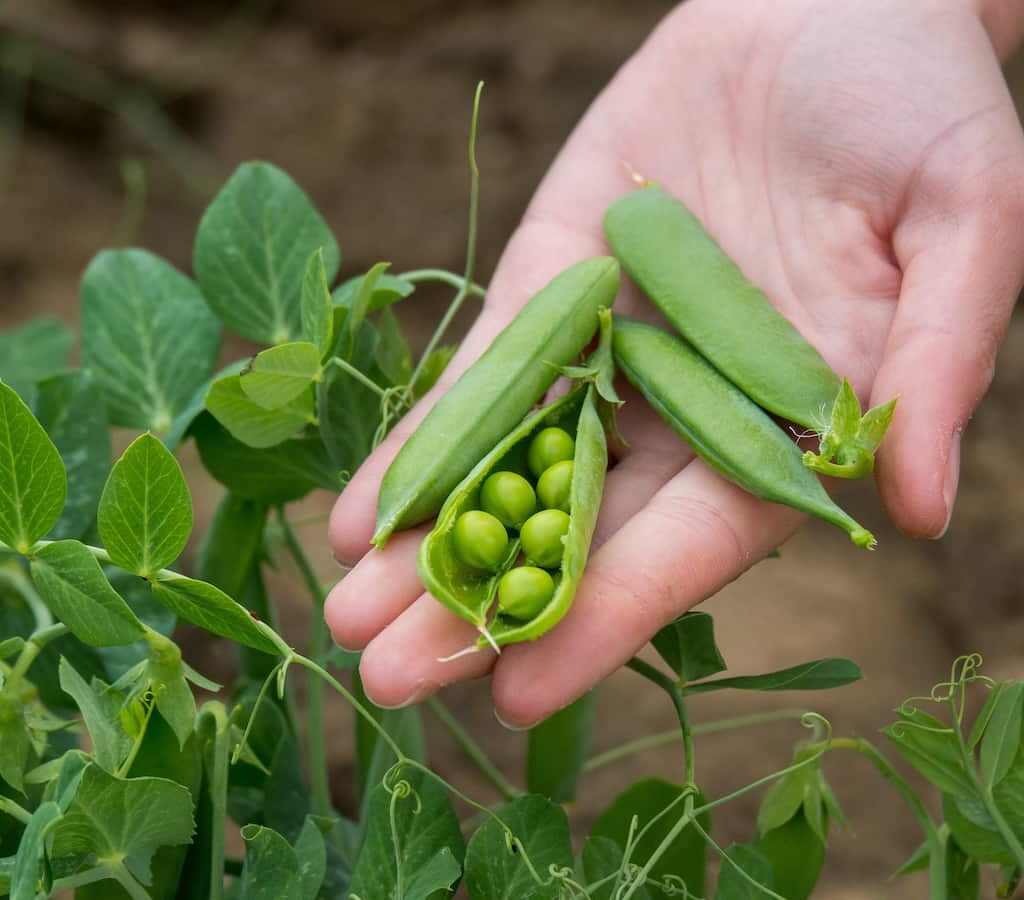
- How to Harvest
- Use two hands: Hold the vine with one hand and gently pull pods with the other to avoid damaging plants.
- Frequent picking encourages more pod production.
Storing and Using Peas
- Fresh Storage
- Store freshly picked peas in the refrigerator for up to 5 days.
- Keep them in an airtight container or plastic bag.
- Freezing
- Blanch peas in boiling water for 1–2 minutes, then freeze to enjoy them year-round.
- Culinary Uses
- Fresh peas are excellent in salads, soups, stir-fries, and pasta dishes.
- Snow peas and snap peas are also great eaten raw as snacks.
Tips for Maximum Harvest
- Plant successive crops every 2–3 weeks for continuous harvests.
- Train vines on trellises to save space and increase airflow.
- Harvest regularly to encourage plants to keep producing.
- Companion plant peas with carrots, radishes, or lettuce for better growth. Avoid onions and garlic, which can stunt growth.
Conclusion
Growing peas at home for fresh harvests is simple, rewarding, and highly nutritious. From preparing the soil to harvesting tender pods, each step is straightforward, making peas an excellent crop for beginners and seasoned gardeners alike. By giving them proper care—cool weather, well-drained soil, adequate support, and regular harvesting—you can enjoy a bountiful supply of sweet, homegrown peas right from your garden.
Whether you prefer garden peas, snap peas, or snow peas, the joy of picking fresh pods and adding them straight to your meals is unmatched. With just a little effort, your home garden can provide a steady stream of green, delicious peas for your table.