How to Grow Cantaloupe for Sweet Summer Treats

How to Grow Cantaloupe for Sweet Summer Treats

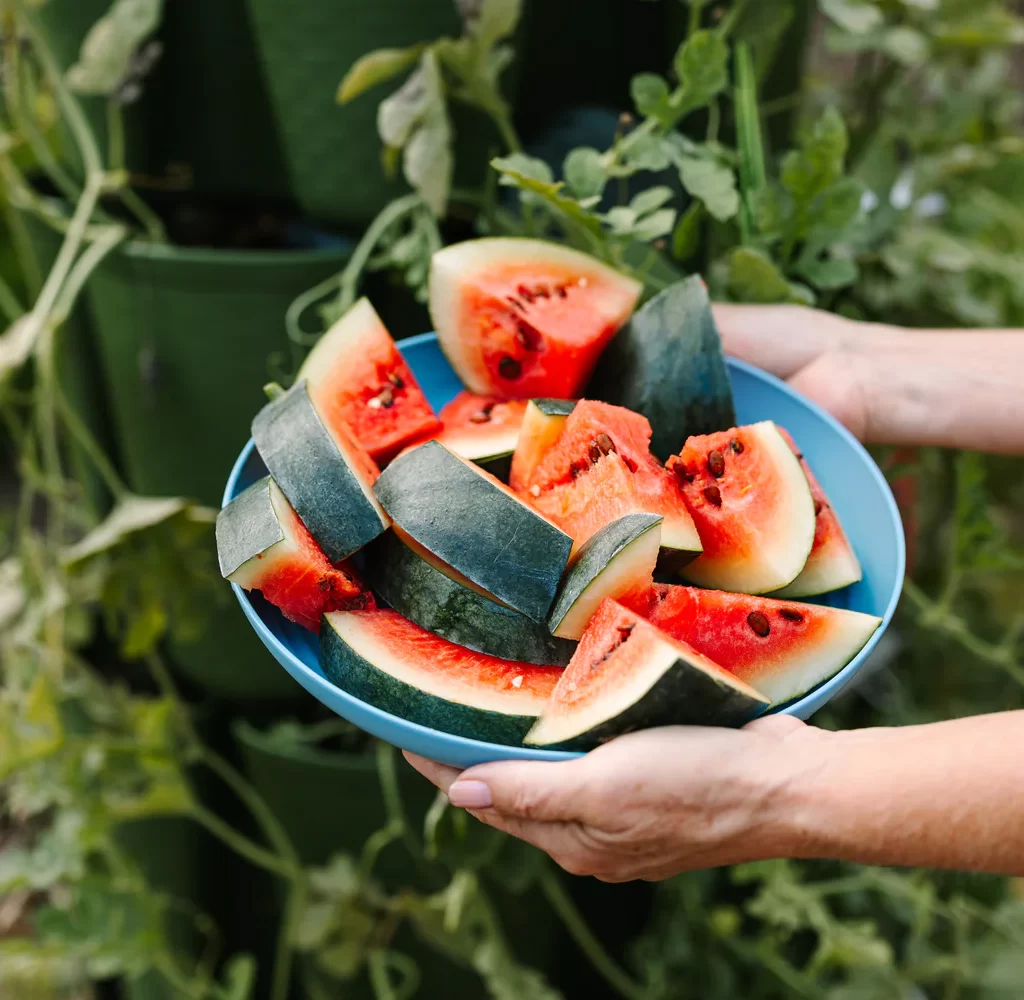
When the summer sun is high and the days stretch long, there’s nothing quite like enjoying a cold, juicy slice of fresh cantaloupe. Sweet, fragrant, and loaded with vitamins, cantaloupe is one of the easiest and most rewarding fruits you can grow in your backyard garden. Even better — with a little know-how and care, you can enjoy a steady harvest of these refreshing summer treats right from your own soil.

In this detailed guide, you’ll learn how to grow cantaloupe successfully, from selecting the right variety and preparing your soil to harvesting perfectly ripened melons. Whether you’re a seasoned gardener or trying your hand at fruit-growing for the first time, this article has you covered.


Why Grow Cantaloupe in Your Garden?

Besides their irresistible flavor and high nutritional value, cantaloupes are relatively easy to grow and thrive in warm, sunny conditions. Growing them yourself also ensures:

  • Freshness you won’t find at the store
  • Control over pesticides and soil health
  • A fun and rewarding gardening project for the whole family

Cantaloupes love heat, sunshine, and fertile soil — making them a perfect candidate for home gardeners in most regions during the summer.


Choosing the Right Cantaloupe Variety

Cantaloupes, also called muskmelons in some areas, come in several varieties, with differences in size, sweetness, growing season, and disease resistance.

Popular Cantaloupe Varieties:

  • ‘Hale’s Best Jumbo’: Heirloom favorite with a sweet, aromatic flavor.
  • ‘Minnesota Midget’: Compact plant ideal for small gardens or containers.
  • ‘Ambrosia’: Exceptionally sweet, fragrant, and disease-resistant.
  • ‘Sugar Cube’: Personal-sized melons with concentrated sweetness.
  • ‘Athena’: Common market variety with good disease resistance.

Tip: Choose a variety suited to your climate and available growing space. Shorter-season varieties like ‘Minnesota Midget’ are great for cooler regions.


Preparing the Soil for Planting

Cantaloupes thrive in light, well-drained, fertile soil with a pH between 6.0 and 6.8. Rich, loose soil warms quickly, promotes root growth, and ensures your melons develop the sweet, juicy flesh you’re craving.

Steps to Prepare Soil:

  1. Choose a sunny location with at least 8 hours of direct sunlight.
  2. Amend soil with organic compost and well-rotted manure for fertility.
  3. Work in a balanced fertilizer like 10-10-10 or 5-10-10 before planting.
  4. Ensure excellent drainage by raising beds or planting in mounds.

Pro Tip: Melons prefer soil temperatures above 70°F (21°C) — consider using black plastic mulch to warm soil early in the season.


Planting Cantaloupe: When and How

Cantaloupes can be grown from seed or transplanted seedlings. In colder climates, starting seeds indoors is a good way to get a head start.

When to Plant:

  • Direct-sow seeds outdoors 1–2 weeks after the last frost when soil is warm.
  • Start seeds indoors 3–4 weeks before the final frost date and transplant when outdoor temperatures stay above 70°F.

How to Plant:

  1. Create small hills or mounds, spacing them about 3–4 feet apart.
  2. Sow 4–6 seeds per hill, 1 inch deep.
  3. Once seedlings sprout, thin to the 2 strongest plants per hill.

If using transplants, harden them off gradually before planting.


Caring for Your Cantaloupe Plants

Cantaloupes require consistent warmth, moisture, and nutrients to produce their best fruit.

Watering:

  • Water deeply once or twice a week, about 1–2 inches of water.
  • Keep soil consistently moist, especially during flowering and fruit development.
  • Avoid overhead watering to reduce fungal disease risk — water at the base of plants.

Tip: Reduce watering slightly as fruits near maturity to concentrate sweetness.

Mulching:

  • Apply organic mulch like straw, shredded leaves, or grass clippings to retain moisture, suppress weeds, and keep fruit clean.

Fertilizing:

  • Side-dress plants with a high-phosphorus fertilizer when vines start to run and again when flowers appear.
  • Avoid excessive nitrogen, which encourages leaves over fruit.

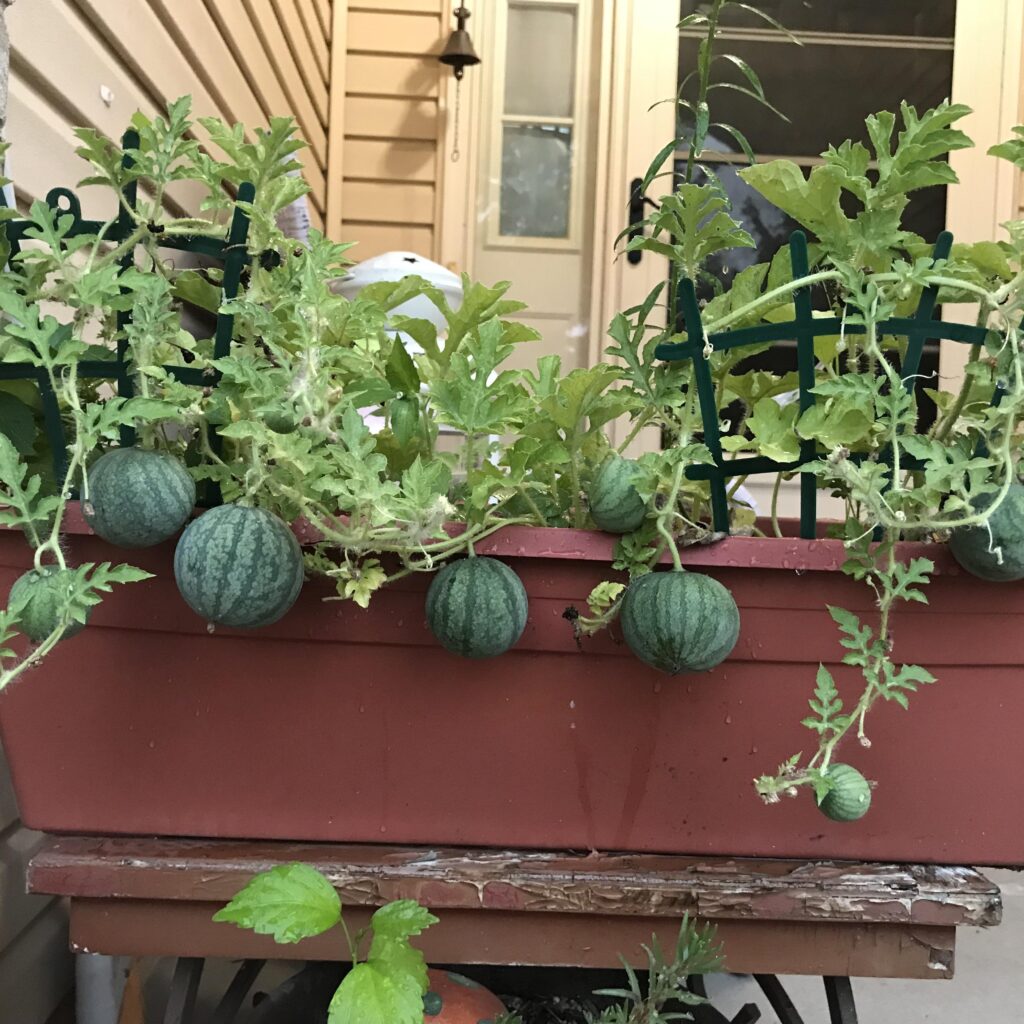
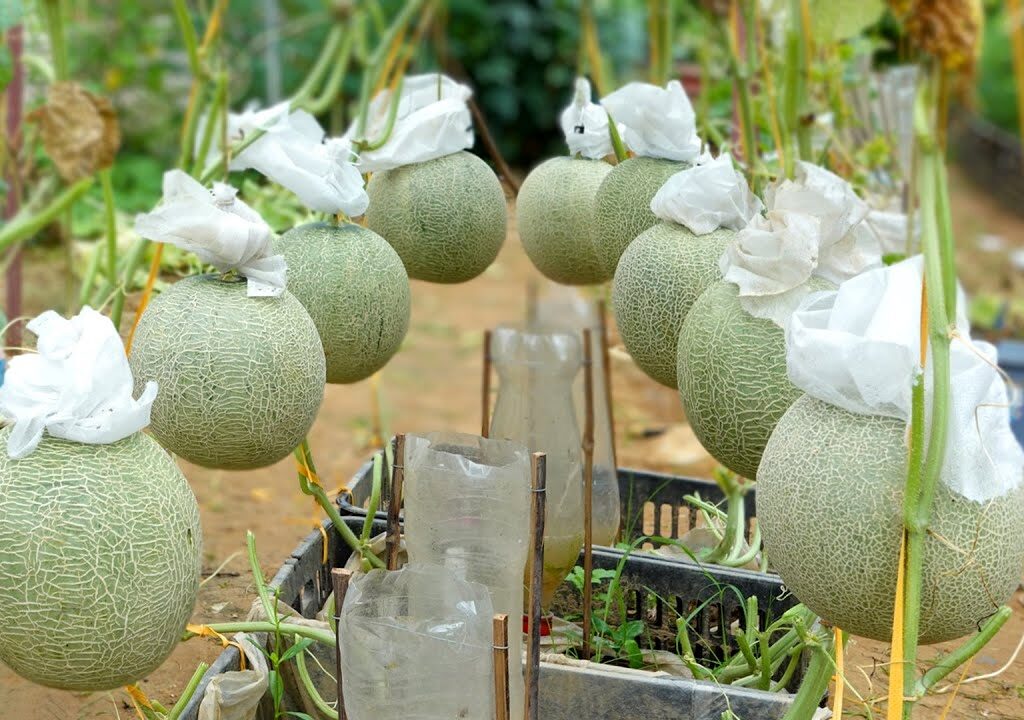
Training Vines and Saving Space

Though cantaloupes naturally sprawl, you can train them vertically with a sturdy trellis or fence to save space.

Trellising Tips:

  • Support vines with a strong trellis or cage.
  • As fruit develops, use slings made from fabric or netting to support the weight.
  • Keep vines tidy and direct growth by gently tying with soft garden twine.

Vertical growing improves air circulation, reducing disease and making harvesting easier.


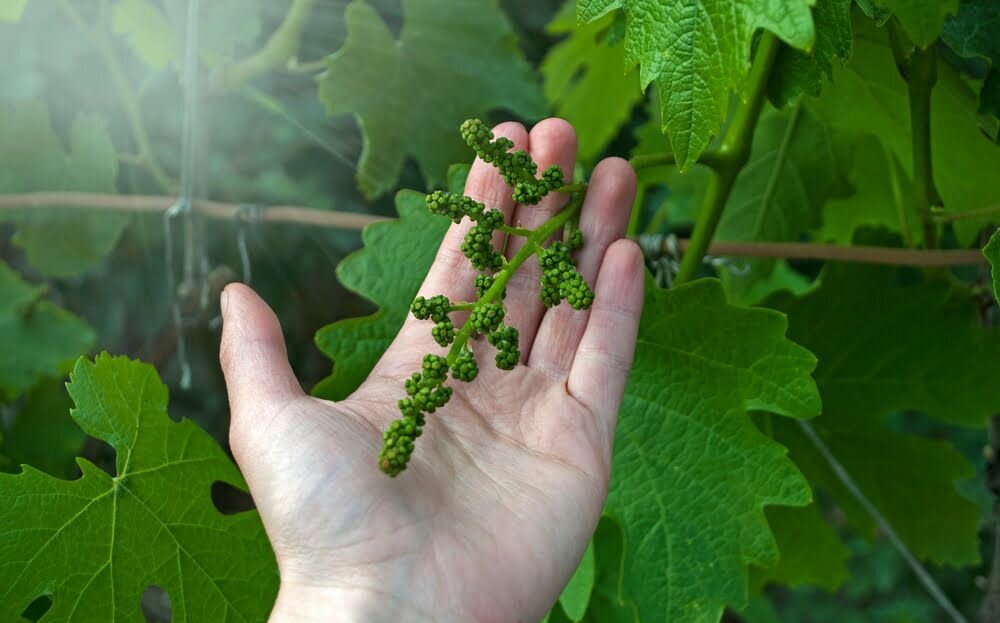
Pollination and Flowering

Cantaloupes produce both male and female flowers. Pollination by bees and other insects is crucial for fruit set.

Identifying Flowers:

  • Male flowers appear first in clusters.
  • Female flowers have a small swelling at the base that develops into a melon after pollination.

Encourage pollinators by planting bee-friendly flowers nearby or hand-pollinate by transferring pollen from male to female flowers using a small brush or cotton swab.


Common Pests and Problems

Common Pests:

  • Aphids
  • Cucumber beetles
  • Squash bugs
  • Spider mites

Control pests with insecticidal soap, neem oil, or floating row covers early in the season.

Common Diseases:

  • Powdery mildew
  • Downy mildew
  • Anthracnose
  • Fusarium wilt

Prevent disease by:

  • Ensuring good air circulation.
  • Watering at the base of plants.
  • Removing infected leaves or plants promptly.
  • Rotating crops yearly.

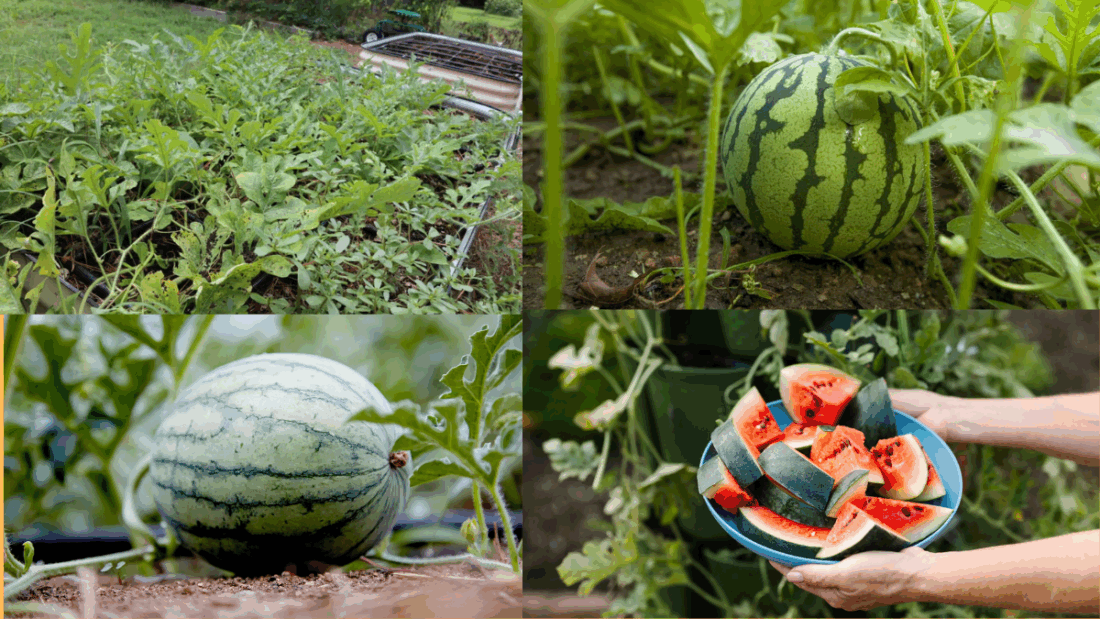
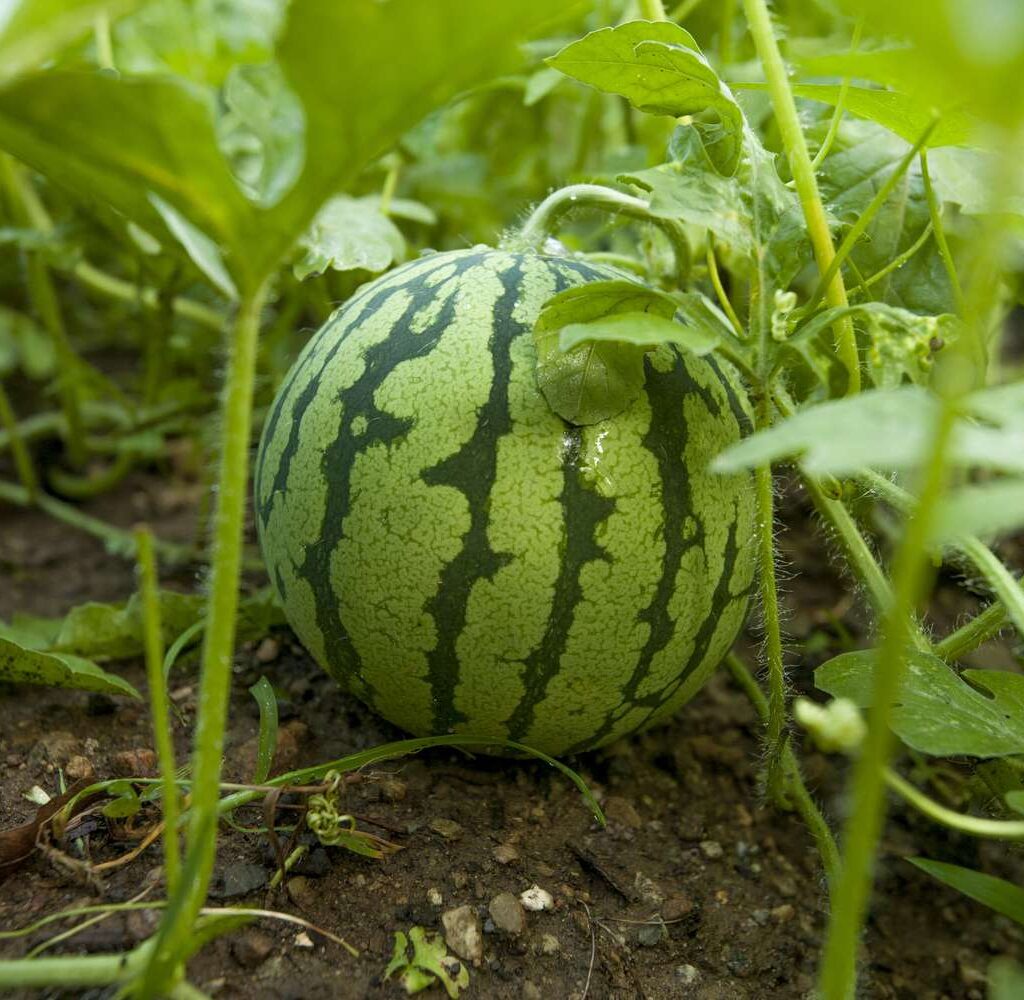
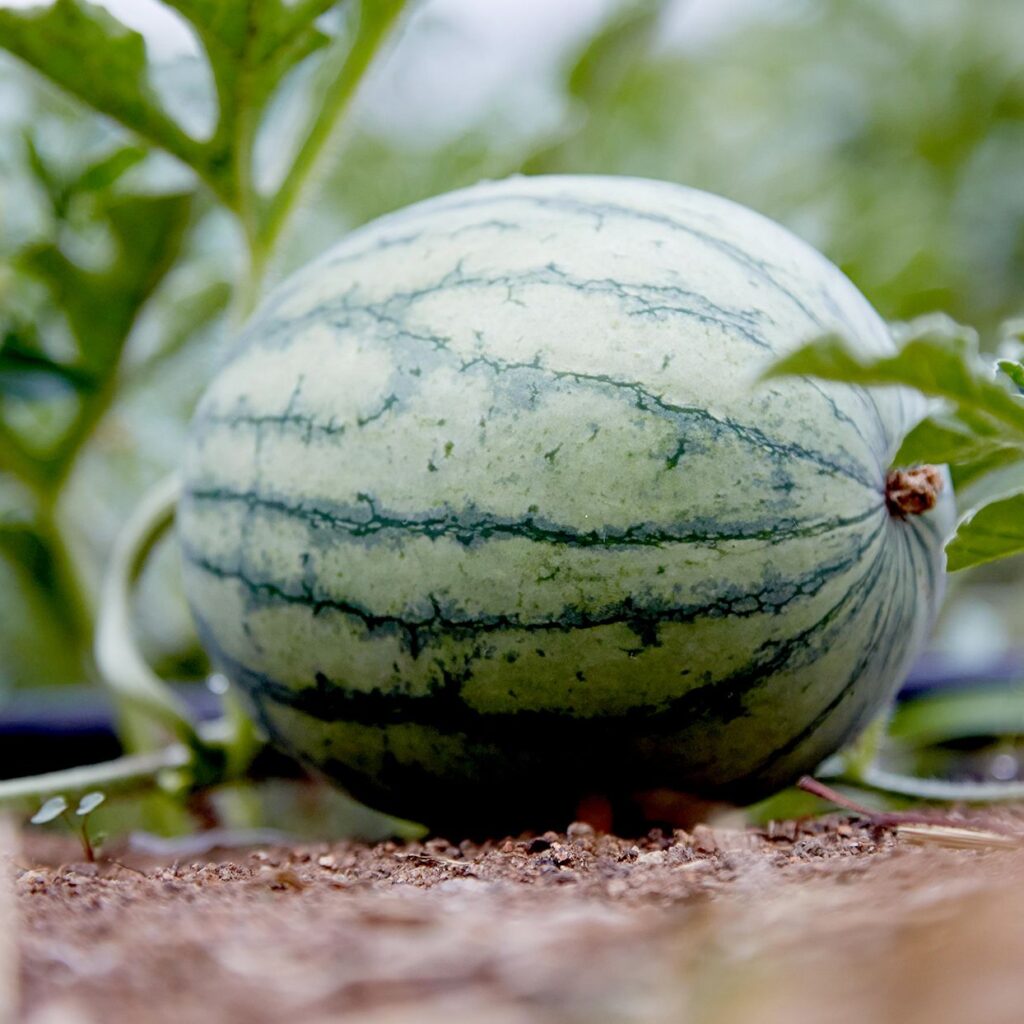
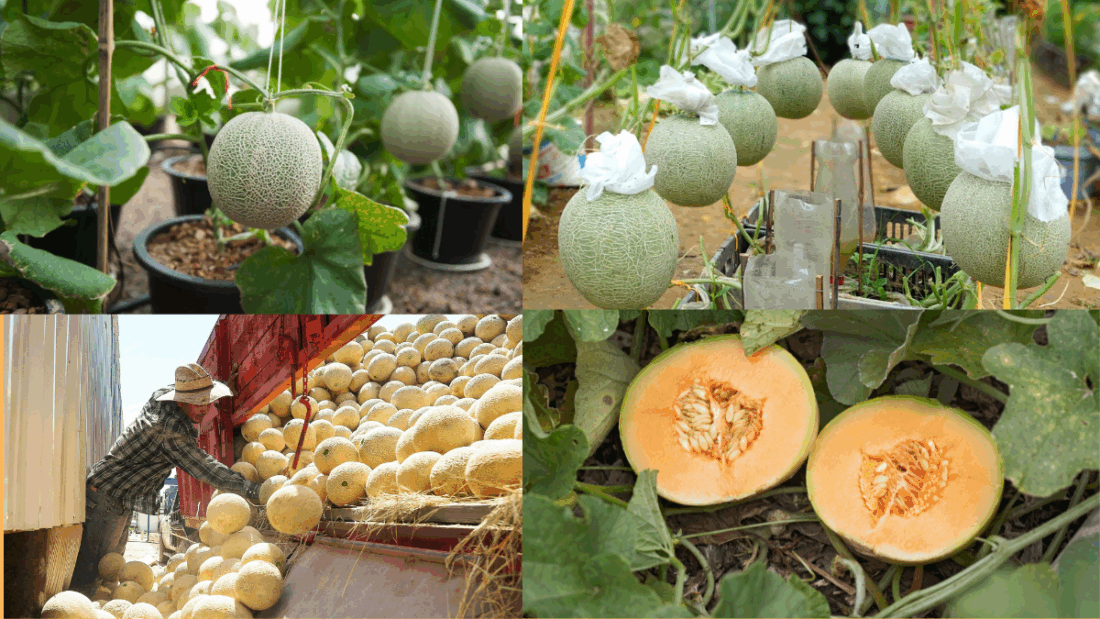
Harvesting Cantaloupe

Cantaloupes take about 70–90 days from planting to harvest, depending on the variety.

How to Know When Cantaloupe is Ripe:

  • The skin changes to a dull tan or yellowish color.
  • A sweet, musky aroma develops at the blossom end.
  • The melon easily slips off the vine with gentle pressure — known as the “full-slip stage.”
  • The netting on the rind becomes pronounced and coarse.

Avoid harvesting too early — cantaloupes don’t continue to sweeten after picking.


Storing and Enjoying Your Cantaloupes

After harvesting:

  • Store whole cantaloupes at room temperature for a day or two to fully develop flavor.
  • Refrigerate ripe melons to extend shelf life.
  • Cut cantaloupe should be stored in the refrigerator and consumed within 3–4 days.

Delicious Ways to Enjoy Cantaloupe:

  • Fresh slices or melon balls
  • Blended into smoothies or chilled soups
  • Paired with prosciutto for a sweet-savory appetizer
  • Tossed in fruit salads
  • Frozen into refreshing sorbets or popsicles

Final Thoughts

Growing cantaloupes at home is easier than you might think. With a sunny spot, warm soil, and a little patience, you can enjoy homegrown, vine-ripened melons bursting with natural sweetness. The rewards are well worth the effort — from sun-warmed fruits plucked right from the vine to refreshing summer snacks for your family.

Whether you’re growing them in backyard beds, raised planters, or along a fence line, cantaloupes are a fantastic addition to any summer garden. Plant them this season and savor the sweet taste of summer, straight from your own garden.

How to Grow Watermelons in Raised Beds

How to Grow Watermelons in Raised Beds

Few summer pleasures compare to biting into a cool, sweet slice of watermelon. If you’ve ever dreamed of harvesting your own watermelons but thought they required sprawling fields or acres of space, think again! Watermelons can thrive in raised beds, offering home gardeners a manageable, productive way to grow this beloved summer fruit.

Raised beds offer several advantages for watermelon cultivation, including improved soil control, better drainage, and easier pest management. Whether you’re a seasoned gardener or a first-timer, this guide will walk you through how to grow watermelons in raised beds successfully — from choosing the right varieties to harvest time.


Why Grow Watermelons in Raised Beds?

Watermelons are warm-season plants that love heat and well-drained soil. Raised beds naturally warm up faster in spring, extending your growing season, and offer excellent drainage — something watermelons absolutely need.

Benefits of growing watermelons in raised beds include:

  • Better soil control: Amend soil for optimal fertility and texture.
  • Improved drainage: Prevent waterlogged roots and diseases.
  • Warmer soil: Faster seed germination and stronger early growth.
  • Easier weed and pest control: Tidy, contained space makes maintenance simple.
  • Efficient space use: Vertical growing options with trellising.

Choosing the Right Watermelon Varieties

Not all watermelons are created equal — especially for raised beds where space is limited. Compact, bush-type, or small-fruit varieties are perfect for raised-bed gardening.

Great Watermelon Varieties for Raised Beds:

  • ‘Sugar Baby’: A classic icebox variety, producing 8–12 lb fruits, ripens in about 75 days.
  • ‘Bush Sugar Baby’: Compact vines ideal for small gardens and raised beds.
  • ‘Golden Midget’: Early maturing, yellow-skinned watermelon perfect for tight spaces.
  • ‘Mini Love’: Personal-sized, sweet fruits with compact vines.
  • ‘Sweet Beauty’: Crisp, juicy flesh with 6–10 lb fruits and space-saving growth.

Tip: Choose varieties suited to your growing zone and length of growing season.


Preparing Your Raised Bed

Size matters when growing watermelons. Opt for a raised bed that’s at least 12–18 inches deep to accommodate their extensive root systems and allow for proper drainage.

Soil Preparation:

  • Watermelons thrive in loose, well-draining, fertile soil.
  • Aim for a soil pH of 6.0 to 6.8.
  • Mix in plenty of organic compost, aged manure, and a balanced slow-release fertilizer (such as 10-10-10) before planting.

Pro Tip: Watermelons love warmth, so position your raised bed in a sunny spot with at least 8 hours of direct sunlight daily.


Planting Watermelons in Raised Beds

Watermelons can be started from seed or transplants. In regions with short growing seasons, starting seeds indoors gives a head start.

When to Plant:

  • After all danger of frost has passed and soil temperatures reach at least 70°F (21°C).

Planting Seeds:

  1. Sow 2–3 seeds per mound or hole, about 1 inch deep.
  2. Space mounds 2–3 feet apart to give vines room to sprawl.
  3. Thin to the strongest seedling per spot after germination.

Transplanting Seedlings:

  • Harden off indoor-started seedlings by gradually exposing them to outdoor conditions for 7–10 days.
  • Transplant on a warm, calm day, spacing them similarly to direct-seeded plants.

Watermelon Care and Maintenance

Watering:

  • Watermelons need consistent, deep watering to develop juicy, sweet fruit.
  • Provide 1–2 inches of water per week, keeping soil evenly moist but not soggy.
  • Reduce watering slightly as fruits begin to mature to intensify sweetness.

Pro Tip: Water at the base of plants early in the day to avoid fungal diseases.

Fertilizing:

  • Watermelons are heavy feeders. Apply a balanced fertilizer (10-10-10) at planting.
  • Once vines begin running, switch to a low-nitrogen, high-potassium, and phosphorus fertilizer to encourage flowering and fruiting.

Mulching:

  • Apply organic mulch like straw or shredded leaves to:
    • Retain soil moisture.
    • Suppress weeds.
    • Keep fruits clean and protect them from soil contact, reducing the risk of rot.

Training Vines in Raised Beds

While watermelons naturally sprawl, you can train them to grow vertically on sturdy trellises or fences to save space in raised beds.

Trellising Tips:

  • Use heavy-duty supports — watermelons get heavy!
  • As fruits form, support them with slings made of cloth or old pantyhose to prevent breaking off the vine.

If letting vines sprawl:

  • Guide them over the sides of the raised bed.
  • Protect pathways with mulch or ground covers to avoid muddy fruit.

Pollination and Fruit Set

Watermelons need bees and other pollinators to transfer pollen from male to female flowers.

How to Identify Flowers:

  • Male flowers: Appear first; have slender stems.
  • Female flowers: Have a tiny immature fruit (ovary) behind the petals.

Pro Tip: If pollination seems poor, hand-pollinate by transferring pollen from male to female flowers using a small brush or cotton swab.


Common Pests and Diseases

Pests:

  • Aphids
  • Squash bugs
  • Cucumber beetles

Control Methods:

  • Use floating row covers early in the season.
  • Apply organic insecticidal soap or neem oil as needed.
  • Encourage beneficial insects like ladybugs.

Diseases:

  • Powdery mildew
  • Anthracnose
  • Fusarium wilt

Prevention Tips:

  • Provide good air circulation.
  • Avoid overhead watering.
  • Remove and discard infected plant material.

Harvesting Watermelons

Knowing when a watermelon is perfectly ripe can be tricky but look for these signs:

Signs of Ripeness:

  • Tendrils nearest the fruit turn brown and dry.
  • Underside spot turns from white to creamy yellow.
  • Fruit sounds hollow when thumped.
  • Skin becomes dull and resists puncture with a fingernail.

Use sharp shears to cut watermelons from the vine, leaving a short stem attached.


Storing and Enjoying Your Watermelon

After harvesting:

  • Watermelons can be stored at room temperature for 7–10 days.
  • Refrigerate cut fruits and consume within 3–5 days for best flavor.

Watermelons aren’t just for eating fresh. Try them in:

  • Smoothies
  • Salads with feta and mint
  • Grilled slices with a sprinkle of sea salt
  • Freshly blended juice

Final Thoughts

Growing watermelons in raised beds is not only doable but incredibly rewarding for home gardeners craving sweet, homegrown fruit. With proper soil preparation, variety selection, trellising, and attentive care, even a small garden space can yield big, juicy harvests.

So whether you dream of picnic-perfect wedges or homegrown watermelons for summer gatherings, now’s the perfect time to plan your raised bed garden. Give watermelons a try — your future self, basking in the sun with a juicy slice in hand, will thank you.

How to Grow Grapes for Homemade Wine

How to Grow Grapes for Homemade Wine

There’s something undeniably romantic about the idea of making your own wine — especially when it comes from grapes you’ve grown in your own backyard. While it might sound like a complicated or luxurious endeavor reserved for vineyards in sunny European countrysides, the truth is that growing grapes for homemade wine is entirely achievable for home gardeners.

With the right variety, proper care, and a little patience, you can cultivate lush, fruitful vines that yield enough grapes for a batch of your very own wine. In this comprehensive guide, we’ll walk you through everything you need to know about how to grow grapes for homemade wine — from selecting the perfect grape variety to harvesting, and a few winemaking tips to get you started.


Why Grow Your Own Wine Grapes?

Growing grapes for wine at home offers several benefits:

  • Control over the quality and flavor profile of your wine.
  • Access to organic, chemical-free grapes.
  • The satisfaction of enjoying a beverage crafted from your own garden.
  • Decorative, productive vines that add charm and privacy to outdoor spaces.

Even if you’ve never grown grapes before, with a little planning and dedication, you’ll be well on your way to producing delicious, homemade wine.


Choosing the Right Grape Variety for Wine

The first — and perhaps most important — step is selecting the right grape variety. Not all grapes are suitable for winemaking, and your region’s climate plays a significant role in what will thrive.

Key Considerations:

  • Climate (USDA Hardiness Zone): Grapes require a warm growing season but can vary in cold tolerance.
  • Disease resistance: Look for varieties that resist common issues like powdery mildew or black rot.
  • Type of wine you want to make: Red, white, or rosé — different grapes yield different flavors and colors.

Popular Wine Grape Varieties:

🍇 For Colder Climates (Zones 4–6)

  • ‘Marquette’: A cold-hardy red grape, ideal for robust red wines.
  • ‘Frontenac’: Produces full-bodied reds with high acidity.
  • ‘La Crescent’: A white grape known for aromatic, fruity white wines.

🍇 For Warmer Climates (Zones 6–9)

  • ‘Cabernet Sauvignon’: A classic red wine grape, thrives in warm, sunny areas.
  • ‘Chardonnay’: Versatile white grape for dry or sparkling wines.
  • ‘Zinfandel’: Popular for rich reds and blush wines.

Tip: Consult your local cooperative extension service or nurseries for varieties well-suited to your area.


Where and How to Plant Grapevines

Grapes love sunshine. Choose a spot that gets at least 7-8 hours of direct sun daily. Grapes also need well-draining soil and good air circulation to prevent fungal diseases.

Soil Preparation:

  • Test soil pH — aim for a slightly acidic to neutral pH of 5.5 to 7.0.
  • Enrich soil with aged compost or well-rotted manure before planting.
  • Avoid heavy clay or waterlogged areas.

Planting Steps:

  1. Space vines 6–8 feet apart in rows, with 8–10 feet between rows.
  2. Dig a hole twice the width of the root ball.
  3. Place the plant in the hole, spreading roots gently.
  4. Backfill with soil, firming it gently.
  5. Water deeply after planting.

Pro Tip: Install your trellis or support system at planting time. Grapes need vertical support to grow properly and fruit well.


Trellising and Training Grape Vines

Grapevines are vigorous climbers and need a sturdy trellis, arbor, or fence to support their weight and promote healthy growth.

Common Trellis Types:

  • Single-wire trellis: Ideal for small home gardens.
  • Double-wire or high-cordon trellis: Supports heavier fruit loads.
  • Arbor or pergola: Doubles as a decorative garden feature.

Training Tips:

  • In the first year, allow one or two main shoots to grow.
  • Tie the strongest shoot(s) to your trellis.
  • Remove any suckers or weak growth.
  • By year two or three, establish horizontal cordons (arms) along the trellis wires.

Proper training encourages sunlight exposure, air circulation, and easier harvesting.


Watering and Fertilizing

Watering:

Grapes are fairly drought-tolerant but need consistent moisture during their first 2–3 years of establishment and while fruiting.

  • Water deeply once a week during dry spells.
  • Avoid overwatering — soggy soil leads to root rot and fungal diseases.

Fertilizing:

  • Apply balanced organic fertilizer or compost in early spring.
  • Avoid high-nitrogen fertilizers as they promote leafy growth over fruit.

Pruning for Productivity

One of the most important parts of grape growing is annual pruning — essential for high fruit yields and disease prevention.

When to Prune:

  • Late winter or early spring (while vines are dormant).

How to Prune:

  • Remove up to 90% of the previous season’s growth.
  • Leave 2–4 healthy canes (branches) from last year.
  • Each cane should have 4–6 buds for fruiting.

Don’t be afraid to cut back heavily — grapes fruit on one-year-old wood, so reducing excess growth helps concentrate the plant’s energy.


Dealing with Pests and Diseases

Grapes are vulnerable to a few common issues:

Pests:

  • Japanese beetles
  • Grape berry moth
  • Birds (cover vines with netting when fruit ripens)

Diseases:

  • Powdery mildew
  • Black rot
  • Downy mildew

Prevention Tips:

  • Maintain good airflow by pruning.
  • Keep vines off the ground and on a trellis.
  • Remove fallen leaves and debris.
  • Use organic fungicides like neem oil if necessary.

Harvesting Grapes

Grapes ripen in late summer to early fall, depending on your variety and climate.

How to Tell They’re Ready:

  • Color reaches a deep, consistent shade.
  • Grapes taste sweet and full-flavored.
  • Seeds turn brown.
  • The stem attaching the grape to the vine begins to brown.

Use sharp scissors or pruners to clip grape clusters and handle them gently.


Basic Tips for Making Homemade Wine

Once your grapes are harvested, you’re ready to turn them into wine! Here’s a simplified overview:

Basic Winemaking Process:

  1. Crush and destem the grapes.
  2. Add wine yeast and allow fermentation in a sanitized container.
  3. Press the fermented grapes to extract juice (for red wine, ferment with skins; for white, press before fermentation).
  4. Age the wine in glass carboys or oak barrels for several months.
  5. Bottle and cork your wine when fermentation is complete and the wine has cleared.

Pro Tip: Sanitation is key in winemaking. Always sterilize equipment and containers to prevent spoilage.


Final Thoughts

Growing grapes for homemade wine isn’t just a gardening project — it’s a rewarding, age-old tradition that combines horticulture and craftsmanship. With patience, proper care, and attention to detail, you can enjoy the fruits of your labor in the form of a unique, flavorful wine made entirely from your backyard.

Whether you dream of a crisp white, a bold red, or a delicate rosé, starting your vineyard journey today brings you one season closer to uncorking a bottle of your very own vintage.

How to Grow Raspberries for a Summer Harvest

How to Grow Raspberries for a Summer Harvest

There’s nothing quite like picking plump, sun-warmed raspberries straight from your garden on a bright summer day. These jewel-like fruits aren’t just delicious — they’re also packed with antioxidants, fiber, and vitamins. And the good news? Raspberries are surprisingly easy to grow at home with a little care and the right conditions.

In this article, we’ll walk you through everything you need to know about growing raspberries for a bountiful summer harvest — from choosing the best variety to planting, pruning, and picking.


Why Grow Raspberries at Home?

Homegrown raspberries are a true garden treat. Unlike store-bought berries that often lack flavor and spoil quickly, fresh raspberries from your garden are incredibly sweet, juicy, and full of nutrients.

Plus, raspberry plants are hardy, low-maintenance, and productive for years with proper care. One good patch can produce quarts of berries every summer!


Choosing the Right Raspberry Variety

Before you plant, it’s important to select a variety that suits your climate and harvest goals. Raspberries are generally divided into two main types:

  • Summer-bearing raspberries: These produce one large crop in early to mid-summer. Popular varieties include ‘Latham’, ‘Killarney’, and ‘Boyne’.
  • Ever-bearing (or fall-bearing) raspberries: These produce two crops — a smaller one in early summer and a larger one in late summer to fall. Common choices are ‘Heritage’, ‘Caroline’, and ‘Autumn Bliss’.

If you’re aiming for a summer harvest, focus on summer-bearing varieties or select ever-bearing types for their early summer crop.

Tip: Consult your local garden center or extension service for recommendations on varieties that thrive in your region’s growing conditions.


When and Where to Plant Raspberries

Best Time to Plant

The ideal time to plant raspberries is in early spring, as soon as the ground can be worked. In warmer climates, late fall planting is also an option.

Choosing the Perfect Spot

Raspberries love full sun — aim for at least 6-8 hours of direct sunlight per day. They also prefer well-drained, fertile soil with a pH between 5.5 and 6.5.

Avoid areas where tomatoes, peppers, potatoes, or eggplants have recently grown, as these plants can harbor diseases like verticillium wilt, which affects raspberry plants.

Soil Preparation

Prepare the planting area by removing weeds and working in plenty of organic matter like compost or aged manure. Good soil drainage is essential to prevent root rot.

If your soil is heavy clay, consider creating raised beds or mounded rows.


How to Plant Raspberries

  1. Space the canes 18-24 inches apart in rows that are 6-8 feet apart.
  2. Dig holes wide enough to spread out the roots.
  3. Set the plant so the crown is 1-2 inches above the soil line.
  4. Backfill with soil and water thoroughly.
  5. Mulch around the base with straw, wood chips, or shredded leaves to retain moisture and suppress weeds.

Pro Tip: Install a trellis or support system at planting time to help manage the canes as they grow.


Caring for Your Raspberry Plants

Watering

Raspberries need consistent moisture, especially while establishing roots and during fruit development. Aim for 1-1.5 inches of water per week, either from rainfall or supplemental watering.

Water at the base of the plants to keep the foliage dry and reduce the risk of fungal diseases.

Fertilizing

Feed your raspberries in early spring with a balanced fertilizer (like 10-10-10) or organic compost. Repeat after harvest if the plants appear weak or yellowed.

Avoid over-fertilizing, as this can produce excessive leafy growth at the expense of fruit.


Pruning and Training Raspberries

Proper pruning is essential for healthy, productive raspberry plants.

Summer-bearing raspberries:

  • After harvesting in mid-summer, cut down the canes that produced fruit (they won’t fruit again).
  • Leave the new green canes (called primocanes) that grew during the season, as these will bear fruit the following summer.

Ever-bearing raspberries:

  • For two crops: After the fall harvest, cut back only the canes that fruited on their tips. Leave the lower parts to fruit next summer.
  • For one larger fall crop: In late winter or early spring, cut all canes to the ground.

Training Tip: Tie the canes to a trellis, fence, or horizontal wire system to keep them upright and make harvesting easier.


Managing Pests and Diseases

Raspberries can occasionally attract pests like aphids, Japanese beetles, and spider mites. Fungal diseases such as powdery mildew and anthracnose can also be problematic in humid or poorly ventilated areas.

To prevent problems:

  • Space plants for good air circulation.
  • Water at the base, not overhead.
  • Remove any diseased canes immediately.
  • Use insecticidal soap or neem oil for minor pest infestations.
  • Rotate planting sites every 5-7 years.

Harvesting Raspberries

Raspberries are typically ready for picking 4-6 weeks after flowering.

How to tell when they’re ripe:

  • Berries should be deep in color (red, golden, or black, depending on the variety).
  • They’ll pull easily from the plant without tugging.

Harvest every couple of days during peak season, ideally in the morning when temperatures are cooler.

Handle berries gently — they’re delicate and bruise easily. Refrigerate immediately if not eating right away.


How to Store and Use Raspberries

Fresh raspberries only last a couple of days in the fridge, so it’s best to use or preserve them quickly.

Great ways to enjoy your harvest:

  • Eat fresh by the handful.
  • Add to smoothies, yogurt, or salads.
  • Bake into pies, muffins, or cobblers.
  • Make homemade raspberry jam, syrup, or sauce.
  • Freeze for use in winter recipes.

To freeze: Spread berries on a baking sheet in a single layer, freeze until firm, then transfer to airtight containers.


Final Thoughts

Growing your own raspberries is one of the simplest and most rewarding garden projects you can take on. With just a little planning and care, you’ll be enjoying baskets of sweet, sun-ripened berries every summer for years to come.

Whether you favor the classic red raspberries or unique golden and black varieties, your garden will be all the sweeter for it.

How to Grow Peaches in a Small Garden: A Complete Guide

How to Grow Peaches in a Small Garden: A Complete Guide

Who wouldn’t love the idea of plucking a sun-ripened, juicy peach from their own garden? While peaches are often associated with sprawling orchards, the good news is — you don’t need acres of land to grow this luscious fruit. Even if you have a small garden, with a little creativity and care, you can successfully grow peach trees and enjoy their sweet rewards.

This guide will walk you through everything you need to know about growing peaches in a small garden, from choosing the right variety to harvesting your homegrown fruits.


Why Grow Peaches in a Small Garden?

Growing your own peaches comes with several benefits:

  • Freshness: Homegrown peaches taste far better than store-bought ones.
  • Control: You can choose organic, pesticide-free growing methods.
  • Aesthetic Appeal: Peach trees, with their delicate blossoms and lush foliage, enhance the beauty of any garden.
  • Compact Varieties Available: Thanks to dwarf and semi-dwarf cultivars, even tiny spaces can accommodate a peach tree.

Choosing the Right Peach Variety

Selecting the right variety is crucial when space is limited. Look for dwarf or semi-dwarf cultivars that thrive in containers or small plots.

Best Compact Peach Varieties:

  • Bonanza: A popular dwarf variety ideal for pots, reaches about 5-6 feet tall.
  • Pix Zee: Compact tree with medium-sized, sweet fruits.
  • El Dorado: Semi-dwarf tree with excellent flavor and disease resistance.
  • Garden Gold: Another dwarf option with yellow-fleshed, freestone peaches.

Tip: Make sure the variety you choose is suitable for your local climate and USDA hardiness zone.


Ideal Growing Conditions for Peaches

To produce healthy, sweet fruits, peach trees require specific growing conditions.

1. Sunlight

Peach trees love the sun. Ensure they receive at least 6-8 hours of direct sunlight daily. Full sun exposure is essential for fruit development and disease prevention.

2. Soil

  • Well-draining soil is a must to prevent root rot.
  • A slightly acidic to neutral pH (around 6.0-7.0) is ideal.
  • Enrich the soil with organic matter or compost to enhance fertility.

3. Climate

Peaches need a certain number of chilling hours (between 32°F and 45°F) during winter for proper flowering and fruiting. Check your local average chilling hours and select a variety accordingly.


Planting Peaches in a Small Garden

Depending on your available space, you can plant peach trees directly in the ground, in containers, or as espaliered trees against a wall or fence.

1. In the Ground

  • Dig a hole twice the width of the root ball and just as deep.
  • Mix compost into the excavated soil.
  • Place the tree in the hole, spread out the roots, and backfill.
  • Water thoroughly and mulch around the base to retain moisture.

2. In Containers

  • Choose a container at least 18-24 inches in diameter with drainage holes.
  • Use a lightweight, well-draining potting mix.
  • Place the tree at the same depth it was growing in its nursery pot.
  • Keep the container in a sunny spot.

3. Espalier

This space-saving technique involves training the tree along a wall or trellis in a flat, two-dimensional shape.

  • Select a young, flexible tree.
  • Attach horizontal wires to a wall at intervals.
  • Prune and tie branches to the wires to create a fan or horizontal pattern.

Caring for Your Peach Tree

Proper care ensures healthy growth and bountiful harvests.

1. Watering

  • Keep the soil consistently moist but not soggy.
  • During dry spells, water deeply once or twice a week.
  • Avoid wetting the foliage to prevent fungal diseases.

2. Feeding

  • Apply a balanced, slow-release fertilizer in early spring.
  • Avoid high-nitrogen fertilizers, which encourage leafy growth over fruit production.
  • Top-dress with compost annually.

3. Pruning

  • Prune peach trees in late winter before new growth begins.
  • Remove dead, damaged, or diseased branches.
  • Thin out crowded areas to improve airflow and sunlight penetration.
  • Maintain an open-center or vase shape for optimal fruiting.

Tip: Container-grown trees may require more frequent pruning to manage their size.


Dealing with Pests and Diseases

Peach trees can be susceptible to certain pests and diseases, but with early intervention and care, you can keep them healthy.

Common Issues:

  • Peach Leaf Curl: Causes leaves to become distorted and discolored. Treat with a dormant-season fungicide.
  • Aphids and Mites: Control with neem oil or insecticidal soap.
  • Fruit Borers: Inspect regularly and remove affected fruits.
  • Brown Rot: A fungal disease affecting fruit. Remove infected fruit and improve air circulation.

Pollination Needs

Most peach varieties are self-pollinating, which means a single tree can produce fruit. However, having another peach tree nearby can sometimes improve yield.

For container or espalier trees, hand pollination with a soft brush during the flowering period can also enhance fruit set.


Harvesting Your Peaches

Peach trees usually start bearing fruit within 2-4 years of planting, depending on the variety and growing conditions.

How to Know When Peaches Are Ready:

  • Fruits develop a rich color and lose their green undertones.
  • They yield slightly when gently pressed.
  • They emit a sweet, fruity aroma.

Tip: Harvest carefully to avoid bruising, and handle them gently. Peaches are best eaten fresh but can also be canned, frozen, or made into jams.


Overwintering Peach Trees in Small Gardens

If you live in a region with harsh winters, container-grown peach trees should be protected from extreme cold.

  • Move containers to a sheltered spot like a garage or greenhouse.
  • Mulch heavily around the base.
  • Water sparingly during dormancy.

Ground-planted trees should be mulched and, if young, can be wrapped with burlap for insulation.


Final Thoughts

Growing peaches in a small garden is a rewarding and achievable endeavor. With the right variety, careful planting, and dedicated care, even the tiniest of gardens can offer the pleasure of sun-warmed, homegrown peaches. Whether you plant one in a pot on your patio or train it elegantly against a garden wall, a peach tree will not only bear delicious fruit but also add charm and vitality to your space.

So why wait? Pick your favorite variety and start growing your own little slice of orchard magic today!

How to Grow Strawberries Year-Round: A Complete Guide for Continuous Harvests

How to Grow Strawberries Year-Round: A Complete Guide for Continuous Harvests

Who can resist the sweet, juicy taste of fresh-picked strawberries? Imagine having these vibrant red berries at your fingertips all year long — not just during summer months. While most people think of strawberries as a seasonal treat, with the right setup and care, you can grow strawberries year-round, indoors or outdoors.

In this comprehensive guide, we’ll cover everything you need to know to enjoy continuous harvests of luscious strawberries. From choosing the right varieties and setting up indoor systems to managing light, temperature, and care routines — here’s how to keep your strawberry patch thriving, no matter the season.


Why Grow Strawberries Year-Round?

Besides their irresistible flavor, growing strawberries year-round offers several benefits:

  • Fresh organic fruit whenever you want it
  • Greater control over plant health and pest management
  • Adds a pop of green indoors during colder months
  • Saves money on out-of-season berries
  • Makes an attractive, edible indoor or balcony plant

With a little planning, you can easily transition from seasonal growing to harvesting strawberries 12 months a year.


Step 1: Choose the Right Strawberry Variety

Not all strawberries are created equal when it comes to continuous harvests. Some are naturally better suited for extended or indoor growing.

The Three Main Types:

  1. June-Bearing
    • Produces one large harvest in early summer.
    • Not ideal for year-round growing.
  2. Ever-Bearing
    • Yields two to three harvests (spring, summer, fall).
    • Suitable for extending the harvest season but not truly continuous.
  3. Day-Neutral
    • Produces fruit steadily as long as conditions remain favorable.
    • Best choice for year-round cultivation.

Recommended Day-Neutral Varieties:

  • Albion – Large, flavorful, disease-resistant.
  • Seascape – Sweet berries with high yields.
  • Evie-2 – Excellent for indoor and container growing.
  • Mara des Bois – Highly aromatic, gourmet flavor.

Step 2: Decide Between Indoor and Outdoor Growing

Outdoor Year-Round Growing:

Possible in regions with mild winters (USDA Zones 8–11). In colder areas, you’ll need to overwinter plants indoors or use protective setups like greenhouses or cold frames.

Indoor Growing:

Ideal for colder climates or when you want total control over growing conditions. Strawberries adapt well to containers, vertical planters, hanging baskets, and hydroponic systems.


Step 3: Preparing the Right Growing Environment

Whether indoors or outdoors, strawberries have specific environmental needs:

Temperature:

  • Optimal: 60°F–80°F (16°C–27°C)
  • Keep indoor temperatures stable; avoid drafts and overheating.

Light:

  • Strawberries require 10–14 hours of bright light daily.
  • Place them near a south-facing window or use grow lights in winter.
  • LED or fluorescent grow lights work well, positioned 6–8 inches above plants.

Humidity:

  • Maintain moderate humidity (around 50–70%).
  • Use a humidity tray or mist plants occasionally in dry indoor conditions.

Step 4: Planting Strawberries for Year-Round Growth

Containers:

  • Use containers with good drainage.
  • Minimum size: 8–12 inches deep.
  • Hanging baskets, vertical planters, and hydroponic setups work great indoors.

Soil:

  • Well-draining, slightly acidic soil with a pH of 5.5–6.5.
  • Use a mix of high-quality potting soil, compost, and perlite.

Planting Tips:

  • Space plants 8–10 inches apart.
  • Bury roots, leaving the crown (top of the root system) at soil level.
  • Mulch with straw, pine needles, or shredded leaves to retain moisture.

Step 5: Watering and Feeding

Watering:

  • Keep soil consistently moist but not soggy.
  • Water when the top inch feels dry.
  • Avoid overhead watering to prevent mold and rot.

Fertilizing:

  • Use a balanced liquid fertilizer (10-10-10) every 2–3 weeks.
  • Switch to a bloom-boosting fertilizer (high in potassium) when flowers appear.

Organic options: Fish emulsion, seaweed extract, or compost tea.


Step 6: Pollination for Indoor Strawberries

Unlike outdoor gardens where bees and insects assist with pollination, indoor plants rely on you.

Pollination Techniques:

  • Use a small soft brush or cotton swab to gently transfer pollen from flower to flower.
  • Do this daily during flowering for better fruit set.
  • Or lightly shake plants to help spread pollen.

Step 7: Managing Pests and Diseases

Even indoors, strawberries can face pest and disease challenges.

Common Pests:

  • Aphids
  • Spider mites
  • Whiteflies

Solutions:

  • Inspect plants regularly.
  • Wipe leaves with a damp cloth or insecticidal soap.
  • Introduce natural predators (ladybugs) if growing outdoors or in a greenhouse.

Common Diseases:

  • Powdery mildew
  • Botrytis (gray mold)
  • Root rot

Prevention:

  • Ensure good air circulation.
  • Avoid waterlogged soil.
  • Remove any dead or diseased leaves immediately.

Step 8: Harvesting Strawberries Year-Round

Strawberries are ready to pick 4–6 weeks after flowering. Harvest berries when:

  • They’re fully red (no green or white spots)
  • Slightly soft to the touch
  • Easily detach with a gentle twist

Harvest daily during peak production to encourage more flowers and fruit.


Step 9: Propagating New Plants for Continuous Production

To maintain year-round harvests, propagate new strawberry plants regularly.

How to Propagate:

  • Use runners (small offshoot plants).
  • Once runners have developed small roots, plant them in their own containers.
  • Or buy bare-root plants and stagger plantings every few months for uninterrupted harvest cycles.

Step 10: Overwintering Outdoor Plants

In cold regions, protect outdoor strawberries in winter.

Tips:

  • Cover plants with straw or frost blankets.
  • Move container plants to an unheated garage, basement, or cold frame.
  • Water sparingly during dormancy to keep roots from drying out.

Bonus: Hydroponic Strawberry Growing

For serious year-round production, consider a hydroponic system. Strawberries thrive in nutrient-rich water systems and produce clean, pesticide-free berries indoors.

Benefits:

  • Faster growth and fruiting
  • Space-saving vertical setups
  • No soil-borne pests or diseases
  • Higher yields in controlled environments

Hydroponic kits are available for home use and can produce berries within 60–90 days.


Final Thoughts

Growing strawberries year-round isn’t just a gardener’s fantasy — it’s entirely possible with the right varieties, conditions, and care. Whether you’re tending a sunny balcony, an indoor windowsill garden, or a hydroponic tower in your kitchen, the joy of harvesting sweet, homegrown berries every season is well within your reach.

By choosing day-neutral varieties, providing consistent light, temperature, and moisture, and staying attentive to plant needs, you can enjoy a steady supply of fresh strawberries whenever the craving strikes.

How to Grow Blueberries in Containers: A Complete Guide

How to Grow Blueberries in Containers: A Complete Guide

Imagine stepping onto your patio or balcony and picking fresh, juicy blueberries right from your very own container garden. It’s easier than you might think! Blueberries are not only delicious and packed with antioxidants, but they’re also well-suited for container growing — perfect for small gardens, balconies, and urban spaces.

In this detailed guide, we’ll cover everything you need to know to successfully grow healthy, productive blueberry plants in containers. From choosing the right variety to soil preparation, watering, and harvesting, let’s turn your outdoor space into a fruitful blueberry haven.


Why Grow Blueberries in Containers?

Container gardening offers unique advantages, especially for blueberry plants:

  • Control over soil pH and quality (essential for blueberries)
  • Easier to move plants to ideal sun positions
  • Manageable pest and disease control
  • Great for small spaces, patios, balconies, and decks
  • A decorative and edible plant with beautiful spring blossoms and vibrant fall foliage

With the right care and a little patience, your container-grown blueberries can yield delicious berries for years to come.


Step 1: Choosing the Right Blueberry Variety

Not all blueberry varieties are the same, especially when it comes to container growing. Some types stay compact and thrive in confined spaces, while others may be too vigorous.

Best Blueberry Varieties for Containers:

  • Top Hat – A dwarf variety ideal for pots, growing up to 2 feet tall.
  • Sunshine Blue – Semi-dwarf, self-pollinating, with excellent yields.
  • Jelly Bean – Compact, with sweet berries and attractive foliage.
  • Patriot – Cold-hardy and suitable for larger containers.
  • Peach Sorbet – Known for its colorful leaves and flavorful berries.

Pro Tip:
Although some varieties are self-pollinating, having at least two different blueberry varieties nearby improves pollination and increases fruit yield.


Step 2: Selecting the Perfect Container

Your container’s size and material are crucial for healthy root development and long-term growth.

Container Requirements:

  • Minimum size: 16-20 inches in diameter and depth
  • Material: Plastic, ceramic, or wooden planters work well
  • Drainage: Must have ample drainage holes to prevent waterlogging

Bonus Idea:
Consider using decorative pots or whiskey barrels for a rustic, aesthetic touch on patios and balconies.


Step 3: Preparing the Right Soil Mix

Blueberries are acid-loving plants, thriving in soils with a pH of 4.5 to 5.5. Regular garden soil won’t work well in containers.

Ideal Soil Mix for Blueberries:

  • 50% peat moss
  • 30% pine bark fines
  • 20% perlite or coarse sand

Alternatively, you can use a commercial acid-loving plant mix formulated for azaleas, rhododendrons, or camellias.

Pro Tip:
Test your soil’s pH using a simple home kit. If needed, lower the pH with elemental sulfur or an acidifying fertilizer.


Step 4: Planting Your Blueberries

Planting blueberries in containers is straightforward, but attention to detail ensures their success.

Planting Instructions:

  1. Fill the container with your prepared acidic soil mix, leaving about 2 inches below the rim.
  2. Remove the plant from its nursery pot, gently loosening the root ball.
  3. Place the blueberry plant in the center of the container at the same depth it was growing previously.
  4. Backfill with soil mix and gently firm it down.
  5. Water thoroughly until water drains out of the bottom.

Add a 1-2 inch layer of pine bark mulch or pine needles on top to help retain moisture and maintain soil acidity.


Step 5: Watering and Feeding

Blueberries have shallow roots and are sensitive to dry soil, especially in containers.

Watering Tips:

  • Keep soil consistently moist but not waterlogged.
  • In hot weather, you may need to water daily.
  • Avoid using hard water with high pH; rainwater or distilled water is ideal.

Fertilizing:

Use a fertilizer specifically made for acid-loving plants.

  • Apply an acid fertilizer in early spring, just as new growth starts.
  • Feed again in late spring or early summer.
  • Avoid over-fertilizing, as it can damage sensitive roots.

Organic options like fish emulsion or cottonseed meal work beautifully for container-grown blueberries.


Step 6: Providing Adequate Sunlight

Blueberries love the sun! For healthy growth and maximum fruit production:

  • Place containers in a spot with at least 6–8 hours of direct sunlight daily.
  • In very hot climates, some afternoon shade may be beneficial.
  • Containers are portable — move them to track the sun’s position through the seasons.

Step 7: Pruning and Maintenance

Pruning keeps your blueberry plants compact, productive, and encourages new growth.

Pruning Guidelines:

  • Remove any weak, dead, or crossing branches in late winter or early spring.
  • After fruiting, prune lightly to maintain a balanced, open shape.
  • Remove older, unproductive canes after 3–4 years to promote younger shoots.

Container Tip:
Dwarf varieties typically require less pruning than full-sized bushes.


Step 8: Managing Pests and Diseases

Container-grown blueberries are easier to monitor and manage for pests and diseases.

Common Issues:

  • Birds: Net your plants during ripening season to protect your berries.
  • Aphids: Wash off with water or use insecticidal soap.
  • Fungal diseases: Prevent by avoiding overhead watering and ensuring good air circulation.

Regularly inspect your plants and remove any diseased or damaged leaves and stems.


Step 9: Overwintering Your Container Blueberries

In colder climates (USDA zones 3–7), container blueberries need extra care in winter.

Overwintering Tips:

  • Move containers to a sheltered, unheated garage, shed, or basement during severe freezes.
  • Water occasionally to prevent roots from drying out.
  • Alternatively, wrap the container in bubble wrap or burlap and mulch heavily around the base.

Once the risk of frost passes, move the plant back to its sunny outdoor spot.


Step 10: Harvesting Your Blueberries

The best part of growing blueberries is enjoying the harvest!

How to Know When Blueberries Are Ripe:

  • Fully blue with no green or red tinges.
  • Slightly soft to the touch.
  • Easily detach from the plant with a gentle tug.
  • Allow berries to stay on the bush for a few extra days after turning blue for peak sweetness.

Harvest Tip:
Pick berries in the cool morning hours for the best flavor and storage life.


Final Thoughts

Growing blueberries in containers is a fun, rewarding project that offers fresh, healthy fruit right at your fingertips. By choosing the right variety, maintaining acidic soil, providing ample sunlight, and consistent care, you’ll enjoy bountiful harvests of sweet, antioxidant-rich berries year after year.

Whether you have a sprawling backyard or a modest balcony, container-grown blueberries are a beautiful, productive, and healthful addition to any home garden.

How to Grow Apples in Your Backyard Orchard

How to Grow Apples in Your Backyard Orchard

Nothing tastes quite as satisfying as a crisp, sweet apple picked fresh from your own tree. Growing apples in your backyard orchard not only rewards you with fresh, organic fruit but also adds beauty, shade, and value to your landscape. Whether you have a small suburban yard or a larger property, it’s entirely possible to cultivate healthy, productive apple trees with the right planning and care.

In this detailed guide, we’ll walk you through everything you need to know about growing apples at home — from selecting the right variety to planting, pruning, and harvesting your very own apples.


Why Grow Apples in Your Backyard?

Before we dive into the how-to, let’s explore the reasons why backyard apple trees are worth your time:

  • Fresh, organic fruit free from chemicals and preservatives.
  • Save money on store-bought apples.
  • Variety control — grow unique heirloom or specialty apples unavailable in stores.
  • Beautiful spring blossoms that attract pollinators.
  • Adds ornamental charm and shade to your garden.
  • Fun and educational family project.

Now, let’s get started on how to make your backyard orchard dream a reality.


Step 1: Choosing the Right Apple Varieties

One of the most important decisions you’ll make is choosing the right type of apple tree. Not all apple trees grow well in every climate or soil condition. Also, different varieties produce different flavors, harvest times, and uses (eating fresh, baking, or making cider).

Consider Your USDA Hardiness Zone

Apple trees typically grow best in USDA zones 3-8. Before selecting a variety, find your hardiness zone to determine which types will thrive in your region.

Popular Apple Varieties for Backyard Orchards:

  • Honeycrisp – Crisp, sweet-tart apples. Cold hardy.
  • Gala – Sweet and juicy. Good for eating fresh.
  • Granny Smith – Tart flavor, ideal for pies and baking.
  • Fuji – Sweet, firm, excellent storage.
  • McIntosh – Juicy with a tart flavor. Best for sauces and cider.
  • Golden Delicious – Sweet and versatile.

Pro Tip: Most apple trees require cross-pollination with another compatible variety. Plant at least two different varieties with overlapping bloom times to ensure good fruit production.


Step 2: Preparing the Planting Site

Apple trees need plenty of sunlight and well-drained soil to thrive. Pick a location in your yard that receives at least 6-8 hours of full sun per day.

Ideal Soil Conditions:

  • Slightly acidic to neutral pH (6.0–7.0)
  • Well-drained loamy soil
  • Avoid areas with heavy clay or poor drainage
  • Keep trees away from large trees or structures that may shade them

Before planting, test your soil’s pH with a simple home test kit. If needed, amend your soil with organic matter, compost, or adjust pH using lime or sulfur.


Step 3: Planting Your Apple Trees

You can plant apple trees either in early spring or late fall when the tree is dormant.

Planting Process:

  1. Dig a hole twice as wide and as deep as the tree’s root ball.
  2. Loosen the soil at the bottom of the hole to encourage root penetration.
  3. Position the tree so the graft union (the bulge near the base of the trunk) sits 2–4 inches above the soil line.
  4. Backfill the hole with a mix of native soil and compost.
  5. Water thoroughly after planting.
  6. Add a 2-3 inch layer of mulch around the base, keeping it a few inches from the trunk to prevent rot.

Spacing Tip:
Standard apple trees need 20–30 feet of space between trees, while dwarf or semi-dwarf varieties require 8–15 feet.


Step 4: Watering and Feeding

Newly planted apple trees require regular watering to establish strong roots.

  • Water deeply once a week for the first growing season.
  • In hot, dry weather, increase to twice weekly.
  • Mature trees typically need an inch of water per week through rainfall or irrigation.

Fertilizing:

Use a balanced fertilizer like 10-10-10 or a fertilizer specifically formulated for fruit trees. Apply in early spring before new growth appears, and again in late spring if necessary. Avoid over-fertilizing as it may promote excessive leaf growth at the expense of fruit production.


Step 5: Pruning for Shape and Health

Proper pruning is essential for healthy, productive apple trees. It improves air circulation, sunlight penetration, and encourages strong branch structure.

Pruning Tips:

  • Prune during late winter or early spring when the tree is still dormant.
  • Remove any dead, diseased, or crossing branches.
  • Maintain an open-center or central leader shape depending on tree variety.
  • Shorten overly vigorous branches to maintain a balanced shape.

Tools You’ll Need:

  • Sharp pruning shears
  • Loppers for thicker branches
  • A pruning saw for large limbs

Step 6: Managing Pests and Diseases

Apple trees can be prone to pests and diseases like aphids, apple scab, fire blight, and codling moths.

Preventive Care:

  • Keep the area around trees free of fallen fruit and leaves.
  • Use disease-resistant apple varieties when possible.
  • Apply dormant oil spray in late winter to control overwintering pests.
  • Consider organic options like Neem oil or insecticidal soap.

Regularly inspect your trees for signs of trouble and act promptly.


Step 7: Pollination Essentials

Since most apple trees are not self-pollinating, planting two or more compatible varieties improves fruit yield.

Pollination Options:

  • Plant two different apple varieties that bloom around the same time.
  • Invite natural pollinators like bees by planting nectar-rich flowers nearby.
  • If space is limited, consider grafting multiple varieties onto a single tree or growing a “family tree” with different varieties on one rootstock.

Step 8: Harvesting Your Apples

Patience pays off — most apple trees start bearing fruit 3–5 years after planting. Harvest time depends on the variety and local climate, typically from late summer to early fall.

How to Tell When Apples Are Ripe:

  • The background color changes from green to yellowish or red.
  • Apples come off the branch easily with a slight twist.
  • Taste-test an apple for sweetness and texture.
  • Seeds inside should be dark brown.

Storage Tip:
Store apples in a cool, humid environment. Some varieties like Fuji or Granny Smith can last for months in proper conditions.


Final Thoughts

Creating a backyard orchard filled with healthy, productive apple trees is a rewarding project that offers beauty, fresh fruit, and a deeper connection to nature. By choosing the right varieties, providing proper care, and keeping an eye on pests and diseases, you’ll be well on your way to harvesting crisp, homegrown apples for years to come.

Whether you want to enjoy them fresh off the tree, baked into pies, or made into homemade cider, there’s something truly special about growing your own apples. Start planting today and transform your backyard into a fruitful oasis!

10 Rare Flowering Indoor Vines to Transform Your Living Space

10 Rare Flowering Indoor Vines to Transform Your Living Space

If you love filling your home with lush greenery and vibrant flowers, flowering indoor vines are a stunning way to add a romantic, exotic vibe to your interiors. While trailing houseplants like pothos and philodendron are common, there’s a world of rare and beautiful indoor vines that produce delightful blooms too. These enchanting climbers are perfect for brightening up windows, shelves, and hanging baskets, bringing color, fragrance, and life to your home. Discover these 10 rare flowering indoor vines and elevate your living space with their irresistible charm.


1. Wax Plant (Hoya carnosa)

The Wax Plant is a true gem among indoor flowering vines. Known for its thick, glossy leaves and clusters of star-shaped, sweetly scented blooms, this vine adds both texture and fragrance to your space. Hoyas thrive in bright, indirect light and love being root-bound, making them perfect for small pots or hanging baskets. Their waxy pink or white flowers often appear in late spring or summer, filling the room with a subtle, honey-like scent. Easy to care for, they’re ideal for busy plant lovers craving something a little different.

2. Black-Eyed Susan Vine (Thunbergia alata)

This cheerful vine boasts bright, daisy-like flowers with a dark center hence the name Black-Eyed Susan. While often grown outdoors, it can thrive indoors in a sunny spot, climbing trellises or cascading from hanging planters. Its vivid orange, yellow, or white blooms bring a burst of color to any room. It prefers consistently moist soil and bright light, rewarding you with continuous blooms from spring to fall. This lively vine turns any window or sunroom into a warm, inviting retreat.

3. Bleeding Heart Vine (Clerodendrum thomsoniae)

The Bleeding Heart Vine is a striking indoor plant, featuring heart-shaped white bracts that cradle deep red flowers a dramatic, romantic pairing. Native to tropical Africa, it flourishes in warm, humid environments with bright, indirect light. Given the right conditions, it blooms profusely in late spring and summer. It can be trained onto trellises or allowed to trail from hanging baskets. Regular pruning keeps it manageable indoors while promoting fuller, more abundant flowering.

4. Passionflower (Passiflora caerulea)

One of the most exotic-looking flowering vines, Passionflower dazzles with its intricate, otherworldly blooms in shades of blue, purple, and white. While often an outdoor plant, it can be grown indoors in a sunny room or conservatory. Passionflowers need bright, direct light and consistent moisture. Their flowers not only look extraordinary but also attract pollinators if you open a window or have a garden-facing balcony. This vine adds an artistic, tropical feel to any interior space.

5. Jasmine (Jasminum polyanthum)

Famed for its intoxicatingly sweet scent, Jasmine is a flowering vine that transforms your living space with both fragrance and delicate white-pink blooms. This variety is especially suited for indoor growing, as it remains compact while producing a profusion of flowers in late winter and spring. It loves bright, indirect light and thrives in well-draining soil. Jasmine vines look beautiful trained on a hoop or trellis or trailing from a high shelf, creating a romantic, cozy atmosphere.

6. Canary Creeper (Tropaeolum peregrinum)

A rare and whimsical vine, Canary Creeper charms with its frilly, canary-yellow flowers and delicate, lobed foliage. This plant is an indoor-friendly relative of the nasturtium and thrives in bright, indirect light with moderate watering. It blooms prolifically from late spring into fall, making it a joyful addition to any home. The flowers and young leaves are even edible, adding a peppery note to salads. Let it trail from shelves or climb a miniature trellis for a playful, airy look.

7. Rangoon Creeper (Combretum indicum)

This tropical stunner is known for its clusters of tubular, star-shaped flowers that shift in color from white to pink to deep red as they mature. Rangoon Creeper thrives in bright, sunny rooms and adds a bold, exotic statement to any space. It prefers slightly moist soil and enjoys a bit of humidity, making it ideal for sunrooms or bathrooms with natural light. Its cascading blooms and sweet fragrance turn any indoor corner into a lush, vibrant retreat.

8. Mandevilla (Mandevilla sanderi)

Mandevilla vines are known for their trumpet-shaped, vibrant pink, red, or white flowers and glossy, deep green foliage. Indoors, they thrive in bright, direct light and benefit from regular watering during the growing season. These fast-growing climbers look stunning when trained on a small trellis or allowed to trail from a high shelf or hanging planter. Mandevilla’s bold, tropical flowers create a warm, resort-like vibe inside your home, especially during the blooming months of spring and summer.

9. Flame Vine (Pyrostegia venusta)

For those craving drama, the Flame Vine delivers with cascades of bright orange, trumpet-shaped blooms. Native to South America, this rare flowering vine can be grown indoors in a bright, sunny location. It blooms during the cooler months, bringing color and warmth to your home when most plants are dormant. Flame Vines require regular watering and occasional pruning to maintain shape. Their vibrant flowers attract hummingbirds and make a stunning addition to any indoor plant collection.

10. Madagascar Jasmine (Stephanotis floribunda)

Madagascar Jasmine, also known as Bridal Wreath, is a romantic, rare vine famed for its pure white, waxy, star-shaped flowers and enchanting fragrance. It thrives in bright, indirect light and moderate humidity, blooming primarily in spring and summer. The glossy, dark green leaves provide a beautiful contrast to its delicate blooms. This vine is perfect for wrapping around an indoor trellis or arch, adding elegance and a gentle floral aroma to living rooms, bedrooms, or even bathrooms.

10 Stunning Tropical Air Plants to Elevate Your Terrarium Style

10 Stunning Tropical Air Plants to Elevate Your Terrarium Style

Air plants are the ultimate no-fuss tropical beauties, perfect for adding life, color, and elegance to your terrarium displays. With no soil required and endless styling possibilities, these epiphytic wonders are ideal for both seasoned plant lovers and beginners. From bold blooms to exotic forms, tropical air plants instantly elevate your home’s green corners. In this article, we’ll explore 10 gorgeous tropical air plants that thrive in terrariums and transform any space into a lush, natural sanctuary.


1. Tillandsia ionantha

One of the most beloved air plants, Tillandsia ionantha is a compact beauty known for its dramatic color changes. Its soft, silvery-green leaves blush shades of bright red and pink when it blooms, topped with vivid purple flowers. This plant thrives in bright, indirect light with good air circulation and loves regular misting. Its petite size makes it perfect for hanging globes or glass terrariums, adding a burst of tropical charm to small spaces and modern interiors.

2. Tillandsia xerographica

Often called the “Queen of Air Plants,” Tillandsia xerographica steals the show with its stunning, silvery-green leaves that gracefully curl at the edges. This larger air plant is a statement piece in any terrarium or open display. It loves bright, indirect light and infrequent watering, thriving in well-ventilated environments. Its dramatic form pairs beautifully with driftwood, stones, or hanging planters, offering a sculptural, tropical focal point that’s both low-maintenance and endlessly elegant.

3. Tillandsia caput-medusae

Named for its snake-like leaves, Tillandsia caput-medusae boasts an exotic, otherworldly shape perfect for creative terrarium designs. Its thick, twisting leaves are covered in soft trichomes that help absorb moisture and nutrients. When in bloom, it produces a tall, vibrant flower spike with purple blossoms. This unique air plant prefers bright, filtered light and regular misting. Its quirky form adds texture and movement to displays, making it a favorite for adding a bold, tropical accent.

4. Tillandsia stricta

Tillandsia stricta is prized for its slender, upright leaves and showy pink or purple flower bracts that emerge quickly in the right conditions. This fast-growing air plant adapts well to terrariums and hanging displays, thriving in bright, indirect light with regular misting. Its soft, feathery leaves add a lush texture to tropical arrangements, and it multiplies easily by producing offsets after flowering. It’s perfect for anyone wanting a fuss-free, blooming plant that brightens up small indoor gardens.

5. Tillandsia bulbosa

With its wild, tentacle-like leaves and glossy, dark green color, Tillandsia bulbosa makes a striking addition to tropical terrariums. Its bulbous base stores moisture, making it drought-tolerant and forgiving for beginners. When it blooms, it sends up a vibrant red or purple flower spike, adding dramatic color to its quirky shape. Bulbosa thrives in bright, indirect light and benefits from occasional soaking. Its sculptural appearance makes it ideal for pairing with moss, bark, and natural stones.

6. Tillandsia brachycaulos

Known for its vivid red hue during blooming, Tillandsia brachycaulos is a show-stopping air plant that adds bold color to any display. Its soft, broad leaves arch outward in a beautiful rosette form. This plant loves bright, indirect light and regular misting or occasional soaking. When it flowers, it produces small, tubular blossoms in purple or violet shades. Brachycaulos pairs wonderfully with decorative terrarium elements like crystals or driftwood, offering both color and tropical flair.

7. Tillandsia harrisii

Soft to the touch, Tillandsia harrisii features silvery-gray leaves with a velvety texture, thanks to its dense trichomes. This air plant’s gentle coloring makes it a soothing addition to neutral-toned terrariums and minimalist spaces. It blooms with a bright red spike topped by violet flowers, creating a beautiful contrast against its muted foliage. Harrisii prefers bright, filtered light and consistent misting. Its soft appearance and easy-going nature make it an ideal pick for beginners and design enthusiasts alike.

8. Tillandsia tectorum

If you love soft, cloud-like textures, Tillandsia tectorum is a must-have. Native to the Andes, this air plant boasts fuzzy, silvery leaves that give it a frosted appearance. It’s highly drought-tolerant, needing only occasional misting or soaking, and prefers bright, indirect sunlight. Tectorum adds an ethereal touch to terrariums and open-air planters, pairing beautifully with delicate stones and natural woods. Its airy structure and unique texture make it an eye-catching, low-maintenance tropical treasure.

9. Tillandsia fasciculata

Known for its bold, upright form and striking red or pink flower spikes, Tillandsia fasciculata is one of the most vibrant air plants you can grow. Its stiff, green leaves radiate in a rosette, and it thrives in bright, indirect light with regular misting. This plant’s larger size makes it ideal for centerpiece terrariums or standalone displays. When in bloom, its colorful bracts and violet flowers provide a dramatic tropical accent that instantly elevates your indoor garden’s style.

10. Tillandsia cyanea (Pink Quill Plant)

While technically an epiphyte, Tillandsia cyanea is a stunning air plant often grown potted in loose, well-draining media. Its signature pink, paddle-shaped bract resembling a feather or quill lasts for months and produces delicate violet flowers. This plant enjoys bright, indirect light and moderate misting or occasional soaking. Its colorful blooms and elegant shape make it a standout in terrariums or tabletop displays, bringing a touch of the tropics to any room with minimal care.