7 Indoor Plants That Clean the Air Naturally

7 Indoor Plants That Clean the Air Naturally

In today’s fast-paced urban lifestyle, spending more time indoors means we’re constantly exposed to indoor air pollutants from cleaning products, furniture, paints, and electronics. Poor indoor air quality can cause headaches, allergies, fatigue, and even respiratory problems. Thankfully, nature provides a beautiful solution — indoor plants! These green companions don’t just brighten up your interiors; many species are known to naturally purify the air by absorbing harmful toxins and releasing fresh oxygen. Here’s a list of 7 indoor plants that clean the air naturally, making your home healthier and more vibrant.


1. Spider Plant (Chlorophytum comosum)

The Spider Plant is a favorite among beginner gardeners and interior decorators for its attractive, arching green leaves with white stripes. Beyond its beauty, this hardy plant is excellent at removing indoor air pollutants like formaldehyde, carbon monoxide, and benzene. NASA’s Clean Air Study also lists it among the top air-purifying plants. Spider Plants are non-toxic to pets, easy to propagate, and thrive in indirect sunlight. Simply water it when the soil feels dry and watch it purify your living spaces naturally.


2. Snake Plant (Sansevieria trifasciata)

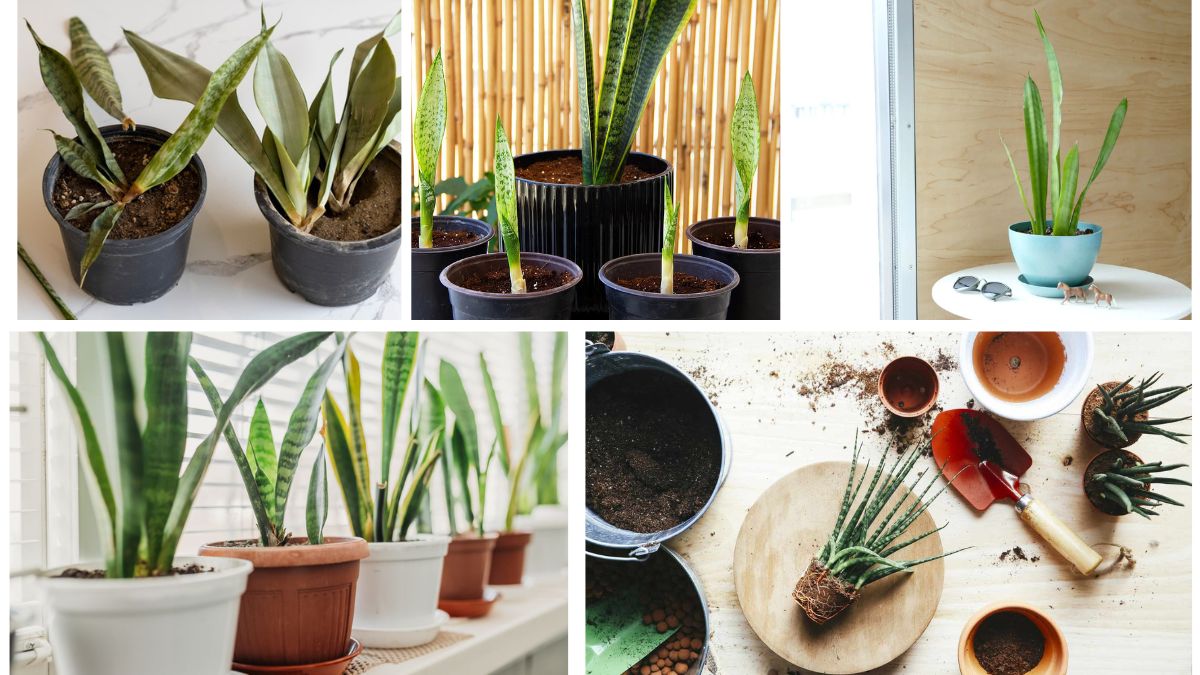
Also known as Mother-in-Law’s Tongue, the Snake Plant is a striking indoor plant with tall, sword-shaped leaves that feature green bands and yellow edges. It’s one of the best air-purifying plants, known to filter toxins such as formaldehyde, trichloroethylene, benzene, and xylene. What sets the Snake Plant apart is its ability to convert CO₂ into oxygen at night, making it an ideal addition to bedrooms. Extremely low-maintenance, it tolerates low light and irregular watering, thriving on neglect.


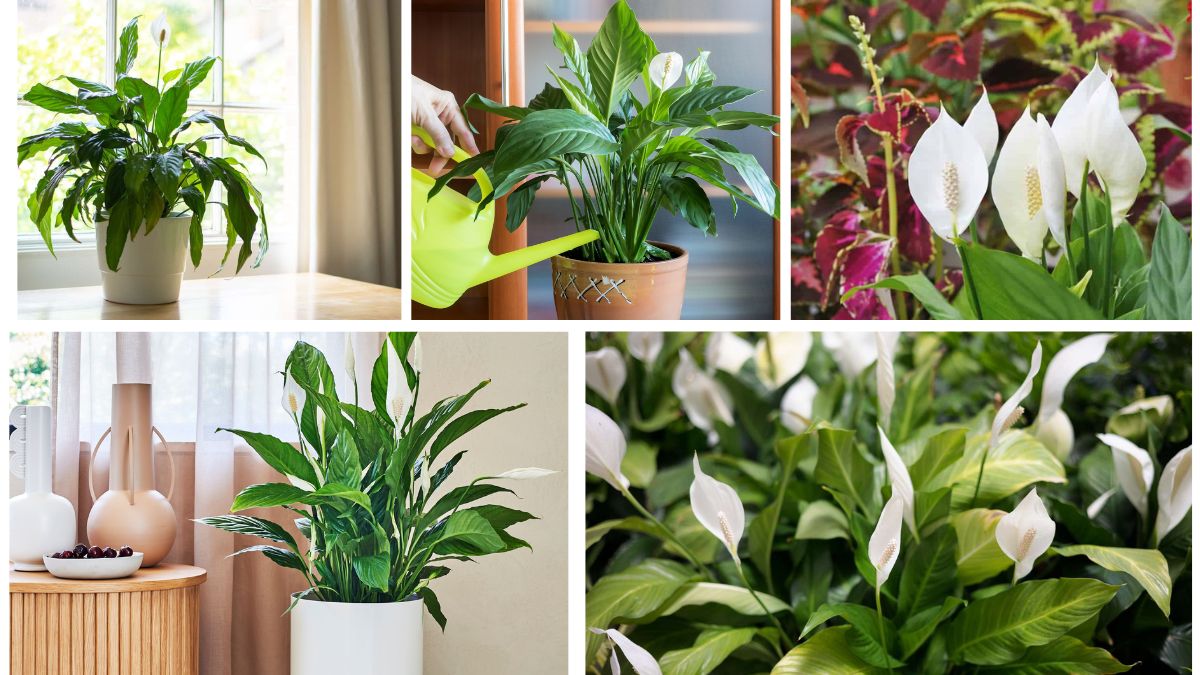
3. Peace Lily (Spathiphyllum)

The elegant Peace Lily adds sophistication to any room with its glossy green leaves and graceful white flowers. More than its visual appeal, it’s a natural air purifier, efficiently removing harmful chemicals like ammonia, benzene, formaldehyde, and trichloroethylene. It also helps in reducing airborne mold spores, making it great for damp areas like bathrooms. Peace Lilies prefer medium to low light and only need watering once the soil dries out. However, pet owners should note that the plant is toxic if ingested by cats or dogs.


4. Areca Palm (Dypsis lutescens)

Areca Palm, often called the Butterfly Palm, is an elegant, feathery plant that not only brings a tropical touch indoors but also works as a natural humidifier and air purifier. This plant is effective at filtering airborne toxins such as formaldehyde, xylene, and toluene. Areca Palm releases moisture into the air, improving humidity levels in dry environments — beneficial for respiratory health and skin. It thrives in bright, indirect light and requires consistent moisture without overwatering.


5. Aloe Vera (Aloe barbadensis miller)

Aloe Vera is famous for its medicinal properties, especially in treating burns, skin irritations, and digestive issues. Lesser known is its ability to purify indoor air by removing harmful chemicals like benzene and formaldehyde, commonly found in varnishes, floor finishes, and detergents. Aloe Vera thrives in sunny spots and prefers minimal watering, making it a fuss-free addition to any windowsill. Its thick, succulent leaves not only look beautiful but also contain a gel rich in antioxidants and vitamins.


6. Boston Fern (Nephrolepis exaltata)

The lush and leafy Boston Fern is a classic houseplant with cascading fronds that enhance indoor aesthetics while purifying the air. It effectively eliminates indoor pollutants like formaldehyde and xylene. Moreover, Boston Fern acts as a natural humidifier, which makes it beneficial in air-conditioned or heated rooms. This plant loves indirect light and consistently moist (but not soggy) soil. Regular misting keeps its delicate fronds fresh and helps it thrive in your home environment.


7. Rubber Plant (Ficus elastica)

With broad, glossy leaves in deep green, the Rubber Plant is an excellent air purifier that combats common airborne toxins such as formaldehyde. It also absorbs carbon dioxide and produces oxygen, improving indoor air quality. Rubber Plants are relatively easy to maintain, preferring indirect sunlight and infrequent watering. They also add a bold, modern look to interiors with their upright growth and rich foliage. Keep in mind that the sap is slightly toxic, so it should be placed out of reach of pets and children.


Final Thoughts

Indoor plants do far more than decorate our homes — they actively improve the air we breathe, regulate humidity, and reduce stress levels. By incorporating these 7 air-purifying plants into your living spaces, you’re investing in both style and wellness. Whether you’re looking for something compact like Aloe Vera, dramatic like a Snake Plant, or lush like a Boston Fern, each of these natural air filters contributes to a healthier, happier home. Embrace these green allies and transform your indoor environment, one leaf at a time!

7 High-Oxygen Bedroom Plants for Better Sleep

7 High-Oxygen Bedroom Plants for Better Sleep

A restful night’s sleep isn’t just about a comfy mattress and quiet room — the air you breathe plays a crucial role too. Introducing high-oxygen plants into your bedroom not only beautifies your space but also purifies the air and promotes better sleep by increasing oxygen levels and removing indoor toxins.

In this article, we’ll explore 7 incredible high-oxygen bedroom plants that help you sleep better naturally, complete with benefits and easy care tips for each.


1. Snake Plant (Sansevieria trifasciata)

Often called Mother-in-Law’s Tongue, the Snake Plant is one of the best air-purifying and oxygen-releasing plants for bedrooms. Unlike most plants, which release oxygen only during the day, the Snake Plant performs photosynthesis at night too. This unique ability helps maintain higher oxygen levels as you sleep, promoting restful breathing.

It’s incredibly hardy and thrives in low light and irregular watering schedules, making it perfect for bedroom corners or nightstands. Besides boosting oxygen, it also filters toxins like formaldehyde and benzene from the air.


2. Aloe Vera

Aloe Vera isn’t just for sunburns and skin care — it’s a powerful bedroom plant that improves air quality while increasing oxygen levels at night. Like the Snake Plant, Aloe Vera releases oxygen in the dark, helping you sleep soundly and wake up refreshed.

It’s low-maintenance, needing water only when the soil is dry, and thrives in indirect light. As a bonus, you’ll have fresh aloe gel on hand for skin, hair, and minor cuts. Keep it by your window, and enjoy cleaner, oxygen-rich air every night.


3. Areca Palm (Dypsis lutescens)

The Areca Palm, also known as the Butterfly Palm, is an excellent natural humidifier and high-oxygen plant perfect for bedrooms. Its lush, feathery fronds release abundant oxygen while increasing indoor humidity, making it ideal for combating dry, stale air — a common culprit behind restless sleep.

This plant prefers bright, indirect light and consistent, moderate watering. Beyond its air-cleaning properties, the Areca Palm adds a calming, tropical aesthetic to your sleeping space, creating a peaceful, spa-like environment that encourages deep relaxation.


4. Peace Lily (Spathiphyllum)

Renowned for its striking white blooms and deep green foliage, the Peace Lily is one of NASA’s top-rated air-purifying plants. It not only removes harmful pollutants like benzene, formaldehyde, and ammonia from the air but also increases oxygen levels, especially in closed bedroom environments.

Peace Lilies prefer low to medium light and slightly moist soil, making them easy to care for indoors. The plant also improves room humidity, which helps soothe dry throats and skin while you sleep, contributing to a healthier, more restful atmosphere.


5. Tulsi (Holy Basil)

Highly valued in Ayurveda and traditional medicine, Tulsi is more than a sacred plant — it’s a superb natural air purifier and oxygen booster for bedrooms. Tulsi releases oxygen throughout the day and night, purifying the air by neutralizing toxins and harmful gases like carbon monoxide.

Its pleasant, calming aroma promotes relaxation and reduces stress and anxiety, enhancing sleep quality naturally. Tulsi thrives in well-lit areas and needs regular watering. Keeping a Tulsi plant in your bedroom connects you with nature’s healing energy and improves overall well-being.


6. Pothos (Epipremnum aureum)

Also known as Devil’s Ivy, Pothos is a hardy, fast-growing vine admired for its trailing green leaves and excellent air-purifying abilities. This plant continuously releases oxygen while filtering out indoor toxins such as benzene, toluene, and formaldehyde — all of which can disturb sleep quality.

Pothos thrives in a range of lighting conditions and requires minimal care, making it perfect for bedrooms. Hang it in a corner or place it on a shelf to enjoy cleaner air and a calming ambiance while you rest.


7. Gerbera Daisy (Gerbera jamesonii)

If you love adding color to your bedroom, the Gerbera Daisy is a beautiful and beneficial choice. Known for its bright, cheerful blooms, this flowering plant also happens to be a high-oxygen producer. Uniquely, Gerbera Daisy releases oxygen during the night, improving air circulation and promoting better sleep, especially for people with sleep apnea or breathing difficulties.

It needs bright, indirect light and moist, well-draining soil. Though a little more demanding than other plants on this list, the combination of beauty and clean, oxygen-rich air makes it worth the effort.


Final Thoughts

Adding high-oxygen plants to your bedroom isn’t just a decor upgrade — it’s a natural way to enhance sleep quality, reduce stress, and create a healthier indoor environment. From hardy Snake Plants to soothing Peace Lilies and vibrant Gerbera Daisies, there’s a perfect plant for every bedroom and lifestyle.

Choose a few favorites from this list, and experience the difference of fresher, oxygen-rich air and deeper, more restful sleep starting tonight.

How to Water Houseplants While on Vacation

How to Water Houseplants While on Vacation

Houseplants bring joy, beauty, and life to our homes — but if you’re heading out for a well-deserved vacation, you might worry about leaving your leafy friends behind. Fortunately, with a little planning and some clever tricks, you can ensure your indoor plants stay happy, hydrated, and healthy while you’re away.

In this detailed guide, you’ll learn how to water houseplants while on vacation using easy, effective methods that anyone can do, whether you’re gone for a weekend getaway or an extended trip.


Why Proper Vacation Plant Care Matters

Most houseplants thrive on consistency. Sudden neglect or changes in their care routine — especially water — can cause:

✔ Drooping leaves
✔ Yellowing or browning foliage
✔ Root rot (if overwatered before leaving)
✔ Wilting, stunted growth, or even plant death

That’s why it’s important to plan ahead and find a watering solution that suits your plants’ needs while you’re away.


Things to Consider Before You Leave

Before setting up a watering plan, assess:

  • Trip duration — A weekend trip requires less prep than a 2-week holiday.
  • Types of plants — Succulents need less frequent watering, while ferns and tropical plants dry out faster.
  • Plant size and pot type — Small pots dry quicker than larger ones.
  • Indoor temperature and light — Hot, sunny rooms increase water loss.

Knowing these factors helps you choose the right watering solution for each plant.


Pre-Vacation Plant Care Checklist

A few smart steps before you leave can make a big difference:

Water thoroughly the day before — Give each plant a good, deep soak, allowing excess water to drain.
Move plants out of direct sunlight — Relocate them to a cooler, shadier spot to reduce water evaporation.
Group plants together — Clustering them creates a mini humid microclimate.
Remove dead leaves and flowers — Reduces water demand.
Consider pruning fast-growing plants — Limits moisture needs while you’re away.


7 Clever Ways to Water Houseplants While on Vacation

1. Self-Watering Planters

These pots come with a built-in water reservoir that allows plants to draw moisture as needed through capillary action.

Pros:

  • Easy to use
  • Great for frequent travelers

Tip: You can DIY a self-watering system using a double container setup and a cotton rope wick.


2. Water Wicking System

A simple, affordable DIY method using cotton ropes or thick strings.

How to set it up:

  • Place a container filled with water next to your plant.
  • Insert one end of the rope deep into the water and the other end about 2 inches into the plant’s soil.
  • The wick will slowly draw water into the soil.

Ideal for: Small and medium houseplants.


3. Plastic Bottle Drip System

A quick and practical solution using a plastic bottle.

How to set it up:

  • Fill a clean bottle with water.
  • Poke a few tiny holes in the cap.
  • Invert the bottle into the plant’s soil, cap side down.
  • The water will slowly release into the soil.

Tip: Use smaller bottles for small pots and larger bottles for big planters.


4. Glass Water Globes or Bulbs

These decorative glass orbs release water slowly into the soil as it dries.

Pros:

  • Easy and stylish
  • No DIY work needed

Consider pairing them with other methods for thirstier plants during long trips.


5. Water Bath Method (for Short Vacations)

For a weekend trip, place plant pots (with drainage holes) in a shallow tray filled with water.

How to do it:

  • The soil will absorb moisture from the bottom as needed.
  • Remove plants after 1–2 days to prevent root rot.

Ideal for: Plants like ferns, calatheas, and peace lilies.


6. Mulching to Retain Moisture

Covering the soil with a layer of organic material slows evaporation.

Use:

  • Peat moss
  • Coconut coir
  • Wood chips
  • Decorative pebbles

Tip: Mulch after watering to trap existing moisture in the soil.


7. Ask a Plant-Savvy Friend or Neighbor

If your trip is longer than two weeks or you have delicate plants, consider asking someone you trust to check in and water your plants.

Provide clear, simple care instructions and group plants together for easier management.


How Long Can Houseplants Go Without Water?

Approximate duration without water varies by plant type:

Succulents & cacti: 2–3 weeks
Ferns, peace lilies, calatheas: 4–7 days
Pothos, snake plants, ZZ plants: 10–14 days
Orchids: 10–14 days

Tip: Always research individual plant care needs before planning a watering schedule.


Extra Tips for Vacation Plant Care

✔ Avoid overwatering before leaving — it can cause root rot.
✔ Clean dust off leaves to improve photosynthesis in lower light.
✔ Use sheer curtains to reduce harsh sunlight.
✔ Consider setting up a humidity tray (a shallow dish filled with pebbles and water beneath the plant pot).
✔ Turn off fans or heaters that dry out air near plants.


Signs Your Plant Needs Water When You Return

When you come home, check your plants for:

  • Drooping or limp leaves
  • Dry, cracked soil
  • Yellowing or browning foliage
  • Wilting flower buds

Water thoroughly and gently trim any dead or damaged parts. Give them a few days to perk up in their normal spot with proper light.


Which Plants Handle Vacations Best?

Some houseplants are naturally forgiving and drought-tolerant:

✔ Snake Plant
✔ ZZ Plant
✔ Pothos
✔ Jade Plant
✔ Aloe Vera
✔ Cactus
✔ Spider Plant
✔ Philodendron

These varieties are perfect for frequent travelers or busy plant parents.


Final Thoughts

Leaving your houseplants behind while you enjoy a vacation doesn’t have to be stressful. With a little planning, simple DIY setups, and clever watering techniques, you can keep your leafy friends hydrated, happy, and healthy until you return.

Whether you choose a wicking system, a drip bottle, mulching, or ask a plant-loving friend, your indoor jungle will greet you with fresh, green foliage when you walk through the door.

So go ahead — book that getaway and leave your plants in good hands!


Would you like me to craft an SEO-friendly meta title and meta description for this article too? I’d be happy to help with that!Tools

How to Propagate Succulents the Easy Way

How to Propagate Succulents the Easy Way

Succulents are among the most popular houseplants, loved for their unique shapes, stunning colors, and easy care. But did you know you can grow new succulents from the ones you already own — right at home? Succulent propagation is simple, satisfying, and a budget-friendly way to expand your plant collection.

In this comprehensive guide, you’ll discover how to propagate succulents the easy way, using different techniques suitable for beginners and experienced plant lovers alike. Let’s dive in!


What Is Succulent Propagation?

Succulent propagation is the process of creating new plants from existing ones using parts like leaves, cuttings, offsets (baby plants), or seeds. Thanks to their hardy, drought-tolerant nature, succulents are incredibly easy to multiply — and it’s a great way to turn one plant into many.


Benefits of Propagating Succulents

✔ Cost-effective — no need to buy new plants
✔ Easy to learn and perfect for beginners
✔ Helps rejuvenate leggy or overgrown succulents
✔ A fun indoor gardening project for families
✔ Makes thoughtful, homemade plant gifts
✔ Expands your home garden effortlessly


Best Time to Propagate Succulents

Succulents can be propagated year-round indoors, but for the best results:

  • Spring and early summer are ideal, when plants are actively growing.
  • Avoid heavy propagation in winter dormancy.

Pro tip: Always use healthy, mature succulents for propagation.


Materials You’ll Need

  • Healthy succulent plant
  • Sharp, clean scissors or pruning shears
  • Small containers or shallow trays
  • Well-draining succulent or cactus soil
  • Spray bottle (for light misting)
  • Optional: Rooting hormone (not necessary, but helpful)

4 Easy Ways to Propagate Succulents

Leaf Propagation

The most popular method — perfect for rosette-shaped succulents like Echeveria, Graptopetalum, or Sedum.

How to do it:

  1. Choose a plump, healthy leaf from your succulent.
  2. Gently twist or wiggle it off the stem, ensuring a clean break.
  3. Allow the leaf to callus over for 1–2 days in a dry, shaded area. This prevents rot.
  4. Place the callused end on top of well-draining soil — do not bury.
  5. Mist lightly every few days to keep the soil slightly damp.
  6. In 2–3 weeks, tiny roots and new baby plants will appear at the base.

When to transplant: Once the baby plant has developed a few leaves and the original leaf shrivels.

Ideal for: Echeveria, Sedum, Graptopetalum, Crassula


Stem Cutting Propagation

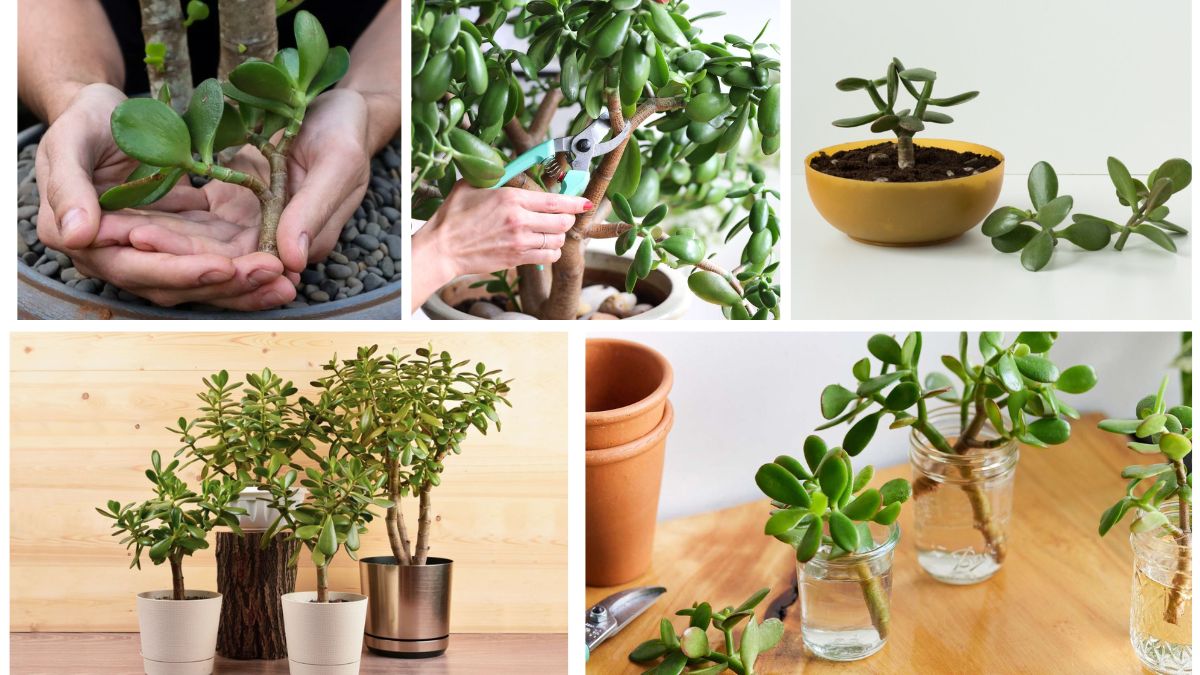
Great for succulents that grow tall or leggy like Jade Plant, Aeonium, or Kalanchoe.

How to do it:

  1. Use clean scissors to snip a healthy stem about 3–4 inches long.
  2. Remove lower leaves from the stem, leaving a few at the top.
  3. Let the cutting callus for 2–5 days in a dry, shaded spot.
  4. Plant the callused end into well-draining soil.
  5. Mist lightly every few days or water once the soil dries out.

Roots typically develop in 1–3 weeks, followed by new growth.

When to transplant: When the cutting shows resistance to a gentle tug and new leaves appear.

Ideal for: Jade Plant, Kalanchoe, Echeveria, Aeonium


Offset (Pup) Propagation

Many succulents naturally produce offsets — baby plants growing at their base.

How to do it:

  1. Gently remove the offset by cutting or pulling it away from the mother plant.
  2. Let the offset callus for 1–2 days.
  3. Plant it in a small pot with succulent soil.
  4. Water sparingly until roots establish, then follow normal succulent care.

Offsets establish faster than leaf cuttings and are genetically identical to the parent.

Ideal for: Aloe Vera, Haworthia, Sempervivum (Hens and Chicks)


Water Propagation (Optional Method)

Though succulents dislike sitting in water, some gardeners successfully root cuttings this way.

How to do it:

  1. Place a leaf or stem cutting with the base hovering just above the water in a glass jar.
  2. Use plastic wrap or toothpicks to hold it in place.
  3. Keep in bright, indirect light.
  4. Change the water every few days.
  5. Once roots form, transplant into soil.

Note: Best for experimenting with certain varieties like Jade Plant or Crassula.


Tips for Successful Succulent Propagation

✔ Always use healthy, disease-free leaves or cuttings.
✔ Ensure cuttings callus over to prevent rot.
✔ Use a gritty, well-draining soil mix specifically for succulents.
✔ Avoid overwatering — let the soil dry between mists or waterings.
✔ Provide bright, indirect light — avoid harsh midday sun.
✔ Be patient — some varieties root faster than others.


Common Mistakes to Avoid

Using damp or soggy soil — leads to rot.
Forgetting to let cuttings callus — increases chances of fungal infection.
Over-misting or overwatering — remember succulents like it dry.
Keeping in low light — propagation requires adequate indirect sunlight.
Using unhealthy or damaged leaves — they won’t propagate successfully.


Best Succulents for Easy Propagation

Some succulents propagate more reliably and quickly than others:

Echeveria
Sedum
Jade Plant (Crassula ovata)
Aloe Vera
Haworthia
Kalanchoe
Sempervivum (Hens and Chicks)
Graptopetalum


How Long Does Propagation Take?

  • Roots typically appear within 1–3 weeks.
  • New baby plants or leaves may take 4–8 weeks depending on conditions and variety.
  • Full transplants are usually ready within 2–3 months.

Be patient — succulents grow slowly, but the results are worth it.


Fun Propagation Projects

Create a succulent propagation station using shallow trays or decorative jars.
Design a DIY living wall frame using propagated succulents.
Use excess plantlets to make eco-friendly gifts for friends and family.
Share cuttings in community plant swaps or on social media gardening groups.


Final Thoughts

Learning how to propagate succulents the easy way is a rewarding, affordable, and sustainable way to grow your plant collection. With simple tools, a bit of patience, and the right care, you can turn one succulent into many, decorate your home, and even share your green thumb with others.

So gather those leaves, snip those stems, and start your own succulent propagation adventure today!

How to Prune Houseplants for Healthy Growth

How to Prune Houseplants for Healthy Growth

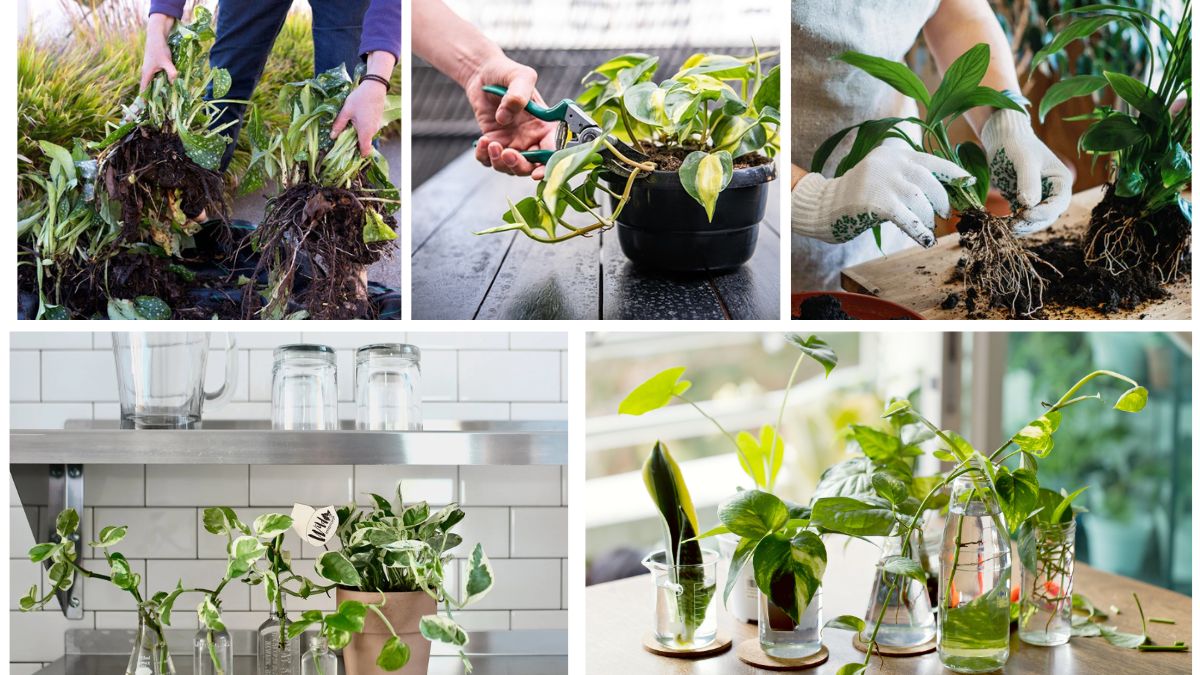
Houseplants bring life, color, and a calming presence into our homes — but like any living thing, they need regular care to stay healthy. One often-overlooked aspect of plant care is pruning. While many new plant owners hesitate to snip away at their beloved greenery, pruning houseplants is essential for healthy growth, appearance, and longevity.

In this comprehensive guide, you’ll learn why pruning is important, when to prune, the right tools to use, and how to safely prune different types of houseplants for the best results.


Why Prune Houseplants?

Pruning isn’t just about keeping your plants neat — it plays a vital role in plant health and development. Here’s why it matters:

Encourages new, healthy growth
✔ Removes dead, yellowing, or diseased leaves
✔ Prevents overcrowded, leggy, or unbalanced growth
✔ Shapes the plant for a fuller, bushier appearance
✔ Increases airflow around leaves and stems
✔ Helps manage plant size for small indoor spaces
✔ Promotes better flowering in some plant varieties

A well-pruned plant is not only healthier but also more attractive and easier to manage indoors.


When to Prune Houseplants

While houseplants can be pruned year-round, the best time is typically during their active growing season, which runs from spring to early fall. Pruning at this time allows plants to recover quickly and sprout fresh growth.

You should prune immediately if you notice:

  • Yellowing, browning, or dead leaves
  • Stems affected by pests or disease
  • Overcrowded, leggy, or misshapen growth
  • Spent flowers or seed heads
  • Roots emerging from the soil surface or drainage holes

Tip: Avoid heavy pruning during winter dormancy, as most plants grow more slowly then.


Essential Tools for Pruning Houseplants

Using the right tools ensures clean, healthy cuts and reduces the risk of damaging the plant.

Recommended tools:

  • Sharp pruning shears or garden scissors
  • Small, sharp scissors for delicate plants
  • Clean, soft cloth or wipes for cleaning tools
  • Isopropyl alcohol or disinfectant for sterilizing blades

Always sterilize tools before and after pruning to prevent the spread of disease between plants.


How to Prune Houseplants: Step-by-Step

Remove Dead or Yellowing Leaves

Start by snipping off any dead, yellow, or brown leaves at their base where they meet the stem. This immediately improves the plant’s appearance and prevents disease spread.

Pro tip: Remove leaves that show signs of mold, spots, or pests as soon as you spot them.


Trim Leggy or Overgrown Stems

Leggy stems are long, bare, and sparse, often caused by insufficient light. Prune them back to a healthy leaf node (the small bump where leaves or new shoots grow).

How to prune leggy stems:

  • Identify the overgrown section.
  • Cut just above a healthy leaf node to encourage bushier growth.
  • For bushy plants like pothos or philodendron, trim back several stems for an even look.

Shape and Size the Plant

If your plant is getting too large or uneven:

  • Trim back longer stems to match the rest of the plant’s shape.
  • For rounded plants like spider plants or jade plants, aim for a balanced, symmetrical form.
  • Remove any stems crossing over others to improve air circulation.

Tip: Step back occasionally while pruning to assess the overall shape.


Deadhead Spent Flowers

For flowering houseplants like African violets, peace lilies, or geraniums:

  • Snip off spent flowers at the base of their stalk.
  • Regular deadheading promotes continuous blooming and prevents wasted energy on seed production.

Control Root Growth (If Needed)

If you notice roots circling the inside of the pot or emerging from drainage holes, it’s a sign your plant may need root pruning or repotting.

How to root prune:

  • Remove the plant from the pot.
  • Gently loosen excess soil.
  • Trim back overly long or damaged roots.
  • Replant in fresh soil and a slightly larger container if needed.

Pruning Tips for Specific Houseplants

Pothos & Philodendron

  • Cut just above a node.
  • Remove up to one-third of the vines for bushier regrowth.

Fiddle Leaf Fig

  • Prune damaged or drooping leaves.
  • Cut back branches to control size.

Spider Plant

  • Snip off brown leaf tips.
  • Remove plantlets (baby plants) to encourage main plant health.

Snake Plant

  • Cut dead or damaged leaves at the soil line.
  • Remove entire leaves only if necessary.

Succulents

  • Remove dead or dried lower leaves.
  • Snip off elongated stems to encourage compact growth.

Common Pruning Mistakes to Avoid

Over-pruning — never remove more than one-third of the plant at once.

Using dull, dirty tools — can tear plant tissues and spread disease.

Pruning at the wrong spot — always cut just above a node or at the leaf base.

Ignoring signs of pest damage — early pruning helps stop infestations from spreading.

Heavy winter pruning — most houseplants grow slower in winter and may not recover quickly.


After-Pruning Care

Pruning can stress plants temporarily, so give them a little extra care afterward:

✔ Water lightly, avoiding soggy soil.
✔ Keep plants in bright, indirect light.
✔ Avoid fertilizing for 1–2 weeks after heavy pruning.
✔ Wipe down leaves to remove dust and improve photosynthesis.
✔ Monitor for signs of new growth within 2–3 weeks.

Pro tip: Propagate healthy cuttings in water or soil for new plants!


Benefits of Regular Pruning

✔ Keeps plants healthy and disease-free
✔ Encourages fuller, more attractive growth
✔ Maintains desired size and shape
✔ Extends plant lifespan
✔ Reduces the risk of pest problems
✔ Creates opportunities for propagation

Regular pruning is one of the simplest yet most impactful ways to boost your houseplant’s health and beauty.


Final Thoughts

Pruning houseplants might seem intimidating at first, but with a little practice, it becomes a satisfying and rewarding part of plant care. By removing dead, damaged, or unruly growth, you allow your plants to thrive, grow fuller, and stay healthier in your home.

So grab your shears, show your plants some love, and let them flourish with these easy, practical pruning techniques!

How to Use Coffee Grounds in Your Garden

How to Use Coffee Grounds in Your Garden

If you’re a coffee lover and a plant enthusiast, here’s some good news — those leftover coffee grounds you toss into the trash each morning could be a secret weapon for a healthier, more vibrant garden. Using coffee grounds in your garden is an eco-friendly, cost-effective way to improve soil, nourish plants, and even deter pests.

In this comprehensive guide, we’ll explain why coffee grounds are beneficial for your garden, how to use them safely and effectively, which plants love them, and the best practices to avoid common mistakes. Grab your mug and let’s dig in!


Why Use Coffee Grounds in Your Garden?

Coffee grounds are packed with organic material and beneficial nutrients that can enhance garden soil and plant health. While commonly regarded as waste, they actually contain:

  • Nitrogen — essential for leafy growth
  • Potassium — boosts root strength and disease resistance
  • Phosphorus — supports flowering and fruiting
  • Micronutrients like calcium, magnesium, and iron

Additionally, coffee grounds improve soil texture, increase drainage and aeration, and feed beneficial microorganisms in the soil.


Benefits of Coffee Grounds for Your Garden

Improves soil structure by making it looser and more friable
✔ Acts as a slow-release fertilizer
✔ Helps with water retention in sandy soils and drainage in clay soils
✔ Encourages earthworms and beneficial microbes
✔ Repels common pests like slugs and snails
✔ Can mildly acidify soil (beneficial for acid-loving plants)
Supports sustainable, waste-free gardening


How to Use Coffee Grounds in Your Garden

There are several easy and effective ways to incorporate coffee grounds into your gardening routine. Here’s how:


Add Coffee Grounds to Compost

Coffee grounds are considered a “green” compost material because of their nitrogen content. They break down quickly and heat up compost piles, speeding up decomposition.

How to use:

  • Mix coffee grounds with dry “brown” materials like leaves, straw, or shredded paper.
  • Aim for a ratio of 1 part coffee grounds to 3 parts brown materials.
  • Turn the compost regularly for proper aeration.

Tip: Used coffee filters are compostable too — toss them in along with the grounds.


Use as a Soil Amendment

Mix coffee grounds directly into your garden soil to improve texture and nutrient content.

How to use:

  • Sprinkle half an inch of coffee grounds over the soil surface.
  • Gently mix them into the topsoil with a rake or hand tool.
  • Avoid piling coffee grounds thickly — they can compact and block water.

Best for: Vegetable beds, flower borders, and raised planters.


Make Coffee Ground Mulch

While not a substitute for traditional mulch, coffee grounds can be blended with other organic matter to suppress weeds and retain moisture.

How to use:

  • Combine coffee grounds with shredded leaves, grass clippings, or straw.
  • Spread a thin layer (½–1 inch) around the base of plants.
  • Keep the mixture loose to avoid crusting and poor airflow.

Pro tip: Avoid placing pure coffee grounds directly on plant stems.


Brew a Coffee Ground Liquid Fertilizer

Create a nutrient-rich, mild liquid feed for your plants using leftover coffee grounds.

How to make:

  • Add 1 cup of used coffee grounds to a gallon of water.
  • Let it steep overnight.
  • Use the mixture to water your plants once a week.

Great for: Houseplants, garden veggies, herbs, and flowers.


Use Coffee Grounds as a Pest Repellent

Slugs, snails, and some soft-bodied pests dislike the gritty texture and mild acidity of coffee grounds.

How to use:

  • Sprinkle a ring of dry coffee grounds around vulnerable plants.
  • Refresh the barrier after heavy rain or watering.

Bonus: The scent can deter cats from digging in garden beds too.


Which Plants Like Coffee Grounds?

Coffee grounds can slightly acidify soil, which benefits certain acid-loving plants:

Acid-Loving Plants:

  • Blueberries
  • Rhododendrons
  • Azaleas
  • Hydrangeas (for bluer blooms)
  • Camellias
  • Gardenias
  • Roses
  • Carrots (when mixed into soil)

Tip: Most leafy greens, herbs, and flowers enjoy coffee-enriched compost in moderation.


Plants to Avoid Using Coffee Grounds On

Some plants are sensitive to the acidity or high nitrogen content of coffee grounds, including:

  • Lavender
  • Tomatoes (can cause growth issues if overused)
  • Succulents and cacti (prefer drier, alkaline soils)
  • Geraniums (coffee grounds can stunt their growth)

When in doubt, test small amounts first.


Common Mistakes to Avoid

Using thick layers of coffee grounds as mulch — it can form a dense, water-repelling barrier.

Overusing coffee grounds — too much nitrogen can harm plant roots and throw off soil balance.

Not balancing with brown compost materials — aim for a healthy compost ratio.

Applying to seedlings or young plants — coffee grounds are best for mature, established plants.


Tips for Storing and Handling Coffee Grounds

✔ Store used coffee grounds in an airtight container or old coffee can.
✔ Dry them before storage to prevent mold.
✔ Use within a week for best results, or freeze for later use.
✔ Always cool used coffee grounds before applying to soil or compost.


Bonus: Creative Garden Uses for Coffee Grounds

Mix coffee grounds with crushed eggshells for a calcium-boosted soil amendment.
Use coffee grounds to dye garden markers or decorative stones a rustic brown shade.
Sprinkle around compost piles to help control odor and attract worms.
Mix with a few drops of essential oil to create a natural, pet-safe pest repellent around your garden perimeter.


Final Thoughts

Learning how to use coffee grounds in your garden is an easy, eco-friendly way to reduce kitchen waste and enhance your plant care routine. Whether you compost them, brew a liquid fertilizer, or use them as pest control, coffee grounds are surprisingly versatile in the garden.

The key is moderation — too much of a good thing can cause problems. But when used thoughtfully, coffee grounds can nourish your soil, support plant health, and help create a more sustainable gardening practice.

So next time you finish your morning brew, don’t toss those grounds — give your garden a natural, aromatic boost instead!

How to Create a DIY Self-Watering Pot

How to Create a DIY Self-Watering Pot

If you love plants but often forget to water them — or travel frequently — a self-watering pot might be your new best friend. These clever containers help regulate soil moisture, delivering just the right amount of water to your plants over time without overwatering or drying out.

And the best part? You don’t have to spend extra money on expensive store-bought versions. With a few simple materials, you can easily create your own DIY self-watering pot at home!

In this detailed guide, you’ll learn what a self-watering pot is, why it’s useful, and how to build one yourself step by step. Let’s get started!


What is a Self-Watering Pot?

A self-watering pot is a container designed with a built-in water reservoir at the bottom. The plant’s roots draw water through a wick or capillary action, ensuring consistent hydration without the risk of overwatering.

Why it works:
The plant takes in water as it needs it, keeping the soil moist but not waterlogged. It reduces the frequency of watering and prevents root rot — perfect for forgetful or busy plant owners!


Benefits of Using Self-Watering Pots

✔ Prevents overwatering and underwatering
✔ Reduces plant care time and effort
✔ Maintains steady moisture levels
✔ Helps plants survive during vacations or busy weeks
✔ Improves plant health by reducing stress
✔ Perfect for indoor and balcony gardening


What You’ll Need for a DIY Self-Watering Pot

You don’t need fancy equipment — most of these items are already in your home:

Materials:

  • Two plastic containers or bottles (one slightly smaller than the other, or a bottle cut into two parts)
  • Cotton rope, fabric strip, or thick yarn (for the wick)
  • Sharp scissors or a utility knife
  • Drill or nail (for making holes)
  • Potting mix
  • Your plant of choice

Optional:

  • Decorative stones or pebbles for the top layer
  • Paint or markers to customize your pot

How to Make a DIY Self-Watering Pot: Step-by-Step

Step 1: Choose Your Containers

You’ll need:

  • A plant container (with drainage holes)
  • A water reservoir container (slightly bigger to fit beneath or hold the plant container)

Tip: Old yogurt containers, water bottles, or leftover plastic pots work great for this project.


Step 2: Cut and Prepare the Containers

If using a plastic bottle:

  • Cut the bottle about ⅓ from the bottom.
  • The top half will hold the plant and soil.
  • The bottom half will act as the water reservoir.

If using two separate containers:

  • Ensure one can nest inside the other, leaving space at the bottom for water storage.

Step 3: Create a Wick System

  • Cut a length of cotton rope, thick yarn, or fabric strip about 6–8 inches long.
  • Insert it through a hole in the base of the plant container so that about 2–3 inches of the wick hangs into the water reservoir below.
  • The rest of the wick will stay in the soil, pulling water up through capillary action.

Pro tip: Make two or more wicks for larger pots or thirstier plants.


Step 4: Add Potting Mix and Plant

  • Place a small layer of soil over the wick inside the plant container.
  • Add your plant and fill with potting mix, ensuring the wick stays vertically in the soil.
  • Lightly press the soil down.

Optional: Add decorative stones or mulch on top to help retain moisture and prevent algae in indoor settings.


Step 5: Assemble the Self-Watering System

  • Place the plant container over or inside the water reservoir.
  • Fill the reservoir with fresh, clean water.

Ensure the wick is submerged in the water for proper absorption.


Step 6: Monitor and Maintain

  • Top up the reservoir as needed — usually once every few days.
  • Clean the container and wick every few weeks to prevent mold or bacteria buildup.
  • Check the soil moisture occasionally, especially during hot weather.

Pro tip: Use a transparent or semi-clear reservoir to easily see water levels.


Best Plants for Self-Watering Pots

Not all plants have the same water needs. These plants thrive in self-watering systems:

Indoor Plants:

  • Pothos
  • Peace Lily
  • Spider Plant
  • Snake Plant
  • Philodendron

Herbs:

  • Basil
  • Mint
  • Parsley
  • Cilantro

Small Vegetables:

  • Lettuce
  • Spinach
  • Cherry Tomatoes (for larger systems)

Avoid succulents and cacti — they prefer dry soil and don’t perform well with constant moisture.


Tips for Successful Self-Watering

✔ Use lightweight, well-draining potting mix — heavy soils can retain too much moisture.
✔ Clean the wick and container every 4–6 weeks to prevent odor and algae.
✔ Place in a bright, indirect sunlight spot for best growth.
✔ Adjust wick length based on plant water needs — longer for thirsty plants, shorter for drought-tolerant ones.
✔ Use rainwater or filtered water if your tap water is high in minerals.


Creative DIY Self-Watering Pot Ideas

  • Paint and decorate your containers to match your home décor.
  • Hang small self-watering pots from windows or balcony railings.
  • Use colored glass bottles for an elegant, upcycled look.
  • Create a herb wall with multiple bottle-based self-watering planters.

Common Mistakes to Avoid

Using non-absorbent synthetic ropes as wicks
Forgetting to clean water reservoirs regularly
Using soil that holds too much water
Leaving succulents or drought-loving plants in constant moisture
Overfilling the reservoir without checking soil dampness


Final Thoughts

A DIY self-watering pot is a brilliant, easy-to-make solution for anyone who wants healthy, low-maintenance plants at home. Whether you’re a beginner, a frequent traveler, or simply someone who forgets to water on time, this clever system ensures your plants get exactly the moisture they need.

Plus, it’s eco-friendly, cost-effective, and a great weekend DIY project. So gather your materials, get creative, and start making your own self-watering pots today — your plants (and your schedule) will thank you!

Winter Care Tips for Your Indoor Plants

Winter Care Tips for Your Indoor Plants

As the temperatures drop and daylight hours shorten, it’s not just people who feel the effects of winter — indoor plants also go through seasonal changes. While they’re shielded from frost and snow inside your home, the cool drafts, dry air, low light, and shifting humidity levels can still impact their health.

Fortunately, with a few simple adjustments, you can keep your indoor plants healthy, vibrant, and thriving through the coldest months of the year. This detailed guide shares the essential winter care tips for your indoor plants — from watering and lighting to humidity and pest prevention.


Why Do Indoor Plants Struggle in Winter?

Winter conditions create several challenges for houseplants:

  • Reduced daylight hours limit photosynthesis.
  • Dry indoor air from heaters lowers humidity levels.
  • Cooler temperatures slow down growth.
  • Overwatering risks increase as plants need less moisture.

Without proper adjustments, these factors can lead to yellowing leaves, stunted growth, leaf drop, and even plant death. But a little attention and care can make a big difference.


Essential Winter Care Tips for Indoor Plants

Adjust Watering Habits

One of the most important winter care changes is modifying your watering routine.

Why?
Plants grow more slowly in cooler months, meaning they require less water. Overwatering during winter is a common mistake that can lead to root rot.

Tips:

  • Check the soil before watering. Stick your finger 1–2 inches into the soil — only water if it feels dry.
  • Water less frequently but thoroughly when needed.
  • Ensure pots have drainage holes to prevent soggy soil.
  • Use room-temperature water to avoid shocking roots.

Signs of overwatering: Yellow leaves, mushy stems, and mold on soil surface.


Maximize Available Light

With fewer hours of natural sunlight in winter, indoor plants can struggle to photosynthesize.

Tips:

  • Move plants closer to south- or west-facing windows where they can catch more light.
  • Rotate pots regularly for even growth.
  • Clean windows and dust leaves to maximize light absorption.
  • Use grow lights or full-spectrum LED lamps if natural light is insufficient — especially for tropical or sun-loving plants.

Pro tip: Place mirrors near plants to reflect extra light onto them.


Maintain Humidity Levels

Indoor heating systems dry out the air, which can harm humidity-loving plants like ferns, calatheas, and peace lilies.

Ways to increase humidity:

  • Group plants together to create a microclimate.
  • Place a tray filled with water and pebbles under plant pots.
  • Use a room humidifier.
  • Mist plants regularly (only in the morning to avoid overnight dampness).

Ideal humidity for most houseplants: 40–60%.


Keep Plants Away from Drafts and Heat Sources

Cold drafts and sudden temperature drops from open windows, exterior doors, or poorly insulated areas can stress plants.

Tips:

  • Relocate plants away from drafty windows, exterior doors, and radiators.
  • Avoid placing plants on top of or too close to heaters and vents.
  • Maintain a consistent indoor temperature between 60–75°F (15–24°C).

Pause or Reduce Fertilizing

During winter, most houseplants enter a semi-dormant phase where growth slows down, and nutrient requirements decrease.

Tips:

  • Stop or reduce feeding to once every 6–8 weeks.
  • Use a half-strength diluted liquid fertilizer if necessary.
  • Resume regular feeding in early spring when new growth appears.

Over-fertilizing during dormancy can lead to salt buildup and root damage.


Monitor for Pests

Winter’s dry indoor conditions can invite pests like spider mites, fungus gnats, and scale insects.

Prevention tips:

  • Inspect plants weekly for signs of pests: sticky leaves, fine webs, or tiny moving dots.
  • Quarantine new or infested plants.
  • Wipe leaves with a damp cloth.
  • Use natural remedies like neem oil spray or insecticidal soap for infestations.

Pro tip: Overwatering encourages fungus gnats — allow the topsoil to dry out between waterings.


Prune Dead or Yellowing Leaves

Regularly removing dead or yellowing foliage helps improve air circulation and prevent mold and pests.

Tips:

  • Use clean, sharp scissors or pruning shears.
  • Cut brown or yellow leaves at the base of the stem.
  • Don’t over-prune; only remove what’s necessary.

Pruning also encourages healthier new growth once spring arrives.


Refrain from Repotting

Winter isn’t the ideal time for repotting because most plants are semi-dormant and can become stressed by soil or pot changes.

Exceptions:
Repot only if a plant is severely root-bound, diseased, or waterlogged.

Best practice:
Wait until early spring when plants resume active growth.


Best Indoor Plants for Winter Months

Some houseplants naturally tolerate low light and dry air better than others. Great winter-friendly options include:

  • Snake Plant (Sansevieria)
  • ZZ Plant (Zamioculcas zamiifolia)
  • Pothos (Epipremnum aureum)
  • Peace Lily (Spathiphyllum)
  • Spider Plant (Chlorophytum comosum)
  • Dracaena
  • Aloe Vera

These hardy plants make excellent companions during the colder months with minimal fuss.


Creative Winter Plant Care Ideas

Create a mini indoor jungle near a bright window for visual warmth and natural humidity.

Use terrariums or glass cloches to protect delicate plants and retain moisture.

Add LED fairy lights or string lights around plant shelves for a cozy winter ambiance.

Display small plants on window sills, wall shelves, or hanging planters to maximize limited light.


Final Thoughts

Caring for indoor plants in winter requires small, thoughtful changes — adjusting watering, managing light, increasing humidity, and staying vigilant for pests. With these simple but effective winter care tips, your houseplants will stay healthy, green, and gorgeous, bringing warmth and life to your home even on the coldest days.

So cozy up, adjust your plant routine, and let your indoor greenery thrive this winter!

How to Grow Mint at Home in Water

How to Grow Mint at Home in Water

Mint is one of the easiest and most rewarding herbs to grow at home. Known for its refreshing aroma, cooling taste, and culinary versatility, mint thrives both in soil and — surprisingly — in water! Growing mint in water is a simple, space-saving method that requires no garden space or fancy equipment.

In this comprehensive guide, you’ll learn exactly how to grow mint at home in water, why it’s an excellent method for beginner gardeners, and expert tips to keep your mint plants lush, aromatic, and thriving year-round.


Why Grow Mint in Water?

Growing mint in water is not only easy but also highly practical, especially for small-space dwellers. Here’s why this method is worth trying:

Low maintenance — no soil, no mess
✔ Great for apartments, kitchens, or balconies
✔ Fresh mint on hand for teas, recipes, and garnishes
✔ Perfect for beginner gardeners
✔ Doubles as a natural air freshener indoors
✔ Easy to propagate from store-bought or garden cuttings

Plus, you’ll get to watch roots grow and stems flourish in clear containers, adding a decorative, green touch to your home.


What You’ll Need

Growing mint in water doesn’t require many tools. Here’s a quick list of what you’ll need to get started:

  • Healthy mint cuttings (from your garden or grocery store)
  • A clean glass jar, bottle, or vase
  • Fresh, non-chlorinated water (filtered or boiled and cooled)
  • Sharp scissors or garden shears
  • A bright, indirect sunlight spot (like a kitchen windowsill)
  • Optional: A label or marker for variety identification

Tip: Avoid direct, scorching sunlight as it can wilt mint leaves.


How to Grow Mint in Water: Step-by-Step

Step 1: Select Healthy Mint Cuttings

Look for a healthy, mature mint plant with vibrant, green leaves and strong stems. If buying from a store, choose a fresh bunch of mint with sturdy, upright stems.

Ideal cutting size:
4–6 inches long with a few sets of leaves.


Step 2: Prepare the Cuttings

  • Using clean, sharp scissors or shears, cut the stem just below a leaf node (the bumpy joint where leaves grow).
  • Remove the lower leaves from the bottom 2 inches of the stem to prevent rot in water.
  • Leave a few healthy leaves at the top.

Pro tip: The leaf nodes submerged in water will sprout new roots.


Step 3: Place Cuttings in Water

  • Fill a clean jar or glass container with fresh, room-temperature water.
  • Insert the prepared mint cuttings into the water, ensuring that at least one or two leaf nodes are submerged.
  • Keep the remaining leaves above the waterline.

Optional: Use multiple cuttings in a single jar for a fuller display.


Step 4: Choose a Bright Spot

Place the container in a well-lit area with indirect sunlight — a kitchen windowsill, balcony corner, or bright shelf works perfectly.

Avoid:

  • Direct afternoon sun
  • Dark or drafty spots
  • Overcrowded shelves without ventilation

Step 5: Maintain Water Quality

Change the water every 2–3 days to keep it fresh, prevent stagnation, and discourage bacterial growth.

  • Rinse the container and refill with clean water.
  • Check for any decayed or yellowing leaves and remove them immediately.

Tip: If your tap water is heavily chlorinated, let it sit for a few hours before using or use filtered water.


Step 6: Watch for Root Growth

Within 7–10 days, you’ll notice white, thread-like roots forming at the submerged nodes.

After 2–3 weeks, roots should be long and healthy, and the cutting will begin producing new leaves.


Step 7: Harvest Mint Leaves

Once the plant has several sets of leaves, you can start harvesting.

  • Use clean scissors to snip off leaves or tips just above a node.
  • Regular harvesting encourages bushier growth and prevents legginess.

Pro tip: Don’t harvest more than one-third of the plant at a time.


How Long Can Mint Grow in Water?

Mint can thrive in water for several months if cared for properly. Regularly changing the water, trimming the roots, and removing decaying leaves will extend its lifespan.

For long-term success:

  • Every 4–6 weeks, gently trim the roots if they get too long.
  • Add fresh cuttings to replenish the jar if some stems weaken.

Optional: You can transfer rooted mint to soil anytime for stronger growth.


Tips for Healthier Water-Grown Mint

✔ Keep water clean and free of algae
✔ Avoid placing jars near heat sources (stoves, heaters)
✔ Remove wilting or yellow leaves promptly
✔ Top up water regularly to keep nodes submerged
✔ Use transparent containers to enjoy the view — or opaque ones to prevent algae if you prefer


Common Issues and How to Fix Them

Yellowing leaves:
Likely due to poor water quality, lack of light, or overcrowding. Change water more often and check your lighting.

No root growth after 2 weeks:
Try using fresher cuttings and ensure nodes are submerged. Place in a brighter spot if necessary.

Slimy roots or cloudy water:
Clean the container thoroughly and replace water every 2 days.


Creative Ways to Display Water-Grown Mint

Use colored glass bottles for a decorative touch
Hang small jars on a vertical rack or window rail
Combine mint with other herbs like basil or oregano in a multi-herb water garden
Place small jars on kitchen shelves or dining tables for an aromatic accent


Benefits of Growing Mint at Home in Water

✔ No soil mess
✔ Easy to manage and propagate
✔ Cost-effective — start from store-bought sprigs
✔ Enjoy fresh mint year-round
✔ Stylish, natural home décor
✔ Beginner and child-friendly plant project


Final Thoughts

Growing mint at home in water is a simple, rewarding, and beautiful way to keep fresh herbs at your fingertips. With minimal effort and a little care, you can enjoy aromatic, lush green sprigs for your teas, recipes, and home décor — all without a single bag of potting mix.

It’s the perfect gardening project for anyone with a love for fresh herbs, whether you live in a spacious home or a cozy apartment.

So grab a bunch of mint, a glass jar, and start growing your water garden today — your kitchen (and your taste buds) will thank you!

Vertical Gardening Tips for Small Spaces

Vertical Gardening Tips for Small Spaces

Love plants but running out of room? Don’t worry — vertical gardening is the perfect solution for small spaces! Whether you live in a compact apartment, have a small balcony, or a limited backyard, vertical gardening lets you grow a lush, green paradise without taking up precious floor space.

In this detailed guide, you’ll discover the benefits of vertical gardening, creative ideas for setting up your vertical garden, and smart, practical tips to make the most of your vertical growing space.


What is Vertical Gardening?

Vertical gardening is the art of growing plants upward, using walls, trellises, shelves, hanging planters, and other vertical structures instead of spreading plants across the ground. This clever, space-saving method works well for:

  • Small apartments
  • Balconies
  • Tiny patios
  • Fences
  • Even indoor walls

Vertical gardens can include vegetables, herbs, flowers, or ornamental plants, making them versatile for both edible and decorative greenery.


Benefits of Vertical Gardening

Maximizes small spaces
✔ Adds beauty to plain walls and fences
✔ Improves air quality and reduces indoor heat
✔ Makes plant maintenance easier
✔ Protects plants from pests and soil-borne diseases
✔ Offers excellent drainage and air circulation
✔ Allows for creative and artistic garden displays

Whether you’re aiming for a vibrant herb wall in your kitchen or a green privacy screen on your balcony, vertical gardens open up endless possibilities.


Best Plants for Vertical Gardening

When planning a vertical garden, select plants that thrive in the conditions of your chosen space (sunlight, humidity, and temperature). Here are excellent vertical-growing options:

Edible Plants

  • Herbs: Basil, Mint, Parsley, Thyme, Coriander
  • Lettuce and leafy greens: Spinach, Kale, Swiss Chard
  • Climbing veggies: Beans, Peas, Cucumbers, Cherry Tomatoes
  • Strawberries (perfect for wall pockets)

Flowering Plants

  • Petunias
  • Nasturtiums
  • Pansies
  • Morning Glories
  • Verbena

Indoor Plants

  • Pothos
  • Philodendron
  • Ferns
  • Spider Plants
  • Succulents

Tip: Choose lightweight, compact, or trailing plants for the upper levels, and heavier, sturdy plants for lower spots.


Vertical Gardening Ideas for Small Spaces

Get creative with these smart and stylish vertical gardening solutions:

Wall-Mounted Planters

Use shelves, small pots, or hanging pockets mounted directly onto your wall. Ideal for herbs, flowers, and succulents in kitchens, balconies, or living rooms.

Hanging Baskets

Suspend baskets from hooks or ceiling rods, allowing trailing plants to cascade down. A beautiful option for ferns, pothos, and flowering plants.

Vertical Pallet Gardens

Upcycle wooden pallets by adding pockets or planting between slats. Lean against a wall for an instant rustic green wall.

Trellis or Wire Mesh

Attach a trellis to a fence or wall and train climbing plants like peas, beans, and flowering vines to grow upward.

Ladder Plant Stands

A tiered plant stand or an old ladder offers multiple shelves for displaying potted plants vertically.

Shoe Organizers

Hang fabric shoe organizers filled with soil and small plants. Ideal for herbs, strawberries, or succulents.

Stackable Planters

Use modular, stackable pots or towers that allow plants to grow upward while using minimal floor space.

Macramé Plant Hangers

Add a decorative touch to your small balcony or living room by hanging pots in stylish macramé holders.


Essential Vertical Gardening Tips

To make your vertical garden flourish, follow these key tips:

Choose the Right Location

Determine whether your plants need full sun, partial shade, or indirect light. South-facing walls and balconies typically receive the most sunlight.

Tip: Rotate plants occasionally to ensure even growth.


Select Lightweight Containers

Use plastic, fabric, or lightweight resin pots to avoid putting excessive weight on your walls, fences, or hangers.

Important: Ensure all containers have drainage holes to prevent root rot.


Use High-Quality Potting Mix

Vertical planters often dry out faster than ground beds. Use a moisture-retaining, well-draining potting mix enriched with organic matter.


Water Wisely

  • Vertical setups may require more frequent watering, especially on hot days.
  • Water from the top down, allowing gravity to help irrigate lower plants.
  • Use a spray bottle or long-spouted watering can for tight spots.

Tip: Add mulch or sphagnum moss to retain soil moisture.


Fertilize Regularly

Since vertical planters hold limited soil, nutrients get used up quickly. Feed plants with a diluted liquid fertilizer every 2–3 weeks during the growing season.


Prune and Harvest Often

Keep plants healthy and encourage continuous growth by regularly pruning dead leaves and harvesting edible plants like herbs, lettuce, and beans.


Install a Simple Irrigation System (Optional)

If you have a large vertical garden, consider a drip irrigation kit or self-watering planters to simplify watering tasks.


Common Vertical Gardening Mistakes to Avoid

Using heavy soil mixtures
Overcrowding plants
Neglecting drainage needs
Not checking light requirements
Using heavy, fragile containers on weak structures
Skipping regular watering and fertilizing

Avoiding these mistakes ensures your vertical garden remains vibrant, healthy, and easy to manage.


Vertical Gardening Indoors vs Outdoors

Indoor vertical gardens:

  • Use trailing houseplants, herbs, and small flowers
  • Ensure good light exposure (grow lights help)
  • Control humidity and avoid overwatering

Outdoor vertical gardens:

  • Choose sun-loving vegetables, flowering vines, or climbers
  • Ensure structures are weatherproof and sturdy
  • Water and fertilize consistently during growing months

Final Thoughts

Vertical gardening transforms even the tiniest spaces into lush, living walls of greenery. Whether you dream of a vertical herb garden in your kitchen, a colorful plant wall on your balcony, or a trellis of climbing veggies, there’s a vertical solution for you.

By choosing the right plants, using smart structures, and following essential care tips, you can create a vibrant vertical garden that’s easy to maintain and visually stunning.

So, don’t let a lack of space stop you — start growing upward and turn your small space into a vertical green haven today!