How to Grow Jujube (Chinese Date) Trees in the South

How to Grow Jujube (Chinese Date) Trees in the South

If you live in the southern United States and dream of growing a unique, easy-to-care-for fruit tree that’s both delicious and drought-tolerant, the Jujube tree (also known as the Chinese Date) is a fantastic choice. Known for its small, apple-like fruits and impressive adaptability to heat and dry conditions, the Jujube has been cultivated for over 4,000 years in Asia and is now gaining popularity in southern gardens and orchards.

In this comprehensive guide, we’ll cover everything you need to know to grow thriving Jujube trees in the South — from choosing the right varieties to planting, caring, and harvesting these charming and productive trees.


What is a Jujube Tree?

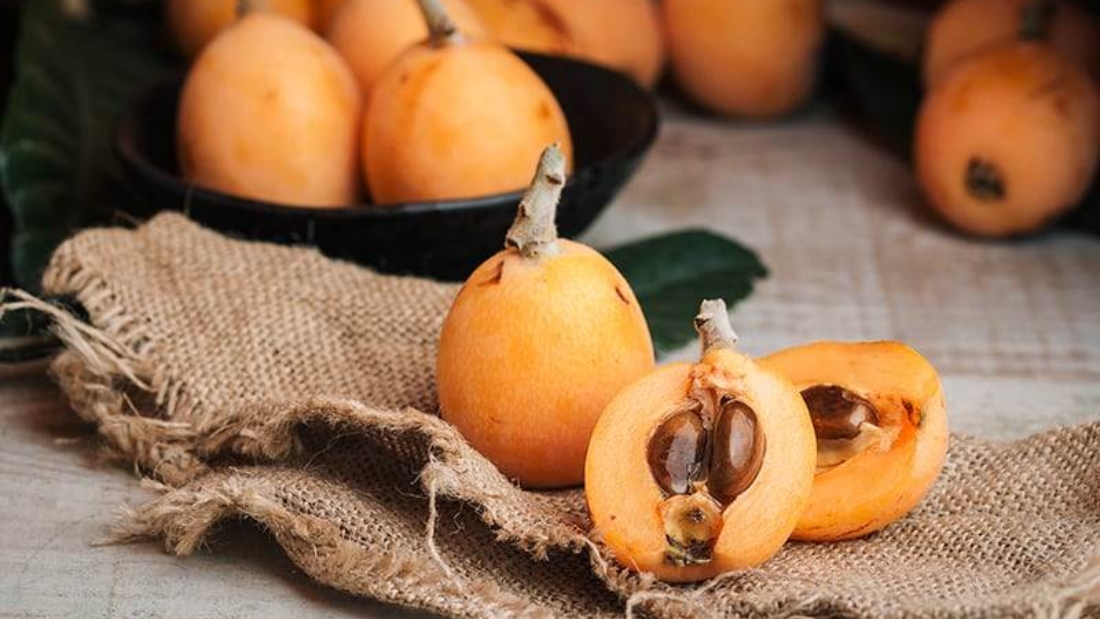
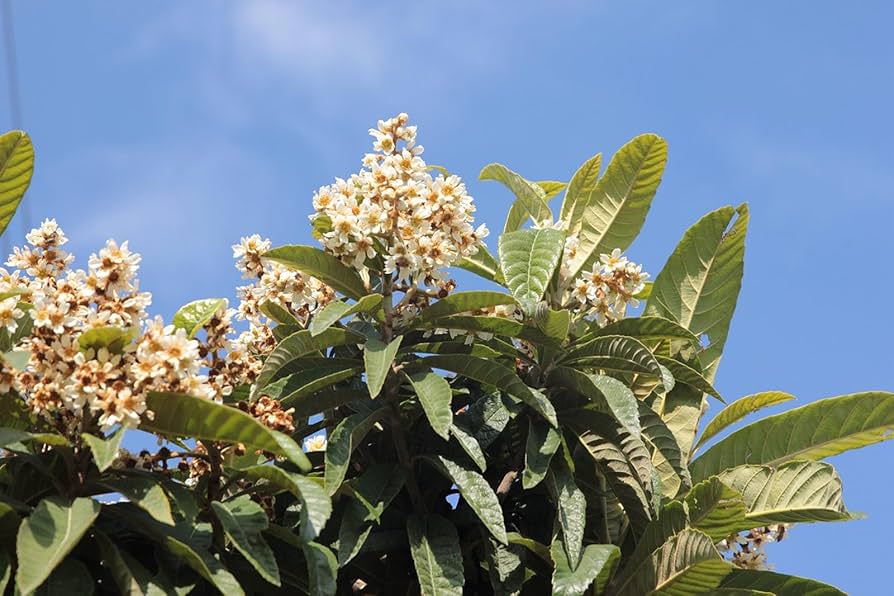
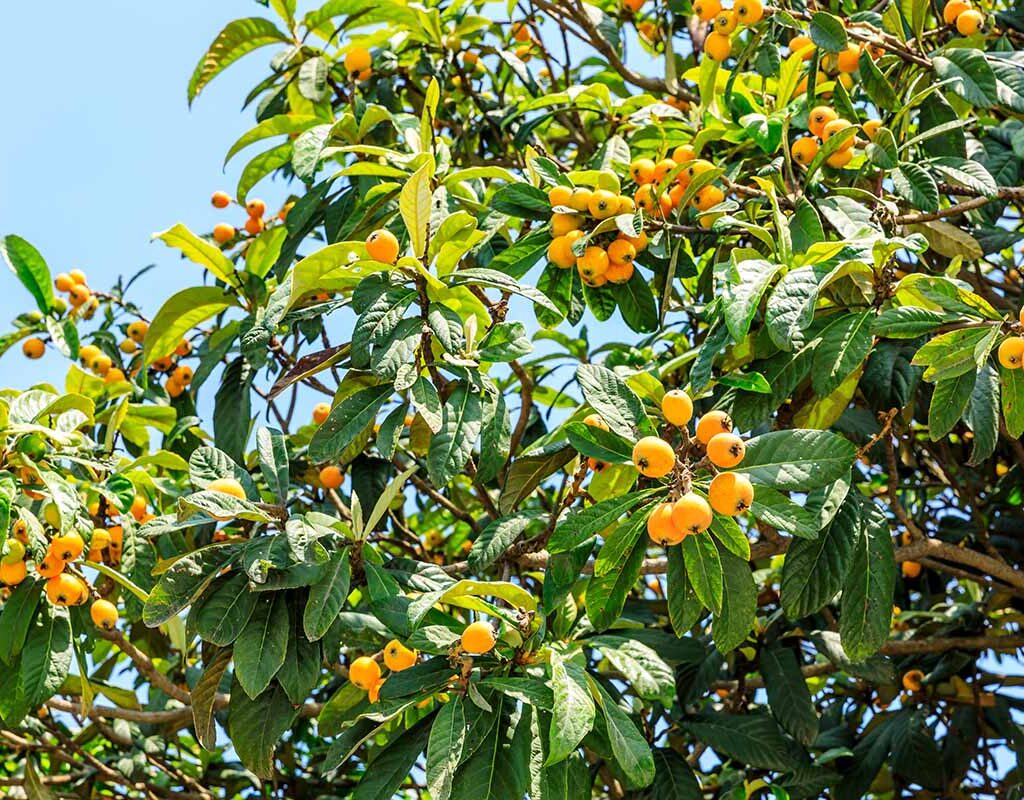
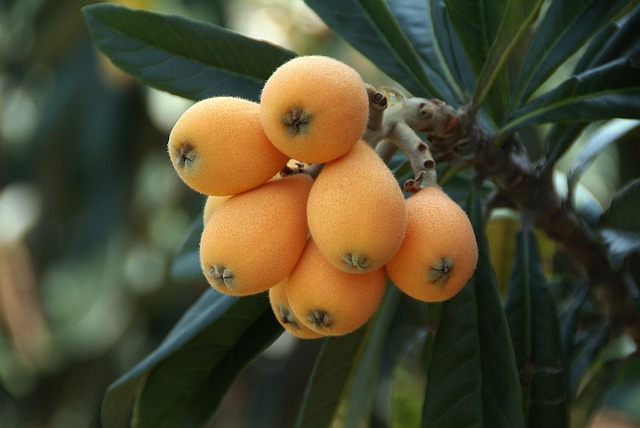
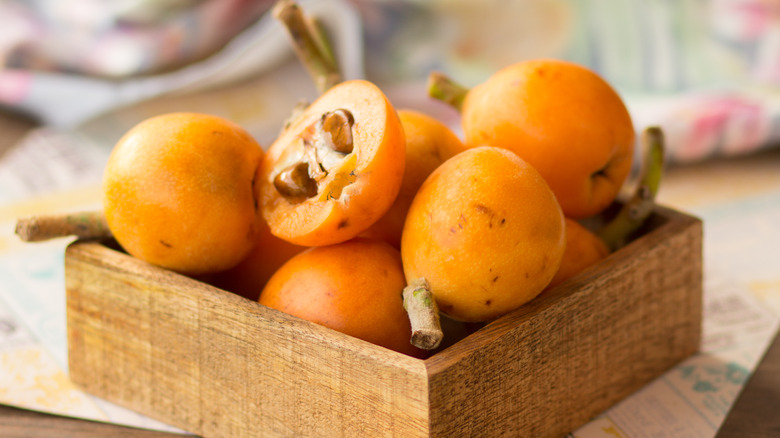
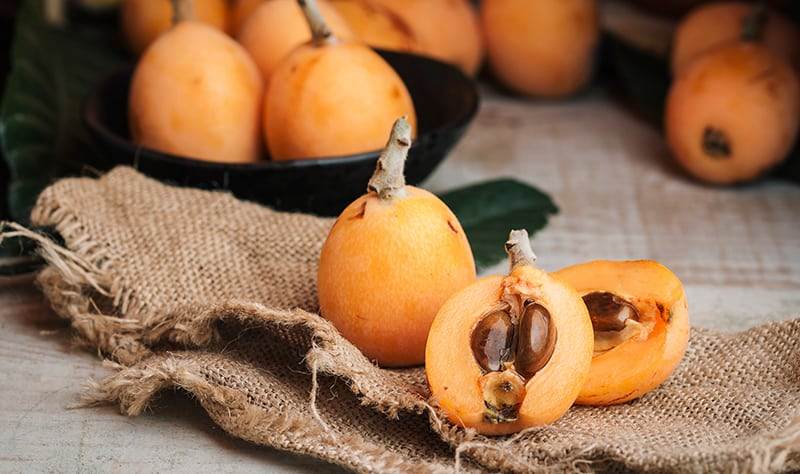
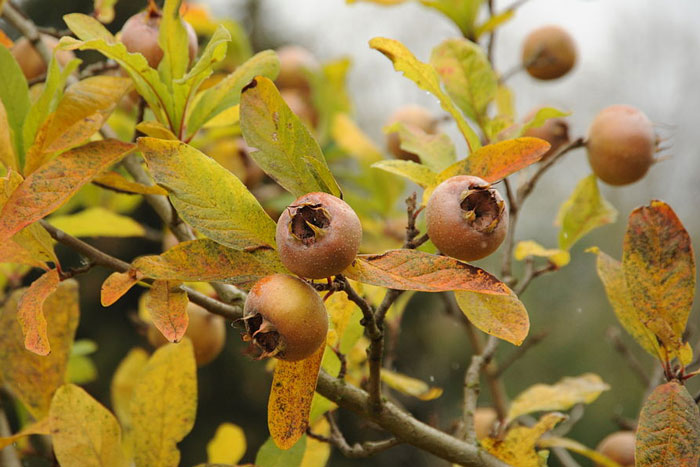
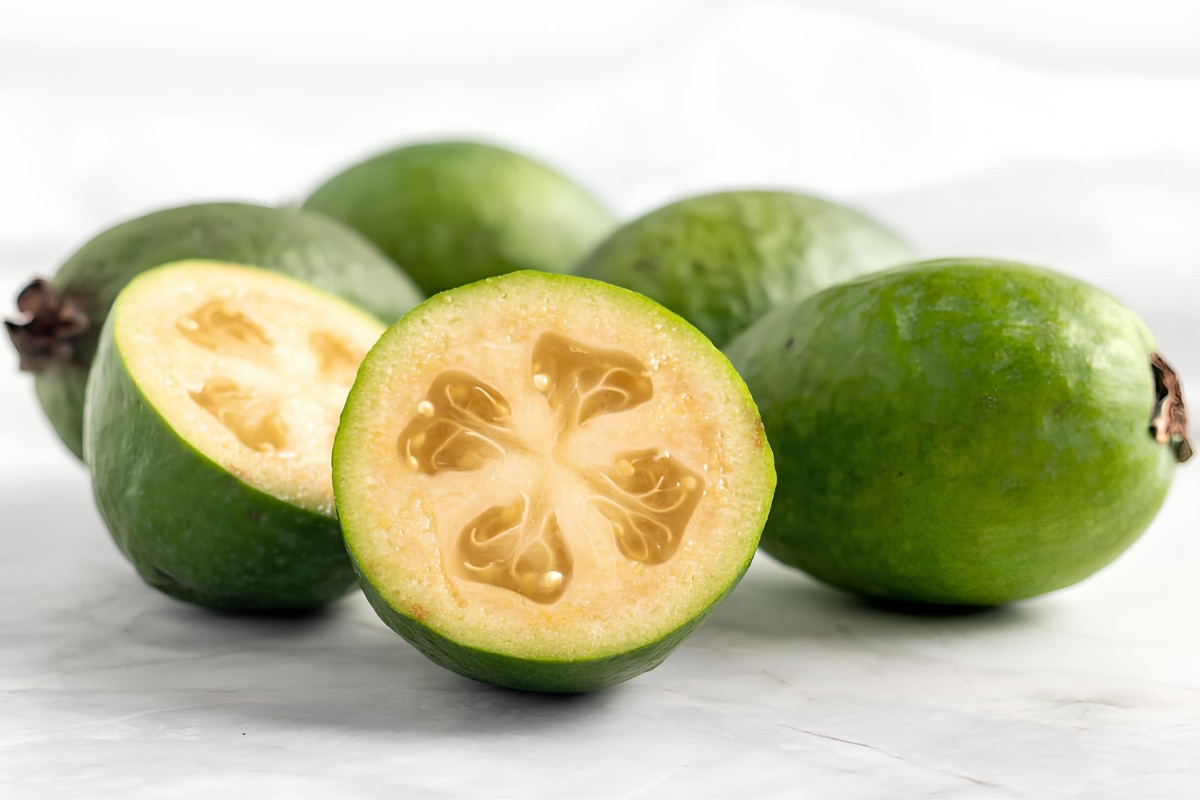
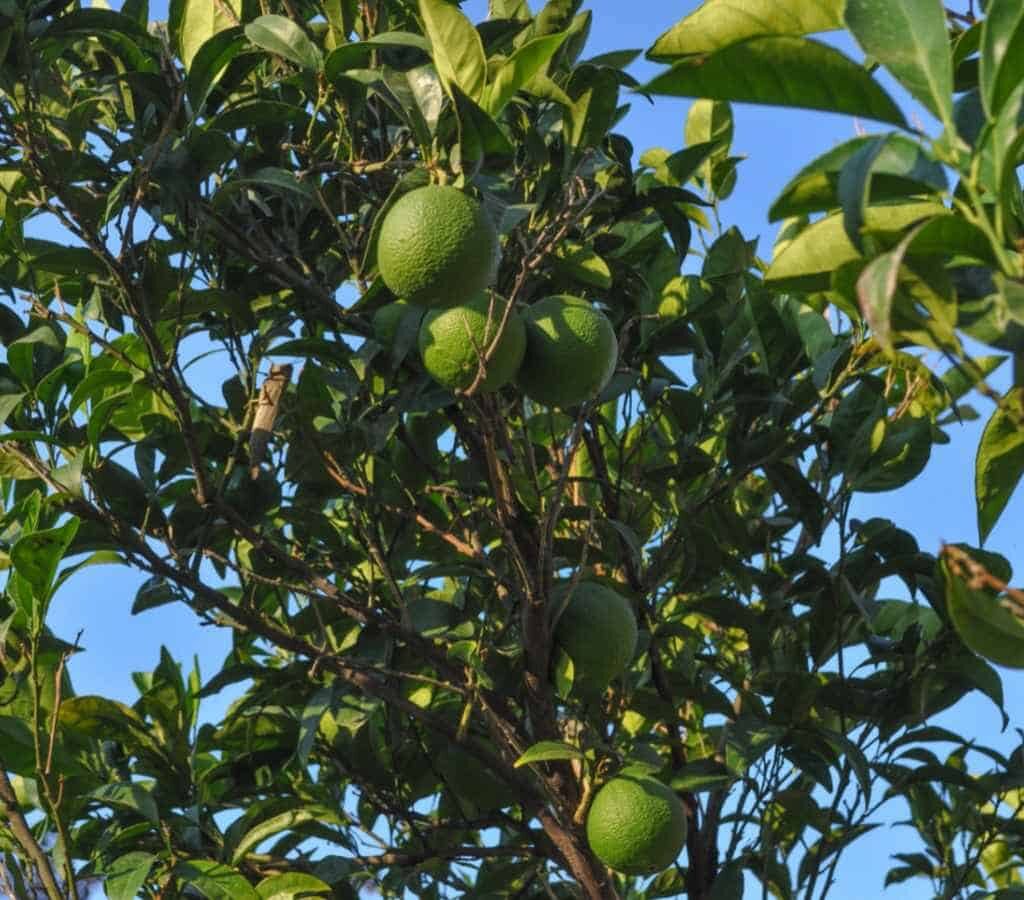
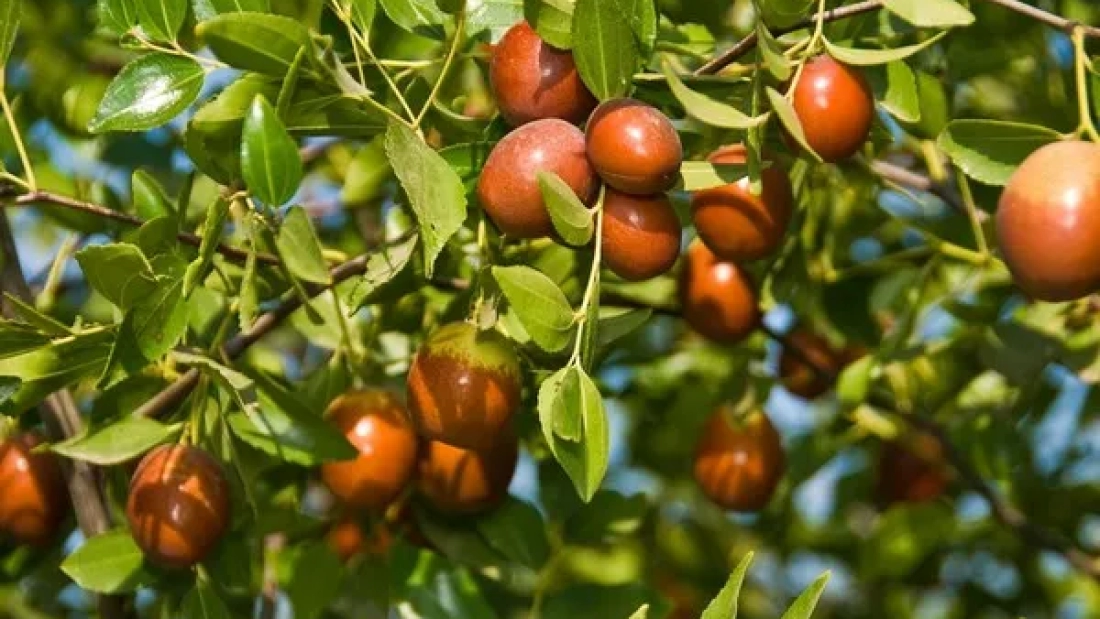
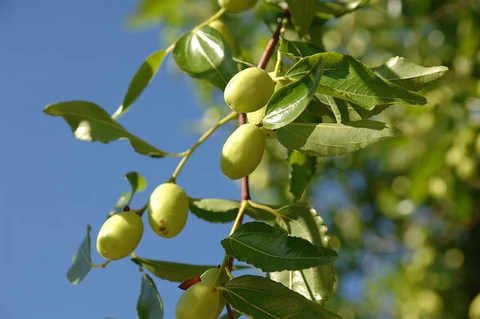
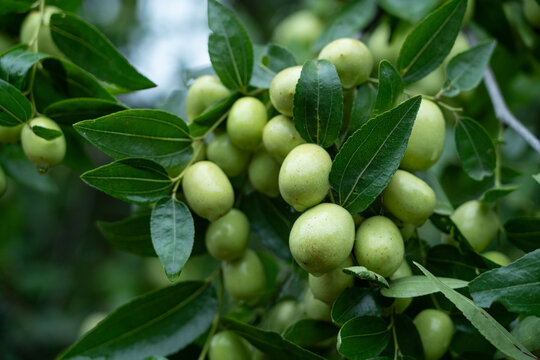
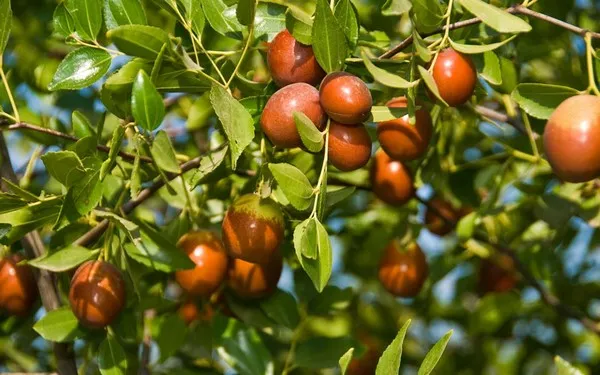
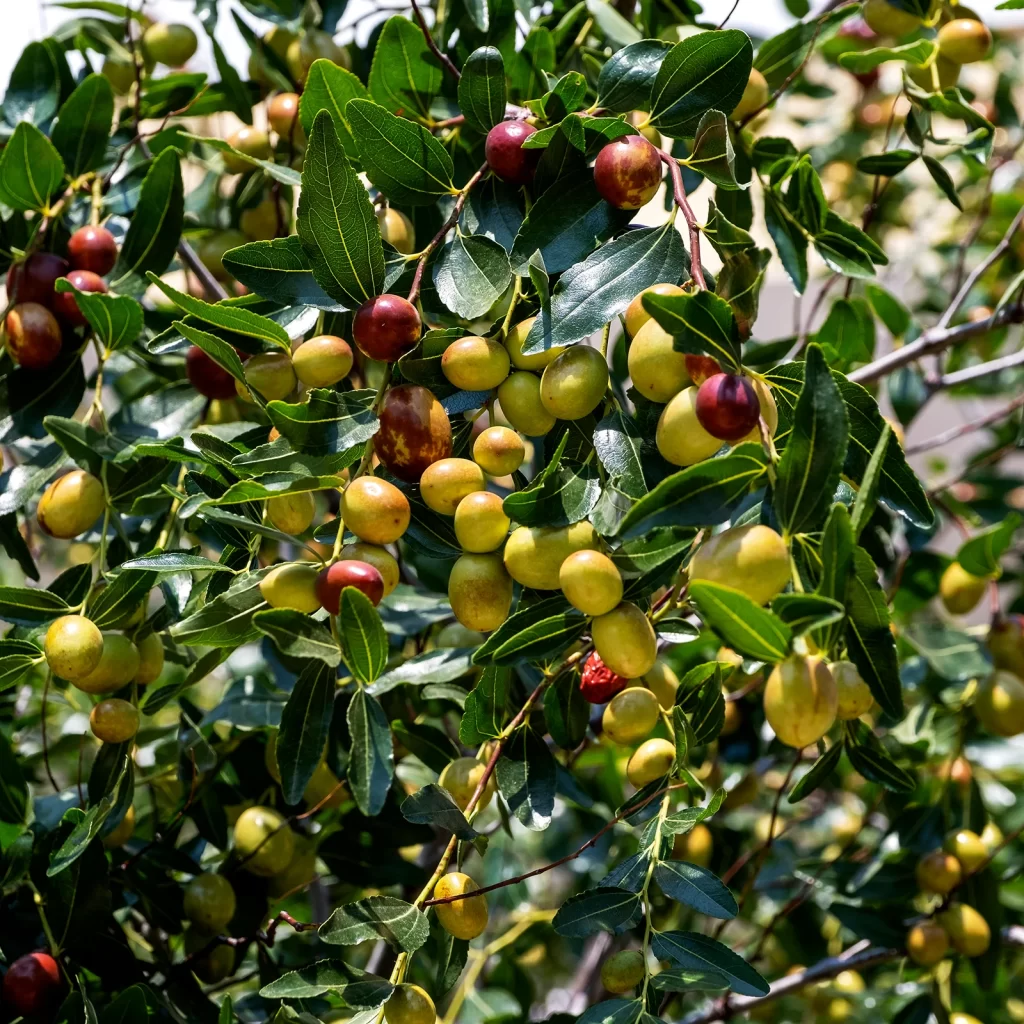
The Jujube (Ziziphus jujuba) is a deciduous fruit tree native to China but perfectly suited for southern U.S. climates. It produces small, oval-shaped fruits that turn from green to reddish-brown as they ripen. The flavor varies from crisp and apple-like when fresh to sweet and date-like when dried.

Jujubes thrive in USDA hardiness zones 6 through 11, making them ideal for southern states such as Texas, Louisiana, Georgia, Alabama, Florida, and the Carolinas.


Why Grow Jujube Trees in the South?

Jujube trees are particularly well-suited for southern climates because:

  • Heat and drought tolerance: They handle high summer temperatures and dry spells with ease.
  • Pest and disease resistance: Few pests and diseases trouble these hardy trees.
  • Low maintenance: Minimal pruning and fertilizing needs.
  • Nutrient-rich fruit: High in vitamin C, antioxidants, and minerals.
  • Versatile use: Enjoyed fresh, dried, in teas, or even fermented.

Choosing the Right Jujube Varieties

While there are over 400 Jujube cultivars worldwide, a few perform exceptionally well in the southern U.S. Consider these popular varieties:

  • ‘Li’: One of the best choices for fresh eating. Large, round fruits with a crisp, sweet flavor. Self-fertile.
  • ‘Lang’: Elongated fruits, excellent for drying. Benefits from cross-pollination with ‘Li’.
  • ‘Honey Jar’: A newer, smaller-fruited variety prized for its intensely sweet flavor.
  • ‘Sugar Cane’: Noted for its crunchy texture and high sugar content.
  • ‘Shanxi Li’: Produces large, sweet fruits and is highly productive.

If possible, plant more than one variety to improve fruit set and enjoy a longer harvest season.


How to Plant Jujube Trees

1. Site Selection

Jujubes love the sun — aim for a spot that receives at least 6-8 hours of direct sunlight daily. Well-drained soil is crucial, as they dislike wet feet.

Tip: Avoid planting in low-lying areas where water may collect.

2. Soil Preparation

Jujubes aren’t picky about soil type and thrive in everything from sandy to loamy soils. That said:

  • Aim for a soil pH between 5.5 and 7.8.
  • Loosen the soil to a depth of 18-24 inches.
  • Add organic matter if your soil is poor, though overly rich soil can cause excessive vegetative growth at the expense of fruit.

3. Planting

  • Best planting time: Late winter to early spring, after the risk of frost.
  • Dig a hole twice as wide and as deep as the tree’s root ball.
  • Place the tree in the hole, keeping the graft union (if present) above soil level.
  • Backfill with native soil and water deeply.

Spacing: Plant trees 15-20 feet apart to allow adequate room for growth.


Caring for Your Jujube Tree

1. Watering

Although drought-tolerant once established, young Jujube trees need regular watering during their first year:

  • Water deeply once a week during dry spells.
  • Reduce watering once the tree matures, as overwatering can reduce fruit quality.

2. Fertilizing

Jujube trees generally require minimal fertilization:

  • Apply a balanced fertilizer like 10-10-10 in early spring as new growth emerges.
  • Avoid heavy nitrogen applications, which promote foliage at the expense of fruit.

3. Pruning

Jujubes need little pruning beyond shaping and removing dead or crossing branches:

  • In late winter or early spring, thin out crowded branches.
  • Encourage an open center shape for good airflow and light penetration.

4. Mulching

Apply a 2-3 inch layer of organic mulch around the base of the tree to retain moisture, suppress weeds, and moderate soil temperature.


Pests and Diseases

One of the biggest advantages of growing Jujube trees is their natural resistance to most pests and diseases. Occasionally, you might encounter:

  • Leaf-footed bugs or stink bugs: Can damage fruits; handpick or use organic insecticides if necessary.
  • Spider mites: Can appear in hot, dry weather. Use horticultural oil or insecticidal soap.
  • Rust: Rare, but treat with a fungicide if it occurs.

Harvesting Jujube Fruits

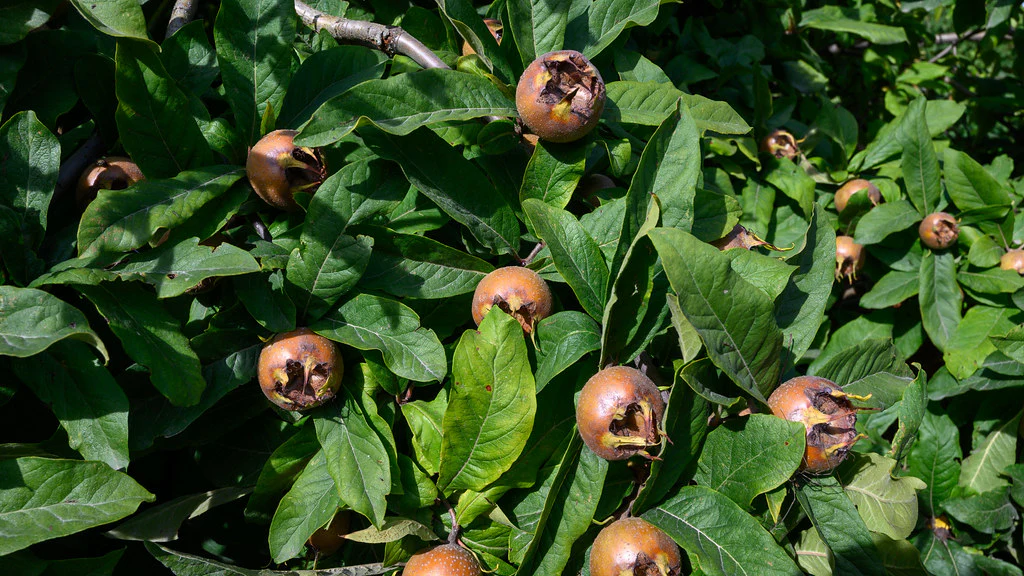
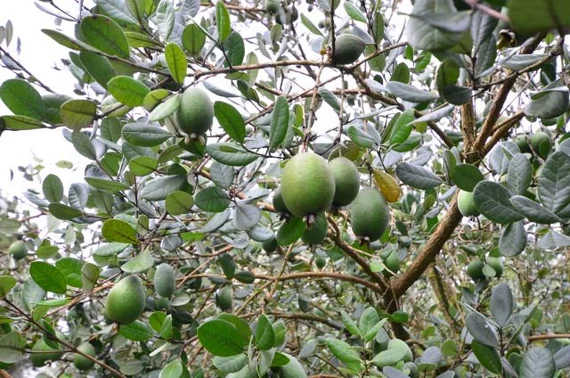
Jujube fruits typically ripen from late summer to early fall, depending on your location and variety.

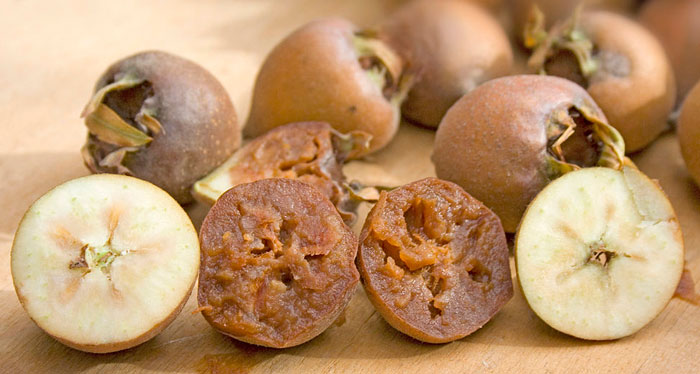
  • Fresh use: Pick when the fruit turns from green to light brown. It should be crisp and sweet.
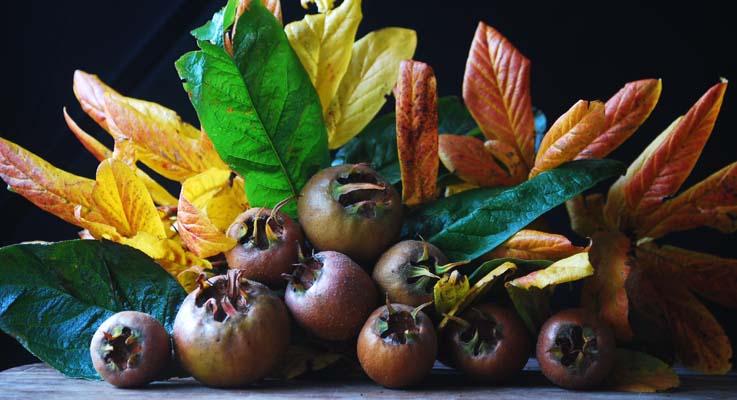
  • For drying: Allow fruits to fully ripen to a dark reddish-brown and begin to wrinkle on the tree.

Fruits store well in the refrigerator for 2-3 weeks, and dried Jujubes can last for several months in an airtight container.


Propagating Jujube Trees

If you’d like to expand your orchard or share trees with friends, propagation can be done through:

  • Grafting: Most commercial Jujubes are grafted onto hardy rootstocks.
  • Root suckers: Jujube trees often produce suckers you can dig up and replant.
  • Seed propagation: Possible but slower, and seed-grown trees may not be true to type.

Enjoying Jujube Fruits

Jujubes are incredibly versatile:

  • Eat them fresh like an apple.
  • Dry them for a chewy, date-like snack.
  • Brew into teas.
  • Use in jams, preserves, or fermented drinks.
  • Slice and add to salads or desserts.

Final Thoughts

Jujube trees are one of the most rewarding, low-maintenance fruit trees you can grow in the southern United States. With their drought tolerance, minimal pest issues, and nutrient-rich fruits, they’re an excellent addition to home gardens, homesteads, and urban orchards.

Whether you’re looking for a tree that can handle intense summer heat or a new, conversation-starting fruit to share with friends, the Jujube is a charming, productive choice that won’t disappoint.

How to Grow Loquats in Warmer States

How to Grow Loquats in Warmer States

If you’re a gardener living in the warmer regions of the United States and looking to add a tropical touch to your backyard with a tree that’s both ornamental and productive, the loquat tree (Eriobotrya japonica) is a fantastic choice. With its glossy evergreen foliage, fragrant white flowers, and clusters of juicy, golden-orange fruit, the loquat is a beautiful addition to any warm-climate landscape.

Native to southeastern China and widely cultivated in Japan, loquats have made their way into gardens across the southern U.S., from California to Florida and Texas to Arizona. If you live in USDA Zones 8–11, you’re in luck — this hardy, attractive tree thrives in warm, sunny environments and rewards growers with sweet, tangy fruit.

In this guide, we’ll cover everything you need to know to successfully grow loquats in warmer states: from choosing a planting site and caring for your tree to harvesting and using its delicious fruit.


What Are Loquats?

Loquats are small, evergreen fruit trees that typically grow to about 15–30 feet tall. Their large, leathery leaves have a deep green color on top and a fuzzy, silvery underside, giving them a striking appearance year-round.

In late fall to early winter, loquats produce clusters of fragrant, white, star-shaped flowers. By late winter to early spring, these flowers mature into oval or pear-shaped fruit about 1–2 inches long. The ripe fruit has a smooth, thin skin ranging from pale yellow to deep orange, encasing juicy, sweet-tart flesh and several large seeds.

Loquats are rich in vitamins A, B6, potassium, and fiber — making them a healthy, refreshing snack straight from the tree or a delicious ingredient in jams, sauces, and desserts.


Ideal Growing Regions in the USA

Loquats flourish in warm, subtropical to mild-temperate climates and are especially popular in:

  • Southern California
  • Arizona (low desert regions)
  • Southern Texas
  • Florida
  • The Gulf Coast
  • Parts of Louisiana, Georgia, Alabama, and Mississippi

They prefer areas without extended periods of freezing temperatures. Mature trees can survive occasional frosts down to 15–20°F, but flower buds and young fruit are damaged at 26°F or lower, so choosing the right planting location is key.


Choosing the Right Location

Loquats need a sunny, sheltered spot to thrive and produce abundant fruit. Look for a site that offers:

  • Full sun for at least 6–8 hours daily.
  • Protection from strong winds, which can damage flowers and reduce fruit production.
  • Well-draining soil. Loquats dislike standing water and heavy clay.

They’ll do well in a range of soil types, including loamy and sandy soils, provided drainage is good. An ideal soil pH is between 6.0 and 7.0.


How to Plant Loquats

When to Plant:

The best times to plant loquat trees are spring or fall when temperatures are moderate, and the young tree can establish its roots without heat stress.

Planting Instructions:

  1. Dig a hole twice as wide and slightly deeper than the root ball.
  2. Remove the tree from its container, gently loosening the roots if they’re tightly packed.
  3. Place the tree in the hole so the top of the root ball is even with or slightly above ground level.
  4. Backfill with native soil mixed with organic compost to encourage healthy root growth.
  5. Water thoroughly after planting to settle the soil.
  6. Apply a 3–4 inch layer of mulch around the base (keeping it a few inches away from the trunk) to retain soil moisture and suppress weeds.

Spacing: If planting multiple loquats, space them 15–25 feet apart to allow for proper growth and air circulation.


Caring for Your Loquat Tree

Watering:

Loquats need regular watering, especially during their first few years of establishment.

  • Water deeply once or twice a week, adjusting for rainfall.
  • Mature trees are somewhat drought-tolerant but will bear better fruit with consistent moisture.

Fertilizing:

Feed loquats three times a year:

  • Early spring
  • Early summer
  • Early fall

Use a balanced 10-10-10 fertilizer or one formulated for fruit trees. Avoid over-fertilizing, which can lead to excessive leaf growth at the expense of fruit.

Pruning:

Minimal pruning is needed. Focus on:

  • Removing dead or crossing branches.
  • Opening up the canopy to improve air circulation.
  • Shaping the tree to maintain a manageable size.

Prune after harvest, in late spring or early summer.


Pollination and Fruit Production

Loquats are typically self-fertile, but having a second tree nearby can increase fruit yields. Bees and other insects handle pollination naturally.

Flowering Season:

  • Late fall to early winter.

Harvest Season:

  • Late winter to early spring, depending on climate and variety.

Loquats ripen unevenly on the tree and are best picked when fully colored and slightly soft to the touch. Handle gently as the fruit bruises easily.


Common Pests and Problems

While relatively pest-resistant, loquats can occasionally encounter:

  • Aphids
  • Scale insects
  • Fruit flies
  • Birds (they love ripe loquats!)

Control pests with organic insecticidal soap or neem oil. Netting can deter birds during fruiting season.

Diseases like fire blight and pear blight can affect loquats, especially in humid areas. Prune infected branches and disinfect tools between cuts.


loquats on kitchen counter background

Popular Loquat Varieties for Warm States

Some loquat cultivars are especially well-suited for warm U.S. regions:

  • ‘Big Jim’: Large, sweet, orange-yellow fruit. Excellent for fresh eating. Popular in California.
  • ‘Champagne’: Juicy, pale yellow fruit with a mild, sweet flavor. Reliable and productive.
  • ‘Gold Nugget’: Small to medium fruit with firm, flavorful flesh.
  • ‘Vista White’: White-fleshed loquat with a sweet, mild flavor and good cold tolerance.

Check local nurseries for cultivars suited to your specific growing zone.


Uses for Loquats

Beyond fresh eating, loquats are wonderfully versatile:

  • Jams and jellies
  • Fruit sauces for poultry or pork
  • Loquat wine or liqueur
  • Pies and tarts
  • Dried snacks

Their flavor is a delicious blend of apricot, citrus, and mild mango.


Final Thoughts

If you live in a warmer state and love growing unique, productive trees, loquats are a fantastic choice. Their year-round beauty, minimal care requirements, and bountiful, sweet-tart fruit make them a rewarding addition to any garden or edible landscape.

By selecting the right variety, choosing a sunny, sheltered location, and providing a little care throughout the year, you’ll enjoy fragrant blooms and generous harvests for years to come.

How to Grow Medlar Trees in the USA

How to Grow Medlar Trees in the USA

If you’re searching for a unique, heirloom fruit tree to add to your garden, the medlar (Mespilus germanica) is a hidden gem. Often overlooked in modern orchards, this ancient fruit tree offers charming blossoms, quirky fruit, and a storied history dating back to Roman times. Native to southwest Asia and southeastern Europe, medlars have found their way into American specialty gardens — especially in areas with temperate climates.

In this guide, we’ll cover everything you need to know about growing medlar trees in the USA: from choosing the right planting site and caring for your young tree to harvesting and enjoying its unusual fruit.


What Is a Medlar Tree?

Medlars are small, deciduous fruit trees belonging to the Rosaceae family, making them relatives of apples, pears, and quinces. The trees typically grow between 10–20 feet tall and are prized for their attractive, twisted branches and broad, dark-green leaves that turn rich bronze in the fall.

The medlar fruit looks like a cross between a small apple and a rosehip — brownish in color and about 1–2 inches wide, with a star-shaped open calyx at the end. The fruit is inedible when first picked and requires a ripening process called bletting, where it softens and sweetens, developing a rich, spiced flavor often compared to applesauce, dates, and cinnamon.


Ideal Growing Regions in the USA

Medlars thrive in USDA Hardiness Zones 5–8, making them suitable for much of the northeastern, midwestern, and Pacific coastal United States. They appreciate cold winters for proper dormancy and moderate summers. Regions like the Pacific Northwest, parts of New England, and northern California are particularly well-suited for medlar cultivation.


Choosing a Planting Site

Medlars prefer full sun, so choose a location where your tree will receive at least 6–8 hours of direct sunlight per day. While they can tolerate partial shade, fruit production will be reduced.

Soil Requirements:

  • Well-drained, loamy soil is ideal.
  • Soil pH should be neutral to slightly acidic (around 6.0–7.0).
  • Avoid waterlogged or heavy clay soils.

If your soil tends to retain water, consider planting medlars on a mound or raised bed to improve drainage.


How to Plant a Medlar Tree

When to Plant:

The best time to plant medlar trees is in early spring or fall when the weather is cool and the tree can establish roots without the stress of summer heat.

Planting Instructions:

  1. Dig a hole twice as wide and just as deep as the tree’s root ball.
  2. Loosen the soil at the bottom and sides of the hole.
  3. Remove the tree from its container and gently tease out the roots if they appear root-bound.
  4. Place the tree in the hole so that the top of the root ball is level with the surrounding ground.
  5. Backfill the hole with a mix of native soil and organic compost.
  6. Water thoroughly to settle the soil around the roots.
  7. Apply a 3-inch layer of mulch around the base, keeping it a few inches away from the trunk to avoid rot.

Caring for Your Medlar Tree

Watering:

  • Water young trees deeply once a week during dry periods.
  • Established trees are drought-tolerant but will benefit from occasional deep watering during prolonged dry spells.

Fertilizing:

  • In early spring, apply a balanced 10-10-10 fertilizer following package instructions.
  • Avoid over-fertilizing, as excessive nitrogen can lead to lush foliage but poor fruiting.

Pruning:

  • Medlars require minimal pruning.
  • Remove dead, diseased, or crossing branches in late winter.
  • Lightly shape the tree to maintain an open canopy for good air circulation.

Pest and Disease Management:

Medlars are relatively hardy and resistant to many common fruit tree pests. However, keep an eye out for:

  • Aphids
  • Fire blight (bacterial disease)
  • Canker

Use organic sprays or insecticidal soap if infestations occur, and prune out infected branches promptly.


Pollination and Fruit Production

Most medlar varieties are self-fertile, meaning a single tree can produce fruit. However, planting a second tree nearby can enhance yields.

Medlars bloom in late spring with large, white, five-petaled flowers that are pollinated by bees and other insects.

Fruit begins forming in summer and is typically ready for harvest in late fall, around October or November.


Harvesting and Bletting Medlars

How to Harvest:

  • Medlars should be harvested when they are firm and fully colored (golden-brown to russet) but before frost.
  • Clip them from the tree with a small stem attached to avoid damage.

Bletting Process:

Freshly picked medlars are hard and sour. To make them edible:

  1. Place the fruits in a single layer in a cool, dark, and airy spot (like a shed or garage) or store them stem-side down in a shallow tray.
  2. Allow them to soften over 2–3 weeks until the flesh turns dark and feels mushy to the touch.
  3. At this stage, the flavor is sweet, spicy, and perfect for eating fresh, making jams, or adding to desserts.

Popular Medlar Varieties

A few medlar cultivars are particularly well-suited for home gardeners in the USA:

  • ‘Nottingham’: Highly regarded for its heavy cropping and excellent fruit flavor.
  • ‘Royal’: Large, flavorful fruits; vigorous growth.
  • ‘Dutch’: Traditional European variety with rich, spicy flavor.

Using Medlars in the Kitchen

Once bletted, medlars are surprisingly versatile:

  • Eaten fresh with a spoon
  • Made into rich, tangy jellies or jams
  • Baked into tarts and pies
  • Combined with spiced wine or cheese platters

Historically, medlars were considered a winter delicacy in medieval Europe, often enjoyed around Christmas.


Final Thoughts

Growing medlar trees in the USA is a rewarding endeavor for gardeners interested in unique, historical fruits. With their attractive shape, cold-hardiness, and fascinating fruit, medlars can become the conversation piece of your home orchard. Though relatively easy to grow, these trees offer a touch of old-world charm and a culinary curiosity that’s well worth the wait.

If you have a sunny spot in your garden and a little patience for the bletting process, medlars could soon become your favorite late-autumn treat.

How to Grow Pineapple Guava in Your Yard

How to Grow Pineapple Guava in Your Yard

If you’ve ever dreamed of growing your own exotic, tropical-tasting fruits without the need for a greenhouse or tropical climate, pineapple guava (Feijoa sellowiana) is a fantastic choice. Also known simply as feijoa, this hardy, evergreen shrub or small tree not only produces sweet, aromatic fruits but also serves as a beautiful ornamental plant with its silver-green foliage and showy, edible flowers.

Native to the highlands of South America, pineapple guava has gained popularity in home gardens around the world for its versatility, resilience, and unique combination of aesthetic beauty and edible rewards. Whether you’re aiming for a statement landscape plant or a productive backyard fruiter, this guide will cover everything you need to know about successfully growing pineapple guava in your yard.


What is Pineapple Guava?

Despite its name, pineapple guava isn’t a true guava and has no direct relation to pineapples either. It belongs to the myrtle family and is prized for its small, egg-shaped fruits with a tangy, tropical flavor that tastes like a combination of pineapple, guava, and mint.

The plant features:

  • Evergreen, silvery-green foliage
  • Fragrant, exotic flowers with crimson stamens and white-pink petals (both edible)
  • Small, green, egg-shaped fruits that ripen in fall

It’s an excellent addition to edible landscapes, hedgerows, privacy screens, or as a standalone ornamental tree.


Why Grow Pineapple Guava in Your Yard?

Pineapple guava offers several attractive benefits:

  • Tolerates a range of soil conditions
  • Requires minimal maintenance
  • Drought-tolerant once established
  • Attractive, edible flowers
  • Self-pollinating (in some varieties)
  • Cold-hardy down to 15°F (-9°C), making it suitable for USDA zones 8–10, and sometimes even 7b with protection.

Its versatility as both a fruit-bearing shrub and ornamental plant makes it a fantastic dual-purpose addition to any garden.


Choosing the Right Variety

Before planting, select a pineapple guava variety suited to your climate and intended use.

Popular Varieties:

  • ‘Nazemetz’: Self-fruitful, compact, and productive. Excellent flavor.
  • ‘Coolidge’: Another self-pollinating variety with reliable yields.
  • ‘Apollo’: Requires cross-pollination but produces large, sweet fruit.
  • ‘Mammoth’: Known for its exceptionally large fruits, needs a pollinator.

If possible, plant at least two different varieties for cross-pollination to improve fruit set and size.


Ideal Growing Conditions

Pineapple guava is a forgiving and adaptable plant, but providing optimal conditions will enhance growth and fruit production.

Sunlight

  • Prefers full sun (at least 6–8 hours a day) for the best flowering and fruiting.
  • Can tolerate partial shade but with reduced fruit production.

Soil

  • Thrives in well-draining, slightly acidic to neutral soil (pH 5.5–7.0).
  • Tolerates sandy, loamy, and even slightly clay soils if drainage is good.
  • Avoid soggy, waterlogged conditions.

Temperature

  • Hardy to about 15°F (-9°C).
  • In colder areas, grow in sheltered spots, against south-facing walls, or in large containers for overwintering indoors.

Water

  • Drought-tolerant when mature but benefits from regular watering during dry spells, especially in the fruiting season.
  • Water deeply, allowing soil to dry slightly between waterings.

How to Plant Pineapple Guava

When to Plant

  • Best planted in spring or fall, allowing roots to establish in mild weather before extreme heat or frost.

Planting Steps

  1. Choose a sunny location with well-draining soil.
  2. Dig a hole twice as wide and as deep as the root ball.
  3. Mix in some organic compost or aged manure to enrich poor soil.
  4. Place the plant in the hole, making sure the top of the root ball is level with the surrounding soil.
  5. Backfill and firm gently.
  6. Water thoroughly to settle the soil around the roots.
  7. Apply a layer of mulch to retain moisture and suppress weeds.

Spacing:

  • Space multiple plants 8–12 feet apart for hedging or cross-pollination.
  • Single specimens can be grown with at least 5–8 feet clearance from other large plants.

Caring for Pineapple Guava

Once established, pineapple guava is low-maintenance but benefits from a few simple care practices.

Watering

  • Water regularly during the first year to establish strong roots.
  • Once mature, water deeply every 1–2 weeks in dry weather.
  • Avoid overwatering; it prefers slightly dry conditions between drinks.

Fertilizing

  • Feed in early spring with a balanced slow-release fertilizer.
  • Apply additional compost or well-rotted manure around the base annually.

Pruning

  • Minimal pruning is needed.
  • Remove dead or crossing branches in late winter or early spring.
  • Light shaping can maintain size and encourage bushier growth.

Tip:
If using as a hedge, prune after flowering to preserve both blooms and potential fruit.


Pest and Disease Management

Pineapple guava is notably resistant to most pests and diseases. Occasional issues include:

  • Fruit flies (in warmer regions): Use traps or cover fruit with fine mesh bags.
  • Scale insects or aphids: Treat with neem oil or insecticidal soap if needed.

Good air circulation and well-drained soil help prevent fungal problems.


When and How to Harvest Pineapple Guava

When to Harvest

  • Fruit typically ripens in late fall (October–November).
  • Mature fruits often drop from the tree when ripe.

Signs of ripeness:

  • Slightly soft to the touch
  • Aromatic fragrance
  • Easily detaches with a gentle twist

How to Harvest

  • Collect fallen fruit daily.
  • Or gently twist and pick when fruits feel slightly soft.
  • Ripe pineapple guavas can be stored in the refrigerator for up to a week.

Pro Tip:
The edible flower petals can be gently plucked in early summer without affecting fruit set — they taste sweet and floral, perfect for salads and desserts.


How to Use Pineapple Guava

Beyond snacking fresh, pineapple guava can be enjoyed in various culinary applications:

  • Fresh: Scoop out the pulp and enjoy raw.
  • Smoothies and fruit salads: Adds a tropical twist.
  • Preserves and jams: Highlight its unique flavor.
  • Baked goods: Use in muffins, cakes, and tarts.
  • Chutneys and sauces: Pair well with meats and cheeses.
  • Edible flowers: Garnish for salads, desserts, and cocktails.

Final Thoughts

Pineapple guava is a brilliant addition to any yard, offering year-round visual appeal, minimal maintenance, and delicious, tropical-tasting fruits. Whether you’re gardening in a Mediterranean-style landscape, a suburban backyard, or even large containers, this versatile plant delivers beauty, productivity, and resilience.

With the right care, you’ll enjoy showy edible flowers in spring, lush silvery foliage year-round, and a bounty of fragrant, sweet fruits every fall — turning your yard into a personal slice of the subtropics.

How to Grow Olives in Containers

How to Grow Olives in Containers

There’s something undeniably charming about olive trees — their slender, silvery-green leaves, gnarled trunks, and ancient symbolism of peace and prosperity. While traditionally grown in Mediterranean climates and sprawling orchards, olives are surprisingly adaptable and can thrive in containers on patios, balconies, or small urban gardens.

Growing olives in containers is a brilliant way to enjoy this elegant, productive tree even if you lack garden space or live in a cooler climate. With the right care and conditions, you can cultivate your own miniature olive grove and even harvest your own olives for pickling or pressing.

In this guide, we’ll walk you through everything you need to know — from choosing the right variety to container care, watering, pruning, and overwintering — so you can successfully grow olives in containers wherever you are.


Why Grow Olives in Containers?

Container gardening offers several benefits when it comes to olive trees:

  • Space-saving: Ideal for balconies, patios, terraces, and small urban spaces.
  • Mobility: Easily move the container to protect the tree from harsh weather.
  • Control over soil and conditions: Tailor the growing medium and drainage to suit the tree.
  • Decorative appeal: Olive trees make beautiful focal points with their sculptural form and silvery foliage.

Choosing the Right Olive Variety

Not all olive trees are well-suited to container growing. For the best results, choose dwarf or compact varieties that are known for their hardiness and container adaptability. Here are some top picks:

1. Arbequina

  • One of the most popular container varieties.
  • Compact, bushy growth habit.
  • Self-pollinating and produces small, flavorful olives ideal for oil or brining.

2. Arbosana

  • Small tree with dense foliage.
  • Excellent for containers in cooler climates.
  • Produces rich, flavorful olives used for oil and pickling.

3. Koroneiki

  • A Greek variety known for its oil-rich fruit.
  • Compact and ideal for small spaces.
  • Requires a long, warm growing season for optimal yields.

4. Picholine

  • French variety known for its crisp, slightly bitter olives.
  • Versatile and suitable for both table olives and oil.

Pro Tip: Most container-grown olives are self-pollinating, but having two different varieties nearby can improve fruit set.


Ideal Growing Conditions for Container Olives

Olive trees are sun-loving and drought-tolerant, but growing them in containers means you’ll need to provide certain essentials to keep them healthy.

Sunlight

  • Require at least 6–8 hours of direct sunlight daily.
  • Place containers in the sunniest spot possible — south or west-facing locations are ideal.

Temperature

  • Thrive in warm, dry conditions.
  • Most olives can tolerate light frosts but should be protected from prolonged freezing.
  • In colder climates (Zones 7 and below), move containers indoors or into a greenhouse during winter.

Soil

  • Prefer well-draining, slightly alkaline soil.
  • Use a high-quality potting mix blended with sand, perlite, or fine gravel to improve drainage.
  • Avoid water-retentive, heavy garden soils in containers.

Choosing the Right Container

The right pot can make all the difference when growing olives in containers.

Size

  • Start with a container at least 18–24 inches wide and deep.
  • Olive trees have shallow but widespread root systems, so width is just as important as depth.
  • As the tree grows, repot into a larger container every 2–3 years.

Material

  • Terracotta and ceramic pots are excellent for their breathability and classic appearance.
  • Plastic and fiberglass containers are lightweight and easier to move, especially in colder climates.

Drainage

  • Ensure your container has several large drainage holes at the base.
  • Add a layer of pebbles or broken terracotta pieces to the bottom to improve drainage.

Planting Your Olive Tree

  1. Add a layer of coarse gravel to the bottom of your container for drainage.
  2. Partially fill with your prepared potting mix.
  3. Gently remove the olive tree from its nursery pot, teasing out any bound roots.
  4. Position the tree in the center of the pot, ensuring it sits at the same depth as it did previously.
  5. Backfill with soil, firming gently around the root ball.
  6. Water thoroughly until water drains from the bottom.

Tip: Mulch the surface with fine gravel or pebbles to retain moisture and keep the roots cool.


Watering and Feeding

Watering

  • Olive trees are drought-tolerant but need regular watering when grown in containers.
  • Water thoroughly when the top inch of soil feels dry.
  • Reduce watering in winter when the tree is dormant, but never let the soil dry out completely.

Feeding

  • Feed container olives with a balanced liquid fertilizer (NPK 10-10-10 or similar) every 4–6 weeks during the growing season (spring to early fall).
  • Alternatively, use a slow-release fertilizer in early spring.

Pro Tip: Avoid overfeeding, as it can lead to excessive leaf growth with little fruit production.


Jekka Wrapping wrap up and covering an Olive Tree olea europaea tender silver leaved mediterranean shrub with horticultural fleece and cover the pot container with bubble wrap to protect roots from inside from frost winter weather wind or snow plant protection 04/11/11 04/11/2011 041111 04112011 4 4th November 2011 Autumn Jekka McVicar at Jekkas Herb Farm photographer Jason Ingram Series 02 practical maintenance step by step

Pruning and Maintenance

Pruning

  • Prune lightly in late winter or early spring to maintain shape, remove dead or crossing branches, and encourage airflow.
  • Olive trees respond well to pruning and can be trained as standards, bushes, or bonsais in containers.

Repotting

  • Repot every 2–3 years to refresh soil and provide room for growing roots.
  • Choose a pot one size larger and use fresh, well-draining soil.

Overwintering Container Olives

In cooler regions or areas with harsh winters, container olives need protection.

  • Move the pot to a sunny, sheltered spot like a greenhouse, conservatory, or indoors by a south-facing window.
  • Keep soil slightly moist but avoid overwatering.
  • Reduce or stop fertilizing during the dormant period.
  • If left outside, wrap the pot in bubble wrap or burlap and cover the plant with horticultural fleece during freezing weather.

Harvesting Olives

Most olive trees grown in containers will start bearing fruit within 3–5 years, although dwarf varieties can produce earlier.

  • Harvest timing depends on intended use:
    • Green olives: Pick when firm and pale green.
    • Black olives: Allow to ripen on the tree to a deep purple-black.

Fresh olives are very bitter and require curing or brining before they’re edible.


Popular Uses for Homegrown Olives

  • Pickled or brined olives for snacking and appetizers.
  • Infused olive oils by adding herbs and spices to oil with cured olives.
  • Tapenade: A Mediterranean spread made from olives, capers, garlic, and olive oil.
  • Olive-leaf tea, known for its antioxidant properties.

Final Thoughts

Growing olives in containers is a rewarding and surprisingly manageable endeavor that brings a touch of Mediterranean magic to your patio, balcony, or garden. With the right variety, proper care, and a sunny spot, you’ll be rewarded with beautiful foliage, ornamental appeal, and potentially your own crop of delicious olives for culinary creations.

Whether you’re aiming to harvest fruit, enjoy the aesthetic beauty of an ancient tree, or create a miniature olive grove in the city, container-grown olives are a versatile and elegant choice for any gardener.

How to Grow Currants for Summer Desserts

How to Grow Currants for Summer Desserts

If you’re searching for a small fruit shrub that’s beautiful, productive, and perfect for adding a burst of flavor to your summer desserts, look no further than the currant. These underappreciated berries are a favorite in European kitchens and are gaining popularity in home gardens for their vibrant color, tart-sweet taste, and high nutritional value.

Whether you’re dreaming of homemade jams, tangy sorbets, or a classic summer pudding, growing your own currants is easier than you might think. This guide will walk you through the best varieties to plant, how to grow and care for them, and how to harvest a bountiful crop for your seasonal treats.


Why Grow Currants?

Currants are small, easy-to-grow shrubs that produce clusters of jewel-like berries in red, black, or white. Here’s why they’re an excellent addition to any garden:

  • Compact size: Perfect for small gardens, borders, and even containers.
  • Hardiness: Thrive in cooler climates (USDA Zones 3–8) and tolerate partial shade.
  • High yield: A mature bush can produce several pounds of fruit each year.
  • Nutritional benefits: Rich in vitamin C, antioxidants, and fiber.
  • Versatility: Use them fresh, dried, or cooked in a wide range of desserts and preserves.

Choosing the Right Currant Variety

There are three primary types of currants you can grow, each with unique flavor profiles and uses:

1. Red Currants (Ribes rubrum)

  • Bright red, translucent berries with a tangy flavor.
  • Ideal for jellies, sauces, and garnishing desserts.
  • Popular varieties: ‘Red Lake’, ‘Jonkheer van Tets’, and ‘Rovada’.

2. Black Currants (Ribes nigrum)

  • Deep purple-black berries with an intense, rich flavor.
  • Used in jams, syrups, cordials, and desserts like black currant sorbet.
  • Popular varieties: ‘Ben Sarek’, ‘Ben Lomond’, and ‘Titania’.

3. White Currants (Ribes rubrum var.)

  • Pale yellow to white berries with a milder, sweeter taste.
  • Excellent for fresh eating, fruit salads, and delicate summer desserts.
  • Popular varieties: ‘White Imperial’ and ‘Primus’.

Pro Tip: Choose a mix of varieties for color, flavor, and different ripening times to extend your harvest season.


Ideal Growing Conditions

Currants are hardy, resilient plants but perform best when their basic needs are met.

Sunlight

  • Prefer full sun to partial shade.
  • In hot, dry regions, provide afternoon shade to protect berries and leaves.

Soil

  • Thrive in moist, well-drained, slightly acidic to neutral soil (pH 6.0–7.0).
  • Enrich the planting site with plenty of organic compost or well-rotted manure.

Water

  • Require consistent moisture, especially when fruiting.
  • Avoid waterlogged conditions, which can cause root rot.

Planting Currants

When to Plant

  • Best planted in late fall or early spring while the plants are dormant.

How to Plant

  1. Choose a sunny or partially shaded location with good air circulation.
  2. Space bushes 3–5 feet apart in rows or borders.
  3. Dig a hole twice the width of the root ball and as deep.
  4. Mix compost or organic matter into the soil.
  5. Set the plant slightly deeper than it was in the nursery container.
  6. Backfill the hole and water well.
  7. Mulch around the base with straw, leaves, or bark to retain moisture and suppress weeds.

Container Planting: Use a large container (at least 18 inches wide and deep) filled with rich, well-draining potting mix. Keep the soil consistently moist and feed with a balanced fertilizer during the growing season.


Caring for Currant Bushes

Watering

  • Water deeply once or twice a week during dry spells.
  • Avoid wetting the foliage to reduce disease risk.

Fertilizing

  • In early spring, apply a balanced, slow-release fertilizer or top-dress with compost.
  • Avoid excessive nitrogen, which encourages leafy growth at the expense of fruit.

Pruning

Proper pruning improves airflow, sunlight penetration, and fruit production.

When to Prune: Late winter or early spring while the plant is dormant.

How to Prune:

  • Remove dead, weak, or diseased wood.
  • Cut out old stems (over 3 years) to encourage new, productive growth.
  • Keep 8–12 healthy shoots per plant, with a mix of young and older canes.
  • Shorten side shoots to maintain shape and encourage larger berries.

Managing Pests and Diseases

Currants are relatively trouble-free but can occasionally face problems:

  • Aphids: Control with insecticidal soap or strong water sprays.
  • Currant sawfly: Hand-pick caterpillars or use an organic pesticide if infestations occur.
  • Powdery mildew: Prevent with good air circulation and regular pruning.
  • Birds: Protect ripening fruit with netting or garden fleece.

Pro Tip: Keeping the area around your plants weed-free and mulched reduces pest habitats and conserves soil moisture.


Harvesting Currants

When to Harvest

  • Most currants ripen from early to mid-summer, depending on the variety and climate.
  • Berries ripen in clusters and should be picked when fully colored and plump.

How to Harvest

  • Cut entire clusters from the bush using garden scissors or your fingers.
  • Avoid picking individual berries to prevent damaging the delicate fruit.
  • Refrigerate or process berries soon after picking, as they’re highly perishable.

Using Currants in Summer Desserts

Freshly picked currants are bursting with flavor and color, making them ideal for summer recipes. Here are some classic ways to enjoy them:

  • Red Currant Jelly: A bright, tart spread for pastries and scones.
  • Black Currant Sorbet: A rich, tangy frozen treat perfect for hot days.
  • Summer Berry Pavlova: Use a mix of red and white currants for a colorful topping.
  • Fruit Tarts and Pies: Their tartness pairs wonderfully with sweet pastry and custards.
  • Currant Clafoutis: A rustic French dessert with a flan-like batter and fresh currants.
  • Cordial and Syrups: Especially popular with black currants for refreshing summer drinks.

Pro Tip: Freeze excess currants for later use — they freeze beautifully and are excellent for baking and smoothies.


Final Thoughts

Currants are one of the easiest and most rewarding fruits to grow in home gardens. Their compact size, hardiness, and generous yields make them perfect for gardeners with limited space or time. From tangy red currants and rich black varieties to delicately sweet white currants, there’s a type for every taste and culinary use.

With just a little care, you’ll soon be harvesting basketfuls of these vibrant berries for your favorite summer desserts. Once you taste the difference of homegrown currants in a chilled sorbet or glossy berry tart, you’ll wonder how you ever did without them.

How to Grow Serviceberries for Urban Gardens

How to Grow Serviceberries for Urban Gardens

Urban gardens might have limited space, but that doesn’t mean you have to sacrifice variety, flavor, or beauty. One of the most overlooked yet wonderfully rewarding plants for city landscapes is the serviceberry. Also known as Juneberry, Saskatoon, or Amelanchier, this small, hardy tree or shrub delivers multi-season charm and sweet, edible berries — all while fitting comfortably into small yards, patios, or even large containers.

If you’re looking to add a resilient, ornamental, and productive plant to your urban green space, serviceberries might be just what you need. In this guide, we’ll explore the types of serviceberries, how to grow them in compact spaces, and how to enjoy their bounty of fruit.


Why Grow Serviceberries in Urban Gardens?

Serviceberries are perfectly suited for city living. Here’s why they make a smart addition to urban landscapes:

  • Compact size: Many species stay small, ideal for small backyards, balconies, or patios.
  • Four-season appeal: Beautiful spring flowers, summer berries, stunning fall foliage, and attractive winter branches.
  • Edible fruit: Berries can be enjoyed fresh or turned into jams, pies, and syrups.
  • Wildlife-friendly: Attracts pollinators, birds, and beneficial insects.
  • Low maintenance: Adaptable to different soil types and urban conditions.

Adding a serviceberry to your city garden brings both beauty and harvest — a win-win for any modern gardener.


Best Serviceberry Varieties for Urban Gardens

There are about 20 species of serviceberries, but a few stand out for urban planting due to their size, hardiness, and fruit quality.

1. Amelanchier alnifolia (Saskatoon Serviceberry)

  • Popular for its sweet, blueberry-like berries.
  • Grows 6–15 feet tall.
  • Extremely cold-hardy (USDA zones 2–7).

2. Amelanchier canadensis (Canadian Serviceberry)

  • Multi-stemmed shrub or small tree.
  • 15–25 feet tall.
  • Beautiful white spring flowers and good fruit yield.

3. Amelanchier laevis (Allegheny Serviceberry)

  • Noted for smoother, purplish bark and early spring blooms.
  • Grows 15–25 feet tall.
  • Tolerates partial shade.

4. Amelanchier × grandiflora (‘Autumn Brilliance’, ‘Princess Diana’)

  • Hybrid known for heavy fruit production and stunning fall colors.
  • 15–25 feet tall.
  • Perfect for small landscape accents.

When choosing a variety, consider your climate zone, available space, and whether you prefer a multi-stemmed shrub or single-trunk tree.


Ideal Growing Conditions

Serviceberries are adaptable but perform best in certain conditions:

Sunlight

  • Full sun to partial shade (at least 4–6 hours of sunlight daily).
  • More sunlight means better flowering and fruit production.

Soil

  • Prefers well-drained, loamy soil, but tolerates sandy or clay conditions.
  • Slightly acidic to neutral pH (5.5–7.0).

Water

  • Requires consistent moisture, especially during the first year.
  • Mature plants tolerate light drought but perform best with regular watering.

Planting Serviceberries in Urban Gardens

When to Plant

  • Best planted in early spring or fall when temperatures are cooler and soil moisture is more stable.

How to Plant in the Ground

  1. Dig a hole twice as wide and as deep as the root ball.
  2. Loosen the soil at the bottom and mix in compost for better drainage.
  3. Place the plant in the hole so the top of the root ball is level with the soil surface.
  4. Backfill with soil and gently tamp down.
  5. Water thoroughly.
  6. Apply a 2-3 inch layer of mulch around the base to retain moisture and suppress weeds.

Container Planting Tips

Serviceberries can thrive in large containers if cared for properly.

  • Use a container at least 18-24 inches deep and wide.
  • Fill with well-draining potting mix amended with compost.
  • Ensure the pot has ample drainage holes.
  • Water regularly, as container plants dry out faster than those in the ground.
  • Consider a dwarf or compact variety for better container performance.

Caring for Serviceberries

Watering

  • Water deeply during dry spells, especially in the first 2–3 years.
  • Once established, serviceberries tolerate light drought.

Fertilizing

  • Apply a balanced, slow-release tree or shrub fertilizer in early spring.
  • Avoid over-fertilizing; excess nitrogen can reduce fruit production.

Pruning

  • Prune in late winter to:
    • Remove dead, damaged, or crossing branches.
    • Shape the plant and control size.
    • Thin the interior for better air circulation.

In small gardens, annual light pruning keeps serviceberries tidy and manageable.


Pest and Disease Management

Serviceberries are relatively low-maintenance but can encounter a few issues:

  • Rust and powdery mildew: Prevent by planting in sunny areas with good air circulation.
  • Aphids and caterpillars: Spray with a strong blast of water or use insecticidal soap.
  • Birds: Cover ripening fruit with netting if you want to save berries for yourself.

Regular inspection and good garden hygiene (cleaning up fallen leaves and debris) will keep most problems at bay.


Harvesting Serviceberries

When to Harvest

  • Serviceberries ripen in late spring to early summer, depending on your location.
  • Berries start red and turn deep purple to blue-black when ripe.
  • They’re sweetest when fully colored and slightly soft.

How to Harvest

  • Gently pluck ripe berries by hand or with small snips.
  • Harvest daily during peak season as birds will also be eager for the fruit.

Using Serviceberries

Serviceberries are delicious and versatile, with a flavor somewhere between a blueberry and a cherry. Here are a few ways to enjoy them:

  • Fresh off the bush
  • Pies, cobblers, and crisps
  • Jams, jellies, and syrups
  • Smoothies and desserts
  • Dried for winter snacks

Rich in fiber, vitamin C, and antioxidants, these berries are as nutritious as they are tasty.


Benefits Beyond the Fruit

Serviceberries offer year-round interest:

  • Spring: Showy white flowers that brighten up urban spaces.
  • Summer: Edible berries and glossy green leaves.
  • Autumn: Vibrant red, orange, and yellow foliage.
  • Winter: Attractive branching patterns and smooth gray bark.

They also support urban ecosystems by attracting pollinators, songbirds, and beneficial insects.


Final Thoughts

For city dwellers who want to grow something beautiful, practical, and environmentally friendly, serviceberries are a perfect fit. They bring four-season appeal to small landscapes, deliver sweet, antioxidant-rich berries, and require minimal care once established.

Whether planted in a tiny backyard, along a sunny balcony, or in a decorative container, serviceberries prove that you don’t need a sprawling orchard to enjoy fresh, homegrown fruit. With just a little attention, you can savor their charm and flavor right in the heart of your urban garden.

How to Grow Cactus Fruit (Prickly Pear) in the Southwest

How to Grow Cactus Fruit (Prickly Pear) in the Southwest

The American Southwest is a land of rugged beauty — sun-drenched deserts, striking rock formations, and resilient plants that thrive in the arid climate. Among these native wonders, the prickly pear cactus stands out as both an iconic symbol and a practical, edible plant. Known for its distinctive paddle-shaped pads and vibrant, jewel-like fruits (called tunas), the prickly pear is more than just a desert decoration. It offers sweet, tangy fruit that can be enjoyed fresh or turned into jellies, juices, and even cocktails.

If you’ve ever wondered how to grow this fascinating cactus fruit in your Southwest garden, you’re in luck. With minimal care and a little know-how, you can cultivate prickly pears at home and enjoy their beauty and bounty for years to come. This guide covers everything you need to know — from selecting the right variety to harvesting your very own tunas.


Why Grow Prickly Pear Cactus?

Prickly pear (Opuntia species) is perfectly adapted to life in the Southwest. It thrives in hot, dry climates where other fruiting plants would struggle. Its thick, succulent pads store water, allowing it to survive long droughts. But beyond its toughness, this plant offers plenty of benefits for home gardeners:

  • Produces edible fruit and pads (called nopales).
  • Low maintenance and drought tolerant — perfect for xeriscaping.
  • Attracts pollinators like bees and hummingbirds with its vibrant spring flowers.
  • Provides a natural barrier when planted along property lines.
  • Adds beauty and cultural significance to any desert or Southwestern-themed garden.

Whether you’re growing it for practical harvests or as a decorative feature, prickly pear is a smart, sustainable plant choice for arid regions.


Choosing the Right Variety

There are more than 100 species of prickly pear cactus, but only a handful are commonly cultivated for their fruit. Here are a few top varieties ideal for growing in the Southwest:

  • Opuntia ficus-indica: The most popular variety for large, sweet fruits. Often found in Mexican and Mediterranean cuisines.
  • Opuntia engelmannii: Native to Arizona and Texas, known for flavorful fruit and stunning magenta flowers.
  • Opuntia robusta: Features thick, round pads and produces juicy, edible fruits.

Check with local nurseries, botanical gardens, or agricultural extension services to find the best species for your particular climate zone and soil conditions.


Ideal Growing Conditions in the Southwest

Sunlight

Prickly pears love the sun. They require at least 6-8 hours of direct sunlight daily to grow and produce fruit. Choose a south-facing location free from shade caused by trees, buildings, or walls.

Soil

These cacti thrive in sandy, rocky, or well-drained soil. Heavy clay soils can cause root rot, so amend with sand, gravel, or perlite if necessary. Slightly alkaline to neutral soil pH (6.0–7.5) is ideal.

Temperature

Prickly pears prefer temperatures between 70–100°F during the growing season and can tolerate mild winter frost, although young plants may need protection during hard freezes.


How to Plant Prickly Pear Cactus

Planting from Pads (Cuttings)

The easiest way to start a prickly pear is by propagating pads from an existing plant.

Steps:

  1. Select a healthy, mature pad about 6–12 inches long.
  2. Allow the cut end to dry and callous for 1–2 weeks in a shaded, dry spot.
  3. Plant the pad upright, burying the lower third in soil.
  4. Firm the soil around the base and water lightly.
  5. Avoid watering again until the soil is dry and roots begin to form (typically 3–6 weeks).

Planting from Seeds

Although possible, growing prickly pear from seeds is a slower process. Seeds need to be soaked, scarified (lightly nicked), and planted in well-drained soil. Germination can take several weeks to months.


Watering and Feeding

Watering

One of the best things about prickly pear is its minimal water requirements.

  • Young plants: Water every 2–4 weeks during the first summer.
  • Established plants: Water only during extended droughts.
  • Avoid overwatering, which can lead to root rot.

Fertilizing

Most prickly pears don’t need fertilizer in native soils. However, if desired, use a low-nitrogen cactus fertilizer once in early spring to encourage blooming and fruiting.


Care and Maintenance

Pruning

Prickly pears grow quickly, and pads can become crowded. Prune as needed to remove dead, damaged, or overcrowded pads. Always wear thick gloves and use long-handled tools to avoid contact with spines and tiny, irritating glochids (hair-like barbed bristles).

Pest and Disease Management

Prickly pear cacti are hardy but may occasionally be bothered by:

  • Cochineal scale (white, cottony clusters on pads)
  • Root rot from overwatering
  • Rodents and wildlife nibbling on pads and fruit

Treat pests with insecticidal soap or a strong blast of water. Ensure excellent drainage to prevent rot.


Flowering and Fruit Production

Prickly pear cacti typically flower in late spring to early summer, producing large blooms in shades of yellow, orange, or pink, depending on the species. These flowers attract pollinators and lead to the formation of colorful fruits by late summer.

Tip: Some varieties require cross-pollination from a second plant for optimal fruiting. Check with your nursery when purchasing.


Harvesting Cactus Fruit (Tunas)

The prickly pear’s tunas ripen in late summer to early fall, turning deep red, magenta, or purple. When ripe, the fruits will be plump, soft to the touch, and easily detachable.

Harvesting Tips:

  • Wear thick gloves and use tongs to pick fruit.
  • Twist gently to detach.
  • Remove glochids by burning them over an open flame or rubbing with a stiff brush.

How to Use Prickly Pear Fruit

Once cleaned, prickly pear fruit offers a subtly sweet, melon-like flavor and brilliant magenta color. Popular uses include:

  • Fresh eating (peeled and chilled)
  • Juices and cocktails
  • Jellies and syrups
  • Sauces for meats or desserts

Prickly pear juice is also rich in antioxidants, vitamin C, and dietary fiber.


Growing in Containers

For those with limited garden space or who prefer to grow cacti on patios, prickly pears can also thrive in large, well-drained containers.

Container Growing Tips:

  • Use cactus-specific soil or a sandy mix.
  • Choose pots with ample drainage holes.
  • Water sparingly.
  • Place in full sun.

Container-grown plants may be smaller but will still flower and fruit with proper care.


Final Thoughts

If you’re looking for a low-maintenance, drought-resistant, and strikingly beautiful addition to your Southwest garden, look no further than the prickly pear cactus. With minimal effort, you can enjoy its seasonal blooms, harvest sweet and tangy tunas, and admire a plant deeply woven into the culture and cuisine of the desert Southwest.

From its iconic silhouette to its practical harvests, the prickly pear offers both aesthetic charm and culinary rewards. So grab your gloves, choose your favorite variety, and start growing your very own cactus fruit oasis today!

How to Grow Hardy Citrus Trees in Cold Regions: A Complete Guide

How to Grow Hardy Citrus Trees in Cold Regions: A Complete Guide

Citrus trees are often associated with sunny, warm climates like Florida or California, but did you know you can successfully grow hardy citrus trees even in colder regions? Thanks to advances in plant breeding and clever cultivation techniques, gardeners in cooler climates can now enjoy fresh, homegrown oranges, lemons, and other citrus delights.

In this in-depth guide, we’ll cover everything you need to know about how to grow hardy citrus trees in cold regions — from choosing the right varieties to winter protection tips and year-round care.


Why Grow Citrus in Cold Regions?

Nothing beats the satisfaction of plucking a sun-ripened lemon or sweet orange from your own tree. In colder climates, this was once a rare luxury, but with cold-hardy citrus varieties now widely available, it’s a possibility for many gardeners.

Benefits of growing citrus in cold regions:

  • Fresh, organic citrus fruit at your fingertips.
  • Adds exotic charm to your garden or patio.
  • Aromatic blossoms that brighten up indoor spaces.
  • Attractive foliage that remains green year-round.

Best Cold-Hardy Citrus Varieties

If you live in a region where winter temperatures dip below freezing, choosing the right citrus varieties is crucial. Here are some of the best options for colder climates:

Best Hardy Citrus Trees for Cold Regions

  1. Yuzu (Citrus junos)
    Tolerates temperatures down to 10°F (-12°C). Yuzu fruits are small and sour but prized for culinary and cocktail uses.
  2. Changsha Mandarin (Citrus reticulata)
    Hardy to 5°F (-15°C). Produces small, sweet, easy-to-peel mandarins.
  3. Flying Dragon Trifoliate Orange (Poncirus trifoliata ‘Flying Dragon’)
    Extremely hardy to -10°F (-23°C). While its fruit is bitter, it makes an excellent cold-hardy rootstock for grafting.
  4. Ichang Lemon (Citrus ichangensis)
    Handles temperatures down to 10°F (-12°C). Large, lemon-like fruits with a tart flavor.
  5. Satsuma Mandarin (Citrus unshiu)
    Survives in temperatures as low as 15°F (-9°C). Sweet, seedless, and easy to grow in containers.

Ideal Growing Conditions for Hardy Citrus

Even cold-hardy citrus trees thrive best with certain conditions. Mimicking their natural habitat as closely as possible ensures healthy growth and good fruit production.

Light

Citrus trees require at least 6–8 hours of direct sunlight daily. In cold climates, plant them in the sunniest, most protected spot available.

Soil

They prefer well-draining, slightly acidic soil. Heavy clay soils should be amended with sand, compost, or organic matter.

Temperature

Hardy citrus trees can tolerate cold snaps but will struggle in prolonged freezes. Ideal growing conditions are:

  • Summer: 70–90°F (21–32°C)
  • Winter: Above 20°F (-6°C) for most varieties, though some can handle lower.

Planting Citrus Trees in Cold Regions

Best Planting Time

Plant your hardy citrus tree in late spring after the danger of frost has passed. This allows the tree to establish strong roots before winter.

Planting Steps:

  1. Choose the Right Spot: South-facing locations near walls or fences can help trap heat.
  2. Prepare the Soil: Loosen soil to at least 18 inches deep and 2 feet wide. Mix in organic compost and a handful of acidic fertilizer.
  3. Dig the Hole: Slightly wider and the same depth as the root ball.
  4. Plant the Tree: Ensure the root ball’s top is level with the ground surface.
  5. Backfill and Water: Fill in with soil, tamp down gently, and water thoroughly.
  6. Mulch: Apply a 2–3 inch layer of mulch, keeping it away from the trunk base.

Container Growing for Extra Cold Protection

In regions where temperatures routinely drop below 10°F (-12°C), growing citrus trees in containers is a practical solution.

Advantages of container growing:

  • Move indoors or to a greenhouse in winter.
  • Control soil conditions easily.
  • Manage watering more effectively.

Container Growing Tips:

  • Use a large pot with good drainage holes.
  • Choose a light, well-draining citrus potting mix.
  • Water when the top 2 inches of soil feel dry.
  • Fertilize monthly with a citrus-specific fertilizer during active growth (spring to fall).

Protecting Citrus Trees in Winter

Protecting your trees from harsh winters is crucial for survival and productivity.

Outdoor Protection:

  • Use frost blankets or horticultural fleece during cold nights.
  • Build windbreaks with burlap or plastic to shield trees from icy winds.
  • Mulch heavily around the base to insulate roots.

Bringing Indoors:

If your tree is in a container, bring it indoors or into a garage, greenhouse, or sunroom before the first hard frost. Ensure it still gets at least 6 hours of bright light daily and keep temperatures between 40–60°F (4–15°C).


Watering and Feeding Hardy Citrus

Watering

Citrus trees dislike both drought and waterlogged soil.

  • In summer: Water deeply once or twice a week.
  • In winter: Water sparingly, just enough to keep the soil slightly moist.

Fertilizing

Use a balanced, slow-release citrus fertilizer high in nitrogen and micronutrients.

  • Apply in early spring, mid-summer, and fall.

Avoid fertilizing in late fall to prevent tender new growth susceptible to frost damage.


Pruning and Maintenance

Citrus trees require minimal pruning, but it’s essential for maintaining shape, encouraging airflow, and removing dead or damaged branches.

When to prune:

  • Late winter or early spring before new growth begins.

What to prune:

  • Remove any suckers growing below the graft union.
  • Trim crossing branches and thin out crowded centers.
  • Remove frost-damaged or dead wood.

Harvesting Citrus in Cold Regions

Depending on the variety and climate, citrus fruits typically ripen between late fall and early spring.

Signs fruit is ready:

  • Full color development.
  • Slightly soft when gently squeezed.
  • Easily detaches from the tree.

Tip: Citrus does not ripen well off the tree, so harvest only when fully mature.


Common Problems and Solutions

Though hardy citrus trees are resilient, they can face challenges in colder climates.

Frost Damage

Solution: Cover trees with frost cloths, mulch heavily, and avoid pruning until spring to assess damage.

Leaf Yellowing

Cause: Nutrient deficiency or overwatering.
Solution: Adjust watering schedule and apply a balanced fertilizer.

Pests

Aphids, spider mites, and scale insects are common.
Solution: Spray with neem oil or insecticidal soap.


Final Thoughts

Growing hardy citrus trees in cold regions is not only possible — it’s immensely rewarding. With careful variety selection, proper planting, seasonal care, and winter protection, you can enjoy fragrant blossoms and fresh, tangy fruit straight from your own garden.

Whether planted directly in the ground in milder cold zones or grown in containers and moved indoors for winter, citrus trees can thrive and produce delicious harvests even when snow blankets the landscape.

So go ahead — embrace a little tropical flair in your cold-climate garden. Your future self, sipping fresh-squeezed juice on a crisp morning, will thank you.

How to Grow Huckleberries in the Wild Garden: A Complete Growing Guide

How to Grow Huckleberries in the Wild Garden: A Complete Growing Guide

If you’re a lover of berries and rustic garden spaces, huckleberries should be at the top of your planting list. These flavorful, antioxidant-rich berries have long been cherished in North America, especially in forested and mountainous regions. Growing huckleberries in a wild garden setting not only adds a delicious, native plant to your landscape but also nurtures pollinators and wildlife.

In this detailed guide, we’ll walk you through how to grow huckleberries in the wild garden, from choosing the right species to planting, care, harvesting, and even troubleshooting common problems.


What Are Huckleberries?

Huckleberries belong to the Ericaceae family, the same family as blueberries, and are primarily native to the United States and Canada. While often confused with blueberries, huckleberries are distinct in flavor, texture, and habitat preference.

They thrive in wild, acidic soils and offer berries ranging in color from bright red to deep purple-black depending on the variety.

Notable characteristics:

  • Small to medium-sized shrubs.
  • Produces sweet-tart berries ideal for jams, pies, syrups, and fresh eating.
  • Excellent for native and wild-style gardens.
  • Attracts bees, birds, and butterflies.

Best Huckleberry Varieties for Wild Gardens

Several huckleberry species can be cultivated, but a few stand out for home gardeners and wild landscapes:

Top Huckleberry Types:

  • Vaccinium membranaceum (Mountain Huckleberry):
    Found in mountainous regions of the Pacific Northwest. Produces dark purple, sweet-tart berries.
  • Vaccinium ovatum (Evergreen Huckleberry):
    Native to coastal areas. Grows well in shade and produces small, glossy berries.
  • Gaylussacia baccata (Black Huckleberry):
    Native to the eastern U.S., thriving in woodlands and sandy soils. Sweet, flavorful berries.
  • Vaccinium parvifolium (Red Huckleberry):
    Prefers acidic, moist soils in shaded areas. Produces bright red, tangy berries.

Ideal Conditions for Growing Huckleberries

Huckleberries naturally thrive in wild, acidic, and well-drained soil environments. To replicate this in your garden, keep the following conditions in mind:

Light Requirements

Most huckleberries prefer partial shade to full sun. Mountain huckleberries and black huckleberries do well in full sun, while evergreen and red huckleberries appreciate dappled light or partial shade.

Temperature

They prefer cool, temperate climates with cold winters and mild summers. Ideal for USDA zones 4–8 depending on the variety.

Soil Preferences

The key to healthy huckleberry growth is acidic, well-drained soil with a pH of 4.5 to 5.5.

Tips for preparing soil:

  • Incorporate peat moss, pine needles, or leaf mold to increase acidity.
  • Avoid clay-heavy, alkaline soils unless heavily amended.
  • Ensure excellent drainage to prevent root rot.

How to Plant Huckleberries in a Wild Garden

Best Planting Time

Plant huckleberries in early spring or fall, when temperatures are mild and moisture is abundant.

Planting Steps:

  1. Select a Location: Choose a spot that mimics their natural habitat — partial shade with acidic, well-draining soil.
  2. Test and Amend Soil: Use a soil test kit to check pH. Lower it using soil acidifiers like sulfur or organic materials if needed.
  3. Dig Planting Holes: Holes should be twice the width of the root ball and the same depth.
  4. Set Plants in Soil: Place the plant so that the top of the root ball is level with the ground surface.
  5. Backfill and Water: Fill in with soil, gently tamp down, and water deeply.
  6. Mulch Heavily: Apply a 2–3 inch layer of pine needles or wood chips to retain moisture and improve soil acidity.

Caring for Huckleberries

Once planted, huckleberries are fairly low-maintenance, especially when planted in a wild garden setting.

Watering

While drought-tolerant once established, young huckleberry plants need consistent moisture. Water deeply once or twice a week during dry spells.

Avoid waterlogged soil, as these plants hate standing water.

Fertilizing

Huckleberries don’t require heavy fertilizing. Use a balanced, acid-loving plant fertilizer (like one for azaleas or rhododendrons) in early spring and again in mid-summer.

Pruning

Pruning is minimal. Remove:

  • Dead or damaged wood in late winter.
  • Older, unproductive branches after fruiting to encourage new growth.

This maintains the plant’s shape and vigor.

Pollination

Huckleberries are pollinated by bees, butterflies, and other native pollinators. Planting multiple shrubs together encourages cross-pollination and boosts berry yields.


Harvesting Huckleberries

Depending on the variety and region, huckleberries typically ripen from mid to late summer.

Signs they’re ready to harvest:

  • Fully colored, dark purple, black, or red (depending on type).
  • Easily detach when gently tugged.
  • Juicy and sweet-tart flavor.

Harvesting Tips:

  • Use your hands or berry combs for picking.
  • Harvest in the morning for best freshness.
  • Store berries in a cool place or freeze for long-term use.

Common Problems and Solutions

Though hardy, huckleberries can face a few challenges:

Leaf Yellowing

Cause: Poor soil drainage or alkaline soil.
Solution: Improve drainage and lower soil pH with acidifying materials.

Pests

While generally pest-resistant, watch for:

  • Aphids: Control with insecticidal soap or neem oil.
  • Birds: Protect ripening berries with bird netting.

Fungal Issues

In overly wet, poorly drained soils, root rot and mildew can occur. Avoid overwatering and ensure good air circulation.


How to Propagate Huckleberries

Huckleberries can be propagated from:

  • Seed: Slow, requires stratification (cold exposure) for 2–3 months.
  • Cuttings: Take 6-inch semi-hardwood cuttings in summer.
  • Suckers: Separate and transplant young shoots from established plants.

Propagation by cuttings or suckers is faster and more reliable for home gardeners.


Companion Planting Ideas

In a wild garden, huckleberries pair beautifully with other native and woodland plants:

  • Ferns
  • Salal
  • Rhododendrons
  • Azaleas
  • Wild blueberries
  • Elderberries

These companions share similar soil and moisture preferences, creating a harmonious and ecologically beneficial planting.


Final Thoughts

Growing huckleberries in a wild garden is a deeply rewarding project for nature lovers and home gardeners alike. These native shrubs not only provide delicious, antioxidant-packed berries but also enhance the biodiversity and natural charm of your outdoor space.

With a little attention to soil acidity, water, and shade, your huckleberry patch can thrive for years — offering a steady harvest and an inviting haven for pollinators and wildlife.

So if you’re dreaming of foraging in your own backyard, plant a few huckleberries this season and watch your wild garden flourish.


FAQs

Q: Are huckleberries easy to grow in home gardens?
A: Yes — as long as you can replicate their preferred acidic, well-drained soil and partial shade conditions.

Q: How long do huckleberry bushes take to fruit?
A: Typically 2–4 years after planting, depending on the age of the plant and growing conditions.

Q: Can I grow huckleberries in containers?
A: Yes, especially dwarf or evergreen varieties, provided the container is large, acidic soil is used, and proper drainage is maintained.

Q: Are huckleberries invasive?
A: No — they spread moderately through suckers but are not considered invasive in their native regions.