How to Grow Soursop (Guanabana) in South Florida: A Complete Guide for Home Gardeners

How to Grow Soursop (Guanabana) in South Florida: A Complete Guide for Home Gardeners

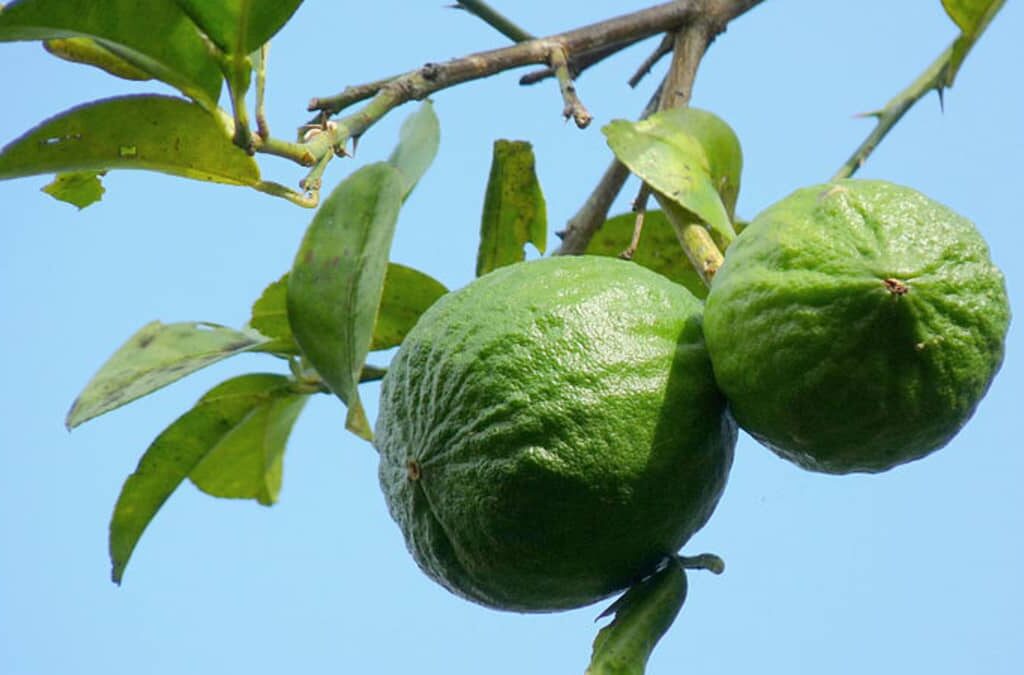
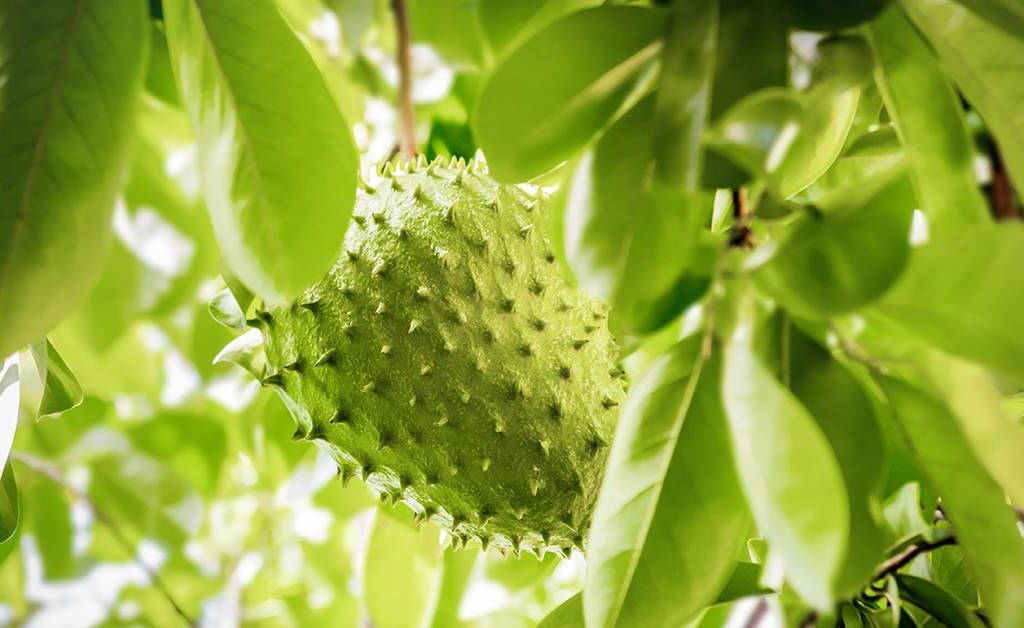
If you’ve ever bitten into a creamy, sweet, and slightly tangy soursop fruit, you’ll know why it’s considered a tropical delicacy around the world. Known locally in the Caribbean as guanábana, soursop (Annona muricata) is prized not just for its delicious flavor but also for its medicinal benefits. And if you live in South Florida’s warm, subtropical climate, you’re in luck — it’s one of the few regions in the continental U.S. where you can successfully grow this tropical gem outdoors.

In this comprehensive guide, we’ll walk you through how to grow soursop in South Florida — from choosing the right planting spot to pest management and harvesting those spiky green treasures.


What is Soursop (Guanabana)?

Soursop is an evergreen tropical fruit tree native to the Caribbean, Central America, and parts of South America. The fruit is large, heart-shaped, and covered in soft green spines. Its creamy white flesh is aromatic, with a unique flavor that’s often described as a blend of pineapple, banana, and citrus.

Aside from being delicious, soursop is known for its traditional medicinal uses — believed to support immunity, digestion, and relaxation.


Can You Grow Soursop in South Florida?

Yes! South Florida’s climate is one of the best in the United States for growing soursop outdoors.

Ideal growing conditions:

  • USDA Hardiness Zones: 10a–11
  • Temperature range: 70°F–85°F (21°C–29°C)
  • Cannot tolerate temperatures below 40°F (4°C) without damage.

South Florida’s mild winters, humid summers, and rich soils offer a near-perfect environment for soursop to flourish.


When to Plant Soursop in South Florida

The best time to plant soursop in South Florida is during the late spring or early summer, once the soil has warmed consistently and the chance of cold snaps has passed.

Planting in this season ensures rapid growth and gives the young tree time to establish before winter.


How to Plant Soursop in South Florida

1. Choose a Good Planting Spot

  • Full sun exposure: At least 6–8 hours of direct sunlight daily.
  • Sheltered location: Protect young trees from strong winds, especially hurricanes.
  • Well-draining soil: Soursop doesn’t like soggy feet — sandy loam or organically enriched soils work best.

Pro Tip: Avoid low-lying areas where water tends to collect after heavy rains.


2. Preparing the Soil

Enrich the planting area with:

  • Organic compost
  • Well-rotted manure
  • A balanced slow-release fertilizer (10-10-10)

Ensure soil pH is between 5.5 and 6.5 for optimal growth.


3. Planting the Tree

  • Dig a hole twice as wide and as deep as the root ball.
  • Remove the tree from its container carefully to avoid disturbing roots.
  • Place the tree in the hole, ensuring it sits at the same depth it was growing in the pot.
  • Backfill with enriched soil, gently tamping it down to eliminate air pockets.
  • Water thoroughly after planting.

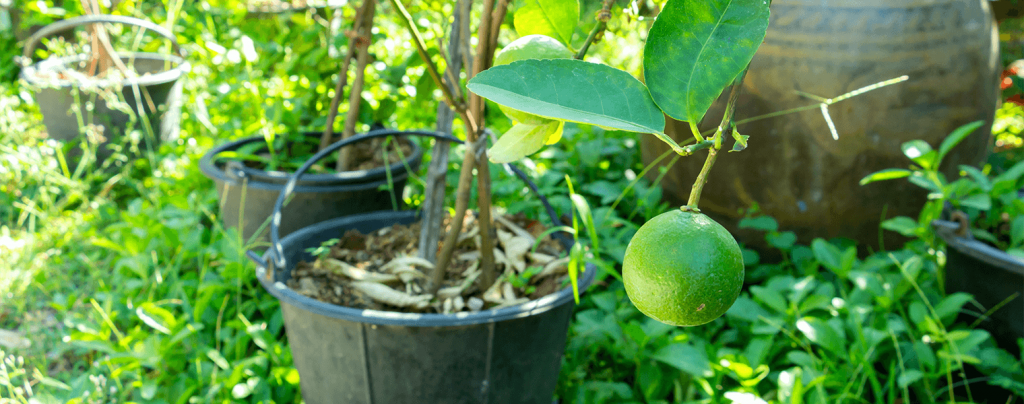
Space requirement: 15–25 feet away from other trees or structures for healthy root spread and canopy growth.


Watering and Fertilizing

Watering

Soursop thrives in evenly moist, well-drained soil.

Watering guide:

  • Water 2–3 times a week for young trees.
  • Mature trees can handle once-weekly deep watering during dry spells.
  • Avoid overwatering to prevent root rot.

Fertilizing

Feed your soursop tree regularly to encourage strong, healthy growth.

Fertilizer guide:

  • Apply a balanced (10-10-10) granular fertilizer every 6–8 weeks during the growing season.
  • Top-dress with compost or aged manure in spring and midsummer.
  • Reduce fertilization during cooler months.

Pruning and Maintenance

Regular pruning helps shape the tree, promote airflow, and improve fruit yield.

When to prune:

  • After the first growing season.
  • Remove:
    • Dead or damaged branches
    • Low-hanging limbs
    • Crossed or overcrowded branches

Maintain a manageable height of 12–15 feet for easy care and harvesting.


Common Pests and How to Control Them

While soursop is relatively hardy, it can attract some common tropical pests in South Florida.

PestSymptomOrganic Control
Fruit fliesSmall larvae in fruitsUse fruit fly traps and harvest early
MealybugsCottony clusters on branchesNeem oil or insecticidal soap
Scale insectsSticky sap and sooty moldHorticultural oil spray
AphidsLeaf curl, sticky residueNatural predators like ladybugs or neem oil

Tip: Keep the area around the tree clean of fallen fruits and debris to discourage pests.


Flowering and Pollination

Soursop trees bloom within 3–5 years from planting, producing small yellow-green flowers directly on the trunk or branches.

Pollination tips:

  • In South Florida, natural pollinators like beetles and small flies may assist.
  • For better fruit set, hand-pollinate using a small brush to transfer pollen between flowers in the early morning hours.
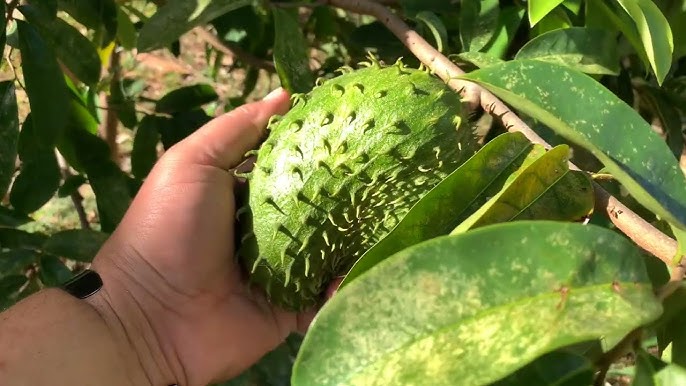
Harvesting Soursop

Time to maturity:

  • 3–5 years after planting from seed
  • 2–3 years from grafted trees

When to harvest:

  • When the fruit’s skin turns from dark green to lighter green or pale yellowish-green.
  • The fruit should feel slightly soft when gently squeezed.

Harvesting tip:
Use pruning shears or twist the fruit gently from the branch to avoid damaging the tree.

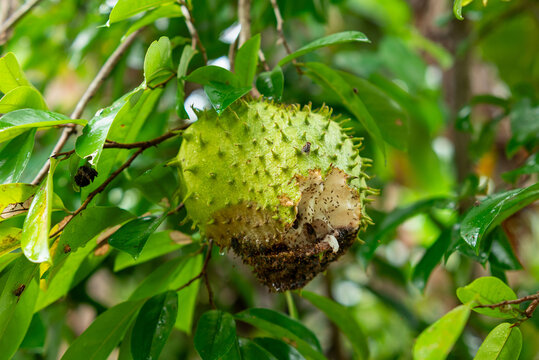
Important: Don’t let soursop overripen on the tree — it can split or attract pests.


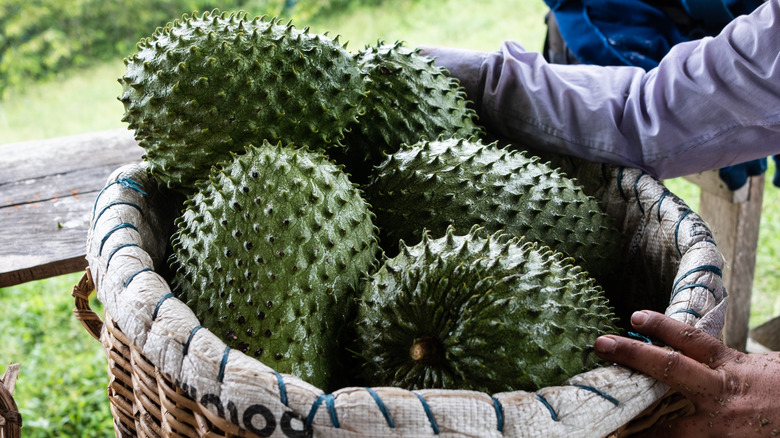
How to Use and Store Soursop

Culinary uses:

  • Eaten fresh by scooping out the creamy flesh
  • Blended into smoothies, ice creams, and juices
  • Used in desserts, jams, and syrups

Storage tips:

  • Ripe soursop lasts 2–3 days at room temperature.
  • Refrigerate ripe fruit for up to a week.
  • Flesh can be frozen for smoothies and desserts for up to 6 months.

Health Benefits of Soursop

Soursop isn’t just delicious — it’s also loaded with beneficial nutrients:

  • High in Vitamin C: Supports immunity
  • Rich in fiber: Aids digestion
  • Antioxidants: Protect against oxidative stress
  • Alkaloids and acetogenins: Researched for potential health benefits (though always consult a healthcare professional before using for medicinal purposes)

Quick Growing Tips

Plant in full sun with shelter from strong winds
Maintain regular watering without over-saturating the soil
Fertilize every 6–8 weeks during active growth
Prune annually to encourage fruiting and airflow
Use organic pest controls when necessary
Harvest fruits when they’re slightly soft and pale green


Final Thoughts

Growing soursop in South Florida is a deeply rewarding venture for any gardener with a taste for the tropics. With a little care, patience, and attention to this tree’s preferences, you’ll be rewarded with luscious, fragrant fruits perfect for cooling smoothies, decadent desserts, or just enjoying fresh from your backyard.

Ready to plant your guanabana tree?

How to Grow Starfruit in a Tropical Greenhouse: A Complete Beginner’s Guide

How to Grow Starfruit in a Tropical Greenhouse: A Complete Beginner’s Guide

If you’ve ever marveled at the sight of a perfectly sliced starfruit, its crisp golden skin and star-shaped cross-sections, you know just how exotic and irresistible this tropical treat can be. Known scientifically as Averrhoa carambola, starfruit is a sweet-tart fruit native to Southeast Asia but beloved worldwide. And if you own or plan to build a tropical greenhouse, growing this luscious fruit yourself is absolutely within reach.

In this detailed guide, we’ll walk you through how to grow starfruit in a tropical greenhouse, from choosing the right variety and planting it properly, to greenhouse care, pest management, and harvesting.


What Is Starfruit?

Starfruit, or carambola, is a small, tree-grown fruit known for its distinctive five-pointed star shape when sliced. The fruit has a thin, edible, waxy skin ranging from pale green to bright yellow when ripe. Its flesh is crisp, juicy, and mildly sweet, with a subtle tartness — a refreshing tropical snack you can enjoy straight from the tree.

Bonus: Starfruit trees are attractive ornamentals too, with pretty lilac-pink flowers and glossy green foliage.


Why Grow Starfruit in a Tropical Greenhouse?

A tropical greenhouse provides an ideal controlled environment for starfruit, especially in regions with:

  • Cooler winters
  • Unpredictable weather
  • Subtropical or borderline climates

Benefits of greenhouse cultivation:

  • Stable warm temperatures
  • Protection from frost and cold snaps
  • Shield from high winds and heavy rain
  • Easier pest and disease management
  • Year-round growing potential in the right conditions

Best Starfruit Varieties for Greenhouse Growing

Not all starfruit types are created equal — some are sweeter, larger, or hardier than others.

Popular varieties for greenhouses:

  • Arkin: Sweet, widely grown, and reliable
  • Fwang Tung: Mildly sweet and good for small spaces
  • Kary: Very sweet and productive
  • Maher Dwarf: Compact, ideal for greenhouse pots

When to Plant Starfruit in a Greenhouse

Starfruit can be planted year-round in a tropical greenhouse where temperatures remain consistently warm. The ideal planting period is spring to early summer if your greenhouse has seasonal shifts in temperature.


How to Plant Starfruit in a Tropical Greenhouse

1. Choosing the Right Container

If planting in pots:

  • Use a 20–30 gallon container
  • Ensure excellent drainage (add gravel or coarse sand at the bottom)

For in-ground greenhouse beds:

  • Loamy, well-draining soil is best.
  • pH should be 5.5–6.5.

Enrich with:

  • Organic compost
  • Well-rotted manure

2. Planting Process

  • Dig a hole twice as wide as the root ball.
  • Gently loosen the roots.
  • Position the plant so the soil line of the container matches the greenhouse bed or pot soil level.
  • Backfill with enriched soil.
  • Water thoroughly after planting.

Temperature, Light & Humidity Needs

Starfruit thrives in:

  • Temperature: 70°F–95°F (21°C–35°C)
  • Humidity: 50–70%
  • Full sun: 8+ hours daily

In your greenhouse:

  • Use supplemental grow lights if natural light is limited.
  • Install a thermometer and hygrometer to monitor climate levels.
  • Use a misting system or pebble trays to maintain humidity.

Watering and Fertilizing

Watering

Starfruit prefers evenly moist, not soggy soil.

Tips:

  • Water when the top 2 inches of soil feel dry.
  • In hotter months, water 2–3 times a week.
  • Reduce in cooler periods to avoid root rot.

Fertilizing

Feed your starfruit regularly for strong growth and fruiting.

Fertilizer guide:

  • Balanced fertilizer (10-10-10) every 6–8 weeks
  • Add organic compost or aged manure seasonally
  • Apply a potassium-rich fertilizer before flowering for better fruit set

Pruning and Maintenance

Regular pruning helps manage size, improve airflow, and increase productivity.

When to prune:

  • After fruiting season
  • Remove:
    • Dead, diseased, or crossing branches
    • Excessive inner growth to let light in

Maintain a height of 6–10 feet in greenhouses for easy access and airflow.


Common Pests and How to Control Them

Even in a greenhouse, starfruit can attract some pests.

PestSymptomControl
AphidsSticky leaves, curled tipsNeem oil, insecticidal soap
MealybugsCotton-like clustersAlcohol swab, neem oil
Fruit FliesInfested, rotting fruitsSticky traps, clean fallen fruits
Spider MitesYellow stippling on leavesIncrease humidity, use miticide

Always inspect new plants before bringing them into the greenhouse.


Flowering and Pollination

Starfruit trees produce clusters of star-shaped, pink to lavender flowers that can bloom several times a year in tropical greenhouse conditions.

Pollination tips:

  • Starfruit trees are self-pollinating but benefit from cross-pollination.
  • In a greenhouse, use a small brush to transfer pollen between flowers.
  • Encourage airflow and beneficial insects if possible.

Harvesting Your Starfruit

Time to maturity:

  • 10–14 months from planting a young tree
  • 60–75 days from flower to mature fruit

Signs it’s ready to pick:

  • Bright yellow skin with a hint of light green
  • Firm flesh with slightly browning tips at the ridges

How to harvest:

  • Use pruning shears or handpick carefully.
  • Store at room temperature or refrigerate for up to 2 weeks.

Uses and Health Benefits of Starfruit

Starfruit is:

  • Low in calories
  • High in vitamin C, potassium, fiber, and antioxidants

Culinary uses:

  • Fresh fruit salads
  • Juices and smoothies
  • Desserts and preserves
  • Lightly cooked in stir-fries and seafood dishes

Important: Starfruit contains oxalates, so people with kidney issues should consume it cautiously.


Tips for Success

  • Maintain consistent warmth — never let temperatures drop below 50°F (10°C).
  • Prune regularly for manageable growth.
  • Monitor humidity and ventilation to prevent fungal diseases.
  • Water consistently but avoid waterlogged soil.
  • Use organic mulches to retain moisture and suppress weeds in greenhouse beds.

Final Thoughts

Growing starfruit in a tropical greenhouse might sound ambitious, but with a little care and the right conditions, it’s a rewarding and relatively low-maintenance endeavor. From its stunning flowers to crisp, star-shaped fruits, this plant adds exotic beauty and tropical flavor to your greenhouse garden.

Whether you’re growing for the sheer novelty, the fresh taste, or the year-round harvest potential, starfruit is a standout addition for any tropical greenhouse gardener.

How to Grow Dragon Fruit in Warm Areas: A Complete Beginner’s Guide

How to Grow Dragon Fruit in Warm Areas: A Complete Beginner’s Guide

If you live in a warm, sunny climate and want to grow something both exotic and rewarding, dragon fruit (pitaya) is a perfect choice. This striking tropical cactus produces stunningly bright, pink-skinned fruits with sweet, mildly tangy flesh. Even better — it’s surprisingly easy to grow at home if you give it the right conditions.

In this detailed guide, we’ll cover how to grow dragon fruit in warm areas, from choosing the right variety to planting, caring, and harvesting your own tropical treasure.


What Is Dragon Fruit?

Dragon fruit is the edible fruit of several cactus species in the Hylocereus and Selenicereus genera. Known for its vibrant pink or yellow skin, spiky appearance, and refreshing, mildly sweet pulp, it’s native to Central America but thrives in warm, arid, and tropical regions worldwide.

Popular Varieties:

  • Hylocereus undatus – White flesh, pink skin
  • Hylocereus costaricensis – Red flesh, pink skin
  • Hylocereus megalanthus – White flesh, yellow skin

Where Does Dragon Fruit Grow Best?

Dragon fruit loves warm, sunny, and dry conditions. It’s ideal for:

  • USDA Zones 9–11
  • Tropical, subtropical, and arid climates
    Temperature range: 65°F–85°F (18°C–29°C)
    Frost sensitive: Protect or bring indoors below 40°F (4°C)

Good drainage is crucial. This cactus plant thrives in sandy or loamy soil and detests soggy roots.


When to Plant Dragon Fruit

In warm climates, the best time to plant is spring to early summer, when temperatures are consistently warm, and there’s minimal risk of frost.

Bonus: Dragon fruit is a fast-growing, climbing cactus and can start bearing fruit within 1–2 years under good care!


How to Start Growing Dragon Fruit

1. Choose Your Propagation Method

You can start dragon fruit from:

  • Seed (slow and less reliable)
  • Cuttings (faster and recommended)

Cuttings from a healthy, mature plant produce fruits quicker and more predictably.

How to make a cutting:

  • Take a 12–18 inch section from a healthy, disease-free stem.
  • Let the cutting dry for 1–2 days to form a callus.
  • This prevents rot when planted.

Planting Dragon Fruit

2. Choose the Right Spot

  • Full sun: At least 6–8 hours daily
  • Sheltered from strong winds
  • Good drainage is essential. Avoid low-lying areas.

3. Prepare the Soil

Dragon fruit thrives in:

  • Well-draining, sandy or loamy soil
  • pH between 6–7
  • Enrich with organic compost or aged manure

4. Planting in the Ground:

  • Dig a hole about 2 feet deep.
  • Add a handful of compost and mix.
  • Place the cutting 2–3 inches deep.
  • Backfill and gently firm the soil.

Provide support:
As a climbing cactus, dragon fruit needs a trellis, fence, or vertical post with cross beams for support.


Growing Dragon Fruit in Containers

Great for patios and small spaces!

Choose:

  • A large, sturdy pot at least 15–20 gallons.
  • Well-draining cactus soil or a mix of sandy soil, compost, and perlite.

Plant the cutting upright, with a central stake or trellis for support.


Watering and Care

Dragon fruit loves moist but not waterlogged soil.

Watering tips:

  • Water deeply when the top 2 inches of soil feels dry.
  • In hot weather, water 2–3 times a week.
  • Reduce watering in winter.

Avoid overwatering to prevent root rot, the most common issue for this plant.


Fertilizing Dragon Fruit

For vigorous growth and juicy fruits:

  • Apply a balanced, slow-release fertilizer (10-10-10) every 2 months during active growing season.
  • When flower buds appear, switch to a low-nitrogen, high-phosphorus fertilizer to encourage fruiting.

Bonus tip: Organic compost or well-rotted manure improves soil health naturally.


Flowering and Pollination

Dragon fruit produces stunning, fragrant, white flowers that bloom at night — known as “moonflowers” — and last just one night.

Pollination tips:

  • Some varieties are self-pollinating, but others need hand pollination.
  • Use a small brush to transfer pollen from one flower to another.
  • Cross-pollination between different plants often improves fruit set and size.

When and How to Harvest

Dragon fruit is typically ready to pick 30–50 days after flowering.

Signs it’s ready:

  • Skin turns bright pink or yellow (depending on variety)
  • Fruit yields slightly to gentle pressure
  • Scales on the fruit edges start to wither

How to harvest:

  • Use pruning shears or a sharp knife.
  • Leave a short piece of stem attached.

Common Problems and How to Fix Them

ProblemCauseSolution
Root rotOverwateringImprove drainage, reduce watering
Stem rotFungal infectionRemove affected parts, treat with fungicide
Aphids and mealybugsSap-sucking pestsUse neem oil spray, rinse with water
Poor fruit setLack of pollinationHand pollinate or plant multiple varieties

Pruning and Maintenance

Pruning keeps your dragon fruit plant healthy, manageable, and productive.

When to prune:

  • After fruiting season
    How to prune:
  • Remove damaged, diseased, or crowded stems.
  • Trim back long stems to encourage branching.
  • Maintain an open structure for airflow.

Clean your tools before and after pruning to prevent disease spread.


Benefits of Homegrown Dragon Fruit

Aside from its exotic appearance and refreshing flavor, dragon fruit is a nutritional powerhouse:

  • Rich in vitamin C, antioxidants, and fiber
  • Boosts immunity and gut health
  • Low in calories and cholesterol
  • Hydrating and cooling — perfect for hot climates!

And let’s be honest — nothing beats the bragging rights of harvesting your own dragon fruit!


Final Growing Tips

  • Always provide sturdy support for climbing.
  • Protect young plants from harsh midday sun with partial shade cloth if necessary.
  • Fertilize regularly during growing season.
  • Use sandy, well-draining soil to avoid waterlogged roots.
  • Harvest fruits when fully colored for best flavor.

Conclusion

Growing dragon fruit in warm areas is a fun, rewarding, and surprisingly straightforward gardening project. With the right care, you can enjoy gorgeous night-blooming flowers and a steady supply of delicious, exotic fruits straight from your backyard or patio.

Whether you’re planting it in a garden, container, or balcony, dragon fruit brings tropical charm, unique blooms, and refreshing fruit to your home landscape. Now that you know how to grow dragon fruit in warm areas, it’s time to grab a cutting and get planting — your future harvest is waiting!

How to Grow Key Limes for Fresh Pies: Your Complete Guide

How to Grow Key Limes for Fresh Pies: Your Complete Guide

Few fruits embody the essence of tropical sunshine and refreshing zest like the Key lime. Famous for their iconic role in the classic Key lime pie, these small, aromatic citrus fruits offer a perfect balance of tangy acidity and subtle sweetness. If you love fresh pies and want to bring the bright flavor of Key limes straight from your garden to your kitchen, growing your own Key lime tree is a rewarding and enjoyable experience.

In this comprehensive guide, you’ll learn everything about growing Key limes—from selecting the right variety and planting techniques to care, harvesting, and even how to get the most delicious pie results from your homegrown limes. Whether you’re gardening in a warm climate or planning to grow them in containers, this article will set you on the path to citrus success.


What Are Key Limes?

Key limes (Citrus aurantiifolia), also known as Mexican or West Indian limes, are smaller and rounder than the more common Persian limes. They typically measure 1 to 2 inches in diameter and have a thin, yellowish-green rind when ripe. Their juice is notably more acidic and aromatic, making them ideal for culinary uses, especially the famous Key lime pie.

Originally from Southeast Asia, Key limes are now predominantly grown in tropical and subtropical regions such as Florida, Mexico, and the Caribbean. Their compact size and fragrant blossoms make them popular not only for fruit production but also as ornamental plants.


Why Grow Your Own Key Limes?

Growing your own Key lime tree offers several benefits:

  • Freshness: Nothing beats freshly picked limes for the juiciest, most flavorful pies and cocktails.
  • Sustainability: Homegrown fruits reduce your carbon footprint and packaging waste.
  • Pest Resistance: Key lime trees tend to be more pest and disease resistant compared to other citrus varieties.
  • Compact Size: They are perfect for container gardening, patios, or small spaces.
  • Year-Round Fruit: In suitable climates, Key limes can produce fruit multiple times per year.

Selecting the Right Variety

There are several Key lime varieties, but the most common and widely grown are:

  • ‘Mexican’ or ‘West Indian’ Key Lime: Classic variety used for pies, with tart juice and small fruit.
  • ‘Kaghzi’ Key Lime: Slightly larger fruit, known for sweeter juice.
  • ‘Australian Finger Lime’: An exotic cousin with elongated fruit and caviar-like pulp, excellent for gourmet dishes.

For most gardeners, the ‘Mexican’ Key lime is ideal for pie making and home growing.


Climate and Location Requirements

Key limes thrive in warm, subtropical to tropical climates. They prefer:

  • Temperature: Ideal daytime temperatures between 70°F and 85°F (21°C to 29°C). They are sensitive to frost and temperatures below 28°F (-2°C) can cause damage or kill the tree.
  • Sunlight: Full sun exposure for at least 6 hours daily. Partial shade may reduce fruit production.
  • Soil: Well-draining, slightly acidic soil (pH 6-7) rich in organic matter.

If you live in colder regions, consider growing Key limes in large containers that can be moved indoors during winter.


Planting Your Key Lime Tree

When to Plant

The best time to plant Key lime trees is in the spring after the last frost date, allowing the tree to establish before cooler weather.

How to Plant

  1. Choose a Healthy Tree: Purchase from a reputable nursery or garden center. Look for vibrant leaves and a well-established root ball.
  2. Select a Location: Pick a sunny, sheltered spot with well-draining soil. Avoid low areas prone to standing water.
  3. Prepare the Soil: Mix garden soil with compost or aged manure to improve fertility and drainage.
  4. Dig the Hole: Dig a hole about twice the size of the root ball.
  5. Plant: Place the tree in the hole, backfill with amended soil, and water deeply. Ensure the root crown is level with the soil surface.
  6. Mulch: Add 2-3 inches of mulch around the base to retain moisture and suppress weeds, but keep it a few inches away from the trunk.

Growing Key Limes in Containers

If space or climate is a concern, growing Key limes in containers is a smart option.

  • Use a 20-gallon or larger pot with drainage holes.
  • Use high-quality citrus potting mix or a blend of peat, perlite, and compost.
  • Water regularly but allow the soil to dry slightly between waterings.
  • Fertilize monthly with a citrus-specific fertilizer.
  • Move indoors or to a protected area when temperatures drop below 50°F (10°C).

Caring for Your Key Lime Tree

Watering

  • Keep soil consistently moist, especially during dry spells. Young trees may need watering every 2-3 days, while mature trees require less frequent deep watering.
  • Avoid overwatering, which can cause root rot.

Fertilizing

  • Use a balanced citrus fertilizer rich in nitrogen, potassium, and micronutrients like magnesium and iron.
  • Apply fertilizer every 6-8 weeks during the growing season (spring to early fall).
  • Follow label instructions for proper dosage.

Pruning

  • Prune to remove dead or crossing branches, and shape the tree after harvest or during late winter.
  • Pruning improves airflow and light penetration, reducing disease risk.

Pest and Disease Control

  • Key limes are relatively pest-resistant but watch for aphids, scale insects, and citrus leaf miners.
  • Treat infestations with insecticidal soap or neem oil.
  • Ensure proper sanitation by removing fallen leaves and fruit to reduce fungal diseases.

Pollination and Fruit Production

Key lime trees are generally self-pollinating, but bees and other pollinators help improve fruit set. Planting near flowering plants or placing a bee hive nearby can boost yields.

Fruit typically develops 4-6 months after flowering, and trees can produce fruit year-round in warm climates with proper care.


Harvesting Key Limes

When to Harvest

  • Key limes are ready to harvest when they turn yellow-green to yellow and feel slightly soft to the touch.
  • The fruit size is usually smaller than regular limes—about 1 to 2 inches in diameter.

How to Harvest

  • Use pruning shears or gently twist the fruit from the branch to avoid damage.
  • Harvest regularly to encourage continuous fruiting.

Using Your Homegrown Key Limes for Fresh Pies

Nothing beats the flavor of a pie made with freshly squeezed Key lime juice. Here are some tips:

  • Juicing: Roll the lime firmly on a countertop before cutting to maximize juice. Use a manual or electric citrus juicer.
  • Zesting: The thin, aromatic rind can be zested to add flavor to pie crusts, toppings, or drinks.
  • Storage: Fresh Key limes can be refrigerated for up to two weeks or frozen for longer storage. Juice can be frozen in ice cube trays.

Simple Classic Key Lime Pie Recipe

Here’s a quick way to use your freshly harvested Key limes:

Ingredients

  • 1 cup Key lime juice (freshly squeezed)
  • 1 can (14 oz) sweetened condensed milk
  • 4 large egg yolks
  • 1 prepared graham cracker pie crust
  • Whipped cream for topping (optional)

Instructions

  1. Preheat oven to 350°F (175°C).
  2. In a bowl, whisk together egg yolks and sweetened condensed milk.
  3. Stir in Key lime juice and zest until well combined.
  4. Pour mixture into pie crust.
  5. Bake for 10-12 minutes until filling is set but slightly jiggly.
  6. Cool completely, then refrigerate for at least 2 hours.
  7. Serve chilled with whipped cream.

Troubleshooting Common Issues

  • Fruit drop: Can be caused by irregular watering or excessive heat. Keep watering consistent.
  • Yellow leaves: May indicate nutrient deficiency; check soil pH and fertilize properly.
  • Pests: Manage early with organic sprays and natural predators.

Final Thoughts

Growing Key limes at home is an incredibly satisfying way to add a touch of tropical zest to your kitchen and garden. Their compact size, year-round fruiting potential, and unique flavor make them perfect for fresh pies and other culinary delights. With proper care, the rewards of your own Key lime tree will blossom into delicious memories and endless pie-making joy.

Start your Key lime journey today and savor the tangy taste of fresh, homegrown citrus!

How to Grow Desert Lime Trees in Texas: A Comprehensive Guide

How to Grow Desert Lime Trees in Texas: A Comprehensive Guide

If you’re searching for a unique citrus tree that’s both drought-tolerant and packed with nutritional benefits, the Desert Lime tree (Citrus glauca) is an excellent choice—especially for Texas gardeners. Native to Australia’s arid outback, the Desert Lime is a hardy and resilient citrus variety prized for its tart, flavorful fruit. Its adaptability to hot, dry conditions makes it a promising candidate for Texas’ often harsh climate.

In this article, we’ll explore everything you need to know about growing Desert Lime trees in Texas—from understanding their origins and benefits to selecting the right planting site, care, and harvesting tips. Whether you’re an experienced gardener or just starting, this guide will help you successfully cultivate this intriguing citrus in your own backyard.


What Is a Desert Lime Tree?

The Desert Lime, scientifically known as Citrus glauca, is a small citrus tree native to the arid and semi-arid regions of Australia. Unlike many other citrus trees, Desert Limes have evolved to thrive in harsh, dry conditions with minimal water, making them highly drought-resistant. The fruit itself is small—about the size of a grape—but packed with a tart, lime-like flavor that’s intensely aromatic and highly prized in gourmet cooking and beverages.

The tree is relatively compact, typically reaching 10-15 feet tall, and features silver-green leaves that help reflect sunlight and reduce water loss. It’s a tough plant that can withstand poor soil conditions, high temperatures, and even frost to some degree, making it ideal for Texas gardeners dealing with variable weather and dry spells.


Why Grow Desert Lime Trees in Texas?

Texas has diverse climates, but much of the state experiences hot summers, occasional droughts, and alkaline soils—conditions well-suited to Desert Lime trees. Here are some reasons to consider growing Desert Limes in your Texas garden:

  • Drought tolerance: Desert Limes can survive with less water than most citrus varieties, saving water and reducing maintenance.
  • Nutritional powerhouse: The fruit is rich in vitamin C, antioxidants, and essential oils.
  • Culinary uses: The tart, zesty flavor is perfect for sauces, jams, drinks, and marinades.
  • Ornamental value: Its compact size and attractive silvery foliage make it a beautiful addition to any landscape.
  • Climate resilience: Able to tolerate Texas heat and occasional cold snaps better than many other citrus trees.

Selecting the Right Location

For Desert Lime trees to thrive in Texas, selecting the right planting site is crucial:

Sunlight

Choose a location that receives full sun, ideally 6-8 hours of direct sunlight per day. Desert Limes need plenty of light to produce healthy foliage and abundant fruit.

Soil

Desert Limes prefer well-draining soil to prevent root rot. Texas soils can vary, but they often tend to be alkaline or clay-heavy. Amend heavy clay soils with organic matter or sand to improve drainage. If your soil is highly alkaline, incorporate some peat moss or elemental sulfur to gently acidify the soil.

Space

Desert Lime trees grow compact but still need room to spread. Plant trees at least 10 to 15 feet apart to allow good airflow and easy maintenance.

Wind protection

While hardy, young trees benefit from shelter against strong winds. Consider planting near a fence or windbreak.


Planting Desert Lime Trees in Texas

When to Plant

The best time to plant Desert Lime trees in Texas is early spring after the last frost or early fall when temperatures begin to moderate.

Steps to Plant

  1. Prepare the hole: Dig a hole twice as wide and as deep as the root ball.
  2. Amend soil: Mix native soil with compost or aged manure to enhance nutrients and drainage.
  3. Planting: Place the tree in the hole, ensuring the top of the root ball is level with the soil surface. Backfill gently and water well.
  4. Mulch: Apply a 2-3 inch layer of organic mulch around the base to conserve moisture and suppress weeds, keeping mulch away from the trunk.

Caring for Your Desert Lime Tree

Watering

Although drought-tolerant, young Desert Lime trees need regular watering during the first year. Water deeply once or twice a week depending on rainfall. Established trees require less frequent watering but benefit from occasional deep watering during dry spells.

Fertilizing

Apply a balanced citrus fertilizer in early spring and late summer. Look for fertilizers with micronutrients like magnesium and iron that citrus trees need. Follow package instructions carefully.

Pruning

Prune to shape the tree and remove dead or damaged branches in late winter or early spring. Pruning encourages airflow, reduces disease risk, and promotes healthy growth.

Pest and Disease Management

Desert Limes are generally resistant to many pests and diseases. However, watch out for:

  • Aphids: Can be controlled with insecticidal soap.
  • Scale insects: Treat with horticultural oil if infestation occurs.
  • Root rot: Prevent by ensuring proper soil drainage.

Harvesting and Using Desert Limes

When to Harvest

Desert Lime fruits ripen in late summer to early fall. The fruit turns from green to a pale yellow-green when ripe. They are best harvested when firm but slightly soft to the touch.

How to Harvest

Use pruning shears or gently twist the fruit off the branches to avoid damaging the tree.

Culinary Uses

Desert Limes have a uniquely intense lime flavor with subtle floral notes. Use them:

  • Fresh in salads or garnishes
  • In marmalades, jams, and chutneys
  • To flavor fish and poultry dishes
  • In cocktails and refreshing beverages
  • As a natural flavoring for desserts and baked goods

Tips for Growing Desert Lime Trees Successfully in Texas

  1. Start with quality nursery stock: Purchase trees from reputable Texas nurseries specializing in citrus.
  2. Mulch wisely: Avoid piling mulch against the trunk to prevent rot.
  3. Protect from frost: Use frost cloth or move container-grown trees indoors during extreme cold snaps.
  4. Keep an eye on watering: Overwatering is a common mistake—let soil dry between waterings after establishment.
  5. Use companion planting: Plant herbs like basil or marigolds nearby to deter pests naturally.

Growing Desert Lime Trees in Containers

If space is limited or you want to protect young trees from frost, container planting is a great option.

  • Use large pots (at least 15-20 gallons) with well-draining potting mix.
  • Water regularly, as pots dry out faster than ground soil.
  • Move containers indoors or to sheltered areas during cold weather.

Common Challenges and Solutions

Poor Fruit Set

Cause: Insufficient pollination or extreme heat.
Solution: Plant more than one tree for cross-pollination, and provide shade during peak afternoon sun if needed.

Leaf Drop

Cause: Overwatering, underwatering, or pest infestation.
Solution: Adjust watering, inspect for pests, and prune affected branches.

Slow Growth

Cause: Poor soil nutrition or compacted soil.
Solution: Fertilize properly and aerate soil around roots.


Final Thoughts

Growing Desert Lime trees in Texas offers a rewarding opportunity to cultivate a resilient, drought-tolerant fruit tree with unique flavors and health benefits. By selecting the right site, providing proper care, and harvesting at the right time, you can enjoy fresh, tangy limes straight from your garden.

With patience and a little effort, the Desert Lime can become a standout feature of your Texas landscape—delighting your taste buds and impressing your guests with its exotic flair.

How to Grow Gooseberries for Tart Treats: A Complete Guide

How to Grow Gooseberries for Tart Treats: A Complete Guide

If you’re looking to add a unique and flavorful fruit to your garden, gooseberries are an excellent choice. These tart, juicy berries are perfect for pies, jams, sauces, and fresh eating. Gooseberries thrive in cooler climates, making them a popular fruit for gardeners across North America and Europe. With their thorny bushes and delicious fruit, gooseberries have a rich history and culinary versatility.

This guide will take you through everything you need to know about growing gooseberries—from planting and care to harvesting and using your tart treats. Whether you’re a beginner or experienced gardener, you’ll learn how to successfully cultivate this underrated berry in your backyard.


What Are Gooseberries?

Gooseberries (Ribes uva-crispa) are small, round berries that come in green, red, purple, or yellow varieties. They have a distinct tart flavor that makes them ideal for cooking and baking. Native to Europe, northwest Africa, and parts of Asia, gooseberries grow on hardy deciduous shrubs that are often thorny.

Unlike many berries, gooseberries tolerate cooler climates and partial shade, making them adaptable to a variety of garden settings. Their bushes also offer ornamental value, with attractive foliage and spring blossoms.


Choosing the Right Gooseberry Variety

Choosing the right variety depends on your climate, taste preference, and use. Gooseberries are generally divided into two types:

1. European Gooseberries (Ribes uva-crispa)

  • Larger fruit with a stronger tart flavor
  • Often thorny bushes
  • Best for cooler climates with cold winters
  • Popular varieties: ‘Invicta,’ ‘Hinnonmaki Red,’ ‘Poorman,’ ‘Captivator’

2. American Gooseberries (Ribes hirtellum)

  • Smaller, sweeter berries
  • Thornless or less thorny bushes
  • More resistant to common diseases
  • Hybrid varieties often have the best disease resistance

When choosing a variety, look for one that suits your climate and has good disease resistance, especially to powdery mildew, a common issue for gooseberries.


Where to Plant Gooseberries

Gooseberries prefer a cool to temperate climate and grow best in zones 3 to 8. They can tolerate partial shade but produce the best fruit in full sun (at least 6 hours of direct sunlight daily).

Site selection tips:

  • Well-drained soil rich in organic matter
  • Slightly acidic to neutral pH (6.0 to 6.5)
  • Shelter from strong winds (which can damage thorny branches)
  • Avoid planting near blackcurrants to prevent disease transmission

Preparing the Soil for Gooseberries

Healthy soil is essential for growing productive gooseberry bushes.

  1. Test your soil pH: Gooseberries prefer slightly acidic soil. Amend the soil if needed with lime (to raise pH) or sulfur (to lower pH).
  2. Improve drainage: Gooseberries dislike waterlogged soil. Mix in organic compost or aged manure to improve soil texture and fertility.
  3. Add mulch: Mulch helps retain moisture, suppress weeds, and regulate soil temperature.

Planting Gooseberries: Step-by-Step

You can plant gooseberries either from bare-root plants or container-grown bushes.

  1. Timing: Plant in early spring or late fall while the bush is dormant.
  2. Spacing: Space plants 3-5 feet apart to allow for airflow and growth.
  3. Digging the hole: Make a hole about twice the width of the root ball and deep enough to cover the roots comfortably.
  4. Plant depth: Position the bush so the graft union (if any) is just above soil level.
  5. Backfill and water: Fill the hole with soil, firm it gently, and water thoroughly to settle the soil.
  6. Mulch: Apply a 2-3 inch layer of organic mulch around the base, avoiding direct contact with the stem.

Caring for Your Gooseberry Bush

Watering

Keep the soil moist but not waterlogged, especially during dry spells. Water deeply once or twice a week to encourage deep root growth.

Fertilizing

Apply a balanced fertilizer in early spring before new growth appears. A 10-10-10 NPK fertilizer works well. Alternatively, side-dress with compost or well-rotted manure annually.

Pruning

Pruning encourages better air circulation, reduces disease risk, and promotes vigorous fruiting.

  • First 2-3 years: Focus on developing a strong framework by removing weak or crossing branches.
  • Mature bushes: Each winter, prune out old, woody stems and keep 4-6 healthy new shoots per plant.
  • Remove any dead or diseased wood promptly.
  • Thin crowded branches to let light reach the center.

Managing Pests and Diseases

Gooseberries are hardy but can face a few challenges.

Common pests:

  • Aphids: Small insects that cluster on new growth. Use insecticidal soap or neem oil.
  • Gooseberry sawfly: Larvae can quickly strip leaves. Handpick larvae or use insecticides early in the season.
  • Spider mites: Cause stippled leaves; keep plants well-watered to deter mites.

Common diseases:

  • Powdery mildew: White powdery coating on leaves and stems. Plant resistant varieties and prune for airflow.
  • Anthracnose: Leaf spots and premature leaf drop. Remove infected leaves and improve spacing.

Harvesting Gooseberries

Gooseberries are usually ready to harvest in mid to late summer, depending on the variety.

  • Look for firm berries that have developed full color (green berries will be more tart; red or purple varieties will be sweeter).
  • Use scissors or pruning shears to clip berries to avoid damage.
  • Handle gently to prevent bruising.
  • You can harvest them underripe for a more tart flavor or wait for full ripeness for sweeter fruit.

Using Your Gooseberries

The tartness of gooseberries makes them perfect for a variety of delicious recipes:

  • Pies and tarts: Classic dessert with a sweet pastry crust.
  • Jams and preserves: Cook down with sugar for tasty spreads.
  • Sauces and chutneys: Pair well with savory dishes like pork or chicken.
  • Smoothies and drinks: Add fresh or frozen berries for tangy flavor.
  • Fresh eating: Some sweeter varieties are enjoyable fresh, especially when fully ripe.

Tips for Success: Growing Gooseberries in Containers

If garden space is limited, gooseberries can be grown in large pots (minimum 15 gallons).

  • Use well-draining potting soil enriched with compost.
  • Place the pot in a sunny location, and water regularly.
  • Prune to keep the bush manageable.
  • Protect from extreme cold by moving pots indoors or to sheltered spots.

Final Thoughts

Growing gooseberries offers a rewarding gardening experience with a harvest of vibrant, flavorful fruit perfect for culinary creativity. By selecting the right variety, preparing your soil properly, and maintaining good care practices, you can enjoy tart treats fresh from your own garden for years to come.

With patience and attention, your gooseberry bushes will flourish, producing an abundance of berries that bring a delightful zing to your kitchen.

How to Grow Clementines in a Patio Pot: A Complete Guide

How to Grow Clementines in a Patio Pot: A Complete Guide

If you’ve ever wanted to grow your own sweet, juicy citrus at home but don’t have space for a full garden orchard — growing clementines in a patio pot is the perfect solution. These small, easy-to-peel, seedless oranges are not only delicious but also surprisingly well-suited for container growing. With a little care and the right setup, you can enjoy a healthy, compact clementine tree on your patio, balcony, or sunny porch.

In this comprehensive guide, we’ll walk you through everything you need to know about growing clementines in a pot — from choosing the right variety to watering, fertilizing, pruning, and harvesting your very own citrus crop.


Why Grow Clementines in a Patio Pot?

Clementines (Citrus × clementina) are prized for their:

  • Sweet, tangy flavor
  • Easy-to-peel skin
  • Compact, bushy growth habit
  • Fragrant, white blossoms
  • Ornamental beauty and year-round greenery

Unlike many other citrus trees, clementines adapt well to container growing. They naturally stay small and can be pruned to fit limited spaces without sacrificing fruit production. Best of all, growing them in pots makes it easy to move them indoors if temperatures dip too low.


Best Clementine Varieties for Containers

When growing in patio pots, choosing a dwarf or semi-dwarf variety ensures a manageable size and robust fruit yield.

Top container-friendly varieties:

🌿 ‘Algerian’ (Common Clementine):

  • Most popular variety worldwide
  • Sweet, juicy, seedless fruits
  • Vigorous but can be pruned to remain compact

🌿 ‘Nules Clementine’:

  • A highly productive, seedless type
  • Rich, sweet flavor
  • Matures earlier than other varieties

🌿 ‘Clemenules’:

  • Mild, low-acid, easy-to-peel fruit
  • Excellent for fresh eating
  • Consistently high-yielding in containers

Look for grafted dwarf or semi-dwarf trees from reputable nurseries or garden centers for the best results in pots.


Choosing the Right Pot for Clementines

Clementine trees require ample space for root development while maintaining good drainage.

Pot selection tips:

  • Size: Start with a 10- to 15-gallon pot (18-24 inches in diameter) for young trees. Mature trees will eventually need a 20- to 25-gallon container.
  • Material: Terracotta, resin, or heavy-duty plastic pots work well. Ensure they’re durable and weather-resistant.
  • Drainage: Make sure the pot has multiple drainage holes to prevent root rot.
  • Saucers: Use a saucer to catch excess water, especially if placing the pot on a patio or balcony.

Ideal Soil for Clementines in Containers

Citrus trees thrive in well-draining, sandy loam soil. For container growing:

  • Use a high-quality potting mix specifically designed for citrus or fruit trees, or make your own mix:
    • 2 parts potting soil
    • 1 part perlite or coarse sand
    • 1 part organic compost

Avoid heavy garden soil, which can compact and suffocate roots in a pot.


Planting Clementines in a Patio Pot

Step-by-step guide:

  1. Fill the pot halfway with the soil mix.
  2. Remove the tree from its nursery pot, gently loosening the root ball.
  3. Place the tree in the center of the new pot, making sure the root crown sits 1-2 inches below the rim.
  4. Backfill with soil, firming gently around the base.
  5. Water deeply until water drains from the bottom holes.
  6. Add a layer of mulch (like shredded bark) around the top to help retain moisture, keeping it a few inches from the trunk.

Sunlight Requirements

Clementines need full sun to thrive and fruit well — at least 6-8 hours of direct sunlight per day.

Ideal locations:

  • South or west-facing patios, decks, or balconies
  • Near a reflective wall or fence for extra warmth
  • Indoors by a sunny, south-facing window in colder months

If growing indoors during winter, consider using a grow light to supplement natural light.


Watering Your Clementine Tree

Clementines prefer consistent, moderate moisture — not too dry and not soggy.

Watering guidelines:

  • Check soil moisture with your finger 2 inches deep.
  • Water when the top 1-2 inches feel dry.
  • Avoid letting the pot sit in standing water.
  • Increase watering during hot, dry weather and reduce in cooler months.

Deep, infrequent watering encourages healthy, drought-resistant roots.


Fertilizing Clementines in a Pot

Potted citrus trees quickly use up nutrients and need regular feeding to stay healthy and productive.

Fertilizer tips:

  • Use a citrus-specific fertilizer rich in nitrogen with balanced phosphorus and potassium (like 6-4-6).
  • Apply from early spring through late summer.
  • Feed every 4-6 weeks following label directions.
  • Reduce or stop fertilizing in fall and winter when growth slows.

Optional: Add trace minerals like magnesium, iron, and zinc through liquid foliar feeds for extra vigor.


Pruning and Shaping

Pruning keeps your patio clementine tree compact, promotes airflow, and encourages more fruit production.

Pruning tips:

  • Trim back any leggy, crossing, or inward-growing branches.
  • Remove dead, damaged, or diseased limbs as needed.
  • In early spring, shape the canopy to encourage a balanced, open structure.
  • Pinch off new growth tips to promote bushier growth if desired.

Avoid over-pruning, as heavy cuts can reduce fruit production for the season.


Protecting from Cold Weather

Clementines are cold-sensitive and should be protected when temperatures drop below 40°F (4°C).

Cold weather tips:

  • Move the pot indoors or into a greenhouse if possible.
  • Cover the tree with frost cloth on chilly nights.
  • Cluster potted plants together for added warmth.
  • Reduce watering slightly in winter to prevent root rot.

If moving indoors, place the pot near a bright, south-facing window and away from heating vents.


Common Pests and Problems

Even in patio pots, clementines can attract pests.

Watch for:

  • Aphids (sticky leaves, curling new growth)
  • Spider mites (fine webbing under leaves)
  • Scale insects (small, brown, shell-like bumps on stems)

Control methods:

  • Spray with neem oil or insecticidal soap.
  • Rinse leaves with a gentle stream of water.
  • Introduce beneficial insects like ladybugs outdoors.

Leaf yellowing is often a sign of overwatering or nutrient deficiency. Adjust care accordingly.


Harvesting Clementines

Clementines typically ripen from late fall to early winter, though timing can vary by variety and climate.

Harvesting tips:

  • Fruit turns a rich orange color when ripe.
  • Taste one to check sweetness before harvesting.
  • Clip fruits off with pruning shears, leaving a short stem attached.
  • Ripe clementines stay fresh on the tree for several weeks.

Expect your potted clementine to begin fruiting 2-3 years after planting, depending on its size and care.


Final Thoughts

Growing clementines in a patio pot is a rewarding way to enjoy fresh, homegrown citrus even in limited outdoor spaces. With their manageable size, delightful fragrance, and delicious fruit, clementine trees add charm and productivity to patios, balconies, and sunrooms alike.

By choosing the right variety, using quality soil and containers, and following simple care practices, you can look forward to harvesting your own sun-ripened, seedless clementines year after year. So why not add a splash of Mediterranean sunshine to your home garden today?

How to Grow Date Palms in Desert Climates: A Complete Guide

How to Grow Date Palms in Desert Climates: A Complete Guide

Date palms (Phoenix dactylifera) have been treasured for thousands of years, particularly in arid and desert regions of the world. Their ability to thrive in hot, dry climates while producing rich, sweet fruits makes them a staple of Middle Eastern, North African, and Southwestern U.S. landscapes. Whether you’re looking to cultivate these iconic trees for their delicious dates or simply for their ornamental value, growing date palms in a desert environment is a rewarding, achievable endeavor.

In this detailed guide, we’ll cover everything you need to know — from choosing the right variety and planting to ongoing care and harvesting. If you’ve ever dreamed of having your own oasis of towering date palms, let’s get started.


Why Date Palms Thrive in Desert Climates

Date palms are naturally suited for desert conditions because of their:

  • High heat tolerance (surviving up to 120°F or more)
  • Deep, drought-resistant root systems
  • Ability to handle low humidity
  • Preference for sandy, well-drained soils

Unlike many fruit trees, date palms rely on extreme temperatures to trigger flowering and fruit ripening, making deserts an ideal environment for their cultivation.


Best Date Palm Varieties for Desert Growing

While there are over 1,500 date varieties worldwide, a few stand out for their quality and suitability for desert regions:

‘Medjool’

  • The most popular commercial variety
  • Large, soft, sweet fruit with caramel notes
  • Tolerates extreme desert heat well

‘Deglet Noor’

  • Known as the “queen of dates”
  • Medium-sized, semi-dry dates with a honey-like flavor
  • Widely grown in California and Arizona

‘Barhi’

  • Small, soft, honey-sweet fruits
  • Consumed fresh (at khalal stage) or dried
  • Early maturing and heat-loving

‘Zahidi’

  • Medium-sized, golden-brown fruits
  • Firmer texture, slightly nutty flavor
  • Excellent for long-term storage

How to Plant Date Palms in Desert Climates

1. Choose a Suitable Location

Date palms need full sun exposure for at least 8-10 hours a day. Select an open, unobstructed area away from buildings or tall trees that could shade them.

Important considerations:

  • Soil must be well-drained and sandy.
  • Avoid planting in low-lying spots where water might collect.

2. Prepare the Soil

Though date palms are tolerant of poor soils, they grow best in sandy, loamy soils with a neutral to slightly alkaline pH (7.0-8.5).

Soil preparation tips:

  • Dig a wide, deep hole (about 3 feet wide by 3 feet deep).
  • Mix the native soil with coarse sand and aged compost or well-rotted manure to improve drainage and fertility.
  • Avoid heavy clay soils unless thoroughly amended.

3. Planting Process

  • Carefully remove the sapling from its container.
  • Place it in the hole, ensuring the root ball’s top sits level with the ground surface.
  • Backfill with the soil mixture.
  • Firm the soil around the base.
  • Water deeply immediately after planting.

If planting multiple date palms, space them 20-30 feet apart to allow for mature canopy growth.


Watering Date Palms in Desert Conditions

Although drought-tolerant once established, young date palms require regular watering, especially during their first 2-3 years.

Watering guidelines:

  • First year: Water every 2-3 days in summer and once a week in cooler months.
  • Established trees (after 3 years): Deeply water once a week during hot seasons and every 2-3 weeks in winter.

Pro Tip: Use deep watering techniques like basins or drip irrigation to encourage roots to grow downward, making the palm more drought-resistant.


Fertilizing Date Palms

To promote healthy growth and good fruit production, feed your date palms regularly.

Fertilizer recommendations:

  • Use a balanced fertilizer (8-8-8 or 10-10-10) with added magnesium and trace elements.
  • Apply fertilizer three times a year: early spring, midsummer, and early fall.
  • Supplement with organic compost or aged manure around the root zone for improved soil structure and slow-release nutrients.

Pruning and Maintenance

Date palms naturally shed their old fronds, but routine maintenance keeps them neat and productive.

Pruning tips:

  • Remove dead, dry, or drooping fronds annually.
  • Avoid excessive pruning, as fronds help shade the trunk and reduce sunscald.
  • Wear gloves and use a pruning saw — frond bases are sharp.

Pest management:

  • Common pests include palm weevils, scale insects, and red spider mites.
  • Control with horticultural oils or insecticidal soaps if infestations appear.

Pollination and Fruit Production

Most date palm varieties are dioecious, meaning male and female flowers grow on separate trees. In commercial orchards and home gardens, this means you need at least one male palm for every 20-25 female palms for fruit production.

Pollination options:

  • Natural wind pollination (less reliable in isolated gardens)
  • Hand pollination, where pollen is collected from male flowers and manually brushed or shaken onto female flowers.

Hand pollination significantly increases fruit set and is commonly practiced in modern date farming.


Harvesting Dates

Date palms typically take 4-8 years to begin fruiting and can live and produce fruit for over 80-100 years.

Date ripening stages:

  1. Kimri (Unripe, green)
  2. Khalal (Crunchy, yellow or red)
  3. Rutab (Soft, ripe, brown)
  4. Tamar (Fully dried, wrinkled)

Harvesting tips:

  • Harvest dates at the Rutab or Tamar stage depending on your preference.
  • Use a tall ladder and safety harness for mature palms.
  • Handpick or use date harvesting poles.

After harvesting, dates can be:

  • Eaten fresh
  • Sun-dried for preservation
  • Stored in airtight containers

Winter Care for Date Palms in the Desert

Desert regions can experience occasional frost in winter. While mature date palms tolerate mild cold, young palms are vulnerable.

Cold protection strategies:

  • Wrap the trunk and crown in burlap or frost cloth if temperatures drop below 28°F (-2°C).
  • Water the palm deeply before cold nights — moist soil retains more heat.
  • Use windbreaks or plant near sun-heated walls in marginal areas.

Common Issues and Solutions

1. Yellowing Leaves:
Often a sign of nutrient deficiency, especially nitrogen or magnesium. Fertilize with a balanced fertilizer and supplement with Epsom salt for magnesium.

2. Root Rot:
Caused by overwatering or poor drainage. Always plant in well-drained soil and avoid waterlogging.

3. Pest Damage:
Inspect regularly for palm weevils or scale. Apply horticultural oil or neem-based products when necessary.


Final Thoughts

Date palms are symbols of life, resilience, and sustenance in desert regions worldwide. With the right care, they not only enhance your landscape with their towering, graceful appearance but also reward you with bountiful, nutrient-rich fruits.

Whether you’re a backyard gardener in Arizona, New Mexico, or Nevada, or managing a desert farm, following these growing practices will help you cultivate healthy, productive date palms for years to come.

Ready to turn your desert property into a lush, fruitful oasis? Start planting your date palms today and savor the harvests for generations!

How to Grow Mangoes in a Greenhouse: A Complete Guide

How to Grow Mangoes in a Greenhouse: A Complete Guide

Who doesn’t love the taste of a sweet, juicy mango on a warm day? This tropical fruit is beloved worldwide for its rich flavor, sunny color, and versatility in everything from smoothies to salsas. While mango trees naturally thrive in hot, humid climates, with a little creativity and care, you can successfully grow them in a greenhouse — even in regions where outdoor conditions aren’t ideal.

If you’ve ever dreamed of harvesting your own homegrown mangoes, this guide will walk you through the entire process of growing mangoes in a greenhouse, from selecting the right variety to planting, caring, and enjoying your harvest.


Why Grow Mangoes in a Greenhouse?

Mangoes (Mangifera indica) are native to South Asia but have found homes in tropical and subtropical regions around the world. They require consistently warm temperatures, plenty of sunshine, and protection from frost — which makes greenhouses a perfect environment for them in cooler or variable climates.

Benefits of growing mangoes in a greenhouse:

  • Extend the growing season
  • Protect from frost, wind, and pests
  • Control humidity and temperature for ideal conditions
  • Increase fruit production and quality
  • Grow tropical fruits in non-tropical regions

Best Mango Varieties for Greenhouse Growing

Not all mango trees are suited for greenhouse cultivation. Large, traditional varieties can quickly outgrow confined spaces. The key is to choose dwarf or semi-dwarf cultivars that thrive in pots and controlled environments.

Recommended varieties:

  1. ‘Nam Doc Mai’
    • Compact growth habit
    • Sweet, fiberless fruit
    • Ideal for pots and greenhouses
  2. ‘Carrie’
    • Dwarf variety with rich, aromatic fruit
    • Naturally disease-resistant
    • Stays manageable in size
  3. ‘Pickering’
    • Perfect for container growing
    • Early fruiting and heavy producer
  4. ‘Cogshall’
    • Small tree with full-sized fruit
    • Beautiful ornamental foliage

How to Plant Mangoes in a Greenhouse

1. Select a Suitable Pot

For greenhouse mangoes, start with a large, sturdy pot (at least 15-25 gallons) with ample drainage holes. As mangoes grow deep root systems, using a tall container allows roots to expand properly.

Ideal pot materials: Terracotta, heavy-duty plastic, or fabric grow bags.

2. Use the Right Soil Mix

Mangoes prefer well-draining, slightly acidic to neutral soil (pH 5.5-7.5).

Best soil blend:

  • 60% loamy garden soil
  • 30% coarse sand or perlite for drainage
  • 10% organic compost or aged manure

Ensure good aeration to prevent root rot in the greenhouse’s humid conditions.

3. Planting Process

  • Fill the pot halfway with soil mix.
  • Gently remove the mango sapling from its nursery container.
  • Place it in the center of the pot, keeping the graft line (if grafted) above soil level.
  • Backfill and firm the soil gently around the base.
  • Water thoroughly after planting.

Greenhouse Temperature and Light Requirements

Mangoes are heat lovers and require consistent warmth to thrive and produce fruit.

Ideal greenhouse conditions:

  • Daytime temperature: 75°F to 85°F (24°C to 29°C)
  • Nighttime temperature: Not below 55°F (13°C)
  • Humidity: 50-70%
  • Light: At least 8-10 hours of direct sunlight or supplemental grow lights.

Tip: Use a greenhouse thermometer and hygrometer to regularly monitor temperature and humidity.


Watering and Feeding Mango Trees

Watering

Mango trees prefer moderate but regular watering, especially during active growth and fruiting.

  • Keep soil evenly moist but never soggy.
  • Allow the top 1-2 inches of soil to dry out between waterings.
  • Reduce watering in winter when the tree enters semi-dormancy.

Feeding

Feed mango trees with a balanced, slow-release fertilizer (10-10-10) or a specialized citrus/tropical plant fertilizer.

Fertilizing schedule:

  • Every 6-8 weeks during spring and summer
  • Suspend or reduce feeding in fall and winter

Apply organic compost or liquid seaweed extract for extra micronutrients.


Pruning and Training in a Greenhouse

Greenhouse-grown mango trees need regular pruning to keep their size manageable and promote productive growth.

When to prune:

  • After harvesting
  • Before the onset of new growth in early spring

How to prune:

  • Remove weak, dead, or crossing branches.
  • Cut back long shoots to maintain a compact, bushy shape.
  • Thin inner branches to improve airflow and light penetration.

For limited greenhouse spaces, consider training mango trees as espaliers or against trellises.


Pollination and Fruit Development

Most mango varieties are self-fertile but benefit from insect activity for improved fruit set. In greenhouses, natural pollination might be limited, so manual pollination can help.

Manual pollination tips:

  • Use a soft brush or cotton swab to transfer pollen between flowers.
  • Do this during the morning hours when flowers are most receptive.
  • Repeat daily during peak flowering.

Fruit setting typically occurs within a month of flowering.


Common Pests and Problems

Even in controlled greenhouse conditions, mango trees can face a few challenges.

Watch out for:

  • Spider mites: Fine webbing and leaf stippling.
  • Mealybugs: White, cottony masses on stems and leaves.
  • Aphids: Sticky honeydew and distorted leaves.
  • Root rot: From overwatering or poor drainage.

Solutions:

  • Regularly inspect plants.
  • Spray with neem oil or insecticidal soap.
  • Maintain airflow and clean greenhouse surfaces.
  • Use sticky traps for flying insects.

Harvesting Mangoes in a Greenhouse

Depending on the variety, mangoes take 100-150 days from flowering to ripening. Fruits are typically ready when:

  • The skin turns color (green to yellow, orange, or red).
  • The fruit emits a sweet aroma.
  • It yields slightly to gentle pressure.

To harvest:

  • Use clean, sharp pruning shears.
  • Leave a small section of stem attached to the fruit.
  • Ripen mangoes at room temperature for a few days if picked slightly underripe.

Winter Care for Greenhouse Mango Trees

In cooler months, greenhouse temperatures can drop, so it’s crucial to maintain warmth for your tropical plants.

Winter care tips:

  • Use heaters or heat mats if temperatures fall below 55°F.
  • Reduce watering to prevent root rot during dormancy.
  • Avoid fertilizing until active growth resumes in spring.
  • Move pots away from cold greenhouse walls or drafty areas.

Final Thoughts

Growing mangoes in a greenhouse allows gardeners in cooler climates to enjoy the thrill of cultivating this exotic, flavorful fruit. With the right variety selection, consistent warmth, ample light, and a bit of care, you can successfully nurture lush, fruit-laden mango trees right in your backyard greenhouse.

Whether you’re craving homegrown mango smoothies, jams, or fresh slices on a summer day, this rewarding gardening adventure is worth every effort. So, set up your greenhouse, choose your favorite dwarf mango variety, and start growing your own taste of the tropics today!

How to Grow Passionfruit on a Trellis: A Complete Guide

How to Grow Passionfruit on a Trellis: A Complete Guide

Passionfruit vines are one of the most rewarding plants you can grow if you’re looking for a stunning, fast-growing climber that produces delicious, aromatic fruits. Known for their glossy foliage, beautiful purple or white flowers, and sweet-tart fruits packed with pulp and seeds, passionfruit vines thrive in warm climates and grow particularly well when trained on a trellis.

If you’re eager to enjoy homegrown passionfruit while adding a lush vertical feature to your garden, this detailed guide will walk you through everything you need to know — from choosing the right variety to planting, trellising, and harvesting.


Why Grow Passionfruit on a Trellis?

Passionfruit vines are vigorous climbers with tendrils that naturally seek out vertical structures. A trellis provides support, encourages healthy air circulation, and makes harvesting easier. Plus, a trellis transforms the vine into a beautiful green curtain filled with exotic flowers and hanging fruits — a garden showpiece and edible harvest all in one.

Benefits of using a trellis:

  • Keeps fruits off the ground and away from pests.
  • Prevents tangled vines and overcrowding.
  • Allows better sun exposure for foliage and fruits.
  • Enhances airflow, reducing disease risks.
  • Makes maintenance and harvesting much easier.
  • Adds privacy, shade, or a decorative element to your outdoor space.

Choosing the Right Passionfruit Variety

Before you start, pick a variety suited to your climate and taste preferences. The two most popular types are:

1. Purple Passionfruit (Passiflora edulis)

  • Flavor: Sweet and aromatic
  • Fruit size: Small to medium (egg-sized)
  • Climate: Thrives in subtropical and mild temperate areas
  • Cold hardiness: Can tolerate light frost

2. Yellow Passionfruit (Passiflora edulis f. flavicarpa)

  • Flavor: Slightly more tart but still aromatic
  • Fruit size: Larger than purple types
  • Climate: Prefers tropical and warmer subtropical zones
  • Cold hardiness: Less tolerant of frost

For southern states like Florida, Texas, and California, both varieties can do well, depending on local microclimates.


How to Plant Passionfruit on a Trellis

1. Site Selection

Choose a sunny location that receives at least 6-8 hours of direct sunlight daily. Passionfruit vines thrive in warmth and require well-draining soil.

Ideal spot: Along fences, garden walls, or purpose-built trellises where vines can climb and spread.

2. Soil Preparation

  • Soil type: Loamy, sandy soil with good drainage
  • pH level: Slightly acidic to neutral (5.5 to 7.0)
  • Work in organic compost or aged manure before planting to improve fertility.

3. Building the Trellis

Passionfruit vines are heavy and fast-growing, so build a sturdy trellis capable of supporting their weight and sprawling habit.

Trellis ideas:

  • Horizontal wire supports attached to posts
  • Arched trellises
  • Pergolas or overhead frames
  • Chain-link fences or lattice panels

Use galvanized wire or garden twine for additional support strands every 12-18 inches vertically.

4. Planting the Vine

  • Plant in spring or early summer after the danger of frost has passed.
  • Dig a hole twice the width and depth of the root ball.
  • Gently loosen roots and place the plant in the hole.
  • Backfill with soil mixed with compost and water deeply.
  • Space multiple plants 8-10 feet apart to prevent overcrowding.

Training and Supporting the Vine

As the vine grows, guide its tendrils toward the trellis using soft ties or string. Pinch off lateral growth near the base to encourage upward growth initially.

Tips for training passionfruit vines:

  • Regularly check that new shoots are directed along the trellis.
  • Prune lower branches to create a clear trunk and reduce pests.
  • Encourage a fan shape or espalier pattern for even coverage and easier harvesting.

Caring for Your Passionfruit Vine

1. Watering

Passionfruit vines require consistent moisture, especially during flowering and fruiting:

  • Water deeply once or twice a week, depending on rainfall.
  • Avoid waterlogging, which can cause root rot.

2. Fertilizing

  • Apply a balanced organic fertilizer (10-10-10) every 4-6 weeks during the growing season.
  • Avoid excessive nitrogen as it encourages foliage growth at the expense of flowers and fruit.
  • Top-dress with compost in spring for extra nutrients.

3. Pruning

Regular pruning improves airflow, promotes new growth, and encourages fruit production.

  • Remove dead, weak, or overcrowded stems in late winter or early spring.
  • After the first year, cut back old wood to stimulate fresh shoots.
  • Thin out overgrown areas to maintain access to fruits and prevent disease.

Common Pests and Problems

While passionfruit vines are relatively hardy, keep an eye out for these issues:

  • Aphids and scale insects: Spray with insecticidal soap or neem oil.
  • Fruit fly (in tropical areas): Use exclusion bags or traps.
  • Root rot: Avoid overwatering and improve drainage.
  • Brown spot disease: Remove affected leaves and apply fungicide if needed.

Healthy, well-maintained vines on a trellis are less prone to problems due to improved air circulation and sun exposure.


Pollination and Fruiting

Most purple passionfruit varieties are self-pollinating, but cross-pollination by bees improves fruit set. Yellow types often need cross-pollination from another plant.

To encourage pollinators:

  • Plant bee-friendly flowers nearby.
  • Avoid using pesticides during flowering.

Fruit Maturity: Passionfruits ripen about 70-80 days after flowering. They naturally drop when fully ripe or can be handpicked when skin starts to wrinkle.


Harvesting Passionfruit

  • Gently twist or snip fruits when they turn dark purple or yellow and feel slightly heavy.
  • Store at room temperature until slightly wrinkled for best flavor.
  • Fruits last 2-3 weeks in the fridge or can be frozen for longer storage.

Enjoy the pulp fresh, in smoothies, desserts, syrups, or cocktails.


Propagating Passionfruit Vines

You can grow new vines from:

  • Seeds: Clean and dry seeds from ripe fruit. Plant in seed trays and transplant once established.
  • Cuttings: Take 6-8 inch healthy stem cuttings, remove lower leaves, and root in moist potting mix.
  • Grafting: Used in commercial growing to combine strong rootstocks with productive varieties.

Final Thoughts

Growing passionfruit on a trellis is one of the most rewarding ways to combine function and beauty in your garden. With proper site selection, trellis design, and care, you can enjoy an abundance of fresh, aromatic fruits while adding a lush, flowering green curtain to your outdoor space.

Whether you’re an experienced gardener or a beginner, passionfruit vines are fast-growing, forgiving, and highly productive — a perfect project for gardeners in warm, sunny regions.