How to Grow Seckel Pears in the Backyard

How to Grow Seckel Pears in the Backyard

If you’re dreaming of cultivating a fruit tree that’s both charming in appearance and yields irresistibly sweet, bite-sized pears, Seckel pears should be at the top of your list. Known as “sugar pears” for their naturally honeyed flavor, Seckel pears are a delightful, low-maintenance option for home orchards or backyard gardens. With their compact size, cold tolerance, and ornamental spring blossoms, these petite pears are perfect for gardeners seeking beauty and bounty in one package.

In this guide, we’ll walk you through everything you need to know to successfully grow Seckel pears in your backyard — from choosing the right planting site to harvesting those golden fruits.


What Are Seckel Pears?

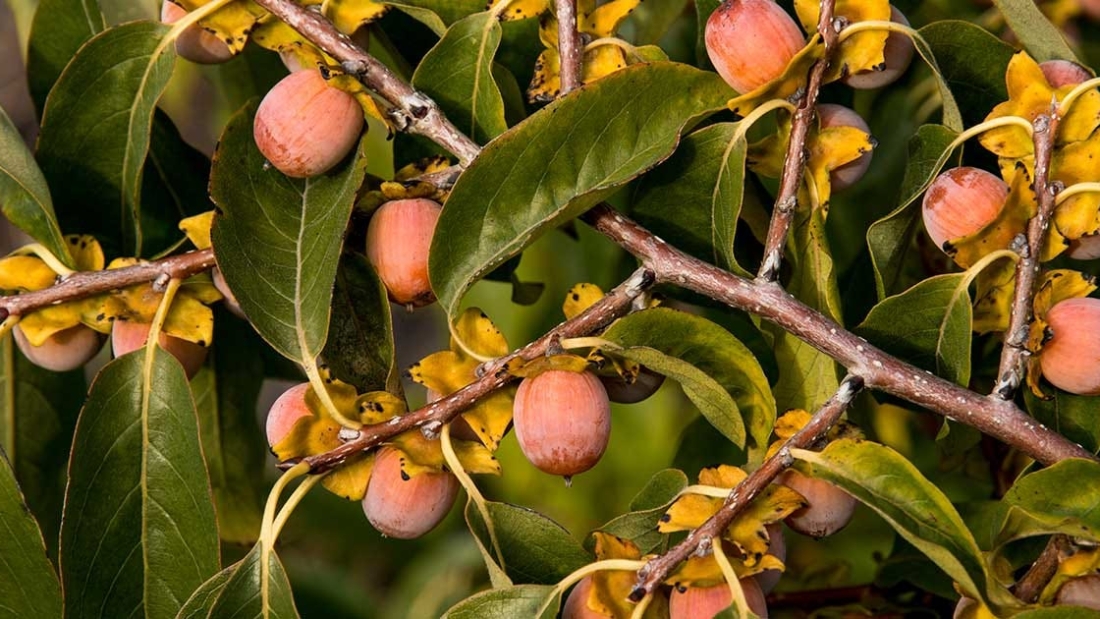
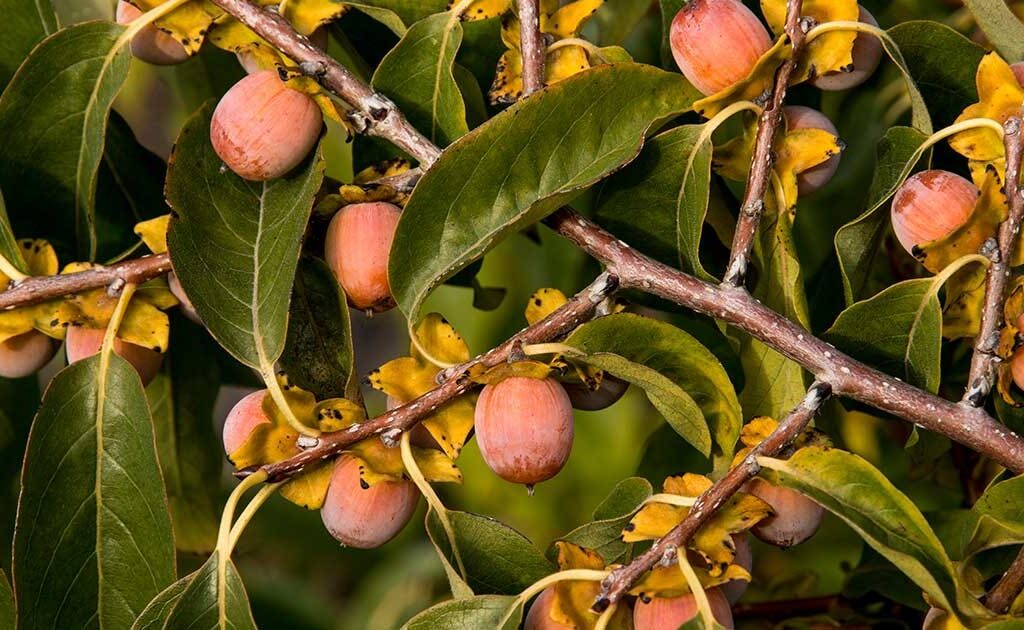
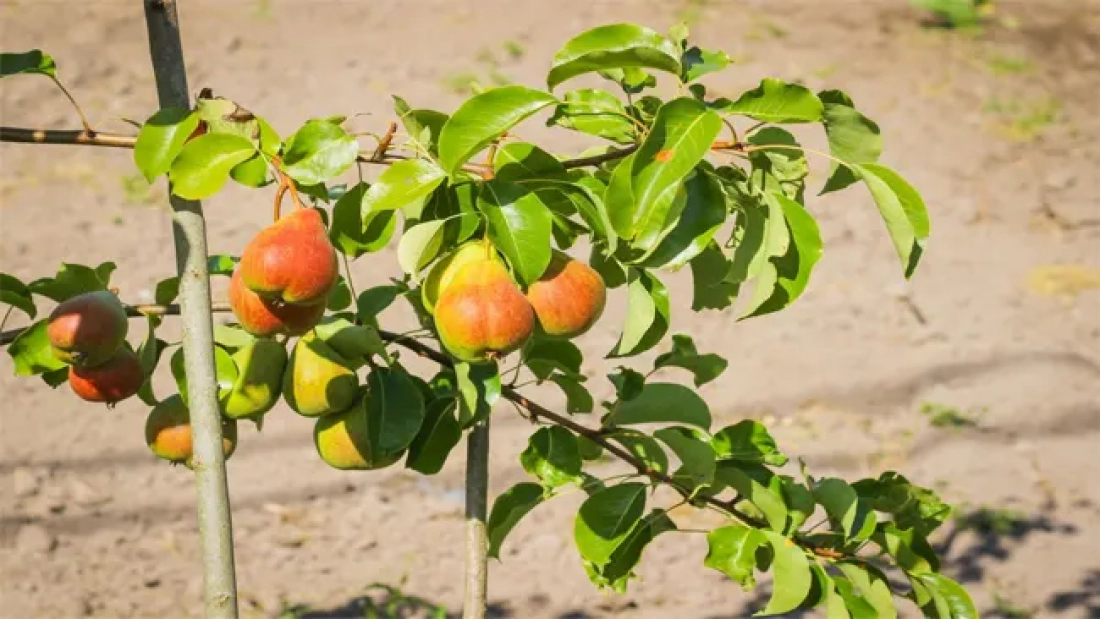
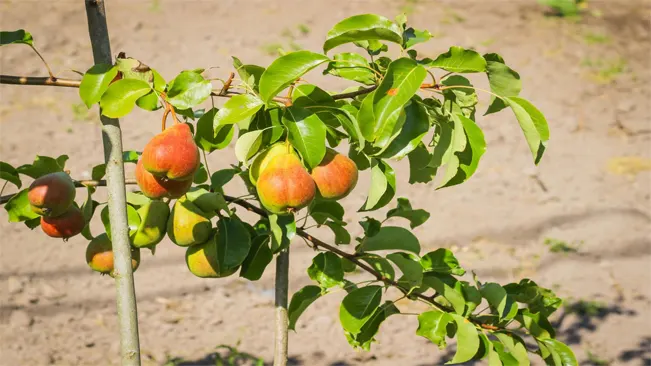
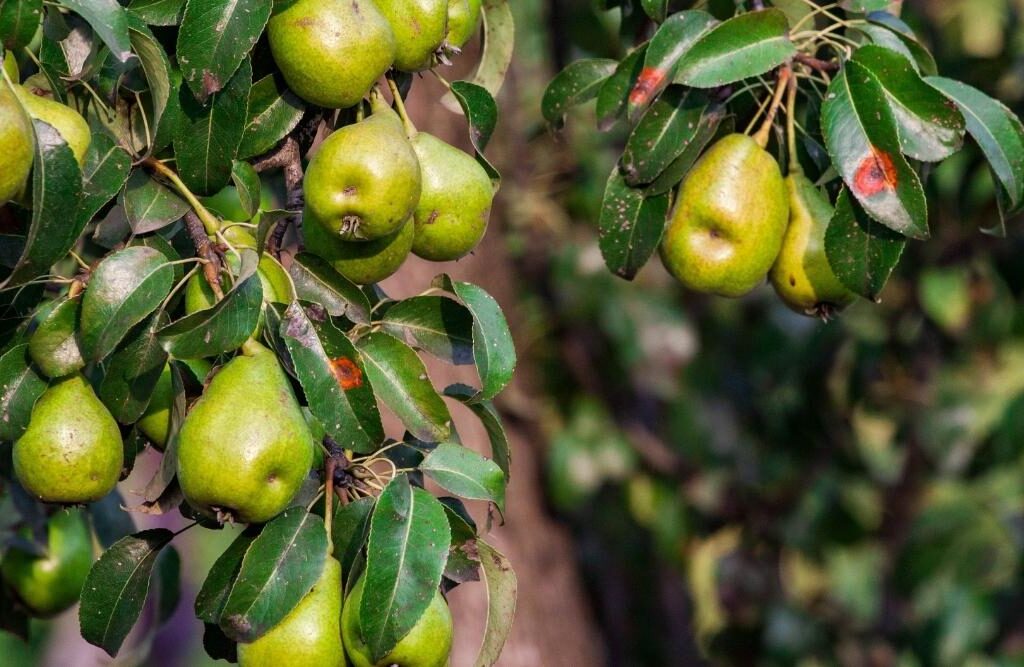
Seckel pears (Pyrus communis ‘Seckel’) are believed to be native to the United States and are often considered the only truly American pear variety. These small, round fruits have a russeted greenish-yellow skin with a red blush and are highly prized for their intensely sweet, spicy flavor.

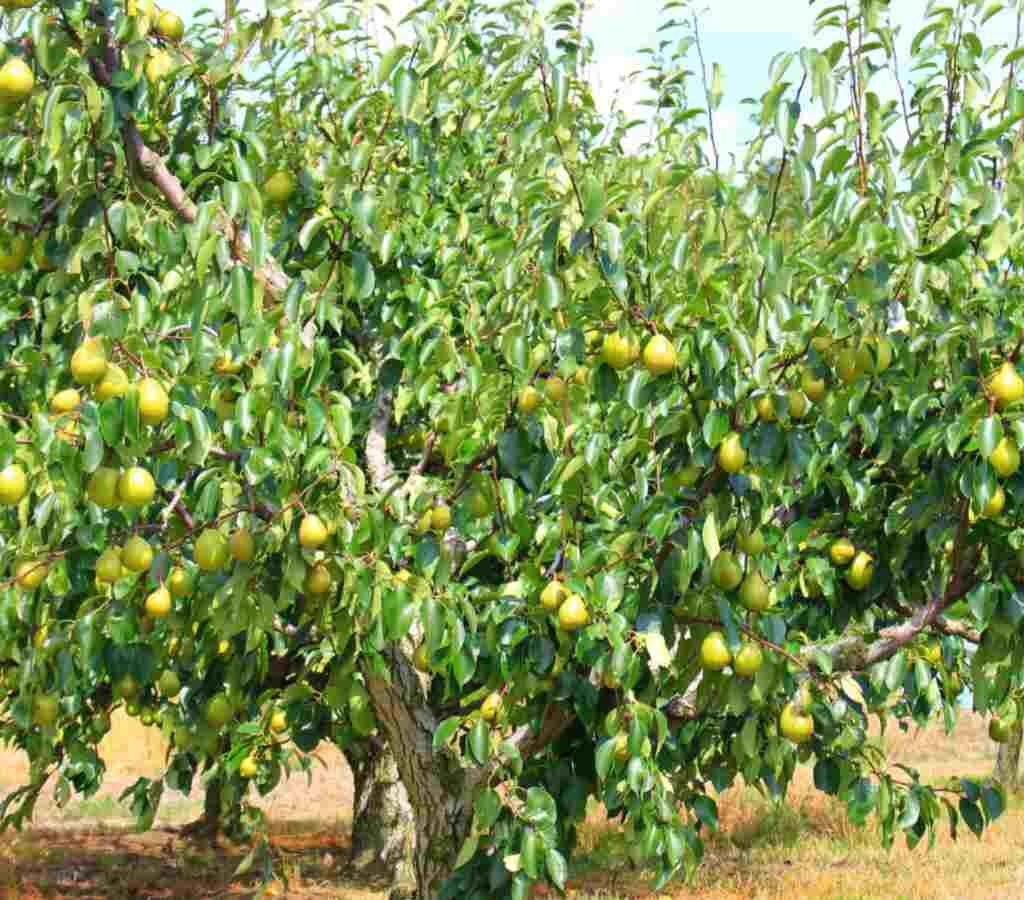
The tree itself is compact, typically reaching 10–15 feet tall, making it a superb choice for small gardens and backyard orchards. Besides producing delectable fruit, Seckel pear trees put on a dazzling display of white blossoms in early spring and offer lush, glossy green foliage through summer.


Choosing the Right Location

Like most fruit trees, Seckel pears thrive in sunny, well-drained locations. When selecting a site, consider the following:

  • Sunlight: Aim for a spot that receives at least 6–8 hours of direct sunlight daily. This ensures healthy growth, abundant flowers, and sweet, fully ripened fruit.
  • Soil: Seckel pears prefer loamy, well-drained soil with a slightly acidic to neutral pH of 6.0–7.0. Avoid planting in low-lying areas prone to waterlogging.
  • Airflow: Good air circulation helps prevent fungal diseases such as fire blight, which can affect pear trees.
  • Space: Allow at least 12–15 feet of spacing between trees to give them room to spread and grow.

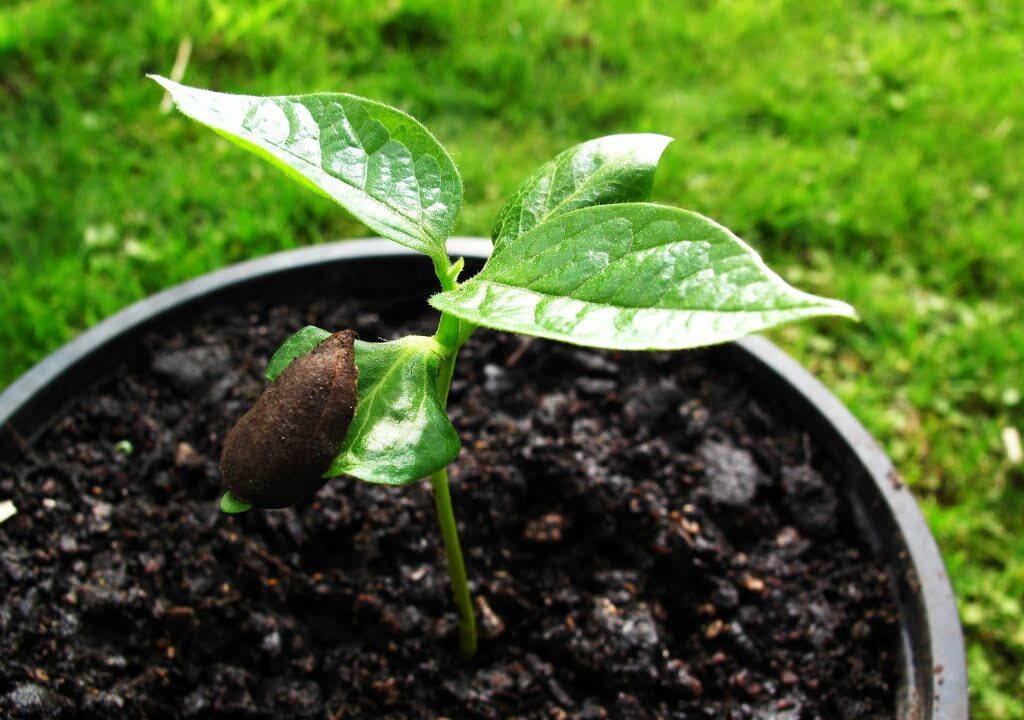
When and How to Plant Seckel Pear Trees

Best Planting Time:

The ideal time to plant Seckel pear trees is early spring or late fall when the tree is dormant and soil is workable.

Planting Steps:

  1. Dig the Hole: Create a planting hole twice as wide and as deep as the root ball or bare-root system.
  2. Prepare the Soil: Mix in organic compost or aged manure to improve soil texture and fertility.
  3. Position the Tree: Place the tree in the hole so the graft union (the slightly swollen area above the roots) sits 2–3 inches above the soil line.
  4. Backfill and Water: Fill the hole with soil, gently tamp it down, and water thoroughly to eliminate air pockets.
  5. Mulch: Apply a 2–4 inch layer of organic mulch like wood chips or shredded bark around the base, keeping it a few inches away from the trunk.

Caring for Seckel Pear Trees

1. Watering

  • Young trees need consistent moisture — water deeply once a week during the first growing season.
  • Mature trees are moderately drought-tolerant but benefit from regular watering, especially during dry spells or fruit development.

2. Fertilizing

  • Use a balanced, slow-release fertilizer (10-10-10) in early spring.
  • Avoid excessive nitrogen, which promotes leafy growth at the expense of fruit production.

3. Pruning

  • Prune during late winter or early spring while the tree is dormant.
  • Remove dead, damaged, or crossing branches.
  • Maintain an open canopy shape for better light penetration and airflow.

4. Pollination

Although Seckel pears are partially self-pollinating, you’ll get a much better harvest if you plant another European pear variety like Bartlett or Anjou nearby for cross-pollination.

5. Pest & Disease Management

Common issues include:

  • Fire blight: Prune affected areas immediately, disinfecting tools between cuts.
  • Pear psylla and codling moths: Use horticultural oil in early spring and monitor for infestations.

Consider using organic practices like beneficial insects or neem oil to manage pests naturally.


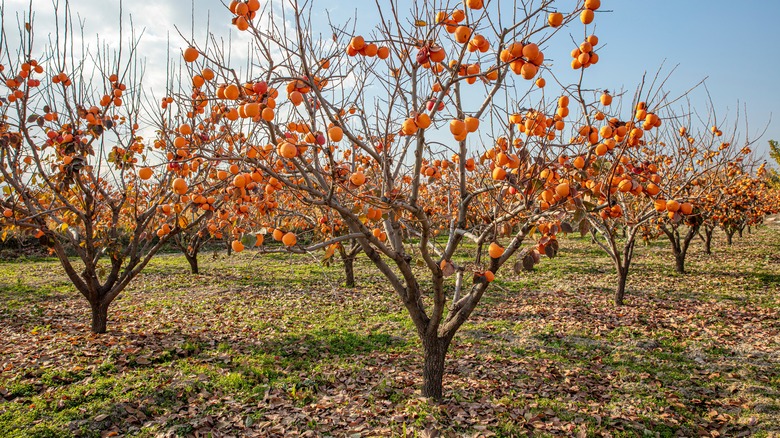
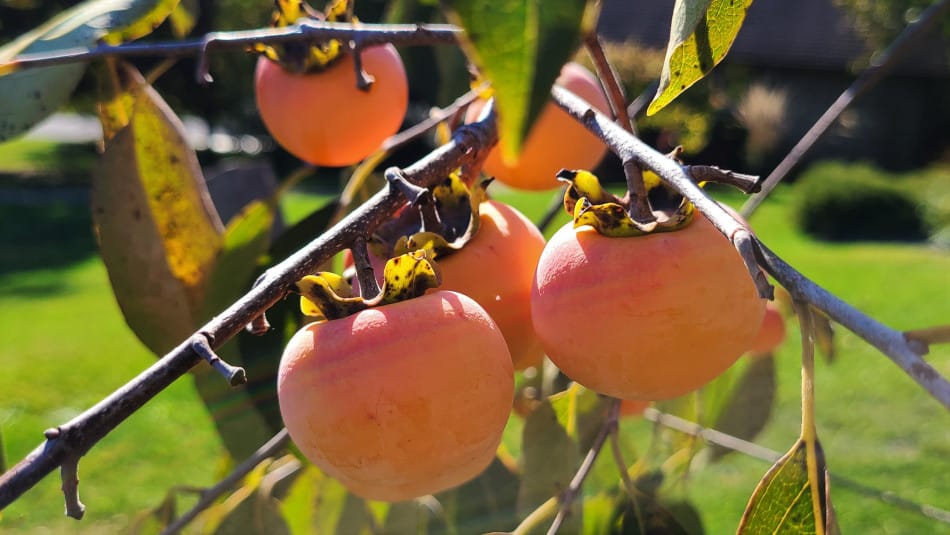
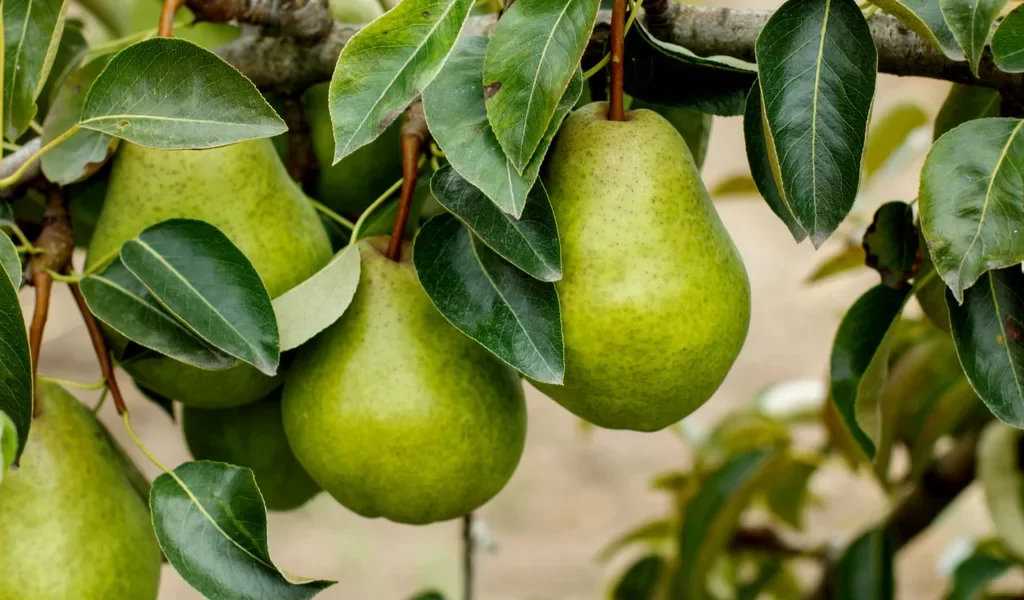
Harvesting Seckel Pears

Seckel pears typically ripen in late summer to early fall. Unlike many other fruits, pears are best harvested slightly underripe and allowed to ripen off the tree for optimal flavor and texture.

Signs It’s Time to Harvest:

  • Pears turn from green to a yellow-green base with a warm blush.
  • They easily detach from the branch when lifted and twisted.
  • The neck near the stem yields slightly to gentle pressure.

After picking, store them at room temperature for 5–7 days to ripen, or refrigerate them to extend shelf life.


Benefits of Growing Seckel Pears

  • Incredible Flavor: Intensely sweet, perfect for fresh eating, desserts, or preserving.
  • Compact Size: Suitable for smaller yards and home gardens.
  • Beautiful Ornamental Tree: Spring blossoms and glossy foliage.
  • Cold Hardy: Tolerant to USDA zones 5–8.
  • Low Maintenance: Requires minimal care once established.

Creative Uses for Seckel Pears

Once your tree starts producing, you’ll have a delicious harvest to enjoy. Here are some ways to savor them:

  • Fresh snacks: Perfectly sized for lunchboxes or charcuterie boards.
  • Poached pears: An elegant, simple dessert.
  • Pear preserves and chutneys: Capture their sweetness for year-round enjoyment.
  • Baking: Use in tarts, galettes, or upside-down cakes.
  • Cider or perry: Home brewers can create unique beverages.

Final Thoughts

Adding a Seckel pear tree to your backyard garden is a rewarding experience for both novice and seasoned gardeners. With its manageable size, beautiful blossoms, and delectable fruit, it’s a multipurpose tree that adds charm and productivity to any outdoor space. By selecting the right site, providing attentive care, and following a simple pruning and feeding routine, you’ll enjoy seasons of sweet, homegrown pears straight from your backyard.

How to Grow Black Currants in Your Garden: A Complete Home Gardener’s Guide

How to Grow Black Currants in Your Garden: A Complete Home Gardener’s Guide

If you’re looking for a flavorful, nutrient-dense berry that’s easy to grow and rewards you with abundant harvests year after year, black currants (Ribes nigrum) are a fantastic choice. These small, glossy, deep-purple berries are packed with vitamin C, antioxidants, and a bold, tart flavor perfect for jams, syrups, wines, and fresh eating for those who love their unique taste.

Long cherished in Europe, black currants are gaining popularity in the USA — especially in northern states where their cold-hardy nature and productive yields shine. In this complete guide, we’ll walk you through everything you need to know about growing black currants in your home garden, from choosing the right variety to planting, care, pest management, and harvesting.


Why Grow Black Currants?

Black currants offer several unique benefits that make them a prized addition to any garden:

  • High Nutritional Value: Rich in vitamin C (4x more than oranges), antioxidants, potassium, and iron.
  • Cold-Hardy: Tolerate frigid winters (USDA zones 3–7).
  • Low Maintenance: Once established, they require minimal intervention.
  • Attractive Shrubs: Beautiful foliage and clusters of glossy berries.
  • Versatile Uses: Perfect for preserves, cordials, pies, and health tonics.

Best Black Currant Varieties to Grow

Not all black currants are created equal. Choose disease-resistant and productive varieties suitable for your growing region. Top picks include:

  • ‘Consort’ — An American variety resistant to white pine blister rust with good flavor.
  • ‘Ben Lomond’ — A heavy producer with large, sweet berries and high disease resistance.
  • ‘Titania’ — Popular for its vigorous growth and excellent resistance to mildew and rust.
  • ‘Crandall’ — Native to North America with larger berries and a milder flavor.

Always purchase certified disease-free plants from reputable nurseries to ensure plant health.


Ideal Growing Conditions for Black Currants

To grow strong, productive black currant bushes, pay attention to their basic needs:

Sunlight

  • Thrive in full sun to partial shade.
  • In warmer zones, they appreciate afternoon shade to prevent heat stress.

Soil

  • Prefer moist, well-drained soil.
  • Optimal pH range: 6.0–6.5, slightly acidic.
  • Enrich soil with compost, aged manure, or organic matter to improve structure and fertility.

Climate

  • Best suited for cooler regions with cold winters and mild summers.
  • Require chilling hours during winter dormancy for successful flowering and fruiting.

How to Plant Black Currants

When to Plant

  • Plant bare-root or potted currants in early spring while dormant.
  • In milder regions, late fall planting is also successful.

Planting Steps

  1. Prepare the site: Loosen soil and mix in organic compost.
  2. Dig a hole: Twice as wide as the root system and deep enough for roots to spread naturally.
  3. Position the plant: Set it 2 inches deeper than its nursery depth to encourage basal shoot growth.
  4. Spacing: Plant bushes 4–5 feet apart in rows 6 feet apart.
  5. Water thoroughly: Settle soil around the roots.
  6. Mulch: Apply a thick layer of organic mulch (straw, wood chips) to retain moisture and suppress weeds.

Caring for Black Currants

Watering

  • Require consistent moisture, especially during flowering and fruit development.
  • Avoid waterlogged soils to prevent root rot.
  • Use drip irrigation or a soaker hose to keep foliage dry and reduce fungal disease risks.

Fertilizing

  • Apply a balanced 10-10-10 fertilizer in early spring.
  • Top-dress with compost or aged manure annually.
  • Avoid high-nitrogen fertilizers as they encourage leafy growth at the expense of fruit.

Pruning

Regular pruning is essential for maintaining plant health, productivity, and airflow.

Pruning Tips:

  • Prune in late winter or early spring before new growth appears.
  • Remove dead, diseased, or weak wood.
  • Cut out canes older than 3-4 years to promote fresh, vigorous growth.
  • Aim to maintain 8-12 healthy canes per bush of mixed ages.

Pro Tip: Black currants produce best on 1- to 3-year-old wood.


Common Pests and Diseases

Pests

  • Aphids: Cause distorted leaves and sticky residue. Control with insecticidal soap or neem oil.
  • Currant borer: Larvae tunnel into stems, causing dieback. Prune and destroy affected canes.
  • Spider mites: Thrive in hot, dry conditions. Increase humidity and apply organic miticides if necessary.
  • Birds: Love ripe berries. Use bird netting during fruit ripening.

Diseases

  • Powdery mildew: White, powdery coating on leaves and fruit. Choose resistant varieties like ‘Titania’ and improve airflow through pruning.
  • Leaf spot: Causes brown spots and premature leaf drop. Remove affected leaves and apply organic fungicides.
  • White pine blister rust: A fungal disease affecting both currants and white pines. Grow resistant varieties and avoid planting near five-needle pines.

Harvesting and Storing Black Currants

When to Harvest

  • Typically ripen mid to late summer, depending on variety and location.
  • Harvest when berries are fully black, glossy, and slightly soft.
  • Pick entire clusters using scissors or pruners for best results.

Pro Tip: Black currants don’t continue to ripen after picking, so wait until fully ripe for peak flavor.

Storage

  • Fresh currants keep up to a week in the refrigerator.
  • Freeze for longer storage: spread cleaned berries on a baking sheet, freeze individually, then transfer to freezer bags.
  • Ideal for making jams, syrups, pies, and wine.

Propagating Black Currants

Propagation is simple and economical using hardwood cuttings:

  1. In late fall to winter, take 8-12 inch cuttings from healthy, disease-free canes.
  2. Insert cuttings into prepared soil, leaving two buds above ground.
  3. Keep soil moist over winter.
  4. New roots form by spring, and plants can be transplanted the following fall.

Growing Black Currants in Containers

Limited on garden space? Black currants adapt well to containers.

  • Use a large pot (18-24 inches in diameter).
  • Fill with high-quality, well-draining potting mix.
  • Place in a sunny spot with afternoon shade in hotter regions.
  • Water consistently, ensuring soil remains evenly moist.
  • Apply slow-release organic fertilizer or liquid feed monthly during the growing season.
  • Prune annually to manage size and promote new fruiting canes.

Black Currant Growing Calendar (Zones 3-7)

MonthTask
March-AprilPlant new currants, prune established bushes
MayApply mulch, monitor pests, fertilize
June-JulyWatch for ripening fruit, net against birds
July-AugustHarvest berries, remove old canes after harvest
SeptemberApply compost, take hardwood cuttings
December-FebPrune dormant bushes, propagate cuttings

Final Thoughts

Growing black currants in your home garden is a rewarding experience, offering you a steady supply of flavorful, nutrient-rich berries for years to come. These hardy shrubs thrive in cool climates, are low-maintenance once established, and serve as both ornamental and edible additions to your landscape.

By choosing the right variety, providing rich soil and consistent moisture, practicing annual pruning, and managing common pests naturally, you’ll be well on your way to enjoying abundant harvests of this old-world favorite.

Ready to get started? Pick your favorite variety, prepare a sunny garden spot, and plant your black currant bush this season — your future harvest awaits!

How to Grow Red Currants in the USA: A Complete Home Gardener’s Guide

How to Grow Red Currants in the USA: A Complete Home Gardener’s Guide

If you’re looking for a vibrant, tangy, and highly nutritious berry to add to your home garden, red currants are a fantastic option. These small, ruby-red berries grow in attractive clusters and are prized for their tart, refreshing flavor, making them perfect for jellies, sauces, desserts, and fresh snacking. While red currants have long been cherished in Europe, they’re growing in popularity across the USA — especially in the Northeast, Pacific Northwest, and other cooler climates.

In this comprehensive guide, you’ll learn how to successfully grow red currants in your own garden, from selecting the right variety and planting, to care, pest control, and harvesting.


Why Grow Red Currants?

Red currants offer more than just beauty in the garden. Here’s why they deserve a spot in your landscape:

  • Nutritious super berries: Rich in vitamin C, antioxidants, and essential minerals.
  • Cold-hardy plants: Thrive in USDA zones 3-7.
  • Compact size: Ideal for small gardens, raised beds, or edible landscapes.
  • Versatile fruit: Use for jellies, jams, sauces, baking, or fresh eating.
  • Easy maintenance: Once established, currants are low-maintenance and long-lived.

Best Varieties of Red Currants for the USA

When selecting red currant plants, choose varieties suited to your region and intended use. Popular cultivars include:

  • ‘Red Lake’ — Most widely grown in the USA; produces large, bright red berries with balanced flavor.
  • ‘Jonker Van Tets’ — Early ripening with good yields and disease resistance.
  • ‘Rovada’ — Late-season variety with long clusters of sweet-tart berries.
  • ‘Tatran’ — Heavy producer known for its large fruit and strong disease resistance.

Check local nurseries or online specialty fruit plant suppliers for certified disease-free plants.


Ideal Growing Conditions for Red Currants

To achieve a healthy, productive crop, it’s essential to provide the right environment:

Sunlight

  • Prefer full sun in cooler climates.
  • In hotter regions, light afternoon shade helps protect against scorching.

Soil

  • Moist, well-drained soil is key.
  • Red currants prefer slightly acidic to neutral soil with a pH of 5.5 to 7.0.
  • Enrich with organic compost or aged manure for fertility.

Climate

  • Thrive in regions with cool summers and cold winters.
  • Dormant plants tolerate temperatures down to -40°F.
  • Avoid planting in hot, humid southern areas unless grown in containers with shade protection.

How to Plant Red Currants

When to Plant

  • Best planted in early spring while plants are dormant.
  • In warmer areas, fall planting is also an option.

Planting Steps

  1. Prepare the soil: Work in compost and organic matter to improve texture and drainage.
  2. Dig a hole: Twice as wide as the root ball and deep enough for roots to spread naturally.
  3. Spacing: Space plants 3-5 feet apart in rows 6 feet apart for good airflow.
  4. Positioning: Set the plant slightly deeper than it grew in the nursery to encourage strong new shoots.
  5. Backfill and water: Firm the soil gently and water thoroughly after planting.
  6. Mulch: Apply 2-3 inches of mulch to retain soil moisture and suppress weeds.

Caring for Red Currants

Watering

  • Keep soil consistently moist, especially during fruit development.
  • Avoid overwatering; currants dislike soggy roots.
  • Drip irrigation or soaker hoses work well to prevent wet foliage and fungal issues.

Fertilizing

  • Apply a balanced fertilizer (like 10-10-10) in early spring.
  • Supplement with compost or well-rotted manure each fall.
  • Avoid excessive nitrogen as it can reduce fruit yield and increase disease risk.

Pruning

Pruning keeps plants productive and disease-free.

  • First year: Cut back new plants to 4-6 inches to promote bushy growth.
  • Subsequent years: Prune in late winter, removing:
    • Dead, weak, or crossing branches.
    • Older stems (over 3 years old) to encourage new canes.
    • Aim to maintain 8-12 healthy canes per bush.

Common Pests and Diseases

Pests

  • Currant aphids: Cause leaf curling and distortion.
    • Control with insecticidal soap or neem oil.
  • Currant borer: Larvae tunnel inside canes.
    • Remove and destroy infested canes.
  • Birds: Love ripe currants.
    • Protect plants with bird netting during ripening.

Diseases

  • Powdery mildew: White fungal coating on leaves and fruit.
    • Improve airflow and apply organic fungicides if necessary.
  • Leaf spot: Brown spots on leaves, leading to defoliation.
    • Remove fallen leaves and mulch annually to reduce overwintering spores.
  • White pine blister rust: Currants can host this disease.
    • Avoid planting near white pines and select resistant varieties like ‘Red Lake.’

Harvesting and Storing Red Currants

  • Berries ripen in mid to late summer depending on variety and location.
  • Harvest whole clusters when berries are bright red and fully ripe.
  • Use scissors or pruners to snip clusters carefully.
  • Handle gently as berries are delicate and bruise easily.

Storing

  • Fresh red currants last up to a week in the refrigerator.
  • Can be frozen whole for long-term storage — simply wash, dry, and spread on a baking sheet before transferring to freezer bags.
  • Ideal for making preserves, sauces, and desserts.

Propagating Red Currants

Red currants are easily propagated from hardwood cuttings:

  1. In late fall or winter, cut healthy stems 8-12 inches long.
  2. Insert cuttings into soil or pots with two-thirds of the cutting buried.
  3. Keep soil moist, and roots will form by spring.
  4. Transplant rooted cuttings to their final location the following fall.

Growing Red Currants in Containers

For gardeners with limited space or warm southern climates:

  • Choose a large container (at least 18 inches in diameter).
  • Use well-draining potting mix rich in organic matter.
  • Provide afternoon shade in hot areas.
  • Regular watering and fertilizing are essential.
  • Prune annually to manage size and promote fruiting.

Red Currant Growing Calendar (For Zones 3-7)

MonthTask
March-AprilPlant bare-root currants; prune existing plants
May-JuneMulch, fertilize, and monitor for pests
June-JulyHarvest ripe berries; protect from birds
AugustCut back old canes after harvest
SeptemberApply compost or organic mulch
OctoberTake hardwood cuttings for propagation
December-FebPrune dormant bushes

Conclusion

Red currants are a charming, productive, and nutrient-packed addition to any home garden in the USA. With their resilience to cold, ease of care, and versatility in the kitchen, they offer a fantastic gardening experience for both beginners and seasoned growers alike.

By choosing the right variety, providing good soil and sunlight, practicing annual pruning, and managing pests naturally, you’ll be rewarded with beautiful clusters of ruby-red berries year after year.

Ready to grow your own red currants? Pick a sunny corner, prepare the soil, and start planting — your future berry harvest awaits!

How to Grow Champagne Grapes for Fresh Eating: A Complete Guide to Cultivating Sweet, Crisp Grapes at Home

How to Grow Champagne Grapes for Fresh Eating: A Complete Guide to Cultivating Sweet, Crisp Grapes at Home

If you love the taste of fresh grapes and want to grow your own at home, Champagne grapes are an excellent choice. Known for their large, crisp, and sweet berries, Champagne grapes are perfect for fresh eating, salads, or snacking straight off the vine. They’re distinct from typical table grapes and have a delightful balance of sweetness and tartness that’s irresistible.

Whether you’re a beginner gardener or an experienced vine grower, this guide will take you step-by-step through everything you need to know to successfully grow Champagne grapes—right from selecting the right variety and planting, to care, pest management, and harvesting.


What Are Champagne Grapes?

Champagne grapes are a variety of table grapes, often recognized for their:

  • Large, round berries with a firm, crisp texture.
  • Sweet, slightly tart flavor that is excellent fresh or in fruit salads.
  • Greenish-yellow to golden skin, sometimes with a slight blush.
  • Thin skins and few seeds, making them enjoyable to eat fresh.
  • Moderate to vigorous vine growth, adapted to warm and temperate climates.

They differ from the grapes used in winemaking, as they are specifically cultivated for eating fresh rather than fermentation.


Why Grow Champagne Grapes?

Growing your own Champagne grapes offers many benefits:

  • Freshness and flavor: Nothing beats grapes straight from the vine.
  • Control over pesticides: Grow organically for safe, healthy fruit.
  • Garden beauty: Grape vines add lush greenery and can be trained over trellises or pergolas.
  • Versatility: Eat fresh, use in recipes, or even make homemade jams and preserves.
  • Satisfaction: Gardening is rewarding, and grape cultivation is both fun and productive.

Choosing the Right Location for Champagne Grapes

Successful grape growing starts with picking the perfect site:

Sunlight

  • Grapevines need full sun — at least 6 to 8 hours of direct sunlight daily.
  • A sunny, south-facing slope or open garden area is ideal.

Soil

  • Well-draining soil is essential to avoid root rot.
  • Loamy or sandy soils with moderate fertility work best.
  • Slightly acidic to neutral pH (5.5 to 7.0) suits grapes well.
  • Avoid heavy clay soils unless amended for drainage.

Airflow

  • Good air circulation reduces fungal disease risks.
  • Avoid planting in low spots where cold air or moisture may settle.

How to Plant Champagne Grape Vines

Step 1: Selecting Quality Vines

  • Purchase certified disease-free grapevines from a reputable nursery.
  • Choose one-year-old dormant vines for the best start.

Step 2: Preparing the Soil

  • Test your soil and amend with organic matter like compost.
  • Ensure the planting site is weed-free and well-tilled.

Step 3: Planting

  • Dig a hole large enough to spread roots without crowding.
  • Space vines 6 to 10 feet apart, depending on your trellis system.
  • Plant vines at the same depth they were grown in the nursery.
  • Backfill with soil, firm gently, and water deeply.

Supporting Your Champagne Grapes: Trellising and Training

Grapevines require support to grow well and produce quality fruit.

Types of Trellises

  • Vertical shoot positioning (VSP): Common for table grapes; wires spaced vertically.
  • Arbors or pergolas: Great for shade and ornamental effect.
  • Simple stake or fence line: Suitable for small gardens.

Training the Vine

  • Start training young vines in spring.
  • Select the strongest shoot to become the main trunk.
  • Remove competing shoots and guide growth along the trellis wires.
  • Prune annually to maintain structure and encourage fruiting.

Watering and Fertilizing Champagne Grapes

Watering

  • Newly planted vines need regular watering to establish roots.
  • Mature vines are drought-tolerant but benefit from deep watering during dry spells.
  • Avoid waterlogging, which causes root diseases.

Fertilizing

  • Test soil nutrient levels to guide fertilization.
  • Apply balanced fertilizer (e.g., 10-10-10) in early spring.
  • Mulch with organic matter to retain moisture and improve soil quality.
  • Avoid excessive nitrogen, which promotes leafy growth at the expense of fruit.

Pruning and Maintenance for Healthy Grapes

Why Prune?

  • Pruning controls vine size and shape.
  • Encourages fruit production by exposing buds to sunlight.
  • Reduces disease by improving airflow.

How to Prune

  • Prune in late winter or early spring when vines are dormant.
  • Remove dead or weak canes.
  • Cut back to 2-4 buds on each fruiting cane.
  • Keep permanent framework strong with 1-2 main trunks.

Common Pests and Diseases of Champagne Grapes

Pests

  • Grape berry moth: Larvae feed on fruit, causing damage.
  • Aphids: Can cause sooty mold.
  • Japanese beetles: Feed on leaves.

Use integrated pest management:

  • Introduce beneficial insects like ladybugs.
  • Use insecticidal soaps or neem oil when necessary.
  • Remove fallen leaves and debris to reduce pest habitat.

Diseases

  • Powdery mildew: White fungal growth on leaves and fruit.
  • Downy mildew: Yellow spots and oily patches on leaves.
  • Black rot: Dark lesions on leaves and rotting fruit.

Preventative measures:

  • Maintain good airflow with proper pruning.
  • Water early in the day to dry foliage.
  • Apply fungicides if needed, following instructions carefully.

Harvesting Your Champagne Grapes

  • Grapes usually mature 100 to 120 days after bud break, depending on climate.
  • Harvest when grapes are fully colored, plump, and sweet.
  • Taste testing is the best way to know ripeness.
  • Use sharp scissors or pruners to cut grape clusters carefully.
  • Harvest in dry weather for best storage life.

Tips for Storing and Using Fresh Champagne Grapes

  • Store grapes in a cool place or refrigerator, unwashed until ready to eat.
  • Consume within 1-2 weeks for optimal freshness.
  • Use grapes fresh in salads, desserts, or as a healthy snack.
  • Preserve by freezing, drying, or making jams.

Troubleshooting Common Problems

ProblemCauseSolution
Poor fruit setInsufficient pollination or pruningHand pollinate if needed; prune correctly
Powdery mildewHigh humidity and poor airflowImprove ventilation; apply fungicides
Leaf yellowingNutrient deficiency or water stressAdjust fertilization; monitor watering
Bird damageBirds eating grapesUse netting or scare tactics

Conclusion

Growing Champagne grapes for fresh eating is a rewarding and enjoyable gardening project, especially in warm and temperate climates like California and other similar zones. With the right location, soil preparation, care, and attention to pruning and pest control, you can enjoy sweet, crisp grapes right from your backyard.

Not only do these grapes offer delicious fresh fruit, but they also add beauty and shade to your garden space. Whether you eat them fresh, share with friends, or incorporate them into recipes, Champagne grapes are a delightful addition to any home garden.

Ready to plant your vines? Start today and watch your garden transform into a luscious vineyard full of sweet, juicy grapes!

How to Grow Desert King Figs in California: Your Ultimate Guide to Cultivating This Sweet, Resilient Fruit Tree

How to Grow Desert King Figs in California: Your Ultimate Guide to Cultivating This Sweet, Resilient Fruit Tree

If you live in California and dream of harvesting delicious, sweet figs right from your backyard, the Desert King fig is an excellent choice. Known for its large size, honey-sweet flavor, and adaptability to warm climates, this fig variety thrives particularly well in California’s Mediterranean environment.

Growing Desert King figs can be a rewarding experience that provides fresh fruit, shade, and a beautiful addition to your garden or landscape. This comprehensive guide will walk you through everything you need to know—from planting to harvesting—to ensure your fig tree flourishes.


What is a Desert King Fig?

The Desert King fig (Ficus carica ‘Desert King’) is a popular fig cultivar prized for:

  • Large, green-skinned fruit that ripens to amber with sweet, juicy flesh.
  • Exceptional heat tolerance and ability to thrive in hot, dry climates.
  • Resilience to drought once established.
  • Two harvest seasons: Early summer and late summer/fall, producing a generous yield.

It’s one of the best fig varieties for California gardeners due to its adaptability and delicious fruit, often described as “honey-like” and mild, making it perfect for fresh eating, baking, or preserving.


Why Grow Desert King Figs in California?

California’s climate—with its warm, dry summers and mild winters—creates an ideal environment for Desert King figs. Here’s why this fig variety works so well in the Golden State:

  • Heat and drought tolerant: Thrives with less water once mature, reducing garden maintenance.
  • Long growing season: Produces two crops in warmer regions of California.
  • Low chill requirement: Suits mild winters common in coastal and inland valleys.
  • Versatile: Can be grown in-ground or in containers.

Selecting the Perfect Location for Your Desert King Fig

Location is key to a healthy and productive fig tree. When choosing where to plant:

  • Sunlight: Select a spot with full sun exposure, ideally 6-8 hours of direct sunlight daily.
  • Soil: Figs prefer well-draining soil with a neutral to slightly acidic pH (6.0-7.0).
  • Protection: Choose a sheltered location protected from strong winds to avoid branch damage.
  • Space: Allow plenty of room for growth; mature trees can spread 10-15 feet wide.

If you live in cooler microclimates or areas with frost risk, consider planting near a south-facing wall or using frost protection methods.


How to Plant Desert King Fig Trees in California

Step 1: Prepare the Soil

  • Loosen the soil in a wide area around the planting spot.
  • Amend with compost or organic matter to improve fertility and drainage.
  • Avoid heavy clay soils that retain water; if necessary, plant in raised beds or mounds.

Step 2: Planting

  • Dig a hole twice as wide and as deep as the root ball.
  • Place the tree at soil level; avoid burying the trunk too deep.
  • Backfill with soil and press gently to remove air pockets.
  • Water thoroughly after planting to settle the soil.

Caring for Your Desert King Fig Tree

Watering

  • Water young trees deeply and regularly during the first year to establish roots.
  • Once established, Desert King figs are drought tolerant but produce better fruit with consistent watering.
  • Avoid overwatering, which can lead to root rot.

Fertilizing

  • Apply a balanced fertilizer (e.g., 10-10-10) in early spring and again mid-season.
  • Alternatively, use organic compost or aged manure.
  • Avoid excess nitrogen, which promotes leaf growth over fruit.

Pruning

  • Prune in late winter or early spring before new growth begins.
  • Remove dead, diseased, or crossing branches.
  • Shape the tree to maintain an open center for airflow and sunlight penetration.
  • Summer pruning can control size and encourage fruit production.

Managing Pests and Diseases

Though relatively pest-resistant, Desert King figs can face:

  • Fig beetles: Can be controlled by handpicking or traps.
  • Birds: Protect fruit with netting or scare devices.
  • Scale insects and aphids: Treat with insecticidal soap or neem oil.
  • Root rot: Avoid waterlogged soil and ensure good drainage.

Harvesting Desert King Figs in California

  • Figs do not continue ripening once picked, so harvest when fully ripe.
  • Ripe figs will be soft to the touch and slightly droop from the branch.
  • Harvest carefully to avoid damaging the delicate fruit.
  • Desert King figs typically produce two crops:
    • Early crop (breba): Grows on last year’s wood, ripening in early summer.
    • Main crop: Ripens in late summer or fall on new wood.

Growing Desert King Figs in Containers

For limited space or colder microclimates, container growing is a great option.

  • Choose a large container (at least 15-20 gallons) with drainage holes.
  • Use a high-quality potting mix with good drainage.
  • Water regularly and fertilize monthly during the growing season.
  • Protect from freezing temperatures in winter by moving indoors or using frost cloth.

Winter Care and Frost Protection in California

Though hardy, Desert King figs benefit from frost protection in areas with occasional freezes:

  • Mulch around the base with straw or leaves to insulate roots.
  • Wrap young trees with frost cloth or burlap on cold nights.
  • For container plants, bring indoors or into a greenhouse during winter.

Propagation of Desert King Figs

You can propagate Desert King figs via:

  • Cuttings: Hardwood cuttings taken in winter root easily when planted in moist soil.
  • Layering: Bend low branches to the ground, cover with soil, and wait for roots to develop.

Propagation is an economical way to multiply your fig trees and share with friends.


Benefits of Growing Desert King Figs in California

  • Homegrown flavor: Fresh, sweet figs without pesticides.
  • Versatility: Eat fresh, dry, bake, or preserve.
  • Low maintenance: Once established, they require minimal care.
  • Sustainability: Drought-tolerant, water-wise choice for California gardens.
  • Wildlife-friendly: Provides food and habitat for pollinators and birds.

Troubleshooting Common Problems

IssueCauseSolution
Leaf dropOverwatering or cold stressAdjust watering; protect from frost
Poor fruit setLack of pollination or nutrientsEncourage pollinators; fertilize properly
Yellow leavesNutrient deficiency or overwateringTest soil; fertilize; improve drainage
Squirrel or bird damageFruit predationUse netting or repellents

Final Tips for Success

  • Start with a healthy nursery plant or well-rooted cutting.
  • Water consistently during the growing season but avoid soggy soil.
  • Mulch regularly to conserve moisture and suppress weeds.
  • Monitor for pests and diseases early to prevent spread.
  • Harvest ripe figs promptly for the best flavor.

Conclusion

Growing Desert King figs in California is a highly satisfying gardening project that yields delicious, nutritious fruit while adding beauty and shade to your outdoor space. Thanks to their heat tolerance and adaptability, these figs thrive with relatively low maintenance in California’s climate.

By selecting the right site, providing proper care, and protecting your tree from pests and frost, you can enjoy bountiful fig harvests for years to come. Whether you’re a seasoned gardener or a beginner, Desert King figs offer a wonderful way to grow your own sweet tropical-style fruit right at home.

Ready to start your fig-growing adventure? Plant a Desert King fig today and savor the sweet rewards of homegrown goodness!

How to Grow White Strawberries (Pineberries) at Home: A Complete Guide to Cultivating These Unique Delights

How to Grow White Strawberries (Pineberries) at Home: A Complete Guide to Cultivating These Unique Delights

If you’re looking to add a truly unique and delicious twist to your home garden, white strawberries—also known as pineberries—are a must-try. These rare and intriguing berries look like strawberries but boast a beautiful white to pale pink color with red seeds and a delightful pineapple-like flavor.

Growing pineberries at home is not only rewarding but also a fun way to expand your gardening horizons with an eye-catching and tasty fruit. This comprehensive guide will walk you through everything you need to know about successfully growing white strawberries from start to harvest and beyond.


What Are White Strawberries (Pineberries)?

White strawberries, or pineberries, are a special variety of the strawberry family (Fragaria × ananassa) that originated in South America but have been cultivated and hybridized over the years to produce their unique characteristics.

Key Features:

  • Color: Pale white to soft pink flesh with bright red seeds on the surface.
  • Flavor: Sweet and tangy with a subtle pineapple aroma, hence the name “pineberry.”
  • Size: Typically smaller than regular red strawberries.
  • Growth Habit: Similar to traditional strawberries, producing runners and crowns.

Pineberries are prized for their novelty, attractive appearance, and their delicious, slightly tropical flavor that can elevate desserts, salads, or simply be enjoyed fresh.


Why Grow White Strawberries at Home?

There are several great reasons to cultivate white strawberries in your garden:

  • Unique Flavor and Appearance: Add a surprising and delightful twist to your fruit harvest.
  • Ornamental Value: Their unusual color and delicate blooms make them attractive as decorative plants.
  • Small Space Friendly: Ideal for container gardening, raised beds, or garden borders.
  • Nutritional Benefits: Rich in vitamins, antioxidants, and fiber like other strawberries.
  • Pollinator Friendly: Flowers attract bees and beneficial insects to your garden.

Choosing the Right Pineberry Variety

Before planting, it’s important to select the right variety for your region and preferences.

Popular pineberry varieties include:

  • ‘White Carolina’: Known for high yield and good disease resistance.
  • ‘Pineberry’: The classic variety with distinctive pineapple flavor.
  • ‘Ananas’ Pineberry: A sweet variety with large, firm berries.

Buy certified disease-free plants or runners from reputable nurseries or online suppliers to ensure success.


How to Grow White Strawberries: Step-by-Step Guide

1. Selecting the Growing Site

White strawberries thrive in:

  • Full sun: At least 6 to 8 hours of direct sunlight daily.
  • Well-draining soil: They dislike soggy soil and root rot.
  • Slightly acidic to neutral pH: Ideal soil pH is between 5.5 and 7.0.

If your garden soil is heavy or clay-like, amend it with organic matter or plant pineberries in raised beds or containers for better drainage.


2. Preparing the Soil

  • Work in plenty of organic compost or aged manure to enrich the soil.
  • Ensure the soil is loose and crumbly to encourage healthy root development.
  • If planting in pots, use a high-quality, well-draining potting mix designed for fruiting plants.

3. Planting Pineberry Runners or Seedlings

  • Timing: Plant pineberries in early spring after the last frost or in late summer to early fall for mild climates.
  • Spacing: Allow about 12 to 18 inches between plants to give them room to spread.
  • Depth: Plant so that the crown is at soil level; burying the crown too deep can cause rot.
  • Water the plants immediately after planting to help settle the soil.

4. Watering and Mulching

  • Keep soil consistently moist but avoid waterlogging. Strawberries need about 1 inch of water per week.
  • Mulch with straw, pine needles, or shredded leaves to:
    • Retain moisture
    • Suppress weeds
    • Protect fruit from soil contact and rot

5. Feeding and Fertilizing

  • Apply a balanced fertilizer (e.g., 10-10-10 NPK) when planting and again mid-season.
  • Organic options like fish emulsion or compost tea work well to boost growth.
  • Avoid excessive nitrogen, which can promote leaf growth over fruiting.

6. Caring for Your Pineberry Plants

  • Remove runners during the first growing season to encourage strong root and crown development.
  • In subsequent years, allow some runners to root and form new plants.
  • Watch for pests like slugs, aphids, and spider mites, and treat organically if needed.
  • Keep an eye out for diseases like powdery mildew or gray mold and provide good airflow around plants.

7. Pollination

Pineberries require pollination by bees or other pollinators to set fruit. Plant flowers nearby or avoid pesticides that harm beneficial insects.


Harvesting White Strawberries (Pineberries)

  • Pineberries ripen from late spring to early summer, depending on your climate.
  • They turn from green to pale white or pink with red seeds.
  • Unlike red strawberries, white strawberries are ripe when fully white or pale pink, so avoid waiting for color changes typical of red varieties.
  • Pick berries gently to avoid bruising, and harvest regularly every 2-3 days for the best fruit quality.

Growing Pineberries in Containers

Pineberries are well suited for container gardening, making them perfect for patios, balconies, and small spaces.

Tips for container growing:

  • Use a pot with good drainage holes.
  • Choose a container at least 12 inches deep and wide.
  • Use a high-quality potting mix and maintain consistent moisture.
  • Fertilize regularly since nutrients leach out faster in pots.
  • Protect containers from extreme temperatures and wind.

Common Challenges and Solutions

ProblemCauseSolution
Poor fruit productionLack of pollinationPlant pollinator-friendly flowers nearby; avoid pesticides
Yellowing leavesOverwatering or nutrient deficiencyAdjust watering schedule; feed with balanced fertilizer
Powdery mildewHigh humidity and poor airflowPrune to increase airflow; apply fungicidal spray if organic
Slugs and snailsMoist conditions and debrisHand-pick; use organic slug bait or barriers

Propagating Pineberries

To expand your patch, you can propagate pineberries through runners:

  • Identify healthy runners in mid to late summer.
  • Peg them down into new soil pots or garden beds.
  • Once rooted, sever the runner from the mother plant.
  • Transplant to permanent locations in early spring.

Storing and Enjoying Your Harvest

  • Fresh pineberries are delicate and should be eaten within a few days.
  • Store in the refrigerator in a breathable container.
  • Pineberries can be used in:
    • Fresh fruit salads
    • Desserts and jams
    • Smoothies and beverages
    • Garnishes for cocktails or cakes

Final Thoughts

Growing white strawberries, or pineberries, at home is a delightful and rewarding gardening adventure. Their exotic flavor, charming appearance, and relatively easy care make them an excellent addition to any fruit garden or container collection.

By choosing the right variety, providing good soil, ample sunlight, and consistent care, you’ll enjoy a bountiful harvest of these rare and flavorful berries season after season.

Ready to give your garden a deliciously unique boost? Start growing pineberries today and savor the sweet taste of success!

How to Grow American Persimmons from Seed: A Complete Beginner’s Guide

How to Grow American Persimmons from Seed: A Complete Beginner’s Guide

If you’re a gardening enthusiast eager to grow something truly special and uniquely American, consider planting an American persimmon tree from seed. Known for their rich, honey-like flavor and ornamental beauty, these native trees offer bountiful harvests, stunning fall foliage, and crucial food for local wildlife.

In this detailed guide, we’ll take you through everything you need to know about growing American persimmons (Diospyros virginiana) from seed — from seed selection and preparation to planting, care, and eventual harvest.


Why Grow American Persimmons?

Before diving into the growing process, it’s worth appreciating why American persimmons are so beloved.

  • Native to the Eastern U.S., these trees are well-adapted to local soils, pests, and weather.
  • The fruits ripen in late fall and boast a rich, custard-like sweetness when fully ripe.
  • American persimmons are hardy, low-maintenance, and tolerate a range of soil conditions.
  • Their beautiful orange foliage in autumn makes them excellent ornamental trees.
  • They’re a valuable food source for deer, birds, and other wildlife.

Understanding American Persimmon Seeds

Unlike cultivated Asian persimmons, American persimmons typically grow true to type from seed, meaning they often retain the characteristics of the parent tree — especially when sourced from quality fruit.

Key seed facts:

  • The seeds require a cold stratification period to break dormancy.
  • They usually take 1 to 3 months to sprout.
  • Seedlings may take 4 to 9 years to bear fruit.

How to Collect and Prepare American Persimmon Seeds

1. Harvest Ripe Fruit

Begin by collecting fully ripe persimmons in late autumn. The fruit should be:

  • Soft to the touch
  • Bright orange in color
  • Slightly wrinkled or mushy (unripe persimmons are astringent and unpleasant)

You can either pick them from the tree or collect windfallen fruits.

2. Extract the Seeds

  • Cut the fruit open and remove the large, flat, brown seeds.
  • Rinse the seeds thoroughly under cool water to remove all pulp.

3. Test Seed Viability

Place the seeds in a bowl of water:

  • Good seeds sink.
  • Discard any floating seeds as they’re unlikely to germinate.

How to Stratify Persimmon Seeds

Persimmon seeds need a period of cold, moist conditions to mimic winter dormancy — a process called cold stratification.

1. Prepare a Medium

Use a mixture of:

  • Damp peat moss
  • Vermiculite
  • Or sand

It should be moist but not soggy.

2. Stratify the Seeds

  • Place the seeds in a plastic bag with the moistened medium.
  • Seal the bag and label it with the date.
  • Refrigerate at 35°F to 45°F (1.5°C to 7°C) for 60 to 90 days.

Check occasionally to ensure the medium stays damp.

Pro tip: You can also sow seeds directly outdoors in late fall, letting nature provide stratification over winter.


How to Plant American Persimmon Seeds

After stratification, you’re ready to plant.

1. Choose a Planting Site

Persimmon trees prefer:

  • Full sun (at least 6 hours daily)
  • Well-draining, loamy soil
  • Slightly acidic to neutral pH (6.0 to 7.0)

They tolerate sandy or clay soils but dislike waterlogged ground.

2. Planting Seeds Indoors

  • Fill seed-starting pots with a good-quality potting mix.
  • Plant seeds 1 inch deep.
  • Keep the soil moist but not soggy.
  • Maintain a temperature of 70°F to 80°F (21°C to 27°C) for optimal germination.
  • Expect germination in 6 to 10 weeks.

3. Direct Outdoor Sowing

In areas with mild winters:

  • Plant seeds 1 inch deep in fall.
  • Protect with mulch and a mesh screen to deter animals.
  • Germination will occur naturally in spring.

Caring for American Persimmon Seedlings

Once your seeds sprout, proper care ensures healthy growth.

1. Watering

  • Keep soil consistently moist but avoid overwatering.
  • Seedlings in pots should be watered when the top inch of soil feels dry.

2. Light

  • Provide bright, indirect sunlight indoors.
  • Gradually harden off seedlings before transplanting outdoors by exposing them to direct sunlight for a few hours daily.

3. Transplanting

When seedlings reach 6 to 8 inches tall:

  • Transplant to larger pots or directly outdoors after the last frost.
  • Space trees 20 to 30 feet apart for optimal growth.

How to Maintain and Grow Healthy Persimmon Trees

Once established outdoors, American persimmons are low-maintenance.

1. Watering

  • Water young trees weekly during dry periods.
  • Mature trees tolerate drought but benefit from occasional deep watering.

2. Mulching

Apply organic mulch (like wood chips or pine straw) around the base to:

  • Conserve moisture
  • Suppress weeds
  • Improve soil health

Leave a mulch-free ring around the trunk to prevent rot.

3. Fertilizing

  • In the first year, avoid heavy fertilization.
  • In subsequent years, apply a balanced slow-release fertilizer in early spring.

4. Pruning

  • Remove dead, damaged, or crossing branches in late winter.
  • Shape young trees by selecting a strong central leader and evenly spaced lateral branches.

Pollination and Fruit Production

American persimmons are dioecious, meaning male and female flowers grow on separate trees. To produce fruit:

  • You need at least one male tree for every 6 to 8 female trees.
  • Some trees may produce perfect flowers, but for reliable harvests, plant multiple trees to ensure cross-pollination.

Wild seedlings may surprise you with either male or female flowers, so planting several increases your chances of future fruiting trees.


When Will Persimmons Start Bearing Fruit?

Patience is essential — American persimmons grown from seed can take 4 to 9 years to begin producing fruit.

Factors affecting time to maturity:

  • Variety and genetics
  • Growing conditions
  • Tree health and care

Common Pests and Diseases

American persimmons are generally hardy but can occasionally face:

  • Persimmon psylla
  • Twig girdlers
  • Leaf spot diseases

Preventive care:

  • Maintain good airflow by spacing trees properly.
  • Remove fallen leaves and fruit.
  • Prune regularly.

Harvesting and Using American Persimmons

When to harvest:

  • Pick fruit when it’s fully soft and deep orange, typically September to November.
  • Unripe persimmons are astringent and bitter.

Popular uses:

  • Fresh eating (once soft)
  • Baked goods like persimmon pudding and bread
  • Jams, jellies, and preserves
  • Dehydrated persimmon slices
  • Wild animal forage

Final Thoughts

Growing American persimmons from seed is a rewarding way to nurture a piece of native American heritage in your own backyard. While it requires patience and a bit of seasonal planning, the payoff is well worth it — with beautiful, resilient trees, vibrant fall color, and the sweet satisfaction of homegrown fruit.

By following this guide on seed collection, stratification, planting, and care, you’ll be well on your way to cultivating these native delicacies for generations to come.

How to Grow Mayhaw Trees in Swampy Areas: A Complete Guide

How to Grow Mayhaw Trees in Swampy Areas: A Complete Guide

If you’re fortunate enough to live in the southeastern United States, particularly in areas with low-lying, moist, or swampy ground, you have the perfect setting for growing a delicious native treasure — the Mayhaw tree. Revered for its tart, jewel-like berries and famously flavorful jellies, the Mayhaw thrives where many other fruit trees struggle.

In this detailed guide, we’ll cover everything you need to know about growing Mayhaw trees in swampy areas, from choosing the right varieties to planting, caring for, and harvesting these unique Southern fruits.


What Is a Mayhaw Tree?

The Mayhaw (Crataegus opaca) is a small, native fruit tree found in wetland areas, bayous, and swampy lowlands of the American South, particularly in states like Louisiana, Mississippi, Texas, Alabama, and Florida. It’s a member of the hawthorn family and produces small, red to yellowish fruit that resemble tiny apples. These fruits ripen in late spring (May — hence the name) and are especially beloved for making jelly, syrup, and wine.

Besides its fruit, the Mayhaw is also valued for its attractive white spring blossoms and its ability to thrive in poorly drained, boggy soils where other trees might fail.


Why Grow Mayhaw Trees in Swampy Areas?

While many fruit trees prefer well-drained, dry soil, Mayhaws naturally grow along riverbanks, sloughs, and swampy woods. Their tolerance for wet soils and occasional flooding makes them an ideal candidate for those challenging, soggy parts of your property.

Benefits of Mayhaw trees:

  • Thrive in wet, swampy conditions
  • Produce antioxidant-rich, vitamin-packed fruits
  • Beautiful spring flowers attract pollinators
  • Provide habitat and food for wildlife
  • Require minimal care once established

Best Mayhaw Varieties for Home Gardens

There are both native wild types and improved cultivated varieties of Mayhaw. Improved varieties typically produce larger, more consistent fruit with better flavor and disease resistance.

Top recommended cultivars:

  • Super Spur — Heavy producer with excellent jelly-quality fruit
  • Maxine — Large, early-ripening berries with good flavor
  • Red Champ — Productive and highly disease-resistant
  • Big Red — Large, flavorful red fruit ideal for jelly

How to Plant Mayhaw Trees in Swampy Areas

Growing Mayhaws begins with choosing the right planting site and preparing the ground properly — even if it’s naturally boggy.

1. Select the Planting Site

Mayhaws thrive in:

  • Full sun — At least 6 hours of sunlight daily
  • Low-lying, moist soils
  • Areas prone to periodic flooding or standing water (though constant waterlogged soil without drainage isn’t ideal)

Pro tip: Avoid areas with deep, stagnant water. Mayhaws prefer moist soils with occasional overflow rather than continuous submersion.

2. Prepare the Planting Hole

Even in wet areas, it’s beneficial to amend the planting site:

  • Dig a hole twice the width and the same depth as the root ball.
  • Mix native soil with organic compost to improve structure and nutrition.
  • In extremely wet locations, plant the Mayhaw on a mounded berm about 1–2 feet above the surrounding soil to improve drainage around the roots.

3. Planting Steps

  • Place the tree in the hole with the root crown level or slightly above the surrounding soil.
  • Backfill and gently firm the soil.
  • Water thoroughly after planting.
  • Apply a thick mulch layer (pine straw or bark mulch) to conserve moisture and suppress weeds.

Watering and Fertilizing Mayhaw Trees

Watering:

In swampy areas, natural moisture typically suffices. In drier spells or during the first growing season:

  • Water newly planted trees regularly to keep soil consistently moist (but not waterlogged)
  • Established trees usually require no supplemental watering unless conditions are unusually dry

Fertilizing:

Feed Mayhaw trees lightly, as too much nitrogen can promote leaf growth over fruiting.

  • Apply a balanced fertilizer like 10-10-10 in early spring before new growth appears.
  • Repeat in early summer if necessary.

Pro tip: Avoid over-fertilizing, especially in swampy soils where nutrient levels can already be high.


Pruning and Maintenance

Pruning:

  • Prune young trees to form a strong central leader and evenly spaced scaffold branches.
  • Remove any dead, damaged, or crossing limbs in late winter or early spring.
  • Thin out crowded growth to improve air circulation and fruit production.

Disease and Pest Control:

Mayhaw trees are generally hardy but can face issues like:

  • Fire blight
  • Rust diseases
  • Aphids and scale insects

Preventive care:

  • Maintain proper spacing between trees for airflow
  • Remove fallen leaves and fruit to reduce disease sources
  • Use horticultural oil sprays in winter to control overwintering pests

Pollination Requirements

Most Mayhaw trees are partially self-fertile but produce better yields with cross-pollination. For best results:

  • Plant at least two different varieties nearby.
  • Encourage pollinators like bees by adding other blooming plants nearby.

Harvesting Mayhaw Fruit

When to harvest:

  • Mayhaws typically ripen in late April through May
  • Fruits are ready when they fully color and drop from the tree
  • In traditional harvests, growers often spread tarps under trees and gently shake the branches to collect the fallen fruit

Handling tips:

  • Use clean, food-safe containers for collecting
  • Process or refrigerate fruit promptly, as Mayhaws can spoil quickly

What to Do With Your Mayhaw Harvest

The classic Southern tradition is to turn Mayhaws into bright, flavorful jelly — but their uses extend beyond that.

Popular uses:

  • Mayhaw jelly and jam
  • Mayhaw syrup for pancakes and desserts
  • Homemade Mayhaw wine
  • Pie fillings, chutneys, and sauces
  • Frozen whole for future use

Pro tip: Mayhaw jelly’s tart, fruity flavor pairs wonderfully with savory dishes like pork chops and wild game.


Final Thoughts

If you’re looking for a productive, beautiful, and low-maintenance fruit tree for those tricky swampy spots in your yard, the Mayhaw is a perfect fit. Its ability to thrive in wet conditions, produce delicious and sought-after fruits, and support local pollinators and wildlife makes it an outstanding addition to any Southern landscape.

With just a little care in site selection, planting, and seasonal maintenance, you’ll soon enjoy the spring blossoms and late-spring harvests of this treasured native tree.

How to Grow Muscadine Grapes in the Southeast: A Complete Guide

How to Grow Muscadine Grapes in the Southeast: A Complete Guide

If you live in the Southeastern United States and dream of growing your own juicy, sun-kissed grapes, Muscadine grapes are your perfect match. Native to the southeastern U.S., Muscadines thrive in warm, humid conditions where other grapes might struggle. Known for their bold flavor and rich antioxidant content, these grapes are ideal for fresh eating, winemaking, jellies, and more.

This comprehensive guide will walk you through everything you need to know — from choosing the right varieties to planting, care, and harvesting your Muscadine vines successfully.


Why Choose Muscadine Grapes?

Muscadine grapes (Vitis rotundifolia) are prized for their adaptability and resilience. Unlike European grape varieties, Muscadines can handle the hot, muggy summers and unpredictable weather common to the Southeast. They’re naturally resistant to many pests and diseases, making them an excellent choice for home gardeners and small orchards alike.

Benefits of growing Muscadines:

  • Thrive in warm, humid climates
  • Resistant to Pierce’s disease and fungal problems
  • High in antioxidants like resveratrol
  • Excellent for fresh eating, wines, jams, and juices
  • Long-lived and productive vines

Best Muscadine Varieties for the Southeast

When selecting Muscadine varieties, consider whether you prefer grapes for fresh eating, winemaking, or both. Also, pay attention to whether the variety is self-fertile or requires a pollinator.

Self-Fertile Varieties:

  • Carlos: Great for wine and juice, heavy producer
  • Noble: Popular for red wine production
  • Alachua: Excellent disease resistance, great for fresh eating

Female Varieties (Require a Pollinator):

  • Scuppernong: The classic bronze-colored Muscadine
  • Big Red: Large, flavorful red grapes
  • Cowart: Sweet, black fruit with a long harvest season

Pro tip: If you plant female varieties, be sure to include a self-fertile type nearby for proper pollination.


How to Plant Muscadine Grapes

1. Choose the Right Location

Muscadines need:

  • Full sun — at least 6-8 hours daily
  • Well-drained, sandy or loamy soil with a pH of 5.5 to 6.5
  • Good air circulation to prevent fungal issues

Avoid low-lying areas where water can accumulate and frost pockets can form.

2. Prepare the Soil

Test your soil’s pH and adjust as needed. Use lime to raise pH or elemental sulfur to lower it. Work in organic matter like compost to improve drainage and fertility.

3. Planting Steps

  • Space vines 12-20 feet apart in rows
  • Dig holes twice as wide and deep as the root ball
  • Mix a little compost or aged manure into the hole
  • Place the plant so the crown is level with the soil surface
  • Backfill and water thoroughly
  • Mulch with pine straw or wood chips to retain moisture and suppress weeds

Trellising and Training Your Vines

Muscadine vines need sturdy support. The most common trellis systems are:

  • Single Wire Trellis: One horizontal wire, 5-6 feet off the ground
  • Double Curtain Trellis: Two parallel wires with vines trained along both sides

Training Tips:

  • In the first year, focus on establishing one strong vertical shoot
  • Tie the shoot to a stake or wire for support
  • Pinch off side shoots until the main vine reaches the wire
  • Once it reaches the wire, allow it to split into two arms and grow horizontally

Watering and Fertilizing Muscadines

Watering:

  • Keep soil moist (but not soggy) during the first year
  • Mature vines tolerate some drought but benefit from regular watering during dry spells and fruiting

Fertilizing:

  • Apply a balanced fertilizer (like 10-10-10) after new growth begins in spring
  • Fertilize again in midsummer
  • Avoid over-fertilizing, as this promotes leafy growth over fruit production

Pruning Muscadine Vines

Pruning is crucial for vine health and productivity. Without regular pruning, vines become tangled, and fruit quality diminishes.

When to prune:
Late winter (January–February) while the plant is dormant.

How to prune:

  • Cut back lateral branches to 2-4 buds from the main arms
  • Remove any dead, weak, or crossing branches
  • Maintain the desired shape along your trellis system

Don’t be alarmed by heavy sap flow (called “bleeding”) after pruning — it’s normal and harmless.


Common Pests and Diseases

While Muscadines are hardy and disease-resistant, a few pests and issues can occur:

Pests:

  • Japanese beetles
  • Grape root borers
  • Aphids

Control these with hand-picking, horticultural oil sprays, or insecticidal soap when necessary.

Diseases:

  • Black rot
  • Powdery mildew
  • Ripe rot

Prevent disease by:

  • Ensuring good air circulation
  • Removing fallen leaves and fruit
  • Using organic fungicides like sulfur or neem oil if needed

Harvesting Muscadine Grapes

When to harvest:

  • Typically from August to October depending on variety and climate
  • Grapes are ripe when fully colored and slightly soft to the touch
  • Unlike other grapes, Muscadines ripen individually, not in clusters

How to harvest:

  • Gently twist or clip ripe grapes from the vine
  • Collect regularly to avoid fruit drop and spoilage

Using and Storing Your Muscadines

Fresh eating: Enjoy as a healthy snack — just remember, Muscadines have thick skins and large seeds.

Preserving:

  • Make jellies, juices, or wines
  • Freeze grapes whole for smoothies and baking
  • Refrigerate fresh grapes for up to a week

Final Thoughts

Growing Muscadine grapes in the Southeast is a rewarding, sustainable project that adds beauty to your garden and fresh, flavorful fruit to your table. With the right site, proper care, and a little patience, you’ll enjoy bountiful harvests of these native American grapes for years to come.

How to Grow Jackfruit in a Large Garden: A Complete Guide for Home Gardeners

How to Grow Jackfruit in a Large Garden: A Complete Guide for Home Gardeners

If you’ve ever admired the giant, spiky green fruits hanging from tropical trees in Southeast Asia or Caribbean markets, chances are you’ve seen a jackfruit. Known as the largest tree-borne fruit in the world, jackfruit (Artocarpus heterophyllus) is a unique tropical delicacy loved for its sweet, fruity flavor and versatility in both savory and sweet dishes.

The good news? If you have a large garden in a warm climate, you can grow your own jackfruit tree and enjoy homegrown harvests of these exotic fruits. In this article, we’ll walk you through how to grow jackfruit in a large garden — covering everything from choosing a planting site to harvesting those enormous, honey-scented fruits.


What is Jackfruit?

Jackfruit is a fast-growing, evergreen tropical tree native to South and Southeast Asia. It belongs to the fig and mulberry family (Moraceae) and produces massive fruits that can weigh anywhere from 10 to 80 pounds (or more!).

The flesh inside ranges from sweet and fragrant when ripe to mild and starchy when unripe, making it a popular ingredient in both curries and desserts. Unripe jackfruit is even used as a meat substitute in vegetarian recipes.


Can You Grow Jackfruit at Home?

Yes — if you live in a tropical or subtropical region, or can simulate those conditions in a greenhouse or protected area, you can successfully grow jackfruit in your own garden.

Ideal growing conditions:

  • USDA Hardiness Zones: 10-12
  • Temperature range: 70°F to 90°F (21°C to 32°C)
  • Cannot tolerate frost or prolonged cold temperatures

In regions like South Florida, Southern Texas, Hawaii, and parts of California, jackfruit can thrive outdoors year-round.


When to Plant Jackfruit

The best time to plant jackfruit is during the late spring or early summer when temperatures are consistently warm, and the risk of frost has passed. Planting during the rainy season can also give your young tree a helpful boost.


How to Plant Jackfruit in a Large Garden

1. Choose a Suitable Location

Jackfruit trees grow large and wide, typically reaching 30–70 feet tall and spreading out 20–50 feet.

Key location requirements:

  • Full sun exposure (6–8+ hours daily)
  • Sheltered from strong winds
  • Well-draining soil (jackfruit hates waterlogged roots)

Avoid areas prone to flooding or heavy clay soil. Sandy loam or organically enriched soils work best.


2. Prepare the Soil

Jackfruit trees prefer soil with a pH of 6.0–7.5.

Soil preparation tips:

  • Mix organic compost or well-rotted manure into the soil
  • Add a balanced slow-release fertilizer (10-10-10)
  • Dig a planting hole twice as wide and deep as the root ball

3. Planting the Tree

  • Carefully remove the tree from its container, preserving the root ball.
  • Position it in the hole so the root collar is level with the surrounding soil.
  • Backfill with amended soil, gently firming it in to remove air pockets.
  • Water thoroughly after planting.

Spacing: Plant jackfruit trees 30–50 feet away from other trees, buildings, and structures to accommodate its wide canopy and large root system.


Watering and Fertilizing

Watering

Consistent moisture is crucial, especially for young jackfruit trees.

  • Water 2–3 times per week for the first year
  • Once established, water deeply once a week during dry spells
  • Avoid overwatering to prevent root rot

Tip: Mulch around the base with 2–4 inches of organic mulch to retain soil moisture and suppress weeds.


Fertilizing

Jackfruit trees are heavy feeders.

Fertilizer schedule:

  • Apply a balanced (10-10-10) fertilizer every 6–8 weeks during active growth.
  • Increase to a higher potassium formula (like 8-3-9) as the tree matures and begins fruiting.
  • Supplement with compost or aged manure annually in spring.

Pruning and Maintenance

While jackfruit trees are relatively low-maintenance, annual pruning helps keep them healthy, productive, and manageable.

When and how to prune:

  • Prune after the first growing season to establish a strong central leader.
  • Remove dead, weak, or overcrowded branches.
  • Maintain a height of 15–20 feet for easier care and harvesting in home gardens.

Tip: Train your jackfruit tree to have 3–4 strong primary branches for a balanced, open canopy.


Common Pests and Diseases

Though hardy, jackfruit trees may encounter pests and diseases in tropical environments.

Pest/DiseaseSymptomsControl
Fruit fliesMaggots in ripening fruitUse traps, harvest early
AphidsSticky leaves, curled foliageNeem oil or insecticidal soap
MealybugsWhite cottony masses on branchesPrune infested areas, neem oil
Leaf spot fungiDark spots on leavesCopper-based fungicide

Good sanitation, proper spacing, and removing fallen fruit can significantly reduce pest and disease problems.


Flowering and Pollination

Jackfruit trees typically bloom within 3–5 years from planting if grown from seed or 2–3 years for grafted trees.

Pollination tips:

  • Jackfruit trees produce both male and female flowers on the same tree.
  • Pollination is mostly wind and insect-driven, though hand pollination improves fruit set in small gardens.
  • Hand pollinate by gently brushing pollen from male flowers onto female flowers in the morning.

Harvesting Jackfruit

Time to maturity:

  • 3–5 years after planting from seed
  • 2–3 years from grafted trees

When to harvest:

  • Fruit color changes from green to light yellowish-green.
  • Dull, hollow sound when tapped.
  • Aroma becomes sweet and fruity.
  • Small spines flatten as the fruit ripens.

How to harvest:

  • Use a sharp knife or saw to cut the fruit, leaving a 2–3 inch stem attached.
  • Wear gloves — jackfruit sap is sticky!

How to Use and Store Jackfruit

Culinary uses:

  • Unripe jackfruit: Used in curries, stir-fries, and as a vegan “pulled pork” substitute.
  • Ripe jackfruit: Eaten fresh, blended into smoothies, desserts, ice creams, and candies.

Storage tips:

  • Whole fruits can be stored at room temperature for 3–5 days.
  • Refrigerate cut jackfruit for up to 7 days.
  • Freeze pulp for up to 2 months for later use.

Health Benefits of Jackfruit

Jackfruit isn’t just delicious — it’s packed with nutrients:

  • Rich in vitamin C and antioxidants
  • High in potassium for heart health
  • Good source of fiber for digestion
  • Contains beneficial plant compounds like carotenoids and flavonoids

Quick Growing Tips

Plant in full sun with ample space
Keep soil consistently moist but well-drained
Fertilize regularly with balanced and potassium-rich fertilizers
Prune annually for a manageable shape and airflow
Control pests with organic sprays and good garden hygiene
Harvest fruits when fully mature, based on color, sound, and aroma


Final Thoughts

Growing jackfruit in a large garden is a deeply rewarding experience for home gardeners with a love for tropical flavors and impressive, eye-catching trees. With the right care, patience, and space, you can enjoy massive, honey-scented fruits right from your own backyard.

So if you live in a warm region and have a spacious garden, why not give this tropical giant a try? It might just become the centerpiece of your garden paradise.