How to Care for a Pachira Plant Easily

How to Care for a Pachira Plant Easily

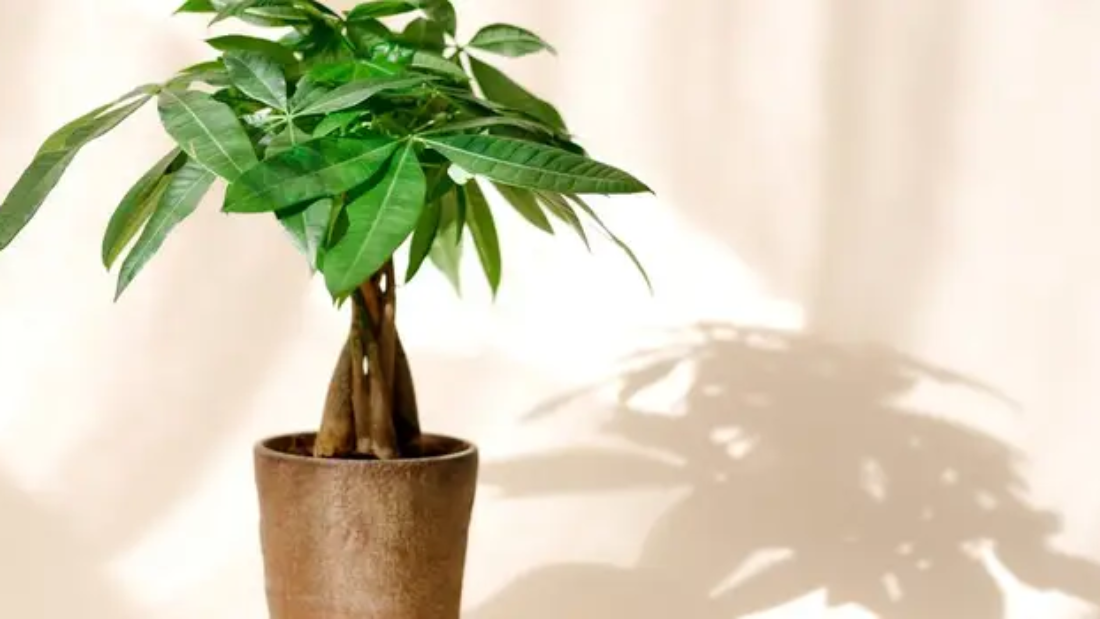
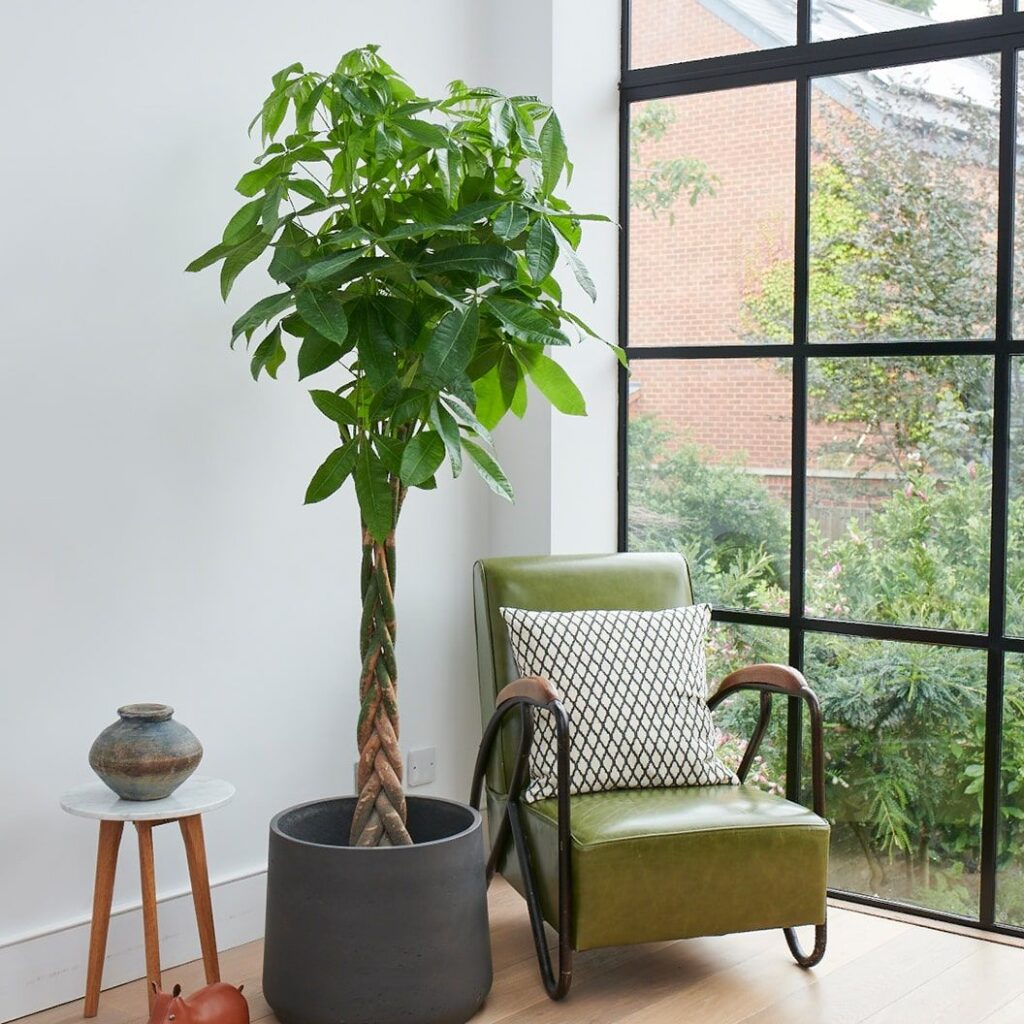
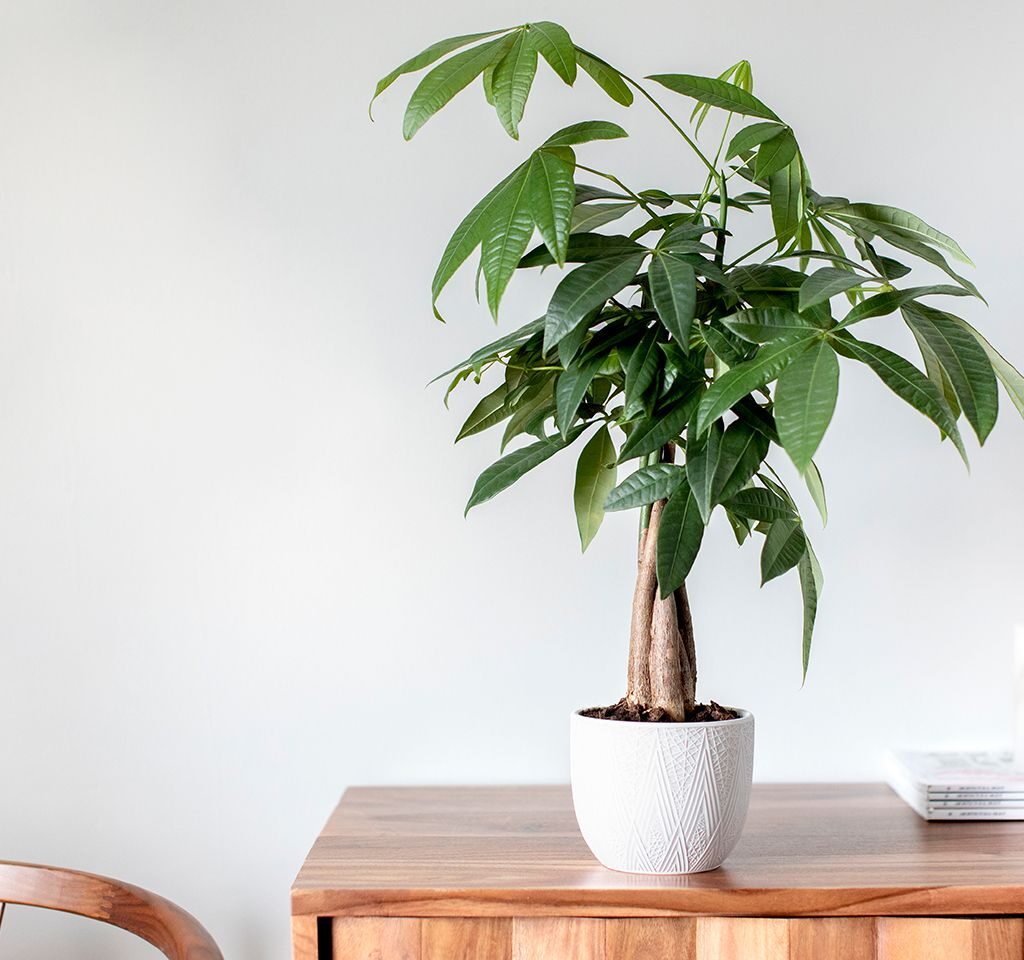
If you’re looking for a stylish, low-maintenance houseplant that adds a tropical flair to your space, the Pachira plant, commonly known as the Money Tree, is an excellent choice. With its glossy, palmate leaves and braided trunk, the Pachira aquatica is not only visually appealing but also believed to bring good luck and prosperity to its owners — which explains why it’s a favorite in homes and offices worldwide.

The good news is that this plant is incredibly easy to care for once you understand its preferences. In this article, we’ll cover everything you need to know about caring for a Pachira plant, from light and water needs to pruning, repotting, and troubleshooting common problems.


What Is a Pachira Plant?

The Pachira aquatica is a tropical plant native to Central and South America, typically found in wetlands and swampy areas. In its natural habitat, it can grow up to 60 feet tall, but as a houseplant, it usually stays around 6-8 feet.

It’s commonly known as the Money Tree because of a popular East Asian legend that claims the plant brings fortune and prosperity. The braided trunk you often see in store-bought plants is created by carefully intertwining young, flexible stems.


Why Choose a Pachira Plant?

Aside from its cultural symbolism, the Pachira offers several practical benefits:

  • Low maintenance and beginner-friendly.
  • Air-purifying qualities that help improve indoor air quality.
  • Versatile in design — fits in modern, boho, or minimalist interiors.
  • Can be grown indoors or outdoors in warm climates.

Ideal Growing Conditions for a Pachira Plant

To keep your Money Tree happy, it’s essential to mimic its natural environment as closely as possible. Here’s how:

1. Light Requirements

Pachira plants prefer bright, indirect light.

  • Place it near an east-facing or south-facing window where it gets filtered light.
  • Avoid direct, harsh afternoon sun, which can scorch its leaves.
  • It can tolerate lower light, but growth may slow.

Tip: Rotate the plant occasionally to ensure even growth on all sides.


2. Temperature and Humidity

Since it’s a tropical plant, Pachira thrives in warm, humid environments.

  • Ideal temperature range: 65°F to 80°F (18°C to 26°C).
  • Avoid exposing it to drafts, sudden temperature drops, or heating vents.
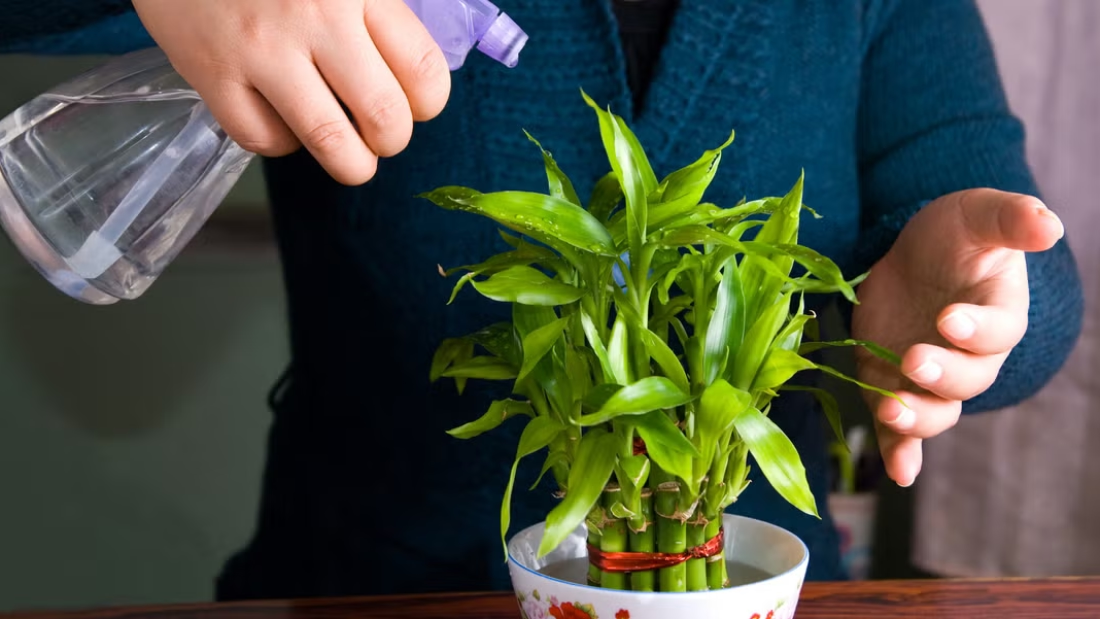
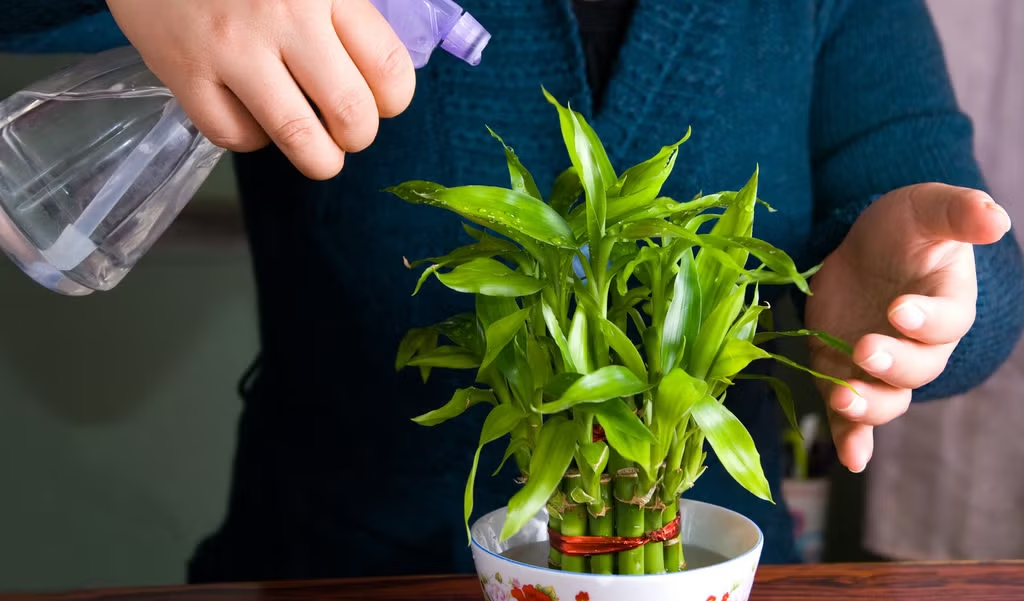
  • Humidity: It loves a humid environment. Mist the leaves regularly or place a pebble tray with water beneath the pot to boost humidity.

Tip: During winter, consider using a room humidifier to prevent dry air from damaging the leaves.


Watering Your Pachira Plant

Watering is one of the few areas where people go wrong with the Money Tree. It prefers consistently moist but not soggy soil.

How Often to Water

  • Water thoroughly when the top 1-2 inches of soil feel dry.
  • Typically, this means watering every 7-10 days in spring and summer and every 2-3 weeks in fall and winter.

Watering Tips

  • Use room-temperature, filtered, or rainwater when possible.
  • Ensure excess water drains freely through the pot’s drainage holes.
  • Never let the plant sit in standing water, as this can cause root rot.

The Best Soil for a Pachira Plant

The Pachira prefers well-draining, nutrient-rich soil that retains some moisture.

Ideal Soil Mix:

  • 1 part organic potting soil
  • 1 part perlite or coarse sand (for drainage)
  • 1 part peat moss or coconut coir (for moisture retention)

You can also use a cactus or succulent mix with added peat for an easy solution.


Fertilizing a Pachira Plant Naturally

Pachira plants aren’t heavy feeders but will benefit from occasional fertilizing during the growing season (spring to early fall).

Natural Fertilizer Options:

  • Compost tea: A gentle, organic nutrient boost.
  • Diluted fish emulsion: Great for promoting healthy foliage.
  • Banana peel water: Soak chopped peels in water overnight and water your plant for a potassium-rich treat.

Feeding Schedule:
Once a month during spring and summer. Skip fertilizing during the fall and winter dormant period.


Pruning and Training Your Pachira Plant

Pruning helps control the size, encourages bushier growth, and maintains the shape of your Money Tree.

When and How to Prune:

  • Best done in spring or early summer.
  • Use clean, sharp scissors to trim back overgrown, leggy stems.
  • Remove any yellowing, damaged, or dead leaves.
  • If you have a braided trunk, occasionally adjust or rebraid young stems gently as they grow.

Repotting a Pachira Plant

Pachira plants don’t mind being slightly root-bound but will benefit from repotting every 2-3 years.

When to Repot:

  • When roots start emerging from the drainage holes.
  • If growth slows significantly despite good care.
  • If soil becomes compacted or waterlogged.

Repotting Tips:

  • Choose a pot 1-2 inches larger in diameter than the current one.
  • Refresh the soil with a well-draining mix.
  • Water thoroughly after repotting.

Common Problems and How to Fix Them

Even though Pachira plants are tough, they’re not immune to occasional issues. Here’s how to spot and solve them easily:

ProblemCauseSolution
Yellowing leavesOverwatering, poor drainageLet soil dry out, check pot drainage, adjust watering
Drooping leavesUnderwatering, temperature shockWater plant, move away from cold drafts
Brown leaf tipsLow humidity, dry airMist leaves, increase humidity
Root rotExcess water, soggy soilRemove affected roots, repot in fresh soil
Pests (spider mites, mealybugs)Dry conditions, poor airflowWipe leaves with neem oil solution or soapy water

Bonus Care Tips for a Healthy Pachira Plant

  • Dust leaves regularly to keep them clean and photosynthesizing efficiently.
  • Rotate the pot every couple of weeks for balanced growth.
  • Use a stake to support tall stems if necessary.
  • Avoid moving the plant frequently — sudden changes in location or light can stress it.

Benefits of Keeping a Pachira Plant

  • Aesthetic appeal: Its lush, green leaves and braided trunk add elegance to any room.
  • Symbol of prosperity: Traditionally believed to attract wealth and good fortune.
  • Air purifier: Helps remove pollutants and improve indoor air quality.
  • Low maintenance: Perfect for beginners and busy plant parents.

Final Thoughts

Caring for a Pachira plant is refreshingly easy when you follow its simple preferences for light, water, soil, and humidity. By providing a warm, bright, and moderately humid environment, watering consistently without overdoing it, and feeding naturally during the growing season, you’ll enjoy a vibrant, healthy Money Tree for years to come.

Whether you believe in its fortune-bringing powers or simply appreciate its beauty and resilience, the Pachira aquatica is a must-have for any indoor plant lover.

How to Care for a Christmas Cactus Plant Naturally

How to Care for a Christmas Cactus Plant Naturally

The Christmas cactus (Schlumbergera spp.) is a favorite houseplant, especially during the holiday season when it bursts into stunning blooms of pink, red, white, or purple. Native to the cloud forests of Brazil, this tropical cactus thrives in shaded, humid environments — quite different from the arid deserts its name might suggest.

If you’re looking for a beautiful, long-living plant that can brighten your home naturally, a Christmas cactus is an excellent choice. Even better, caring for it doesn’t require synthetic fertilizers or chemical treatments. In this guide, we’ll cover everything you need to know about growing and maintaining a healthy Christmas cactus naturally.


Why Choose a Christmas Cactus?

Before we dive into care tips, let’s appreciate what makes the Christmas cactus so special:

  • Seasonal Blooms: It typically flowers around the holidays, adding color and cheer to your winter home.
  • Air-Purifying Qualities: Like many houseplants, it helps purify indoor air.
  • Low Maintenance: Once you understand its needs, it’s remarkably easy to care for.
  • Natural Longevity: With proper, chemical-free care, a Christmas cactus can live for decades — sometimes being passed down through generations.

Best Environment for a Christmas Cactus

Unlike desert cacti, Christmas cacti prefer cooler, more humid environments with indirect light. Here’s how to recreate its natural habitat indoors.

1. Light Requirements

Christmas cacti thrive in bright but indirect sunlight.

  • Best placement: Near an east-facing window where it can get gentle morning light.
  • Avoid intense afternoon sun, which can scorch its leaves.
  • In low-light homes, a spot under grow lights or a few feet from a sunny window will work too.

2. Temperature and Humidity

Since this cactus is native to tropical forests, it prefers moderate temperatures and higher humidity.

  • Ideal temperature: 60°F–70°F (15°C–21°C).
  • Avoid placing it near heating vents, fireplaces, or drafty windows.
  • Increase humidity by placing a tray of water with pebbles under the plant or misting the leaves occasionally with distilled or rainwater.

Choosing the Right Natural Soil Mix

Christmas cacti need well-draining but moisture-retentive soil — different from typical cactus mixes.

Natural Soil Blend

Create a healthy, natural mix at home by combining:

  • 1 part organic potting soil (without chemical fertilizers)
  • 1 part coarse sand or perlite for drainage
  • 1 part coconut coir or peat moss to retain moisture

This combination mimics the loose, organic-rich soil of its native forest floor.


Natural Watering Tips

Overwatering is the most common issue with Christmas cacti. These plants like their soil to be slightly moist, not soggy.

Watering Schedule

  • During active growth (spring to early fall): Water when the top inch of soil feels dry.
  • During bloom (late fall to winter): Keep the soil lightly moist.
  • In dormancy (after flowering): Reduce watering to once every 3–4 weeks.

Natural Watering Method

  • Use rainwater, distilled water, or tap water left out overnight to reduce chlorine and fluoride, which can harm the plant.
  • Water thoroughly until excess drains out, then empty the saucer after a few minutes.

Natural Fertilization

Skip synthetic fertilizers and opt for natural, organic options to feed your Christmas cactus.

Natural Fertilizer Ideas

  • Compost tea: A mild, nutrient-rich liquid made by steeping compost in water.
  • Diluted fish emulsion: Use at half-strength once a month during the growing season.
  • Banana peel tea: Soak a chopped banana peel in water overnight and water your plant with the nutrient-infused liquid.

Avoid fertilizing in late fall and winter while the plant is blooming or dormant.


How to Encourage Blooming Naturally

One of the joys of owning a Christmas cactus is its spectacular seasonal flowers. Here’s how to coax it to bloom without synthetic chemicals:

Bloom-Boosting Conditions

  • Darkness and cooler nights: From mid-October to November, give your cactus 12–14 hours of darkness at night and keep it at 60°F (16°C).
  • Limit water during this period to encourage bud formation.
  • Once buds appear, return the plant to its usual spot and resume normal care.

Avoid moving or repotting the plant when buds are forming, as this can cause them to drop.


Natural Pruning and Propagation

Pruning your Christmas cactus keeps it healthy and encourages fuller growth.

How to Prune Naturally

  • After blooming, gently twist or snip off segments at the joints.
  • Remove leggy or overgrown stems to promote bushier growth.

Propagating Christmas Cactus

  • Use pruned stem segments with 3–4 jointed sections.
  • Allow cuttings to air-dry for 24 hours.
  • Plant in a small pot with your natural soil mix.
  • Mist occasionally and keep in indirect light until roots develop (about 4–6 weeks).

Repotting Your Christmas Cactus

Christmas cacti prefer to be slightly root-bound, so only repot every 3–4 years.

When to Repot

  • When roots begin to emerge from drainage holes.
  • After blooming season in late winter or early spring.

Natural Repotting Steps

  1. Carefully remove the plant from its pot.
  2. Gently shake off excess soil and trim any dead or rotting roots.
  3. Place in a slightly larger pot with fresh, natural soil mix.
  4. Water lightly after a few days.

Common Natural Problems and Solutions

Even with natural care, you might encounter some issues. Here’s how to address them without chemicals:

ProblemCauseNatural Solution
Dropping buds/flowersOverwatering or sudden movesWater only when needed, avoid relocating during budding
Yellowing leavesPoor drainage or overwateringImprove soil mix, ensure proper drainage, reduce watering
WiltingUnderwatering or root rotAdjust watering schedule, repot if roots are rotting
Mealybugs or aphidsPestsSpray with a natural neem oil solution or insecticidal soap

Benefits of Natural Care for Christmas Cactus

By choosing natural methods for your Christmas cactus, you:

  • Promote long-term plant health without chemical dependency.
  • Create a safer environment for pets and children.
  • Support pollinators and beneficial insects if placed near open windows or outdoors seasonally.
  • Enhance indoor air quality with organic, living décor.

Final Thoughts

Caring for a Christmas cactus naturally isn’t difficult — it just requires understanding its tropical origins and mimicking those conditions indoors. With the right balance of indirect sunlight, humidity, natural soil, and gentle watering, your plant can thrive for decades, blooming beautifully each holiday season.

By avoiding synthetic chemicals and choosing natural fertilizers and pest remedies, you not only nurture a healthier plant but also contribute to a more eco-friendly, toxin-free home environment.


FAQs

Q: Can a Christmas cactus survive without fertilizer?
Yes, while it benefits from occasional natural feeding during its growth period, it can survive on well-prepared organic soil alone for long stretches.

Q: How long do Christmas cacti live?
With natural care, a Christmas cactus can live 30 years or more, with some specimens reportedly over 50 years old.

Q: Is a Christmas cactus safe for pets?
Yes — it’s non-toxic to cats and dogs, though ingesting large amounts might cause mild stomach upset.

How to Care for a Lavender Plant Indoors

How to Care for a Lavender Plant Indoors

Lavender is one of the world’s most beloved plants, prized for its delicate purple flowers, soothing fragrance, and versatile uses in aromatherapy, culinary creations, and natural skincare. While typically associated with sprawling gardens and sun-drenched fields, lavender can thrive indoors with the right care and attention. If you’ve ever wondered how to successfully grow and maintain a lavender plant inside your home, this complete guide is for you.


Why Grow Lavender Indoors?

Before diving into care instructions, it’s helpful to understand why so many plant lovers bring lavender indoors:

  • Fragrance: Its sweet, calming scent naturally perfumes your living space.
  • Aesthetic appeal: Lavender’s silvery-green foliage and soft purple blooms enhance your home décor.
  • Air-purifying properties: Like many houseplants, lavender helps purify the air.
  • Therapeutic benefits: Lavender’s aroma reduces stress, improves sleep, and elevates mood.
  • Year-round enjoyment: Indoor lavender offers blooms and greenery regardless of outdoor seasons.

With the right conditions and maintenance, lavender can flourish indoors just as beautifully as it does outdoors.


Best Lavender Varieties for Indoors

Not all lavender types adapt well to indoor growing. Here are some of the best options for container cultivation inside your home:

  • French Lavender (Lavandula dentata): Compact and ideal for pots, with fringed leaves and strong fragrance.
  • English Lavender (Lavandula angustifolia ‘Munstead’): One of the hardiest, known for its soft scent and delicate flowers.
  • Spanish Lavender (Lavandula stoechas): Recognizable by its rabbit-ear blooms and tolerates indoor conditions well.
  • Lavandin (Lavandula x intermedia): A hybrid variety that’s more heat-tolerant and can adapt to indoor settings.

Choose compact, dwarf, or container-friendly types for the best indoor results.


Ideal Growing Conditions for Indoor Lavender

Creating the right environment is the secret to keeping your indoor lavender healthy and vibrant. Let’s break down what it needs:

1. Light Requirements

Lavender loves the sun. Indoors, it should receive at least 6–8 hours of bright, direct sunlight daily.

  • Best placement: A south-facing window is ideal. East or west-facing spots work too, provided there’s ample light.
  • Supplemental lighting: In darker homes or during winter months, use a full-spectrum grow light to mimic natural sunlight.

Without sufficient light, lavender can become leggy, weak, and struggle to flower.


2. Temperature and Humidity

Lavender is naturally suited to warm, dry climates.

  • Ideal temperature: 60°F–75°F (15°C–24°C).
  • Avoid placing lavender near cold drafts, air conditioners, or heating vents.
  • Keep humidity low. Lavender prefers dry air — avoid bathrooms or overly humid rooms.

If your home is naturally humid, improve airflow around the plant and consider using a dehumidifier.


3. Soil Type

Proper soil is crucial for healthy roots.

  • Use a well-draining, sandy potting mix.
  • A cactus or succulent mix works well, or you can make your own blend:
    • 2 parts potting soil
    • 1 part perlite or coarse sand
    • 1 part small gravel or pumice

Avoid rich, moisture-retentive soils, which can cause root rot.


4. Choosing the Right Pot

Select a pot with good drainage holes to prevent water buildup. Lavender doesn’t like soggy roots.

  • Material matters: Terracotta or clay pots are ideal as they allow moisture to evaporate.
  • Ensure the pot is just slightly larger than the plant’s root ball to prevent overwatering.

How to Water Lavender Indoors

Overwatering is the number one cause of indoor lavender problems. The key is to let the soil dry out between waterings.

Watering Schedule

  • Water deeply when the top 1–2 inches of soil feel dry.
  • During spring and summer (active growing season): every 7–14 days.
  • In fall and winter (dormant period): every 3–4 weeks, or as needed.

Watering Technique

  • Water at the base of the plant to keep foliage dry and prevent mildew.
  • Empty excess water from the saucer after 10 minutes to avoid root rot.

Fertilizing Indoor Lavender

Lavender isn’t a heavy feeder but benefits from occasional nutrients.

Best Fertilizer

  • Use a balanced, water-soluble fertilizer or a low-nitrogen organic fertilizer diluted to half strength.
  • Fertilize every 4–6 weeks during spring and summer.
  • Avoid fertilizing in fall and winter.

Too much fertilizer can reduce fragrance and flower production.


Pruning and Deadheading

Pruning promotes a bushier, healthier plant and encourages new blooms.

How to Prune Lavender

  • Lightly trim back the plant in early spring to shape it.
  • Remove dead, woody, or straggly growth.

Deadheading

  • Snip spent flowers just above the foliage to encourage more blooms and maintain tidiness.

Never cut into the woody base, as it may not regrow from old wood.


Repotting Indoor Lavender

As lavender grows, it may outgrow its pot or deplete soil nutrients.

When to Repot

  • Every 1–2 years or when roots emerge from drainage holes.
  • Early spring is the best time.

Repotting Steps

  1. Gently remove the plant from its container.
  2. Shake off old soil and inspect roots.
  3. Prune away any damaged roots.
  4. Replant in fresh, dry potting mix.
  5. Wait a week before watering to let roots settle.

Common Problems and Solutions

ProblemCauseSolution
Yellowing leavesOverwatering or poor drainageLet soil dry, improve drainage, check watering habits
Leggy growthInsufficient lightMove to a sunnier spot or use a grow light
Wilting, soft foliageRoot rot due to overwateringRemove damaged roots, repot in dry soil
Powdery mildewHigh humidity or poor airflowImprove air circulation, avoid overhead watering

Harvesting Lavender Indoors

One of the pleasures of growing lavender is harvesting its aromatic flowers.

When to Harvest

  • When about half the buds on a stem are open for maximum fragrance and oil content.

How to Harvest

  • Cut flower stems in the morning after dew has evaporated.
  • Hang bunches upside down in a cool, dry, dark place for drying.

Use dried lavender for sachets, teas, potpourri, or homemade beauty products.


Benefits of Indoor Lavender

Besides its stunning appearance, lavender offers impressive perks:

  • Natural air freshener with a calming scent.
  • Promotes better sleep when placed near your bed.
  • Reduces stress and anxiety through aromatherapy.
  • Repels indoor pests like moths and flies.
  • Can be used in culinary dishes, teas, and herbal remedies.

Final Thoughts

Caring for a lavender plant indoors is a rewarding experience that fills your home with beauty, fragrance, and tranquility. By providing plenty of sunlight, well-draining soil, and careful watering, you can enjoy this Mediterranean herb year-round. With occasional pruning and a little love, your indoor lavender will flourish, bringing a touch of the countryside to your modern home.

How to Care for an Aloe Plant Successfully

How to Care for an Aloe Plant Successfully

Aloe plants are some of the most loved succulents around the world — and for good reason. Known for their spiky leaves, healing gel, and forgiving nature, aloe plants are perfect for both seasoned gardeners and beginners alike. Whether you keep yours as a bright indoor companion or a sun-loving outdoor plant, proper care ensures it thrives for years. In this guide, we’ll walk you through everything you need to know about successfully caring for an aloe plant, from planting tips to watering schedules and pest prevention.


Why Choose an Aloe Plant?

Before diving into care tips, it’s helpful to know why aloe plants are so popular. Here are a few reasons:

  • Low-maintenance: Aloe is incredibly resilient, making it ideal for busy or novice plant parents.
  • Medicinal benefits: Aloe vera gel is widely used for treating burns, skin irritations, and moisturizing.
  • Air purification: Aloe plants help improve indoor air quality by removing toxins.
  • Aesthetic appeal: Their distinctive fleshy leaves and rosette growth pattern make them a beautiful addition to homes and offices.

Choosing the Right Aloe Plant Variety

While Aloe vera is the most well-known species, there are over 500 varieties of aloe plants. Some other popular options include:

  • Aloe aristata (Lace Aloe): Compact with white speckled leaves and orange flowers.
  • Aloe brevifolia (Short-Leaf Aloe): A dwarf variety with blue-green leaves.
  • Aloe ferox (Cape Aloe): Known for its medicinal uses and tall flower spikes.

Choose a variety that suits your aesthetic preferences and growing conditions.


Ideal Growing Conditions for Aloe Plants

Creating the right environment is crucial for your aloe plant’s health. Here’s what to focus on:

1. Light Requirements

Aloe plants love bright, indirect sunlight.

  • Indoors: Place your aloe near a south or west-facing window where it gets about 6–8 hours of light daily.
  • Outdoors: Position it in a sunny spot, but shield it from harsh afternoon sun to prevent leaf scorch.

If your plant begins to stretch or turn pale, it’s likely not getting enough light.

2. Temperature and Humidity

Aloe plants prefer temperatures between 55°F to 80°F (13°C to 27°C). They can tolerate occasional drops in temperature but should be brought indoors before frost arrives.

Humidity isn’t a big concern — aloe thrives in normal indoor conditions but prefers drier air. Avoid placing it in overly humid bathrooms or kitchens.

3. Soil Type

The key to a healthy aloe is well-draining soil. Use a cactus or succulent potting mix, or create your own blend using:

  • 2 parts potting soil
  • 1 part perlite or pumice
  • 1 part coarse sand

This ensures roots won’t sit in water, which can lead to rot.


How to Water an Aloe Plant Properly

Overwatering is one of the most common mistakes with aloe care. Here’s how to get it right:

Watering Schedule

  • Spring & Summer (growing season): Water deeply when the top 1–2 inches of soil feels dry. Typically every 2–3 weeks.
  • Fall & Winter (dormant season): Reduce watering to once a month or less, as aloe uses less moisture during colder months.

Watering Technique

Water the soil directly, avoiding the leaves. Allow excess water to drain completely. If the plant sits in a saucer, empty any standing water after 10–15 minutes.


Fertilizing Your Aloe Plant

Aloe plants don’t require heavy feeding but benefit from occasional nutrients.

When to Fertilize

Feed your aloe during the active growing season (spring and summer), about once a month.

Best Fertilizer

Use a balanced, water-soluble fertilizer diluted to half strength. A succulent-specific fertilizer is also a great option.

Avoid fertilizing in fall and winter as the plant is resting and not actively growing.


Repotting an Aloe Plant

As aloe plants grow, they may outgrow their pot or produce “pups” (baby plants) around the base.

When to Repot

  • When the plant becomes top-heavy.
  • If roots emerge from the drainage holes.
  • Every 2–3 years to refresh the soil.

How to Repot

  1. Choose a pot with drainage holes.
  2. Gently remove the plant from its current pot.
  3. Brush away old soil and trim any dead roots.
  4. Plant in fresh, dry succulent soil.
  5. Wait 3–5 days before watering to allow roots to settle.

Propagating Aloe Plants

One of the joys of aloe care is propagation. You can easily grow new plants from pups.

Propagation Steps

  1. Wait until pups are at least a few inches tall.
  2. Remove the parent plant from the pot.
  3. Gently separate the pups, ensuring each has some roots attached.
  4. Plant pups in small pots with well-draining soil.
  5. Let them rest a couple of days before watering.

Within weeks, they’ll establish roots and begin growing.


Common Problems and How to Fix Them

Even hardy aloe plants encounter occasional issues. Here’s how to handle them:

ProblemCauseSolution
Leaves turning brownSunburn or overwateringMove to indirect light, adjust watering
Mushy, soft leavesOverwatering, root rotRemove damaged parts, repot in dry soil
Pests (mealybugs, aphids)Excess humidity or poor careWipe leaves with soapy water or neem oil
Leggy, stretched growthNot enough sunlightMove to a brighter location

Seasonal Aloe Care Tips

Spring & Summer

  • Increase watering frequency.
  • Fertilize monthly.
  • Propagate pups.

Fall & Winter

  • Reduce watering to once a month.
  • Move indoor plants away from cold drafts.
  • Avoid fertilizing.

Benefits of Aloe Vera Gel

Beyond being a gorgeous plant, aloe vera’s gel is packed with health and skincare benefits:

  • Soothes burns and sunburns
  • Moisturizes dry skin
  • Reduces inflammation
  • Promotes wound healing
  • Acts as a natural hair conditioner

Simply cut an older, lower leaf, extract the clear gel, and apply it directly to the skin.

Pro tip: Always test a small skin patch before widespread use to rule out allergies.


Final Thoughts

Caring for an aloe plant is simple, rewarding, and beneficial. With just a little attention to light, water, and soil conditions, your aloe will flourish indoors or out, adding beauty and health benefits to your space. Whether you’re a seasoned gardener or a houseplant novice, aloe vera is a fantastic plant to grow and nurture.

How to Care for a Jade Plant Effectively: The Ultimate Indoor Gardening Guide

How to Care for a Jade Plant Effectively: The Ultimate Indoor Gardening Guide

The jade plant (Crassula ovata), with its thick, glossy, deep green leaves and strong woody stems, is one of the most beloved houseplants around the world. Often called the “money plant” or “lucky plant,” it’s believed to bring prosperity and good fortune. But beyond superstition, jade plants are cherished for their hardy nature, longevity, and stunning appearance.

Whether you’re a beginner or a seasoned indoor gardener, this detailed guide will walk you through how to care for a jade plant effectively, ensuring it thrives and graces your home with its enduring beauty for years.


Getting to Know the Jade Plant

Native to South Africa and Mozambique, jade plants are succulents, meaning they store water in their leaves and stems. Thanks to their resilient nature, they’re perfect for busy plant owners and first-time gardeners alike.

Key characteristics of jade plants:

  • Thick, fleshy, oval-shaped leaves
  • Green leaves often tinged with red on the edges in bright light
  • Woody, tree-like stems as they mature
  • Can grow up to 3-6 feet tall indoors over several years
  • Small pink or white star-like flowers in ideal conditions

1. Provide Bright, Indirect Light

Light is one of the most crucial factors in jade plant care. Being a succulent, the jade plant loves bright light but can suffer from too much direct sunlight, especially in very hot climates.

Ideal lighting tips:

  • Place your jade plant near an east-facing or south-facing window with bright, filtered sunlight.
  • If indoors, a spot where it receives at least 4–6 hours of indirect light daily is ideal.
  • Rotate the plant occasionally to ensure even growth.
  • In winter, move the plant to the sunniest window possible to compensate for reduced daylight.

Pro tip: If the leaves start turning yellow or scorched, it’s a sign of too much direct sun.


2. Master the Art of Watering

Jade plants prefer to be kept on the dry side. Overwatering is the most common cause of jade plant problems like root rot.

Watering guidelines:

  • Water thoroughly, allowing water to drain out of the bottom of the pot.
  • Wait until the top 1–2 inches of soil feel completely dry before watering again.
  • In winter, when the plant is dormant, reduce watering to once a month or less.

Avoid: Letting the plant sit in water-filled saucers, which can lead to root rot.

Signs you’re overwatering:

  • Yellowing, mushy leaves
  • Leaf drop
  • Soft, blackened stems

3. Choose the Right Pot and Soil

Since jade plants dislike soggy conditions, using the right pot and soil mix is essential.

Pot selection tips:

  • Use terracotta or clay pots with drainage holes, as these materials absorb excess moisture.
  • Avoid decorative pots without drainage holes.

Best soil mix:

  • Use a well-draining succulent or cactus soil mix.
  • You can also mix regular potting soil with sand, perlite, or pumice in a 2:1:1 ratio.

Proper drainage is crucial to prevent water from lingering around the roots.


4. Maintain Optimal Temperature and Humidity

Jade plants prefer moderate, stable temperatures and are quite sensitive to cold.

Temperature preferences:

  • Daytime: 65–75°F (18–24°C)
  • Nighttime: Not below 50°F (10°C)

Humidity:

  • Jade plants adapt well to typical household humidity levels (30–50%).
  • No need for misting or extra humidity — dry indoor air suits them fine.

If you move them outdoors in summer, bring them inside before nighttime temperatures drop below 50°F (10°C).


5. Feed During the Growing Season

While jade plants aren’t heavy feeders, occasional fertilizing during their active growth period helps promote lush leaves and healthy roots.

Fertilizing tips:

  • Feed once a month from spring to early fall.
  • Use a balanced, water-soluble houseplant or cactus fertilizer diluted to half strength.
  • Avoid fertilizing in winter when the plant is dormant.

Too much fertilizer can cause excessive growth and weak stems.


6. Prune to Shape and Encourage Growth

Jade plants naturally grow into lovely bonsai-like shapes, but occasional pruning helps manage their size, improve air circulation, and encourage new growth.

Pruning guidelines:

  • Use clean, sharp scissors or pruning shears.
  • Remove dead, shriveled, or leggy stems.
  • Trim just above a leaf node (the place where a leaf grows from the stem).
  • Pruning in early spring or summer encourages bushier, compact growth.

You can even propagate cuttings easily (more on that shortly).


7. Repot Every 2–3 Years

As jade plants grow, they may outgrow their pots, or the soil may become compacted and poorly draining.

Repotting tips:

  • Repot every 2–3 years in spring.
  • Choose a pot 1–2 inches larger in diameter.
  • Remove the plant gently, shake off old soil, and trim any dead or rotted roots.
  • Replant in fresh, well-draining soil.

Allow the plant to dry for a day before watering after repotting to prevent root rot.


8. Watch for Common Problems

While jade plants are tough, they’re not immune to issues. Regularly inspect your plant for signs of trouble.

Common problems:

  • Root rot: Caused by overwatering. Remedy by trimming affected roots and repotting in dry soil.
  • Mealybugs and spider mites: White cottony spots or webbing. Wipe leaves with a cloth dipped in rubbing alcohol or use insecticidal soap.
  • Leaf drop: Usually a sign of overwatering, sudden temperature change, or low light.

Early detection and correction are key.


9. Propagate New Plants from Cuttings

One of the joys of owning a jade plant is how easy it is to grow new plants from cuttings.

Propagation steps:

  1. Use clean scissors to cut a healthy leaf or stem.
  2. Let the cutting sit for a day or two to allow the cut end to callous.
  3. Plant in well-draining soil mix.
  4. Lightly water after a few days.
  5. Keep in bright, indirect light.

New roots should develop within a few weeks, and you’ll have a brand-new jade plant to keep or share!


10. Encourage Blooms (With Patience)

While jade plants grown indoors don’t flower often, it’s possible under ideal conditions.

To encourage blooms:

  • Provide bright, consistent light year-round.
  • Allow a cooler, dry rest period in winter (50–55°F/10–13°C at night).
  • Avoid overwatering in winter.
  • Resume regular watering and feeding in spring.

With time and care, mature jade plants may reward you with clusters of tiny, star-shaped white or pink flowers.


Final Thoughts

The jade plant is a resilient, attractive, and meaningful houseplant that rewards good care with years — even decades — of growth and beauty. By following these 10 effective care tips, you’ll ensure your jade plant stays healthy, vibrant, and maybe even a symbol of good fortune in your home.

Whether you’re nurturing a new jade or tending to an old, cherished plant, these guidelines will help it thrive as a beloved part of your indoor garden.

How to Care for a Bamboo Plant Naturally

How to Care for a Bamboo Plant Naturally

Bamboo plants are a symbol of strength, resilience, and good fortune in many cultures worldwide. Their graceful stalks and lush green leaves make them a popular choice for indoor and outdoor gardens alike. Beyond their aesthetic appeal, bamboo plants are relatively easy to care for, especially when you adopt natural and eco-friendly methods.

If you’re interested in nurturing a healthy bamboo plant without relying on synthetic fertilizers or harsh chemicals, this guide will provide you with all the detailed information you need to care for your bamboo naturally and effectively.


Why Choose Bamboo?

Before diving into natural care tips, it’s worth noting why bamboo is such a fantastic plant to have around:

  • Rapid Growth: Bamboo is one of the fastest-growing plants on Earth, making it a renewable resource and a sustainable choice.
  • Air Purifier: Bamboo plants can help improve indoor air quality by filtering toxins and releasing oxygen.
  • Versatile Decor: Their elegant look suits modern homes, offices, gardens, and even water features.
  • Low Maintenance: Bamboo is hardy and resilient, thriving with minimal fuss if cared for properly.

Types of Bamboo Plants Commonly Grown Indoors

When caring naturally for bamboo, it helps to know what type you’re working with:

  • Lucky Bamboo (Dracaena sanderiana): Often grown indoors in water or soil; not a true bamboo but has a bamboo-like appearance.
  • Clumping Bamboo: Grows in tight clusters and is easier to manage indoors.
  • Running Bamboo: Spreads aggressively, better suited for outdoor gardens unless contained.

For this article, the focus will primarily be on Lucky Bamboo and clumping varieties typically grown indoors.


Natural Bamboo Plant Care: A Step-by-Step Guide

1. Light Needs

Bamboo plants prefer indirect, bright light but can tolerate low light conditions.

  • Avoid direct sunlight as it can scorch leaves and dry out the plant.
  • Place your bamboo near an east or north-facing window to ensure it gets gentle, filtered light.
  • In low-light homes, supplement with LED grow lights if necessary.

2. Watering the Natural Way

Proper watering is crucial, especially when avoiding chemicals.

  • Lucky Bamboo: Can be grown in water. Change the water every 1-2 weeks to prevent stagnation and bacteria growth.
  • Use filtered, distilled, or rainwater to avoid chlorine and fluoride, which can harm the plant.
  • If growing in soil, water when the top inch feels dry but avoid waterlogging, as bamboo roots dislike soggy soil.

Tip: Adding a few drops of natural liquid seaweed extract to the water every month can provide a gentle nutrient boost without chemicals.


3. Soil and Potting

For bamboo grown in soil, choose a well-draining, organic potting mix.

  • Mix in natural compost or worm castings to enrich the soil.
  • Avoid synthetic fertilizers; instead, use organic options like compost tea or diluted fish emulsion for occasional feeding.
  • Repot every 1-2 years to refresh soil and allow for root growth.

4. Natural Fertilizing

Bamboo benefits from feeding but with natural fertilizers to keep it chemical-free.

  • Use homemade compost tea: Soak compost in water for a few days, strain, and dilute before applying.
  • Banana peel fertilizer: Chop banana peels and soak in water overnight to create a potassium-rich natural fertilizer.
  • Coffee grounds: Sprinkle a small amount around the base for nitrogen, but don’t overdo it to avoid acidity.

Feed your bamboo plant once every 4-6 weeks during growing seasons (spring and summer).


5. Humidity and Temperature

Bamboo thrives in warm and humid environments.

  • Maintain temperatures between 65°F to 90°F (18°C to 32°C).
  • Increase humidity naturally by misting leaves with water or placing the pot on a pebble tray filled with water.
  • Grouping bamboo plants with other humidity-loving plants can help create a microenvironment with balanced moisture.

6. Pruning and Grooming Naturally

To keep your bamboo looking fresh and healthy:

  • Trim yellow or dead leaves with clean scissors to prevent disease.
  • Cut back any overgrown stalks to encourage bushier growth.
  • Avoid chemical sprays for pests; instead, wipe leaves with a soft damp cloth regularly.

7. Pest Control the Natural Way

Bamboo is fairly resistant but can occasionally attract pests like spider mites or aphids.

  • Use a natural spray made of water and mild liquid soap (like castile soap) to control pests.
  • Introduce beneficial insects such as ladybugs if outdoors.
  • Neem oil diluted in water is a powerful natural pesticide safe for bamboo plants.

Signs Your Bamboo Plant Needs More Natural Care

  • Yellowing leaves: Usually from overwatering, poor water quality, or lack of nutrients.
  • Brown leaf tips: Often due to low humidity or too much direct sunlight.
  • Slow growth: Could indicate the need for natural fertilization or repotting.
  • Wilting or drooping: May mean root problems or underwatering.

Creative Natural Bamboo Plant Displays

  • Place Lucky Bamboo in decorative glass vases with natural river rocks.
  • Create a Zen-inspired corner by grouping bamboo with smooth stones, sand, and small water features.
  • Use bamboo stalks as natural dividers or screens indoors.
  • Incorporate bamboo into terrariums with moss and air plants for a lush, natural look.

Bamboo Propagation Naturally

Propagation is easy and rewarding.

  • Cut a healthy stalk with at least two nodes (bumps where leaves grow).
  • Place the cutting in clean, filtered water to encourage root growth.
  • Change water regularly and provide indirect light.
  • Once roots grow to 2-3 inches, transplant into soil or continue growing in water.

Environmental Benefits of Bamboo

Besides their beauty, bamboo plants provide several ecological benefits:

  • Bamboo absorbs large amounts of carbon dioxide, helping combat climate change.
  • They prevent soil erosion due to their strong root systems.
  • Bamboo products are renewable and sustainable alternatives to hardwood and plastic.

By growing bamboo naturally, you contribute to a healthier environment both inside and outside your home.


FAQs About Natural Bamboo Care

Q: Can I use tap water for my bamboo plant?
A: It’s best to avoid tap water with chlorine and fluoride. Use filtered, distilled, or rainwater for healthier plants.

Q: How often should I repot my bamboo?
A: Every 1-2 years, or when roots crowd the pot, to ensure fresh soil and room for growth.

Q: Is bamboo toxic to pets?
A: Lucky Bamboo (Dracaena sanderiana) can be toxic to cats and dogs, so keep it out of their reach.


Final Thoughts: Embracing Natural Bamboo Care

Caring for bamboo plants naturally is not only rewarding but also supports a sustainable lifestyle. With a few simple steps—providing the right light, water, organic nutrients, and pest control—you can nurture beautiful, healthy bamboo plants that bring peace and vitality to your space.

Remember, nature provides everything your bamboo needs to thrive. By choosing natural care methods, you’re creating a harmonious environment where your bamboo can grow strong and lush, enhancing your home with its timeless elegance.

Air Plant: How to Care Efficiently

Air Plant: How to Care Efficiently

Air plants, scientifically known as Tillandsia, have become wildly popular among plant lovers and interior decorators alike. Their unique ability to thrive without soil and their striking, sculptural forms make them perfect for modern living spaces, offices, and even outdoor gardens. But despite their hardy nature, air plants do require specific care to stay healthy and vibrant.

In this article, we’ll dive deep into everything you need to know about air plants and how to care for them efficiently — ensuring your Tillandsias flourish with minimal effort and maximum beauty.


What Are Air Plants?

Air plants belong to the Bromeliad family and are native to forests, mountains, and deserts of Central and South America. Unlike most plants, air plants do not rely on soil for nutrients. Instead, they absorb moisture and nutrients through their leaves from the air and rain.

Their roots serve primarily to anchor themselves to surfaces such as tree branches, rocks, or even man-made objects. This unique growing habit makes air plants incredibly versatile for decorative uses—they can be mounted, hung, or placed in creative containers.


Why Choose Air Plants?

  • Low Maintenance: No need for soil, less watering compared to traditional houseplants.
  • Space-Savers: Ideal for small apartments or offices.
  • Versatile Decoration: Can be displayed in terrariums, on driftwood, shells, or even suspended in glass orbs.
  • Air Purifiers: Like many plants, they help improve air quality by filtering toxins.

Efficient Air Plant Care: Step-by-Step Guide

1. Light Requirements

Air plants thrive in bright, indirect light. Placing them near a window with filtered sunlight or under fluorescent lighting works perfectly.

  • Avoid direct sunlight for extended periods as it can dry out or scorch their leaves.
  • If indoors, a bright room near east or west-facing windows is ideal.
  • If kept outdoors, place them in a shaded spot that gets dappled sunlight.

2. Watering Your Air Plant

Watering is the most crucial part of air plant care and also where many beginners struggle. Since they don’t grow in soil, their moisture needs are unique.

How often to water?

  • Typically, once a week is sufficient.
  • In dry or hot climates, you may need to water 2-3 times per week.
  • In humid climates, every 10-14 days might be enough.

Watering Methods:

  • Soaking: The most recommended method is soaking. Submerge your air plant in room temperature water for 20-30 minutes. After soaking, gently shake off excess water.
  • Misting: As a supplemental method, mist the plant lightly 2-3 times a week, especially in dry indoor environments.

Important: After watering, allow your air plant to dry completely before placing it back in its display. Leaving them wet can cause rot.


3. Air Circulation

Good air circulation is essential for air plants to thrive. Since they absorb nutrients and moisture from the air, stagnant environments can lead to mold or rot.

  • Avoid keeping air plants in closed terrariums without ventilation.
  • Ensure your home or office has some airflow around the plants.
  • After watering, place the plants somewhere they can dry quickly, such as near a fan or an open window.

4. Temperature and Humidity

Air plants prefer temperatures between 50°F (10°C) and 90°F (32°C). They are not frost-tolerant and should be brought indoors during cold weather.

  • They appreciate humidity, especially in drier homes.
  • If you live in a dry climate, increase misting frequency or place a humidity tray nearby.

5. Feeding and Fertilizing

While air plants don’t need soil nutrients, they still benefit from occasional fertilizing to promote growth and blooming.

  • Use a bromeliad or air plant-specific fertilizer diluted to 1/4 strength.
  • Apply the fertilizer once a month during the growing season (spring through summer).
  • Fertilizer can be added to the water during soaking.

6. Repotting and Mounting

Since air plants don’t grow in soil, “repotting” usually means changing their display or mounting.

  • Mount on driftwood, shells, stones, or hang in decorative holders.
  • Secure gently with non-toxic glue or fishing line if needed.
  • Make sure the mounting allows good air circulation.

7. Common Problems & Solutions

  • Brown or Crispy Leaves: Usually caused by underwatering or too much direct sun. Increase watering and move to indirect light.
  • Rotting Base: Often from overwatering or poor drying after watering. Cut away rotted parts and reduce watering frequency.
  • No Growth or Blooming: May need more light or fertilizer.

Fun Ways to Display Your Air Plants

Air plants are extremely versatile and fun to decorate with:

  • Hang them in glass orbs or terrariums with decorative stones or sand.
  • Place them in geometric wireframes for a modern look.
  • Use them as table centerpieces mounted on driftwood or cork bark.
  • Create living wall art by attaching multiple air plants to a wooden frame.
  • Incorporate them into wreaths or holiday decorations for year-round charm.

How to Propagate Air Plants

Air plants reproduce by producing “pups” or offsets after blooming.

  • Wait until pups are about one-third the size of the mother plant before separating.
  • Gently twist or cut pups away from the mother plant.
  • Care for pups the same way as mature plants, gradually increasing watering as they grow.

FAQs About Air Plant Care

Q: Can I water air plants with tap water?
A: Yes, but if your tap water is hard or heavily chlorinated, it’s better to use filtered or rainwater.

Q: How long do air plants live?
A: With proper care, air plants can live for several years, often blooming once in their lifetime before producing pups.

Q: Can air plants grow outdoors?
A: Yes, in climates that don’t experience frost, air plants can thrive outdoors with proper light and moisture.


Conclusion: Mastering Efficient Air Plant Care

Caring for air plants efficiently involves understanding their unique needs: bright indirect light, proper watering, good air circulation, and occasional feeding. They are forgiving plants but respond best when given the right environment.

With their minimal soil requirements, versatility, and striking appearance, air plants are a fantastic choice for anyone looking to add a touch of green to their space without the fuss of traditional gardening. By following the tips above, you’ll enjoy thriving, beautiful air plants that add a natural, artistic vibe to your home or office.

How to Take Care of an Aloe Plant at Home: The Complete Guide

How to Take Care of an Aloe Plant at Home: The Complete Guide

Aloe plants, particularly Aloe vera, have long been cherished for their medicinal, cosmetic, and decorative qualities. Known for their thick, succulent leaves filled with a soothing gel, these hardy plants thrive in both indoor and outdoor settings, making them a favorite among beginner and experienced plant enthusiasts alike.

If you’ve ever wondered how to take care of an aloe plant at home, this comprehensive guide will walk you through everything you need to know—from choosing the perfect spot to watering, repotting, and troubleshooting common problems.


Why You Should Grow Aloe Plants at Home

Before diving into care instructions, let’s explore why aloe plants deserve a spot in your home:

  • Natural skin soother: Aloe gel is a trusted remedy for burns, cuts, and dry skin.
  • Air-purifying qualities: It removes toxins from the air and adds a fresh, clean vibe.
  • Minimal maintenance: Aloe plants require little attention compared to other houseplants.
  • Aesthetic appeal: Their sculptural, fleshy leaves add a modern, minimalist touch to any room.

Choosing the Right Spot for Your Aloe Plant

The first step in aloe plant care is choosing an ideal location where your plant can thrive.

1. Light Requirements

Aloe plants love bright, indirect sunlight.

  • Indoors: Place your aloe near a sunny window, preferably one facing south or west.
  • Outdoors: If placing it outside during warm months, ensure it gets morning sun and light afternoon shade.

Too much direct sunlight can scorch the leaves, while too little light can cause the plant to become leggy.

2. Temperature and Environment

Aloe plants prefer warm, dry conditions.

  • Ideal temperature range: 55°F to 80°F (13°C to 27°C).
  • Avoid freezing temperatures. Bring outdoor plants inside when temperatures drop below 50°F (10°C).
  • Humidity: Aloe plants prefer low humidity and dry air, making them perfect for typical household environments.

Choosing the Right Pot and Soil

Proper potting is crucial for aloe health, as these succulents are prone to root rot if left in wet soil.

1. Pot Selection

  • Choose a container with drainage holes. Terracotta or clay pots are ideal as they allow moisture to evaporate.

2. Soil Requirements

Aloe plants require well-draining, sandy soil.

  • Recommended mix: A commercial cactus or succulent soil blend works best.
  • DIY mix: Combine regular potting soil with sand, perlite, or pumice for improved drainage.

How to Water an Aloe Plant at Home

Watering is where most aloe plant owners go wrong. Aloe plants prefer the “soak and dry” method.

Watering Guidelines:

  • Allow the soil to dry completely between waterings.
  • Water thoroughly until it drains from the bottom.
  • In summer: Water every 2-3 weeks, depending on light and temperature.
  • In winter: Water sparingly, about once a month, as the plant enters dormancy.

Tip: Use your finger to check soil moisture 2 inches below the surface. If it feels dry, it’s time to water.


Fertilizing Your Aloe Plant

Aloe plants don’t need heavy feeding, but occasional fertilizing can boost growth and health.

Fertilizer Tips:

  • Use a balanced, water-soluble fertilizer diluted to half strength.
  • Feed once in spring and once in midsummer.
  • Avoid over-fertilizing, which can damage the plant.

Repotting an Aloe Plant

Aloe plants grow slowly but may outgrow their pots or produce baby plants (pups) that need separating.

How to Repot:

  1. Remove the plant from its pot.
  2. Gently shake off excess soil and inspect the roots.
  3. Trim away any dead or rotten roots.
  4. Place in a slightly larger pot with fresh succulent soil.
  5. Allow it to settle for a few days before watering.

Repot every 2-3 years or when the plant becomes root-bound.


How to Propagate Aloe Plants

Aloe propagation is simple and satisfying, thanks to its natural offsets or pups.

Propagation Steps:

  1. Identify a pup that’s at least 3-4 inches tall.
  2. Remove the plant from its pot and separate the pup from the parent plant. Ensure it has some roots attached.
  3. Let the pup dry for a day or two.
  4. Plant it in a small pot with succulent soil.
  5. Water lightly after a few days, then follow standard care.

Common Aloe Plant Problems and Solutions

Even though aloe plants are hardy, they may face a few issues if neglected.

1. Yellowing or Browning Leaves

  • Cause: Overwatering or insufficient light.
  • Solution: Adjust watering frequency and move to a brighter spot.

2. Soft, Mushy Leaves

  • Cause: Root rot from excess moisture.
  • Solution: Remove affected leaves, let the soil dry out, and consider repotting in fresh soil.

3. Leggy Growth

  • Cause: Insufficient sunlight.
  • Solution: Move the plant to a sunnier location.

4. Pests (Mealybugs, Aphids)

  • Solution: Wipe leaves with a cloth dipped in mild soapy water or use neem oil.

How to Harvest Aloe Vera Gel at Home

Aloe vera gel is known for its soothing, anti-inflammatory properties and is easy to harvest.

Steps to Harvest Gel:

  1. Select a mature, outer leaf.
  2. Cut it at the base using a sharp knife.
  3. Let the yellow sap drain out (this can be irritating to the skin).
  4. Cut the leaf open and scoop out the clear gel inside.
  5. Use immediately or store in an airtight container in the fridge.

Bonus Aloe Plant Care Tips

  • Rotate the plant occasionally to ensure even sun exposure.
  • Wipe leaves gently to remove dust and help the plant breathe.
  • Use distilled or rainwater if your tap water is high in fluoride or chlorine.
  • Avoid placing the plant near cold drafts or air conditioning vents.
  • Pair with other succulents for a striking, low-maintenance plant arrangement.

Final Thoughts

Aloe plants are perfect for busy homeowners, apartment dwellers, and anyone seeking an attractive, easy-care plant. By providing the right light, soil, and watering schedule, you’ll enjoy a healthy, thriving aloe plant that not only enhances your home decor but also serves as a handy natural remedy.

Following this detailed care guide will help you keep your aloe plant flourishing for years to come. Whether you’re a seasoned plant parent or just starting your indoor garden journey, aloe vera is a must-have addition to your home.

How to Care for an Aloe Plant Properly: A Detailed Guide

How to Care for an Aloe Plant Properly: A Detailed Guide

Aloe plants (Aloe vera) are among the most popular and beneficial houseplants you can own. Known for their thick, fleshy leaves filled with soothing gel, aloe plants are as practical as they are beautiful. Native to arid regions of the Arabian Peninsula, these succulents are resilient, low-maintenance, and a fantastic addition to any indoor or outdoor garden.

In this comprehensive guide, we’ll explore everything you need to know about how to care for an aloe plant properly. From lighting and watering requirements to propagation and troubleshooting common issues, this guide will help you grow a thriving, healthy aloe vera plant.


Why Grow an Aloe Plant?

Besides their striking, architectural beauty, aloe plants offer numerous benefits:

  • Natural remedy for burns and skin irritation.
  • Air-purifying qualities.
  • Easy to grow and propagate.
  • Minimal watering and maintenance needs.

An aloe plant is perfect for beginner gardeners, busy homeowners, or anyone looking for a stylish, functional plant.


Ideal Growing Conditions for Aloe Plants

To keep your aloe plant thriving, it’s essential to mimic its native desert-like environment.

1. Light Requirements

Aloe plants love bright, indirect sunlight.

  • Best Spot: A sunny windowsill or a south- or west-facing window.
  • Avoid: Harsh, direct sunlight for prolonged periods, which can scorch leaves, and overly dark corners where growth may become leggy.

If growing outdoors, place your aloe in a partially shaded area where it can get morning sun and afternoon shade.

2. Temperature and Humidity

Aloe plants prefer warmer conditions and dislike cold temperatures.

  • Ideal Temperature: Between 55°F and 80°F (13°C to 27°C).
  • Cold Sensitivity: Avoid exposing aloe plants to temperatures below 50°F (10°C).
  • Humidity: Aloe plants thrive in dry environments and don’t need added humidity.

3. Soil Type

Proper soil is critical for aloe plants to prevent root rot.

  • Use a well-draining, sandy potting mix.
  • Recommended Mix: Cactus or succulent potting mix, or a blend of regular potting soil with added perlite, sand, or pumice for better drainage.

How to Water an Aloe Plant

The most common mistake people make with aloe plants is overwatering.

  • Water deeply but infrequently. Allow the soil to dry out completely between waterings.
  • Check the soil moisture by inserting your finger up to 2 inches deep. If it’s dry, it’s time to water.
  • Reduce watering during winter when the plant’s growth slows down.

Tip: Always use a pot with drainage holes to prevent water from sitting at the bottom, which can lead to root rot.


Fertilizing Aloe Plants

Aloe plants don’t require heavy feeding but benefit from occasional fertilizing.

  • Use a diluted, balanced fertilizer (like 10-40-10 or 15-30-15) once every 6-8 weeks during spring and summer.
  • Avoid fertilizing during the fall and winter months.

Excess fertilizer can damage the roots, so always dilute to half the recommended strength.


Repotting an Aloe Plant

As aloe plants grow, they may outgrow their pots or produce offsets (baby plants) that need separating.

Steps for Repotting:

  1. Choose a pot 1-2 inches larger in diameter.
  2. Gently remove the plant and shake off excess soil.
  3. Check the roots and trim any rotten or dead portions.
  4. Place in fresh, well-draining soil.
  5. Water lightly after a few days to let any root wounds heal first.

Repot every 2-3 years or when the plant becomes root-bound.


How to Propagate Aloe Plants

Aloe plants naturally produce offsets or “pups,” making propagation easy.

Steps for Propagation:

  1. Wait until the pup is at least 3-4 inches tall.
  2. Remove the parent plant from its pot and gently separate the pup, ensuring it has some roots attached.
  3. Let the offset dry for 24 hours to form a callus.
  4. Plant in a small pot with succulent soil mix.
  5. Water lightly and keep in indirect sunlight until established.

Common Aloe Plant Problems and How to Fix Them

While aloe plants are hardy, they can face a few issues.

1. Brown or Mushy Leaves

  • Cause: Overwatering or poor drainage.
  • Fix: Remove affected leaves, let the soil dry, and adjust watering habits.

2. Leaf Curling

  • Cause: Underwatering or root issues.
  • Fix: Check soil moisture and increase watering frequency slightly.

3. Pale or Yellowing Leaves

  • Cause: Lack of sunlight or overwatering.
  • Fix: Move to a brighter location and reduce watering.

4. Pests (Aphids, Mealybugs)

  • Fix: Wipe leaves with a damp cloth or treat with insecticidal soap.

How to Harvest Aloe Gel

Aloe gel is famous for its soothing, healing properties. Here’s how to harvest it safely:

  1. Choose a mature, thick leaf from the outer section of the plant.
  2. Cut it close to the base with a sharp, clean knife.
  3. Let the yellow sap (aloin) drain out as it can be irritating.
  4. Peel the leaf and scoop out the clear gel inside.
  5. Use immediately or store in an airtight container in the fridge for up to a week.

Note: Always do a patch test before using aloe gel on your skin to check for any allergies.


Bonus Aloe Plant Care Tips

  • Rotate your plant occasionally for even sunlight exposure.
  • Wipe the leaves gently with a damp cloth to remove dust and allow for better photosynthesis.
  • Use terracotta pots to allow excess moisture to evaporate.
  • Avoid placing aloe plants in overly humid environments like bathrooms.
  • Use distilled or rainwater if your tap water is high in minerals.

Final Thoughts

Aloe plants are one of the easiest and most rewarding houseplants to grow. With their sculptural leaves, health benefits, and low-maintenance nature, they’re perfect for novice and experienced gardeners alike.

By providing bright, indirect sunlight, watering sparingly, using well-draining soil, and occasionally repotting and propagating, you can enjoy a healthy, vibrant aloe plant for years to come.

Whether you keep one on your kitchen windowsill for its healing gel or grow a cluster of them for their bold, architectural appeal, an aloe plant is a timeless addition to any plant collection. Follow this simple care guide, and you’ll have a thriving aloe vera plant that not only looks beautiful but also supports your wellbeing.

How to Care for Spider Plants Easily: A Complete Guide

How to Care for Spider Plants Easily: A Complete Guide

Spider plants (Chlorophytum comosum) are some of the most beloved and beginner-friendly houseplants you can grow. With their long, arching green leaves striped with white or cream and their charming baby plantlets, spider plants add instant freshness and charm to any space. Best of all? They’re hardy, adaptable, and require minimal care.

If you’re new to houseplants or simply want a low-maintenance, air-purifying companion, a spider plant is a perfect choice. In this comprehensive guide, we’ll cover everything you need to know about how to care for spider plants easily, from lighting and watering to repotting and troubleshooting common problems.


What Are Spider Plants?

Spider plants are tropical perennials native to South Africa. They get their name from the spider-like appearance of their small offshoots or “pups,” which dangle from the mother plant on long stems. These hardy plants have become a favorite in homes, offices, and classrooms for their ease of care and graceful appearance.

Besides their beauty, spider plants are known for their air-purifying abilities. According to NASA’s Clean Air Study, they help remove harmful toxins like formaldehyde and carbon monoxide from the air.


Ideal Growing Conditions for Spider Plants

Creating the right environment is key to keeping your spider plant healthy and thriving. Here’s what they love:

1. Light Requirements

Spider plants prefer bright, indirect light but are very tolerant of varying conditions. They can adapt to partial shade or even fluorescent lighting, making them ideal for offices and apartments.

  • Best Spot: Near a north- or east-facing window.
  • Avoid: Direct afternoon sun, which can scorch their leaves.

2. Temperature and Humidity

Spider plants enjoy moderate temperatures ranging from 60°F to 80°F (16°C to 27°C).

  • Humidity: They appreciate a bit of humidity but can tolerate dry indoor air. In winter, occasional misting or placing the pot on a pebble tray with water helps keep the leaves from browning.

3. Soil Type

Well-draining potting soil is essential for spider plants.

  • Recommended Mix: A general-purpose, peat-based potting mix works well. You can also mix in perlite for added drainage.

4. Watering Needs

One of the biggest causes of spider plant problems is overwatering. Here’s how to water them properly:

  • Water when the top 1-2 inches of soil feel dry.
  • Reduce watering in winter when growth slows.
  • Avoid letting the plant sit in water, as this can lead to root rot.

How to Fertilize Spider Plants

Spider plants don’t require heavy feeding, but occasional fertilizing keeps them looking their best.

  • Use a balanced, water-soluble fertilizer (like 10-10-10) once a month during spring and summer.
  • Avoid over-fertilizing, which can cause brown leaf tips.
  • Skip fertilizing in fall and winter when the plant’s growth naturally slows.

Propagating Spider Plants

One of the joys of owning a spider plant is propagating its adorable plantlets. Here’s how:

1. Wait for Offshoots

Once your mature spider plant starts producing long stems with baby plants, you’re ready.

2. Detach the Plantlets

When the plantlets have small roots (about 1-2 inches long), snip them off using clean scissors.

3. Root in Water or Soil

  • Water: Place the plantlets in a glass of water until roots grow longer.
  • Soil: Or plant them directly into moist, well-draining potting soil.

4. Care for the New Plants

Keep the new plantlets in indirect light and water them lightly until established.


Common Spider Plant Problems and Solutions

Even though spider plants are hardy, they can encounter a few issues. Here’s how to fix them:

1. Brown Leaf Tips

This is the most common issue.

  • Causes: Over-fertilizing, fluoride in tap water, low humidity, or inconsistent watering.
  • Solution: Use distilled or filtered water, mist the plant, and adjust fertilizing habits.

2. Yellowing Leaves

  • Causes: Overwatering, poor drainage, or lack of light.
  • Solution: Check soil moisture, repot if necessary, and move the plant to a brighter spot.

3. Pests (Aphids, Spider Mites)

  • Solution: Wipe leaves with a damp cloth or spray with insecticidal soap.

Repotting Your Spider Plant

Spider plants grow quickly and may become root-bound. Here’s how to repot them:

  1. Choose a pot 1-2 inches larger in diameter.
  2. Gently remove the plant, loosen the roots, and trim any dead or rotting roots.
  3. Place in fresh, well-draining soil.
  4. Water thoroughly and place in indirect light.

Repot every 1-2 years in spring for best results.


Bonus Spider Plant Care Tips

  • Rotate your plant occasionally for even growth.
  • Wipe leaves with a damp cloth to remove dust and enhance photosynthesis.
  • Use rainwater or filtered water to avoid mineral buildup.
  • Don’t panic if your plant’s leaves curl or brown occasionally—they’re forgiving and bounce back quickly with minor adjustments.

Final Thoughts

Spider plants are the ultimate easy-care houseplant for both beginners and seasoned plant lovers. With their graceful leaves, easy propagation, and air-purifying properties, they make a perfect addition to any indoor space.

By following these simple care guidelines—providing bright, indirect light, watering moderately, feeding occasionally, and repotting when needed—you’ll enjoy a healthy, thriving spider plant that brings beauty and freshness to your home.

So go ahead, pick out a cheerful spider plant, and watch it flourish with minimal fuss!