How to Take Care of Snake Plant Indoors

How to Take Care of Snake Plant Indoors

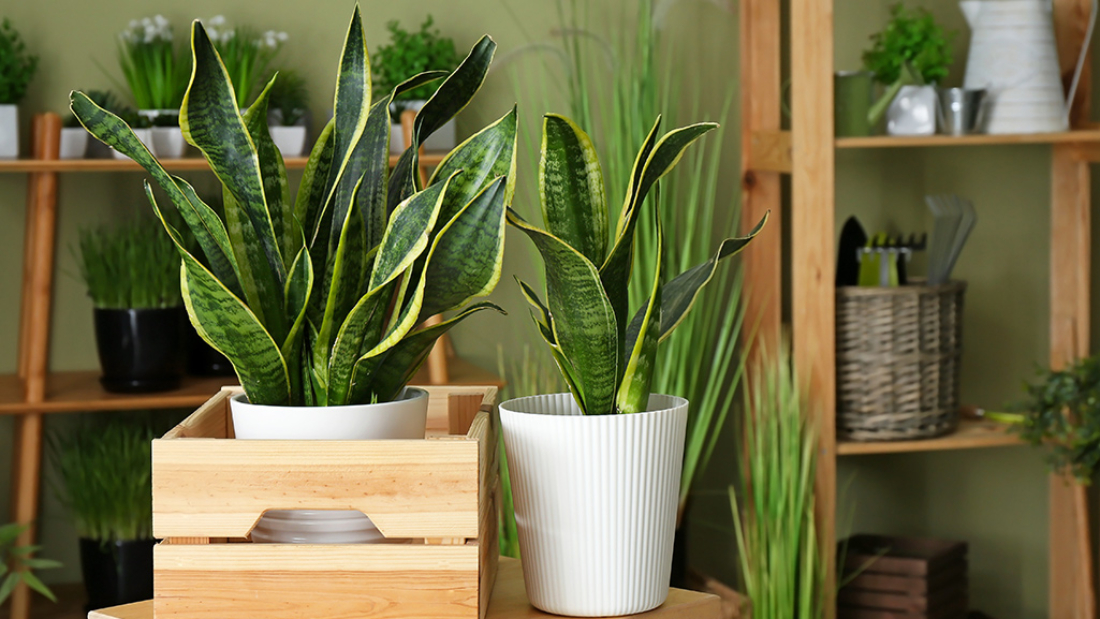
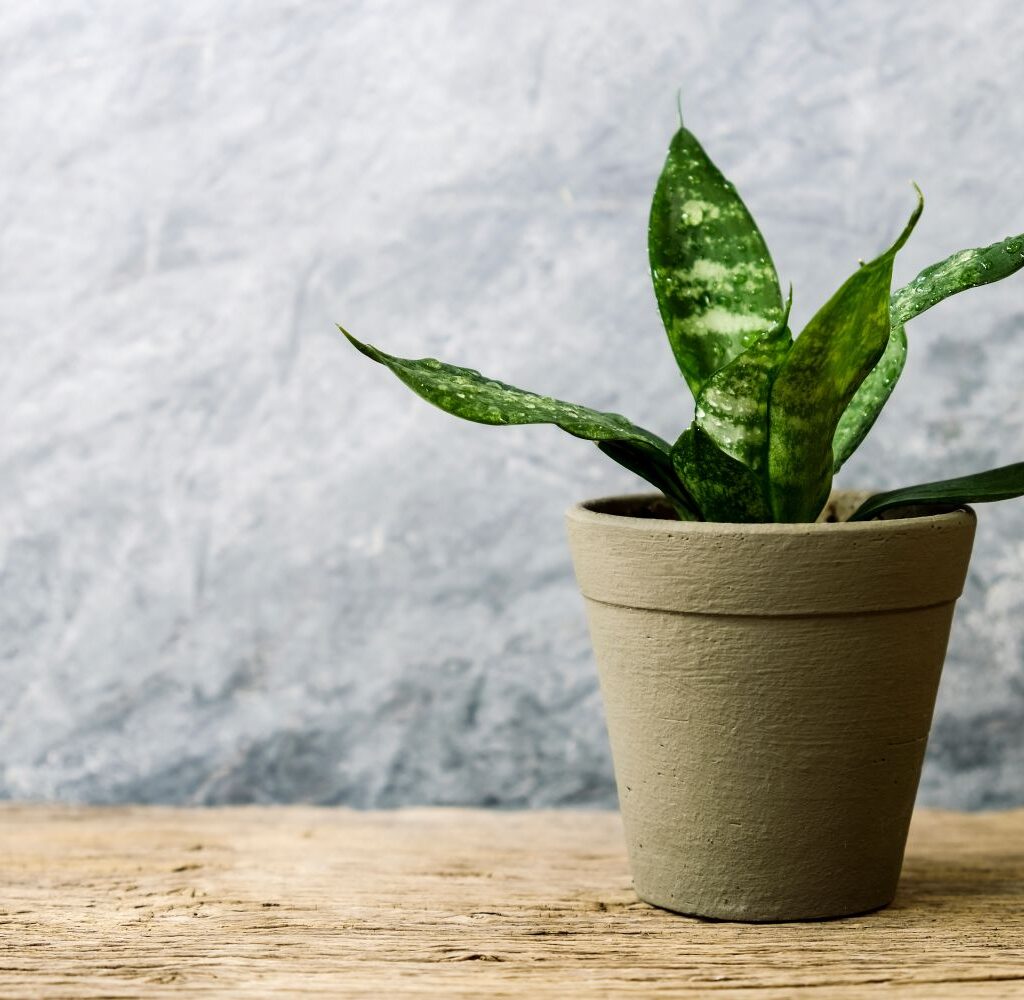
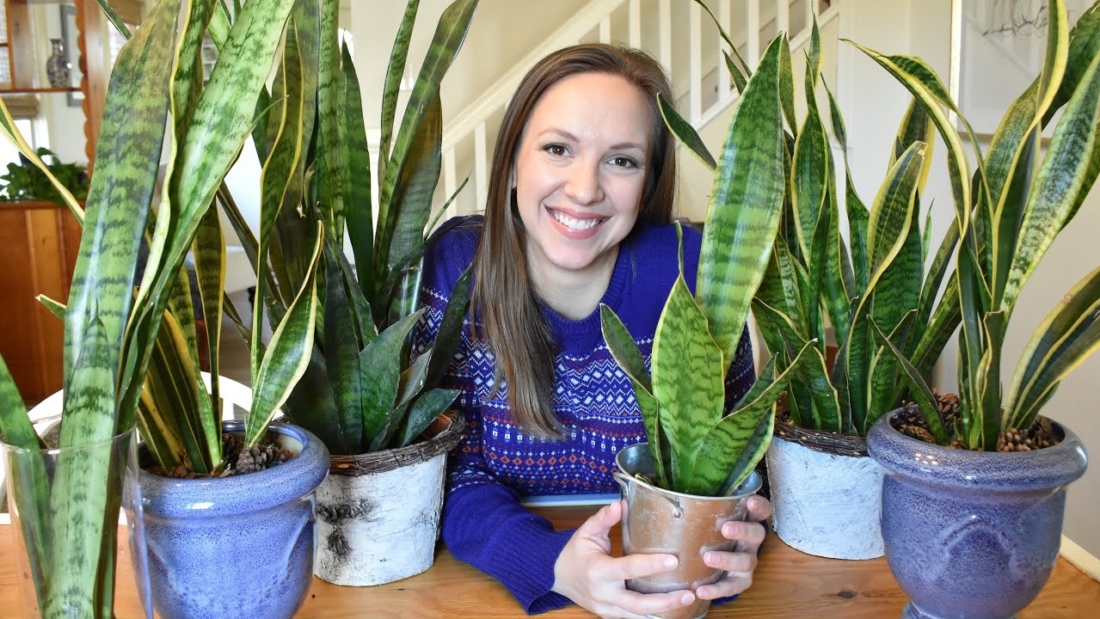
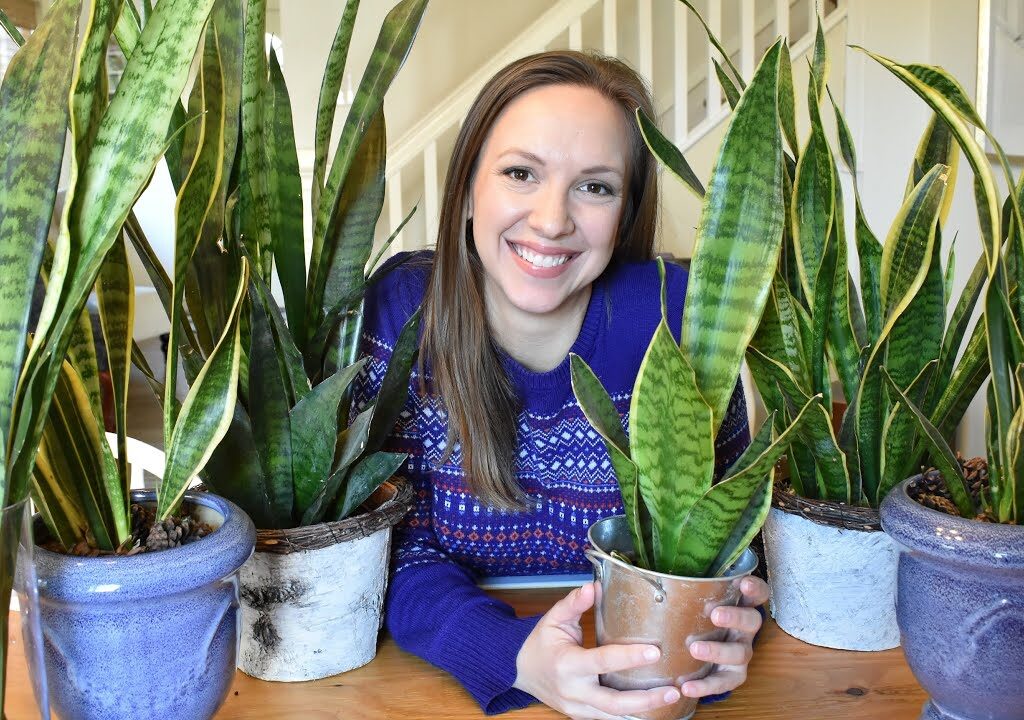
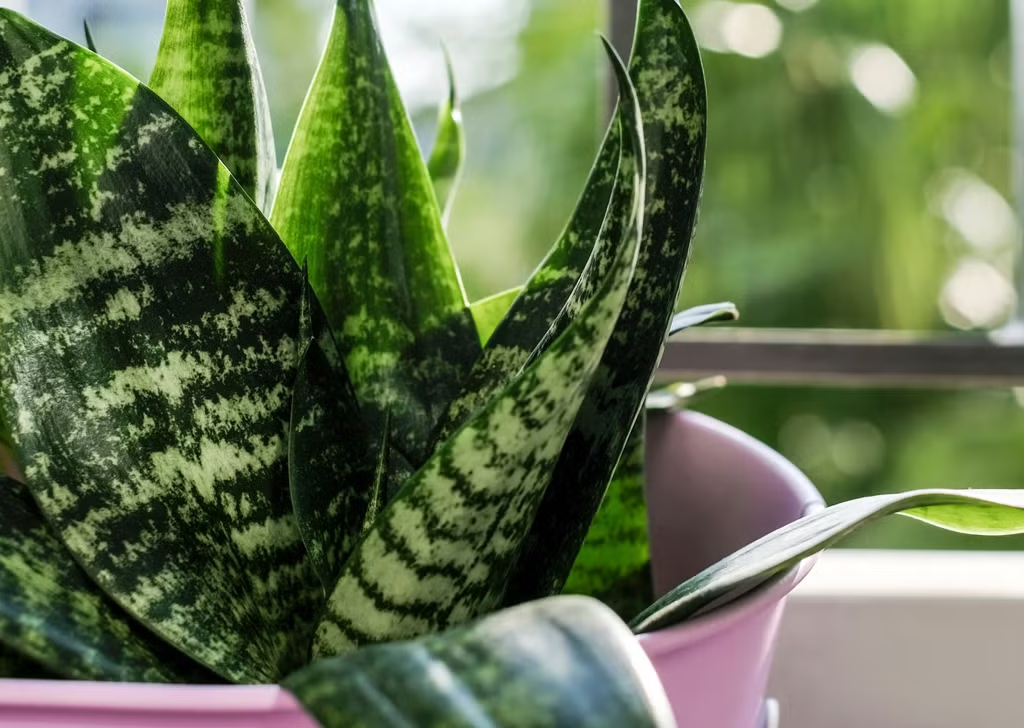
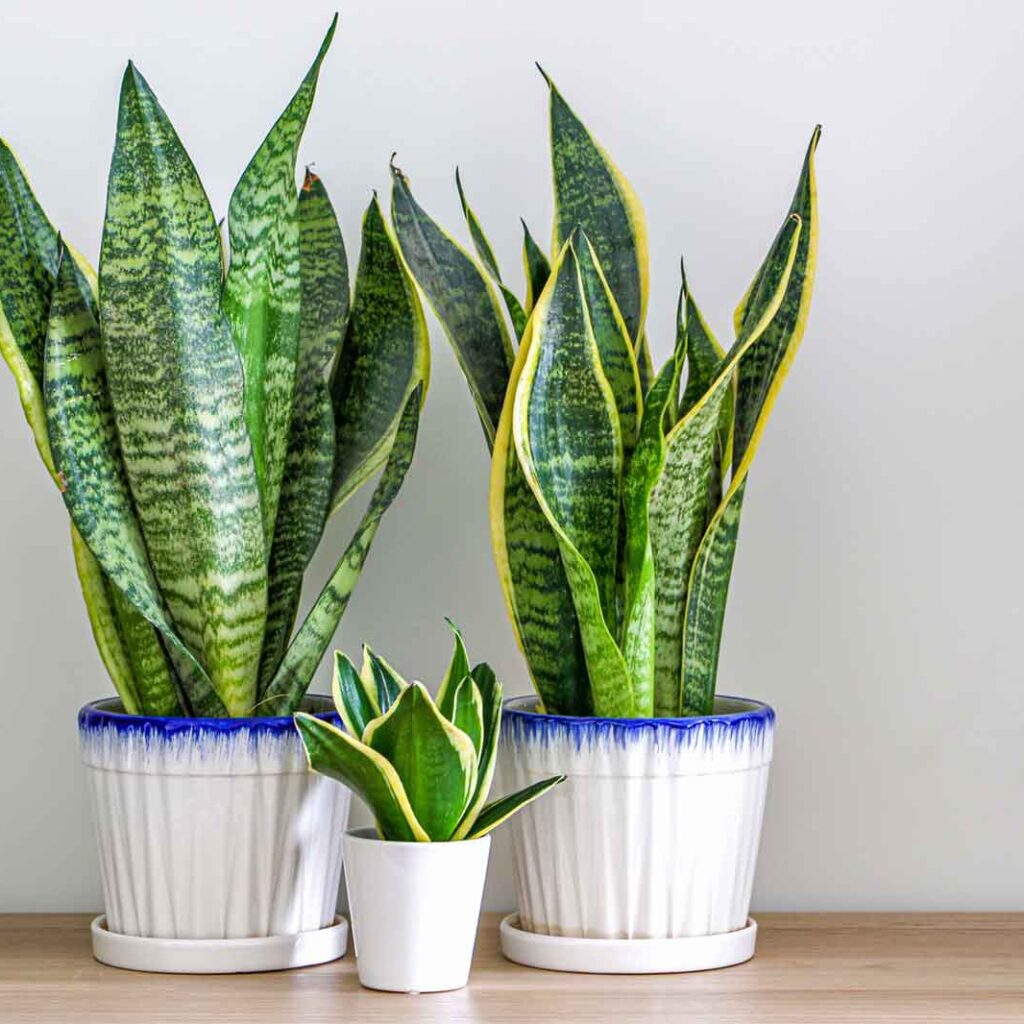
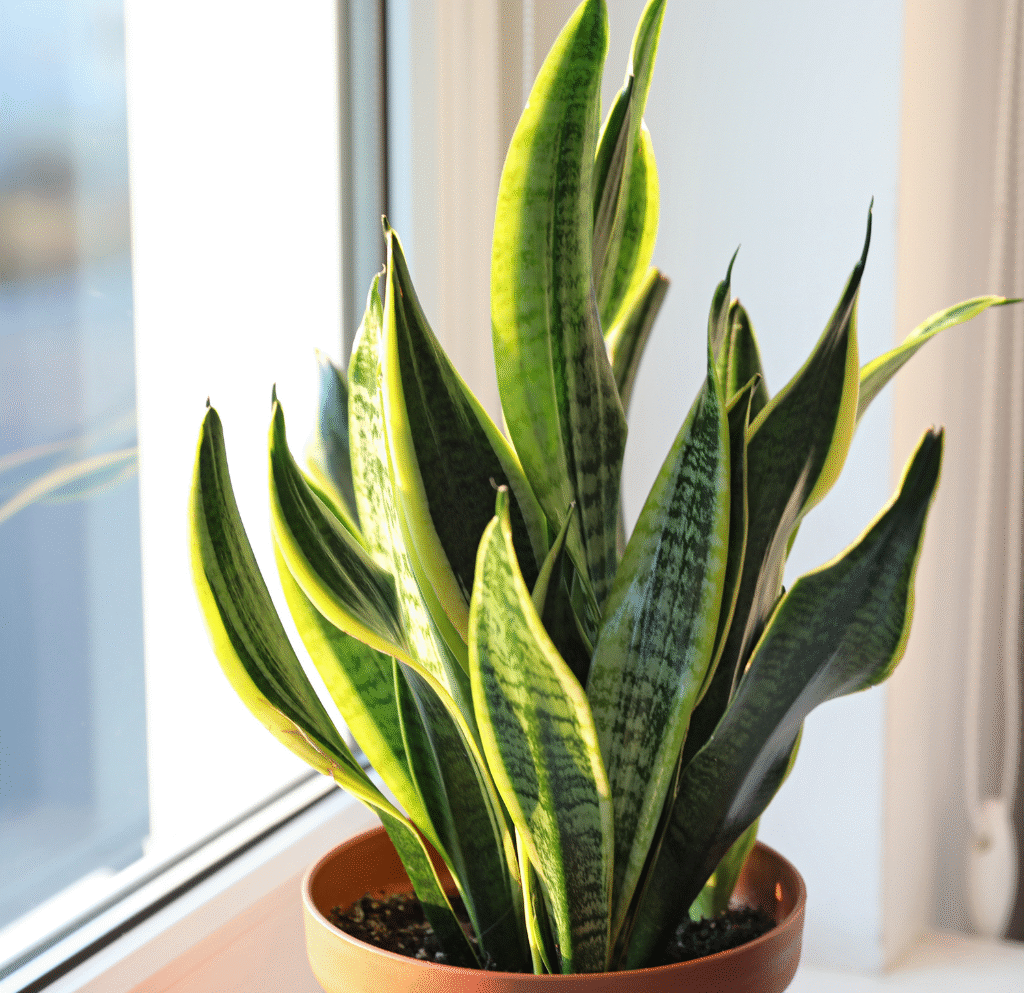
If you’re looking for an indoor plant that’s both beautiful and easy to care for, the snake plant (Sansevieria trifasciata), also known as Mother-in-Law’s Tongue, is one of the top choices. With its upright, sword-like leaves and striking green patterns, this resilient houseplant can thrive in various conditions, making it perfect for both beginner and seasoned plant enthusiasts.

In this detailed guide, we’ll cover everything you need to know about how to take care of a snake plant indoors — from ideal lighting and watering schedules to repotting tips and pest prevention. Whether you already have a snake plant gracing your home or you’re planning to bring one in, this guide will help you keep it happy and thriving.


Why Choose a Snake Plant for Your Home?

Before diving into the care instructions, it’s worth understanding why snake plants have become such popular houseplants:

  • Low Maintenance: Snake plants are incredibly hardy and require minimal care.
  • Air Purification: NASA’s Clean Air Study found that snake plants help filter indoor air by removing toxins like formaldehyde and benzene.
  • Attractive Appearance: Their upright, architectural leaves add modern elegance to any room.
  • Tolerant of Neglect: They can survive with little light and irregular watering, making them ideal for busy or forgetful plant owners.

Indoor Snake Plant Care Guide

1. Lighting Requirements

Snake plants are highly adaptable when it comes to lighting. They prefer bright, indirect light but can also tolerate low-light conditions, making them suitable for bedrooms, bathrooms, or offices with minimal natural light.

Ideal Light Conditions:

  • Place your snake plant near an east- or west-facing window where it can receive filtered sunlight.
  • Avoid placing it in direct, scorching sunlight as this can scorch the leaves.
  • In low-light environments, the plant will grow slower but will still survive.

Pro Tip:
If you notice the leaves losing their vibrant color or becoming limp, it may be due to insufficient light. Move it to a brighter spot to revive its health.
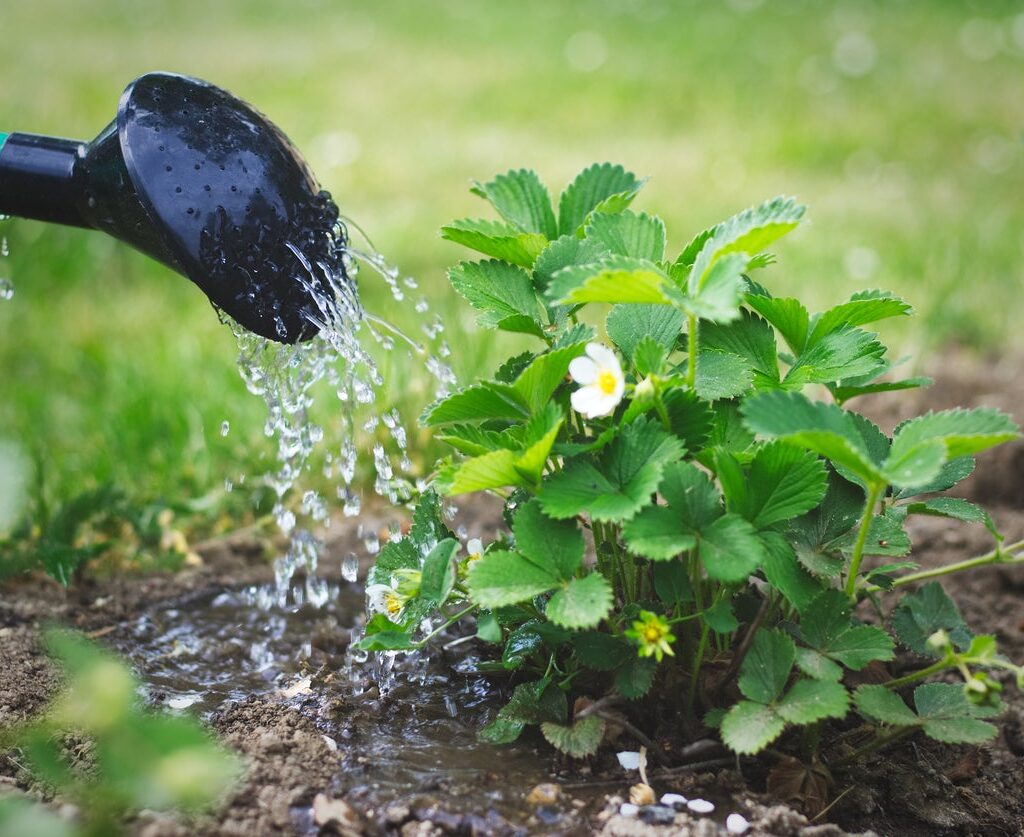

2. Watering Needs

One of the most common mistakes with snake plant care is overwatering. This plant is a succulent, storing water in its thick leaves, and is prone to root rot if left in soggy soil.

Watering Guidelines:

  • Allow the soil to dry out completely between waterings.
  • In summer and spring, water about every 2-3 weeks.
  • In fall and winter, reduce watering to once every 4-6 weeks as the plant’s growth slows.
  • Always use a pot with a drainage hole to prevent water from accumulating at the bottom.

Signs of Overwatering:

  • Yellowing, mushy leaves
  • Foul smell from the soil
  • Black or brown roots (root rot)

Signs of Underwatering:

  • Wrinkled or curling leaves
  • Dry, brittle leaf tips

Pro Tip:
Use room-temperature, filtered, or distilled water to avoid mineral buildup from hard tap water.
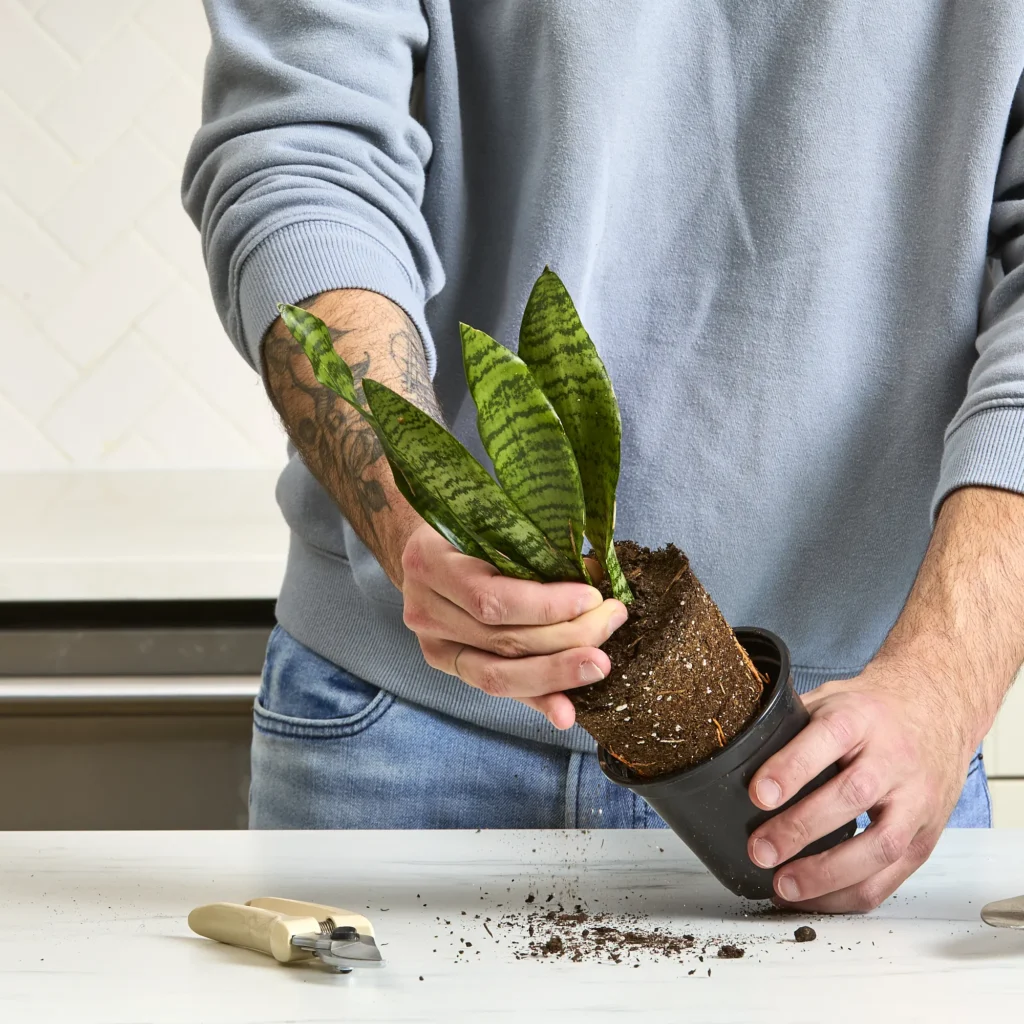

3. Soil and Potting

Snake plants require well-draining soil to prevent water retention around the roots. A cactus or succulent potting mix is ideal.

Potting Tips:

  • Use a pot with drainage holes.
  • Avoid overly large pots, as excess soil can hold water longer and increase the risk of rot.
  • When repotting, choose a container one size larger than the current pot.

Repotting Frequency:

  • Snake plants prefer being root-bound and typically only need repotting every 2-3 years or when the plant outgrows its pot.

4. Temperature and Humidity

Snake plants are not particularly fussy about temperature and humidity but thrive best in warm, dry conditions.

Ideal Conditions:

  • Temperature: 60°F to 85°F (15°C to 29°C)
  • Avoid temperatures below 50°F (10°C)
  • Tolerates normal household humidity but avoid overly damp, humid environments.

Pro Tip:
Keep your snake plant away from cold drafts, air conditioners, and heaters, as sudden temperature changes can harm the leaves.


5. Fertilizing Your Snake Plant

While snake plants don’t require frequent feeding, an occasional boost during the growing season can promote healthier, lusher growth.

Fertilizing Schedule:

  • Use a balanced, water-soluble houseplant fertilizer diluted to half strength.
  • Feed once a month during spring and summer.
  • Avoid fertilizing in fall and winter when the plant is dormant.

6. Pruning and Cleaning

Although snake plants are low-maintenance, occasional pruning and cleaning can help keep them looking their best.

How to Prune:

  • Use sterilized scissors or pruning shears.
  • Remove damaged, yellow, or brown leaves at the base.
  • Trim overly long or misshapen leaves for a tidy appearance.

How to Clean:

  • Wipe leaves gently with a damp cloth to remove dust, which can interfere with photosynthesis.

7. Propagation Techniques

Snake plants are one of the easiest houseplants to propagate. You can expand your collection or share with friends using several methods:

Popular Propagation Methods:

  • Leaf Cuttings in Water: Cut a healthy leaf, place it in a glass of water, and wait for roots to develop.
  • Leaf Cuttings in Soil: Allow the cut end to callous over for a day, then plant it in moist soil.
  • Division: Remove the plant from its pot, separate the root clumps (rhizomes), and plant them individually.

Propagation works best during spring and summer when the plant is actively growing.


8. Common Problems and Solutions

Even though snake plants are hardy, they can sometimes face issues. Here’s how to identify and fix them:

ProblemCauseSolution
Yellowing LeavesOverwatering, poor drainageReduce watering, check soil, and repot if necessary
Soft, Mushy LeavesRoot rotRemove affected leaves, repot in fresh, dry soil
Browning Leaf TipsUnderwatering, low humidity, or cold draftsAdjust watering, move away from drafts
Leaf CurlingToo little water or pest infestationIncrease watering or treat with neem oil

Final Thoughts

The snake plant is truly one of the most forgiving and rewarding indoor plants you can own. Its striking leaves, air-purifying qualities, and minimal care requirements make it an ideal companion for any living space.

By following these care tips — providing the right light, watering mindfully, using well-draining soil, and occasional pruning — you can enjoy a thriving, healthy snake plant for years to come. Whether you place it in your bedroom for cleaner air or in your office for a touch of nature, the snake plant’s elegance and resilience make it a timeless houseplant choice.

How to Take Care of a Spider Plant Efficiently: The Ultimate Indoor Plant Care Guide

How to Take Care of a Spider Plant Efficiently: The Ultimate Indoor Plant Care Guide

If you’re looking for a houseplant that’s easy to care for, resilient, and beautiful — the spider plant (Chlorophytum comosum) is your perfect pick. Known for its gracefully arching, variegated green and white striped leaves and adorable baby “spiderettes,” this plant has earned a place in homes and offices worldwide.

Spider plants are not only aesthetically pleasing but also act as natural air purifiers, removing toxins like carbon monoxide, formaldehyde, and benzene. The best part? They’re one of the easiest plants to maintain with minimal effort. Whether you’re a seasoned plant enthusiast or just starting your indoor jungle, this guide will help you care for your spider plant efficiently and naturally.

Let’s dive in.


Light Requirements for Spider Plants

Spider plants thrive best in bright, indirect sunlight. They’re quite adaptable and can tolerate a range of light conditions, but to keep their leaves vibrant and promote healthy growth, it’s essential to understand their ideal lighting.

Ideal Lighting:

  • Bright, filtered light is perfect.
  • Tolerates partial shade but may lose its vibrant stripes in very low light.
  • Avoid direct harsh sunlight, which can scorch the leaves.

Efficient Tip: Place your spider plant near an east- or north-facing window where it can get bright but indirect morning or afternoon light.


Watering Spider Plants Correctly

One of the most important factors in efficiently caring for a spider plant is proper watering. These plants prefer evenly moist soil but dislike sitting in water.

Watering Guidelines:

  • Water when the top 1–2 inches of soil feel dry.
  • Use room-temperature, filtered, or rainwater to avoid chlorine and fluoride, which can cause leaf tip browning.
  • Reduce watering frequency in winter when the plant’s growth slows down.

Watering Schedule:

  • Spring to Fall: Every 7–10 days.
  • Winter: Every 2–3 weeks or as needed.

Pro Tip: Always check soil moisture before watering. Overwatering is one of the quickest ways to harm a spider plant.


Best Soil Type for Spider Plants

Spider plants flourish in well-draining, loose, and nutrient-rich soil.

Recommended Soil Mix:

  • 2 parts organic potting soil
  • 1 part perlite or coarse sand
  • Optional: Add a small amount of coco coir or peat moss to improve moisture retention without causing waterlogging.

Efficient Tip: Avoid heavy, clay-based soils that hold water and increase the risk of root rot.


Temperature and Humidity Preferences

Spider plants are fairly tolerant but do best in moderate, stable conditions.

  • Ideal temperature: 65°F–80°F (18°C–27°C)
  • Avoid exposure to temperatures below 50°F (10°C)
  • Prefers average to slightly humid indoor environments

Natural Humidity Boost:

  • Place a tray of water and pebbles beneath the plant’s pot.
  • Mist leaves occasionally during very dry seasons.
  • Group plants together to create a naturally humid microclimate.

Pruning and Cleaning Spider Plants

Efficient care includes regular maintenance to keep your spider plant looking its best.

Pruning Tips:

  • Remove yellow, brown, or damaged leaves at the base with clean, sharp scissors.
  • Trim browning leaf tips, a common issue caused by fluoride in water or dry air.
  • Prune spiderettes (baby plantlets) if you don’t wish them to grow or if they’re overwhelming the mother plant.

Cleaning:

  • Wipe leaves gently with a damp cloth to remove dust.
  • Avoid harsh chemical leaf sprays.

Efficient Tip: Regularly pruning off dead or yellowing leaves redirects the plant’s energy to new, healthy growth.


Natural Fertilizing for Healthy Growth

Spider plants aren’t heavy feeders but do appreciate occasional nourishment, especially during the growing season.

Natural Fertilizer Options:

  • Diluted organic liquid fertilizer once a month in spring and summer.
  • Compost tea every 4–6 weeks.
  • Banana peel water (soaked peels in water for 48 hours) as a potassium-rich treat.

Fertilizing Schedule:

  • Spring to Fall: Monthly
  • Winter: None or very sparingly

Efficient Tip: Always water the plant before applying fertilizer to prevent root burn.


Natural Pest Control

Spider plants are quite pest-resistant, but occasionally they might face issues like aphids, spider mites, or mealybugs.

Natural Pest Remedies:

  • Neem oil spray: A natural, non-toxic insecticide.
  • Insecticidal soap: Mild and effective.
  • Water shower: Rinse the plant thoroughly under lukewarm water to dislodge pests.

Efficient Tip: Regularly inspecting your plant helps you catch potential infestations early, making them easier to manage.


Propagating Spider Plants Easily

One of the joys of owning a spider plant is how effortlessly it multiplies through its hanging baby plantlets, called spiderettes.

Propagation Methods:

  1. In Water:
    • Cut a healthy spiderette.
    • Place the base in a glass of water.
    • Roots should develop within 1–2 weeks.
    • Transfer to soil once roots are about 2 inches long.
  2. In Soil:
    • Cut spiderettes and plant directly in moist, well-draining soil.
    • Keep soil slightly damp until roots establish (about 2–3 weeks).

Efficient Tip: Leave the baby attached to the mother plant while rooting in a nearby pot — once established, cut the connecting stem.


Benefits of Having Spider Plants Indoors

Besides their stunning appearance and easy care, spider plants offer several benefits:

  • Air purification: Removes harmful toxins like carbon monoxide, benzene, and formaldehyde.
  • Pet-friendly: Non-toxic to cats and dogs.
  • Low-maintenance: Ideal for busy plant lovers.
  • Natural humidifier: Adds moisture to indoor air.
  • Stress reliever: Studies show indoor plants improve mood and concentration.

Common Care Mistakes to Avoid

Even though spider plants are forgiving, here are a few pitfalls to dodge for efficient care:

  • Overwatering: Leads to root rot.
  • Poor drainage: Always use pots with drainage holes.
  • Exposure to harsh sun: Causes leaf scorch.
  • Ignoring browning tips: Often a sign of fluoride sensitivity or low humidity.

Final Thoughts

Caring for a spider plant efficiently doesn’t require elaborate routines or complex tools. With a little attention to lighting, watering, and regular maintenance, your spider plant will reward you with lush green foliage, graceful arches, and adorable spiderettes.

These resilient plants are perfect for beginner gardeners and experienced plant parents alike, adding life and freshness to any indoor space. Stick to natural care methods — organic soil, gentle misting, natural fertilizers, and non-toxic pest controls — and your spider plant will thrive effortlessly for years.

How to Take Care of a Snake Plant Naturally: A Complete, Low-Maintenance Guide

How to Take Care of a Snake Plant Naturally: A Complete, Low-Maintenance Guide

Snake plants (Sansevieria), also known as Mother-in-Law’s Tongue, have become one of the most popular houseplants worldwide — and for good reason. These hardy, resilient plants are not only striking in appearance with their tall, upright sword-like leaves but also one of the easiest plants to care for naturally.

Native to West Africa, snake plants thrive in a variety of environments, tolerate neglect, and purify indoor air, making them a top pick for beginner plant parents and seasoned gardeners alike. While they don’t require elaborate care routines or chemical-laden products, a few natural practices will keep your snake plant happy, healthy, and flourishing for years.

In this detailed guide, we’ll cover everything you need to know about how to take care of a snake plant naturally — from lighting and watering to organic fertilizing and pest control.


Light Requirements for Snake Plants

Snake plants are wonderfully adaptable when it comes to lighting, which makes them ideal for both bright and dimly lit rooms. However, there are a few natural light tips to maximize their growth:

  • Bright, indirect sunlight is ideal.
  • They tolerate low-light areas, though growth may slow down.
  • Avoid direct harsh sunlight, especially in hot climates, as it can scorch the leaves.

Pro Tip: If your snake plant resides in a dim corner, occasionally rotate it to a brighter spot for a day or two to balance out light exposure.


Natural Watering Tips for Snake Plants

One of the most common mistakes with snake plants is overwatering. These plants store water in their thick leaves, making them drought-tolerant.

How to Water Naturally:

  • Allow the soil to completely dry out between waterings.
  • Use room-temperature, filtered, or rainwater when possible to avoid chlorine and fluoride, which can cause leaf tip burn.
  • In warmer months, water every 2–4 weeks.
  • In cooler seasons, water less frequently — sometimes once a month is sufficient.

Natural Tip: Stick your finger about 2 inches into the soil. If it feels dry, it’s time to water. If there’s any moisture, wait a few more days.


Soil Preferences for Snake Plants

Snake plants thrive in well-draining, loose soil that mimics their native, arid environment.

Natural Soil Mix:

  • 2 parts organic potting soil
  • 1 part coarse sand
  • 1 part perlite or pumice

This natural, airy mix prevents water retention, reducing the risk of root rot — one of the few issues snake plants face.

Pro Tip: Add a small amount of crushed charcoal to the mix for natural deodorizing and soil detoxifying properties.


Temperature and Humidity

Snake plants prefer warm, stable temperatures and can tolerate a wide range.

  • Ideal temperature: 70°F to 90°F (21°C–32°C)
  • Avoid exposing them to temperatures below 50°F (10°C)
  • They handle average indoor humidity well but can also survive dry air.

Natural Tip: In extremely dry environments, lightly mist the leaves with filtered water once a month to remove dust and maintain hydration.


Natural Pruning and Cleaning

While snake plants are low-maintenance, occasional pruning keeps them looking tidy and promotes new growth.

How to Prune Naturally:

  • Remove damaged, yellowing, or drooping leaves at the base with clean, sharp scissors.
  • Cut leaves at soil level rather than mid-leaf to avoid unsightly stumps.
  • Gently wipe leaves with a damp cloth to remove dust and improve photosynthesis.

Natural Cleaner: Mix one part distilled vinegar with three parts water as a natural leaf-cleaning spray.


Natural Fertilizing for Snake Plants

While snake plants don’t demand heavy feeding, occasional nourishment with natural fertilizers supports healthy, vibrant growth.

Natural Fertilizer Options:

  • Diluted organic liquid fertilizer (half-strength) during spring and summer, once a month.
  • Banana peel water: Soak banana peels in water for 2 days and use the water for occasional watering — rich in potassium.
  • Used coffee grounds: Add a small, dried amount to the soil for a nitrogen boost.
  • Compost tea: Water the plant occasionally with nutrient-rich compost tea.

Avoid chemical fertilizers, which can cause salt build-up and leaf burn.


Natural Pest Management

Snake plants are relatively pest-resistant, but occasionally may encounter issues like spider mites, mealybugs, or fungus gnats.

Natural Pest Control:

  • Neem oil spray: Mix neem oil with water and a drop of natural dish soap. Spray on affected leaves and soil.
  • Insecticidal soap: Gentle, plant-based sprays eliminate pests without harming your plant.
  • Cinnamon powder: Sprinkle on soil surface to prevent fungal issues and deter gnats naturally.

Pro Tip: Keep the plant clean and avoid overwatering to naturally reduce pest problems.


Propagating Snake Plants Naturally

Propagating snake plants is not only fun but ensures you always have a spare plant or a thoughtful, natural gift.

Methods:

  1. Leaf Cuttings in Water:
    • Cut a healthy leaf and let it dry for a day.
    • Place the cut end in a jar of filtered water.
    • Roots appear in 3–5 weeks.
    • Once roots reach 2 inches, transfer to soil.
  2. Leaf Cuttings in Soil:
    • Cut a leaf into 3–4 inch sections.
    • Let them dry for 24 hours.
    • Plant in moist, well-draining soil.
    • Water lightly and keep in indirect light.
  3. Rhizome Division:
    • Remove the plant from the pot.
    • Gently divide root clumps with a sharp knife.
    • Replant divisions into separate containers with fresh soil.

Benefits of Keeping Snake Plants

Besides being easy to care for, snake plants offer multiple natural benefits:

  • Air purification: Absorb toxins like formaldehyde, benzene, and xylene.
  • Night-time oxygen production: Unlike most plants, snake plants release oxygen at night, making them ideal for bedrooms.
  • Low allergen risk: Minimal pollen production, making them allergy-friendly.

Common Natural Care Mistakes to Avoid

Even a hardy plant like the snake plant can suffer from neglect or excessive pampering. Here’s what to steer clear of:

  • Overwatering: The most common killer. Err on the side of less water.
  • Poor drainage: Always use well-draining soil and pots with drainage holes.
  • Too much direct sun: Can cause leaf scorch.
  • Neglecting to clean leaves: Dust buildup blocks light absorption.

Final Thoughts

Snake plants are the ultimate beginner-friendly houseplant. By following a few simple, natural care tips — moderate watering, organic fertilizing, pest management, and the right lighting — you can keep these striking plants healthy, happy, and thriving for years.

Their resilience, air-purifying properties, and elegant foliage make them a beautiful, natural addition to any home. Plus, with natural propagation methods, you’ll have plenty of snake plants to gift or decorate every room with.

How to Take Care of a Bamboo Plant Properly: A Complete Indoor and Outdoor Guide

How to Take Care of a Bamboo Plant Properly: A Complete Indoor and Outdoor Guide

Bamboo plants have long been associated with beauty, strength, and good fortune. Whether you’re growing an ornamental bamboo plant indoors for aesthetic appeal or cultivating hardy varieties outdoors for privacy hedges, knowing how to care for bamboo properly is essential for maintaining its health and lush appearance.

While bamboo is often labeled as a low-maintenance plant, it still has specific care needs that, when met, can help it thrive for years. This guide will walk you through everything you need to know — from light and water requirements to soil preferences and pruning techniques — to grow a healthy, vibrant bamboo plant.


Types of Bamboo Plants

Before diving into care tips, it’s helpful to understand the different types of bamboo you might encounter:

Lucky Bamboo (Dracaena sanderiana)

  • Technically not a true bamboo but commonly known by the name.
  • Popular as an indoor plant.
  • Grown in water or soil.
  • Symbol of good fortune in feng shui.

True Bamboo (Bambusoideae)

  • Includes clumping and running varieties.
  • Ideal for outdoor hedges, privacy screens, or ornamental gardens.
  • Some dwarf varieties can be grown indoors with proper care.

Knowing your plant type ensures you can meet its specific needs.


Light Requirements for Bamboo Plants

Bamboo plants have varying light requirements depending on the species and where you’re growing them.

Indoor Bamboo (Lucky Bamboo)

  • Thrives in bright, indirect light.
  • Avoid direct sun, which can scorch leaves.
  • Can tolerate low light but grows slower and may become leggy.

Tip: If placed in a darker room, occasionally move your bamboo plant to a brighter spot for a few hours to maintain its health.

Outdoor Bamboo

  • Prefers full sun to partial shade, depending on the species.
  • Tropical bamboos may appreciate some afternoon shade in hot climates.
  • In cooler climates, full sun helps encourage upright, dense growth.

How to Water Bamboo Plants Properly

Water is crucial for bamboo, but the amount and frequency depend on whether it’s indoors, outdoors, in water, or soil.

Indoor Bamboo (Lucky Bamboo in Water)

  • Keep water level at least an inch above the roots.
  • Change water every 7–10 days to prevent algae and bacteria.
  • Use distilled or filtered water as tap water chemicals (chlorine and fluoride) can cause leaf browning.

Pro Tip: Add decorative pebbles to anchor stems and prevent toppling.

Indoor Bamboo in Soil

  • Water when the top 1-2 inches of soil feels dry.
  • Avoid waterlogged soil — good drainage is key.
  • Mist leaves occasionally in dry environments to maintain humidity.

Outdoor Bamboo

  • Water deeply 1–2 times a week, more during hot or dry spells.
  • Newly planted bamboo needs frequent watering until established.
  • Mulch around the base to retain moisture and regulate soil temperature.

Soil Preferences for Bamboo

Healthy bamboo requires well-draining soil, rich in organic matter.

Indoor Bamboo (Lucky Bamboo)

  • Grows well in water with pebbles or in loose, well-aerated soil.
  • Use a mix of potting soil, sand, and perlite for drainage.

Outdoor Bamboo

  • Prefers loamy, slightly acidic to neutral soil (pH 6.0–7.0).
  • Avoid heavy clay or waterlogged areas.
  • Improve poor soil with compost, aged manure, or organic matter.

Temperature and Humidity Needs

Bamboo plants generally enjoy warm, humid conditions, though some varieties tolerate cold better than others.

Indoor Bamboo

  • Ideal temperature: 65°F to 90°F (18°C–32°C).
  • Avoid placing near heating vents, AC units, or cold drafts.
  • Maintain moderate humidity; mist leaves or place a pebble tray with water nearby during dry seasons.

Outdoor Bamboo

  • Most hardy bamboos withstand temperatures down to -20°F (-29°C).
  • Tropical varieties need protection when temperatures drop below 40°F (4°C).
  • Provide winter mulch in colder climates to insulate roots.

Pruning and Maintenance

Regular pruning helps bamboo plants stay healthy, attractive, and manageable.

Indoor Bamboo

  • Remove yellowing or dead leaves regularly.
  • Trim offshoots or long roots if growing in water.
  • Prune overly tall stems for a compact, tidy shape.

Outdoor Bamboo

  • Thin out old, dead, or weak culms (stems) yearly.
  • Cut back running bamboo shoots to control spreading.
  • Prune to shape and maintain privacy screens or hedges.

Fertilizing Bamboo Plants

While bamboo isn’t a heavy feeder, regular fertilizing encourages vigorous growth.

Indoor Bamboo (Lucky Bamboo)

  • In water: Add a liquid houseplant fertilizer (1/10 strength) every 2–3 months.
  • In soil: Use a balanced 10-10-10 fertilizer during the growing season (spring-summer).

Outdoor Bamboo

  • Apply a high-nitrogen fertilizer (20-5-5) in spring for lush, leafy growth.
  • Feed again mid-summer if needed.
  • Mulch with organic compost to naturally enrich the soil.

Common Pests and Problems

While bamboo is relatively resilient, it’s not immune to issues.

Common Pests:

  • Spider mites: Tiny webbing and speckled leaves.
  • Aphids: Sticky residue and leaf curling.
  • Mealybugs: White, cotton-like patches on stems.

Solution: Wipe with insecticidal soap or neem oil, and improve air circulation.

Common Issues:

  • Yellowing leaves: Often due to overwatering, poor drainage, or chlorine in tap water.
  • Root rot: Caused by soggy soil or stagnant water.
  • Leaf scorch: From excessive direct sunlight or chemical exposure.

Tip: Adjust water, light, and soil conditions at the first sign of trouble.


How to Propagate Bamboo

Propagation is a cost-effective way to expand your bamboo collection.

Indoor Lucky Bamboo

  • Cut healthy stems with at least one node.
  • Place in fresh water until roots form (2-4 weeks).
  • Transfer to soil or a water container.

Outdoor Bamboo

  • Divide clumps during early spring.
  • Use a sharp spade to separate root sections with several culms.
  • Replant immediately and water generously.

Best Placement for Bamboo Plants

Strategic placement enhances both plant health and your home’s feng shui.

Indoor Lucky Bamboo

  • Place in living rooms, offices, or hallways with indirect sunlight.
  • Avoid dark corners or direct sun exposure.
  • In feng shui, position bamboo in the east or southeast for prosperity and health.

Outdoor Bamboo

  • Use as privacy screens, windbreaks, or garden accents.
  • Plant running varieties with a root barrier to control spread.
  • Space clumping bamboos 3-5 feet apart for dense hedges.

Final Thoughts

Bamboo plants are versatile, attractive, and deeply symbolic, whether you’re cultivating a lucky bamboo arrangement indoors or creating a lush outdoor privacy screen. By understanding their basic care requirements — proper watering, light, soil, and pruning — you can enjoy vibrant, healthy bamboo plants for years.

Remember:

  • Use well-draining soil and avoid waterlogging.
  • Provide bright, indirect light for indoor plants.
  • Regularly prune and fertilize during active growth.
  • Watch for pests and environmental stress signs.

With these tips in hand, your bamboo plants will not only survive but thrive, bringing beauty, tranquility, and a touch of nature into your home and garden.

How to Care for Succulent Plants Indoors: The Complete Guide for Healthy, Happy Plants

How to Care for Succulent Plants Indoors: The Complete Guide for Healthy, Happy Plants

Succulents have exploded in popularity in recent years — and it’s easy to see why. Their striking shapes, vibrant colors, and low-maintenance nature make them perfect for both seasoned plant lovers and first-time plant parents. But while succulents are often labeled as “easy-care” plants, they do have specific needs that are essential for keeping them thriving indoors.

If you’ve struggled with limp, discolored, or dying succulents before, don’t worry. This guide will walk you through everything you need to know about how to care for succulent plants indoors effectively, ensuring lush, healthy greenery all year round.


Why Choose Indoor Succulents?

Before diving into care tips, let’s look at why succulents are such popular indoor plants:

  • Low Maintenance: They require infrequent watering and minimal attention.
  • Aesthetic Appeal: Succulents come in various shapes, colors, and textures, from soft pastels to deep purples and spiky greens.
  • Compact Size: Ideal for small apartments, desks, and shelves.
  • Air Purifying: Some succulents help improve indoor air quality by removing toxins.
  • Stress Relievers: Caring for plants has been shown to reduce stress and enhance mood.

Choosing the Right Indoor Succulents

Not all succulents adapt well to indoor environments. Some sun-loving varieties prefer the outdoors. Here are a few of the best indoor-friendly succulents:

  • Aloe Vera
  • Echeveria
  • Haworthia
  • Jade Plant (Crassula ovata)
  • Burro’s Tail (Sedum morganianum)
  • Zebra Plant (Haworthiopsis attenuata)
  • Panda Plant (Kalanchoe tomentosa)

Choose varieties known for their tolerance of lower light conditions and indoor humidity levels.


Light Requirements for Indoor Succulents

Light is the most crucial factor in succulent health. While they’re known as sun worshipers, indoor lighting can pose a challenge.

Ideal light conditions:

  • Place succulents near a south-facing window for 6-8 hours of bright, indirect sunlight daily.
  • East or west-facing windows also work well.
  • Avoid placing succulents in dark corners or north-facing windows without supplemental light.

Signs your succulent needs more light:

  • Stretched, elongated growth (etiolation)
  • Pale or faded color
  • Leaning toward light sources

Supplement with grow lights during winter or in rooms with limited natural light. LED grow lights are energy-efficient and effective for succulents.


The Right Soil Mix for Succulents

Regular potting soil holds too much moisture for succulents, which can lead to root rot.

Best soil characteristics:

  • Fast-draining
  • Gritty and aerated
  • Low in organic material

Recommended mix:

  • 2 parts cactus/succulent potting mix
  • 1 part perlite or coarse sand
  • Optional: Add pumice or small gravel for extra drainage

Never let succulents sit in soggy soil — it’s their number one killer.


How to Water Indoor Succulents Properly

Watering is where most succulent owners go wrong. These desert-adapted plants prefer drought to excess moisture.

Watering guidelines:

  • Water only when the soil is completely dry. Use your finger or a moisture meter to check.
  • During active growth (spring and summer), water about every 2-3 weeks.
  • In dormancy (fall and winter), reduce to once a month or less.
  • Water deeply until it drains from the bottom, then discard any excess from the saucer.

Avoid misting succulents. Unlike tropical houseplants, succulents don’t absorb moisture through their leaves, and excess humidity can promote mold and rot.


Choosing the Right Pots for Succulents

The container you choose can make or break your succulent’s health.

Ideal succulent pots:

  • Have drainage holes at the bottom
  • Are made from breathable materials like terracotta or unglazed ceramic
  • Sized slightly larger than the plant’s root ball

Avoid: Closed-bottom pots, decorative containers without drainage, and overly large planters that retain too much moisture.


Temperature and Humidity Needs

Succulents prefer warm, dry environments, making them well-suited for most homes.

Optimal conditions:

  • Daytime: 65°F–80°F (18°C–27°C)
  • Nighttime: Not below 50°F (10°C)
  • Humidity: Below 50%

If you live in a humid area, increase air circulation with a fan or dehumidifier. Avoid placing succulents in overly damp bathrooms or kitchens.


Fertilizing Indoor Succulents

Though not heavy feeders, succulents do benefit from occasional nutrients.

Fertilizer tips:

  • Use a diluted balanced liquid fertilizer (10-10-10) or one designed for cacti and succulents.
  • Feed once a month during spring and summer.
  • Avoid fertilizing in fall and winter when growth slows.

Pro tip: Over-fertilizing can cause leggy, weak growth. Less is more with succulents.


Pest Control for Indoor Succulents

Though generally hardy, succulents can fall prey to a few common pests.

Watch out for:

  • Mealybugs: White, cotton-like clusters
  • Spider Mites: Fine webs and tiny moving dots
  • Fungus Gnats: Small flying insects near soil

Natural control methods:

  • Wipe leaves with a cotton swab dipped in rubbing alcohol to remove mealybugs.
  • Rinse plants with water to dislodge mites.
  • Allow soil to dry out completely to control fungus gnats.

Regularly inspecting your plants keeps infestations from spreading.


Propagating Succulents Indoors

One of the best things about succulents is how easily they propagate, letting you expand your collection for free.

Common propagation methods:

  • Leaf Cuttings: Gently twist off a healthy leaf, let it callous for a day, then place on dry soil. New roots and pups form in a few weeks.
  • Stem Cuttings: Cut a healthy stem, let it dry for a day or two, then plant in well-draining soil.
  • Offsets (Pups): Gently remove small offshoots from the base of the mother plant and repot.

Tip: Avoid watering propagated leaves or cuttings until roots have formed.


Common Succulent Care Mistakes to Avoid

Even the hardiest plants can struggle if basic care rules are ignored. Watch out for these common pitfalls:

  • Overwatering: The leading cause of succulent death.
  • Poor Lighting: Leads to leggy, stretched-out plants.
  • Using Regular Potting Soil: Retains too much moisture.
  • No Drainage: Waterlogged roots spell disaster.
  • Excessive Humidity: Encourages rot and fungus.

Learning your plant’s signals and adjusting care accordingly will ensure long-term success.


Final Thoughts

Succulents are more than trendy home decor — they’re resilient, beautiful plants that add personality and life to any space. While their care needs are relatively simple, a little attention to their light, water, and soil preferences will go a long way in keeping them happy and healthy indoors.

Remember:

  • Prioritize bright light.
  • Let soil dry out between waterings.
  • Use well-draining pots and soil.
  • Watch for pests and signs of stress.

With these tips, your succulents will not only survive — they’ll thrive. Whether you’re curating a windowsill oasis or a lush shelf garden, taking the time to understand and care for your indoor succulents will reward you with lasting greenery and a sense of botanical pride.

How to Care for Strawberry Plants Effectively: A Complete Guide

How to Care for Strawberry Plants Effectively: A Complete Guide

Strawberries are one of the most rewarding fruits you can grow at home. Their sweet, juicy berries, vibrant greenery, and delicate white flowers make them a charming addition to any garden, patio, or balcony. Whether you’re a beginner or a seasoned gardener, knowing how to care for strawberry plants effectively ensures you’ll enjoy bountiful harvests year after year.

In this guide, we’ll walk you through everything you need to know to keep your strawberry plants thriving — from choosing the right varieties to mastering watering techniques, soil preparation, pest management, and harvesting. Let’s dive in!


Why Grow Strawberries at Home?

Before we get into the care tips, let’s talk about why strawberries deserve a spot in your garden:

  • Freshness: Homegrown strawberries are often sweeter and juicier than store-bought ones.
  • Pesticide Control: You decide what goes into your soil and on your plants.
  • Cost-Effective: Once established, strawberry plants can produce for several years.
  • Compact Growth: Ideal for small spaces, containers, hanging baskets, or raised beds.

Types of Strawberries You Can Grow

Understanding the type of strawberry plant you’re dealing with will influence how you care for them:

  • June-Bearing: Produce a single large harvest in early summer. Popular for jams and freezing.
  • Everbearing: Yield two to three harvests per season — in spring, summer, and fall.
  • Day-Neutral: Fruit continuously through the growing season, as long as temperatures stay between 35°F–85°F (1.5°C–29°C).

When selecting your plants, choose disease-resistant varieties suited to your region’s climate.


Choosing the Right Spot

Strawberry plants thrive in areas with full sun exposure — at least 6-8 hours of sunlight daily. The more sun, the better your harvest.

Ideal locations:

  • Garden beds with good drainage
  • Raised beds
  • Hanging baskets
  • Containers on balconies or patios

Avoid spots where tomatoes, peppers, or eggplants have grown in the past 3 years to reduce the risk of soil-borne diseases.


Preparing the Soil

Strawberries prefer well-draining, slightly acidic soil with a pH between 5.5 and 6.8. Enrich the soil by mixing in organic matter like compost or well-rotted manure before planting.

Pro tip: Avoid overly rich nitrogen fertilizers as they encourage leaf growth over fruit production.

Soil checklist:

  • Loose and airy texture
  • Rich in organic material
  • Slightly acidic
  • Well-draining but moisture-retentive

Planting Your Strawberries

Timing is crucial. Plant your strawberries in early spring as soon as the soil can be worked, or in fall for mild-winter regions.

How to plant:

  1. Space plants 12-18 inches apart in rows about 3-4 feet apart.
  2. Dig a hole wide enough to spread out the roots.
  3. Place the plant so the crown (where leaves meet roots) sits at soil level.
  4. Cover the roots and firm the soil around them.
  5. Water thoroughly.

For containers, ensure the pot has good drainage holes and use a high-quality potting mix enriched with organic compost.


Watering Tips

Consistent moisture is essential for healthy, juicy strawberries. However, overwatering can lead to root rot.

Watering guidelines:

  • Water deeply once or twice a week.
  • Keep soil evenly moist, not soggy.
  • Avoid wetting the leaves to reduce the risk of fungal diseases.
  • Use a soaker hose or drip irrigation for efficient watering.

In hot weather, you may need to water more frequently, especially for container-grown plants.


Feeding and Fertilizing

Strawberry plants benefit from light feeding throughout the growing season.

Fertilizer tips:

  • Apply a balanced organic fertilizer (10-10-10) after planting.
  • Side-dress with compost or a slow-release fertilizer every 4-6 weeks.
  • Stop fertilizing about a month before your expected harvest to avoid overly soft fruit.

Note: Over-fertilizing leads to lush leaves and fewer berries.


Mulching for Healthier Plants

Mulch is a strawberry plant’s best friend. It conserves soil moisture, keeps weeds at bay, and prevents fruit from sitting directly on the soil (reducing rot).

Best mulches:

  • Straw (not hay, which can introduce weeds)
  • Pine needles
  • Shredded leaves
  • Wood chips (for pathways, not directly under the plants)

Apply a 2-3 inch layer around the plants, keeping it away from the crown.


Managing Pests and Diseases

Like any garden plant, strawberries can face pest and disease challenges. Early detection and organic control methods are key.

Common strawberry pests:

  • Aphids
  • Slugs and snails
  • Spider mites
  • Strawberry root weevils

Organic control methods:

  • Handpick slugs and snails in the evening.
  • Use neem oil or insecticidal soap for aphids.
  • Introduce beneficial insects like ladybugs.

Common diseases:

  • Gray mold (Botrytis)
  • Powdery mildew
  • Verticillium wilt

Prevention tips:

  • Water early in the day so foliage dries before evening.
  • Space plants for good air circulation.
  • Remove and destroy infected plants promptly.

Pruning and Runner Management

Strawberries produce runners (long stems with new baby plants) throughout the season.

Why manage runners?

  • They consume the parent plant’s energy, reducing fruit yield.

How to handle runners:

  • Pinch off runners if you want to maximize this year’s harvest.
  • Allow a few to root if you’re expanding your strawberry patch.

After harvest care:

  • Remove old, dead leaves.
  • Thin overcrowded plants.
  • Apply fresh mulch for winter protection.

Harvesting Strawberries

Patience pays off with strawberries. Pick the berries when they’re fully red and ripe — they won’t ripen after being picked.

Harvesting tips:

  • Check plants daily during peak season.
  • Pick with the green cap attached.
  • Harvest in the morning when fruits are cool.
  • Store unwashed in the refrigerator for up to 3 days.

For best flavor, eat freshly picked strawberries within a few hours.


Winter Care for Strawberry Plants

In colder climates, strawberries need protection during winter.

Winterizing tips:

  • After the first hard frost, cut back foliage to 1 inch.
  • Cover plants with 3-4 inches of straw or pine needles.
  • Remove the mulch in early spring as growth resumes.

Container-grown plants should be moved to an unheated garage or covered with insulating material.


Final Thoughts

Caring for strawberry plants effectively is a mix of patience, attentiveness, and timely intervention. With proper sunlight, soil preparation, watering, feeding, and pest control, you’ll be rewarded with baskets of juicy, sun-ripened strawberries.

Whether grown in garden beds, raised planters, or hanging pots, strawberries are a joy to cultivate and even more delightful to eat. Follow these tips and watch your plants flourish season after season!

How to Care for Orchids Plant Successfully

How to Care for Orchids Plant Successfully

Orchids are among the most elegant, exotic, and enchanting plants you can grow. Known for their graceful blooms, delicate fragrance, and long-lasting flowers, orchids bring a sense of luxury and serenity to any home or garden. However, these tropical beauties have a reputation for being tricky to care for — but with the right knowledge, you can easily grow thriving, blooming orchids year after year.

In this complete guide, we’ll uncover how to care for orchids successfully, covering everything from light and watering needs to natural feeding tips, repotting, and common problems with natural solutions.


Why Choose Orchids?

Orchids are more than just pretty flowers — they offer several wonderful benefits:

  • Long-lasting blooms: Orchid flowers can stay in bloom for several months.
  • Air-purifying properties: They help improve indoor air quality.
  • Stress-reducing beauty: Their calming appearance enhances mental well-being.
  • Variety of species: With over 25,000 known species, you can find orchids in various shapes, sizes, and colors to match your décor.

Whether you’re a seasoned gardener or a beginner, with a little attention and care, orchids can become a rewarding addition to your plant collection.


Understanding Orchids’ Natural Environment

To care for orchids properly, it helps to understand their natural habitat. Orchids are mostly epiphytic plants, meaning they grow on trees in the tropics, with their roots exposed to air and frequent rainfall. This means their care routine is quite different from typical houseplants.


Ideal Growing Conditions for Orchids

1. Light Requirements

Orchids need bright, indirect light to thrive.

  • Ideal indoor spot: Near an east- or south-facing window with filtered light.
  • Avoid direct harsh sun, especially in the afternoon, as it can scorch leaves.
  • If natural light is limited, consider using grow lights.

Tip: If your orchid’s leaves turn dark green, it needs more light. Yellowish-green leaves indicate good light exposure.


2. Temperature and Humidity

Orchids prefer moderate temperatures and high humidity, similar to their tropical origins.

  • Daytime temperatures: 65°F to 80°F (18°C to 27°C)
  • Nighttime temperatures: 60°F to 65°F (16°C to 18°C)
  • Maintain humidity levels around 50-70%.

Natural ways to increase humidity:

  • Use a humidity tray (a shallow dish filled with water and pebbles).
  • Group orchids together to create a microclimate.
  • Lightly mist the plants in the morning to avoid overnight dampness.

Best Soil and Potting Medium for Orchids

Unlike regular houseplants, orchids need a well-aerated medium that mimics their native environment.

Best natural orchid potting mixes:

  • Fir bark
  • Coconut husk chips
  • Sphagnum moss
  • Charcoal
  • Perlite

Avoid traditional soil, as it retains too much moisture and suffocates orchid roots.

Tip: Use clear, perforated plastic pots or terracotta containers for better drainage and to monitor root health.


How to Water Orchids Properly

Orchid watering can be tricky — they hate both overwatering and drying out completely.

Natural Watering Tips:

  • Water thoroughly, then let excess drain completely.
  • Allow the potting medium to dry out slightly before the next watering.
  • In warmer months: Water every 5-7 days.
  • In cooler months: Water every 10-14 days.
  • Use room-temperature rainwater or filtered water for best results.

Tip: Never let your orchid sit in standing water. It causes root rot.


Natural Fertilizing for Orchids

Orchids are light feeders but benefit from regular, gentle feeding during their active growth period (spring to early fall).

Best natural fertilizers:

  • Diluted fish emulsion
  • Compost tea
  • Seaweed extract

Feed your orchid every 2-4 weeks during the growing season, and reduce feeding in winter.

Tip: Always water your orchid before applying fertilizer to avoid root burn.


How to Prune and Maintain Orchids

Proper pruning keeps your orchid healthy and encourages new blooms.

After flowering:

  • Cut the flower spike just above a visible node (bump) if it’s still green — it might rebloom.
  • If the spike turns brown, cut it off at the base.

General maintenance:

  • Remove dead or yellowing leaves.
  • Wipe leaves gently with a damp cloth to remove dust and pests.
  • Check for soft or mushy roots and trim them off with sterilized scissors.

Repotting Orchids

Repot orchids every 1-2 years, or when the potting medium breaks down and roots outgrow the container.

How to Repot:

  1. Gently remove the orchid from its pot.
  2. Trim dead roots (black, mushy ones).
  3. Replace old medium with fresh orchid mix.
  4. Water lightly after repotting and avoid fertilizing for a couple of weeks.

Tip: Best done in spring after flowering or when new roots appear.


Natural Pest Control for Orchids

Though generally resilient, orchids can occasionally attract pests like mealybugs, spider mites, or aphids.

Natural Remedies:

  • Neem oil spray: Mix 1 tsp neem oil with 1 liter of water and a drop of natural soap. Spray affected areas.
  • Insecticidal soap: A mild, organic option for infestations.
  • Regularly inspect leaves and undersides for signs of pests.

Tip: Isolate affected plants to prevent spreading.


Common Orchid Care Mistakes and How to Avoid Them

ProblemNatural Solution
Wrinkled, shriveled leavesUnderwatering or root rot. Check roots and adjust watering routine.
Yellow leavesToo much direct sun or overwatering. Adjust light and watering.
Bud dropSudden temperature or humidity changes. Maintain stable conditions.
No bloomsInsufficient light. Move to a brighter location with filtered light.

Orchid Blooming Tips

To encourage orchids to rebloom:

  • Ensure they get adequate bright, indirect light.
  • Maintain a slight temperature drop at night (about 10°F).
  • Provide consistent humidity.
  • Feed lightly with organic fertilizers during the growing season.
  • Trim old flower spikes properly.

Patience is key — some orchids take several months before blooming again.


Benefits of Caring for Orchids Naturally

Growing orchids with natural methods ensures:

  • Healthier, long-living plants.
  • Cleaner indoor air without chemical residues.
  • Environmentally friendly practices.
  • Safer conditions for pets, children, and beneficial insects.

Final Thoughts

Orchids may seem delicate, but with a basic understanding of their needs, you can easily care for them successfully at home. Focus on bright indirect light, proper humidity, well-draining orchid mix, gentle natural watering, and organic feeding to keep them thriving.

With consistent care and a little patience, your orchid will reward you with stunning, long-lasting blooms and a calming presence in your living space. Whether you’re a novice plant parent or a seasoned gardener, orchids are a timeless, elegant choice worth mastering.

How to Care for a Medicinal Aloe Plant Effectively

How to Care for a Medicinal Aloe Plant Effectively

Aloe vera, often called the “plant of immortality” by ancient Egyptians, has earned its reputation as a powerful medicinal plant thanks to its soothing, healing, and detoxifying properties. From calming sunburns to purifying indoor air, the aloe plant is a must-have in every home — not just for its beauty but for its health benefits too.

If you’re hoping to grow and maintain a thriving, healthy aloe plant, you’ve come to the right place. In this detailed guide, we’ll walk you through how to care for a medicinal aloe plant effectively, covering everything from ideal growing conditions to natural pest control and harvesting methods.


Why Keep a Medicinal Aloe Plant at Home?

Before diving into care instructions, it’s worth understanding why aloe deserves a prime spot in your living space:

  • Natural healer: Aloe gel soothes burns, cuts, scrapes, and insect bites.
  • Skin nourishment: Known for hydrating and rejuvenating the skin.
  • Air purifier: Cleans indoor air by removing toxins like benzene and formaldehyde.
  • Digestive support: When consumed safely (in small, regulated amounts), it can aid digestion.

With so many benefits, it’s no surprise that aloe vera is one of the most popular medicinal plants worldwide.


Ideal Growing Conditions for Medicinal Aloe

Since aloe is a succulent native to arid regions of Africa, mimicking its natural environment is key to growing a healthy plant.

1. Light Requirements

Aloe loves sunlight. It needs 6 to 8 hours of bright, indirect sunlight daily.

  • Outdoor aloe: Prefers a sunny spot with some afternoon shade in very hot climates.
  • Indoor aloe: Place it near a bright, sunny window — ideally south or west-facing. Avoid placing it in dark corners as it will become leggy and weak.

Tip: If leaves start turning brown or orange, it might be getting too much direct, harsh sunlight.


2. Temperature and Humidity

  • Ideal temperature: Between 65°F and 85°F (18°C to 29°C).
  • Avoid exposing aloe to temperatures below 50°F (10°C) as it’s sensitive to cold.
  • Humidity: Prefers dry to moderate humidity. Avoid misting the leaves, as excess moisture can lead to rot.

Best Soil for Aloe Plants

Aloe requires well-draining, sandy or gritty soil to prevent root rot.

Natural Soil Mix for Aloe:

  • 2 parts cactus or succulent potting mix
  • 1 part organic compost for light nutrients
  • 1 part perlite, coarse sand, or pumice to improve drainage

Make sure your container has drainage holes to prevent water from sitting at the bottom.


How to Water Aloe Vera Properly

The number one rule with aloe is: less is more when it comes to watering.

Natural Watering Tips:

  • Allow the soil to dry out completely between waterings.
  • Water thoroughly, letting excess water drain away.
  • In warmer months, water every 2-3 weeks; in winter, reduce to once a month.
  • Use room-temperature rainwater or filtered water to avoid chlorine buildup.

Tip: Avoid letting water sit in the rosette (center of the plant), as this can cause rot.


Natural Fertilizing for Aloe

Aloe vera is a light feeder but benefits from occasional natural fertilizing during its growing season (spring and summer).

Organic Fertilizer Options:

  • Diluted compost tea: Offers a mild, balanced nutrient boost.
  • Banana peel water: Provides natural potassium.
  • Fish emulsion (diluted): A gentle nitrogen source.
  • Fertilize every 4-6 weeks during active growth. No need to fertilize in winter.

Repotting Aloe Vera

Aloe plants grow slowly but may need repotting every 2-3 years when roots outgrow the container or offsets (baby plants) crowd the pot.

How to Repot:

  1. Gently remove the plant from its pot.
  2. Remove any dead roots or yellowing leaves.
  3. Replant in a slightly larger pot with fresh succulent soil mix.
  4. Wait a few days before watering to allow roots to settle and heal.

Tip: Use terracotta or clay pots to encourage natural evaporation and avoid soggy roots.


Natural Pest Control for Aloe

Aloe is generally pest-resistant, but it may occasionally attract aphids, mealybugs, or spider mites.

Natural Solutions:

  • Neem oil spray: Mix 1 tsp neem oil, 1 tsp natural dish soap, and 1 liter of water. Spray on affected areas.
  • Insecticidal soap: Mild and effective for small infestations.
  • Wipe leaves with a damp cloth: Regularly clean dust and check for pests.
  • Introduce beneficial insects like ladybugs in outdoor settings.

Tip: Avoid chemical sprays as they can harm aloe’s medicinal properties.


Pruning and Maintaining Aloe Naturally

Pruning keeps aloe neat and encourages healthier growth.

How to Prune Aloe:

  • Remove any dried, damaged, or diseased leaves at the base using a clean, sharp knife.
  • Trim dead flower stalks after blooming.
  • Harvest outer leaves only — leave the inner, younger leaves to keep the plant balanced.

How to Harvest Aloe Gel Safely

Harvesting your aloe plant’s soothing gel is simple and safe when done right.

Steps to Harvest:

  1. Choose a large, outer leaf near the base.
  2. Cut it cleanly with a sterilized knife.
  3. Let the yellow latex (aloin) drain out — this bitter sap can be irritating.
  4. Peel the green skin and scoop out the clear gel.
  5. Use fresh gel immediately or store in an airtight container in the refrigerator for up to a week.

Tip: Only harvest a few leaves at a time to avoid stressing the plant.


Common Aloe Growing Problems and Natural Fixes

ProblemNatural Solution
Yellow, soft leavesOverwatering. Allow soil to dry out completely.
Brown, crispy tipsUnderwatering or too much direct sun. Adjust watering and shade.
Root rotRemove affected roots and repot in dry, fresh soil.
Leggy, stretched growthMove plant to a brighter location.
Slow growthFeed with compost tea or fish emulsion during the growing season.

Benefits of Growing Aloe Naturally

Growing aloe naturally ensures you get the cleanest, most potent gel without chemical residues. Natural care also:

  • Promotes stronger, disease-resistant plants.
  • Protects beneficial insects and the environment.
  • Saves money on commercial fertilizers and pesticides.
  • Supports a healthier, organic lifestyle.

Final Thoughts

A medicinal aloe plant is more than just a houseplant — it’s a living pharmacy, ready to offer its soothing gel for burns, skin irritations, and more. With the right care, aloe is an incredibly resilient, low-maintenance plant that can thrive both indoors and outdoors.

By following these natural care tips — providing bright light, well-draining soil, occasional watering, and organic feeding — your aloe will stay healthy, happy, and ready to serve you whenever you need its healing touch.

So, whether you’re a seasoned plant lover or a beginner looking to add a beneficial green friend to your home, aloe vera is the perfect choice. Plant one today and enjoy both its beauty and medicinal magic for years to come!

How to Care for a Basil Plant Naturally

How to Care for a Basil Plant Naturally

Basil (Ocimum basilicum) is one of the most beloved herbs around the world, prized for its rich aroma, fresh taste, and versatility in cooking. Whether you’re using it in pesto, garnishing your pasta, or infusing your favorite drink, nothing beats the fragrance and flavor of freshly picked basil leaves. And the good news is — it’s incredibly easy to grow at home, even for beginners.

Caring for a basil plant naturally means avoiding synthetic chemicals and leaning on organic, time-tested methods to keep it healthy, lush, and productive. In this guide, we’ll walk you through everything you need to know about how to grow, care for, and harvest your basil plant using natural techniques.


Why Choose to Grow Basil Naturally?

Opting for natural care methods is not only better for the environment but also safer for you and your family. When you skip chemical fertilizers and pesticides:

  • You maintain clean, edible leaves free from harmful residues.
  • You support beneficial insects like bees and ladybugs.
  • You build healthier soil over time.
  • You create a more sustainable and eco-friendly garden.

Plus — basil thrives when cared for naturally!


Best Conditions for Growing Basil

Basil is a sun-loving, warm-weather herb native to tropical regions of Asia and Africa. To keep it thriving indoors or outdoors, mimic its natural habitat.

1. Light Requirements

Basil loves sunlight. It needs at least 6-8 hours of direct sunlight daily.

  • Outdoor Basil: Place it in a sunny spot, like a south-facing garden bed or balcony.
  • Indoor Basil: Position it near a bright, sunny window. If natural light is insufficient, use a grow light to supplement.

Tip: Without enough light, basil plants become leggy and weak, producing fewer leaves.


2. Temperature and Humidity

  • Ideal temperature: Between 70°F and 85°F (21°C to 29°C).
  • Basil is sensitive to cold. Temperatures below 50°F (10°C) can cause leaves to turn black and drop.
  • Humidity: Moderate to high humidity helps keep basil happy. If growing indoors in dry air, consider misting your plant or placing a shallow water tray nearby.

Natural Soil and Potting Needs for Basil

Basil thrives in rich, well-draining soil.

Recommended natural soil mix:

  • 2 parts organic potting soil
  • 1 part compost
  • 1 part perlite or coarse sand for drainage

Ensure the soil pH is slightly acidic to neutral (6.0 to 7.5). If planting in a container, choose one with adequate drainage holes to prevent waterlogging.


How to Water Basil Properly

Basil prefers consistently moist soil — not too dry, not too soggy.

Natural Watering Tips:

  • Water when the top inch of soil feels dry to the touch.
  • Water at the base of the plant to avoid wetting the leaves, which can cause fungal issues.
  • Use room-temperature rainwater or filtered water if possible, as cold water can shock the roots.
  • Avoid overwatering — soggy soil leads to root rot.

Tip: In hotter months, you may need to water basil daily, especially if it’s outdoors.


Feeding Basil Organically

Basil benefits from regular feeding, especially during the active growing season (spring and summer).

Natural Fertilizer Options:

  • Compost tea: Soak compost in water for a few days, then use the nutrient-rich liquid to water your plant.
  • Banana peel water: Soak banana peels in water for a day or two and use the potassium-rich water.
  • Diluted fish emulsion: Provides a balanced natural nutrient boost.
  • Crushed eggshells: Add to soil for a natural calcium source.

Feed basil every 2-3 weeks during its growing period for the best leaf production.


Pruning and Harvesting Basil for Better Growth

Regular pruning not only keeps your basil looking tidy but also encourages it to become bushier and more productive.

How to Prune Basil Naturally:

  • Start pruning once your plant has at least 6-8 leaves.
  • Pinch off the top set of leaves right above a leaf pair. This will encourage the plant to branch out from the sides.
  • Always prune flower buds as soon as they appear to prevent the plant from bolting (flowering and going to seed), which reduces leaf quality.

Best Time to Harvest:

  • Harvest in the morning when leaves are most flavorful.
  • Take no more than one-third of the plant’s leaves at a time to avoid stressing the plant.

Tip: Regular harvesting prolongs the life of your basil plant.


Natural Pest Control for Basil

Basil can attract aphids, spider mites, and whiteflies, but natural remedies can keep these pests under control without chemicals.

Natural Solutions:

  • Neem oil spray: Mix 1 tsp neem oil, 1 tsp mild dish soap, and 1 liter of water. Spray on leaves in the early evening.
  • Insecticidal soap: A gentle homemade mixture of water and a few drops of natural castile soap.
  • Companion planting: Grow basil alongside marigolds, tomatoes, or garlic to naturally deter pests.
  • Hand-picking: Regularly check under leaves and remove any visible pests.

Tip: Avoid overwatering and overcrowding plants, as these conditions invite pests and disease.


Common Basil Growing Problems and Natural Solutions

ProblemNatural Solution
Yellowing leavesCheck for overwatering or nutrient deficiencies. Use compost tea.
Wilting leavesUnderwatering or root rot. Adjust watering habits.
Leaf spotsRemove affected leaves. Improve air circulation.
Flowers appearing too earlyPinch them off immediately to redirect energy into leaf growth.

Growing Basil Indoors Year-Round

One of basil’s best qualities is its ability to grow indoors in containers. Here’s how to make it thrive year-round:

  • Use a bright, south-facing window or supplement with grow lights.
  • Maintain indoor temperatures between 65°F-75°F (18°C-24°C).
  • Use natural fertilizers like compost tea regularly.
  • Keep humidity consistent by misting occasionally.
  • Regularly prune for bushier, healthier growth.

How to Preserve Fresh Basil Naturally

Got a bumper crop of basil? Here’s how to preserve it naturally:

  • Air Dry: Tie stems into small bunches and hang upside down in a dry, dark place.
  • Freeze: Chop leaves and place them in an ice cube tray with olive oil. Freeze and use in recipes.
  • Basil Vinegar: Steep leaves in vinegar for a fragrant infusion.

Tip: Avoid refrigerating fresh basil as it quickly turns black in cold, dry air.


Health Benefits of Fresh, Naturally Grown Basil

Besides being delicious, basil is loaded with health benefits:

  • Anti-inflammatory properties from compounds like eugenol.
  • Rich in antioxidants, including vitamin A and C.
  • Helps promote heart health and supports immune function.
  • Known in herbal medicine for its calming, stress-relieving effects.

Growing it naturally ensures you get the cleanest, most nutrient-packed leaves possible.


Final Thoughts

Caring for a basil plant naturally is easy, rewarding, and incredibly satisfying. By providing your plant with plenty of sunlight, well-draining organic soil, regular watering, and natural fertilizers, you’ll be rewarded with lush, aromatic leaves for months on end. Plus, with natural pest control and proper pruning, you’ll keep your basil healthy, bushy, and productive without needing harmful chemicals.

Whether you’re growing basil in your kitchen windowsill or garden bed, these natural care tips will help you enjoy fresh, flavorful basil leaves anytime you need them. So grab a pot, some good soil, and a few seeds — and get growing!

How to Care for a Spider Plant Properly

How to Care for a Spider Plant Properly

If you’re on the hunt for a houseplant that’s both beautiful and incredibly easy to care for, the Spider Plant (Chlorophytum comosum) is a perfect choice. With its arching green and white-striped leaves and adorable dangling plantlets (baby spider plants), it’s not just charming but also one of the most beginner-friendly indoor plants you can grow.

Spider plants are known for their adaptability, resilience, and air-purifying qualities, making them a must-have for both plant novices and seasoned indoor gardeners. In this comprehensive guide, we’ll explore how to care for a spider plant properly — covering everything from light and water needs to propagation and troubleshooting common issues.


Why Choose a Spider Plant for Your Home?

The Spider Plant is a classic houseplant beloved for several reasons:

  • Low-maintenance: Requires minimal attention.
  • Air-purifying: NASA’s Clean Air Study listed it as one of the best indoor air-cleaning plants.
  • Fast-growing: Produces lush foliage and baby spider plants quickly.
  • Non-toxic to pets: Safe for cats and dogs (though too much nibbling may cause mild digestive upset).
  • Versatile: Thrives in hanging baskets, tabletop pots, or shelves.

Ideal Growing Conditions for a Spider Plant

Native to the tropical and subtropical regions of Africa, Spider Plants are happiest in conditions that mimic their natural habitat. Here’s how to recreate those indoors:

1. Light Requirements

Spider Plants prefer bright, indirect light but are highly tolerant of a range of lighting conditions.

  • Ideal location: Near an east or north-facing window where they get filtered sunlight.
  • Avoid harsh, direct afternoon sun as it can scorch the leaves.
  • Can adapt to low light but may lose their vibrant striping and grow more slowly.

Tip: If your Spider Plant’s leaves start turning pale or crispy at the edges, it might be getting too much sun.


2. Temperature and Humidity

Spider Plants prefer moderate, stable conditions.

  • Ideal temperature: 65°F to 80°F (18°C to 27°C).
  • Protect from temperatures below 50°F (10°C) as cold drafts can damage the foliage.
  • Humidity: Prefers average to high humidity. If your home is dry, especially in winter, increase humidity by:
    • Misting the plant occasionally.
    • Using a humidifier.
    • Grouping it with other plants to create a microclimate.

Watering a Spider Plant Correctly

Watering is crucial for the health of your Spider Plant, as it’s sensitive to both overwatering and underwatering.

How Often to Water

  • Water when the top 1-2 inches of soil feels dry.
  • Typically, water once a week during the growing season (spring and summer) and every 10-14 days in winter.

Tip: Spider Plants are more tolerant of slight underwatering than overwatering. Their thick, tuberous roots store water, giving them a bit of drought resistance.

Best Watering Practices

  • Use room-temperature, filtered, or distilled water to avoid brown leaf tips caused by fluoride and chlorine in tap water.
  • Water thoroughly until it drains from the bottom.
  • Never let the plant sit in standing water — empty the saucer after watering.

The Right Soil for a Spider Plant

Spider Plants thrive in a well-draining, light, and airy soil mix.

Recommended Soil Mix:

  • 2 parts general-purpose indoor potting soil.
  • 1 part perlite or coarse sand for improved drainage.
  • Optional: 1 part peat moss or coco coir for moisture retention.

Avoid heavy soils that hold too much water, as they increase the risk of root rot.


Fertilizing a Spider Plant Naturally

While not heavy feeders, Spider Plants appreciate an occasional nutritional boost.

Feeding Schedule:

  • Fertilize once a month during spring and summer.
  • Avoid fertilizing in fall and winter when the plant’s growth naturally slows.

Natural Fertilizer Options:

  • Compost tea: A gentle organic option.
  • Liquid seaweed or fish emulsion: Encourages lush, green growth.
  • Banana peel water: Provides a natural source of potassium.

Tip: Over-fertilizing can cause brown leaf tips and build-up of salts in the soil.


Pruning and Grooming Your Spider Plant

Regular grooming keeps your plant healthy and attractive.

Pruning Tips:

  • Trim off brown or yellowing leaf tips and damaged leaves.
  • Remove baby spider plants (plantlets) if you prefer a tidier look or want to propagate.

Use clean, sharp scissors or pruning shears to avoid spreading plant diseases.

Cleaning Leaves:

Wipe leaves with a damp, soft cloth occasionally to remove dust and maintain healthy photosynthesis.


Repotting a Spider Plant

Spider Plants grow quickly and may become root-bound, requiring repotting every 1-2 years.

Signs It’s Time to Repot:

  • Roots protruding from drainage holes.
  • Soil dries out too quickly.
  • Plant appears stunted or overcrowded.

How to Repot:

  • Choose a pot 1-2 inches larger in diameter.
  • Use fresh, well-draining soil mix.
  • Gently loosen the roots and remove any dead or mushy sections.
  • Water thoroughly after repotting.

Propagating a Spider Plant

One of the most rewarding aspects of owning a Spider Plant is propagating the adorable baby plantlets it produces.

How to Propagate:

  1. Wait for plantlets to develop small roots.
  2. Snip them off the main plant.
  3. Place them in water or moist potting soil.
  4. Roots typically develop in 7-10 days.
  5. Transfer to individual pots when roots are at least 1-2 inches long.

Tip: Spider plantlets can also stay attached to the parent plant and root into nearby soil if allowed.


Common Problems and How to Solve Them

Even though Spider Plants are hardy, a few issues can arise. Here’s how to troubleshoot:

ProblemPossible CauseSolution
Brown leaf tipsFluoride in water, over-fertilizing, low humiditySwitch to distilled water, reduce fertilizing, mist leaves
Yellow leavesOverwatering, poor drainageAllow soil to dry before watering, ensure proper drainage
Limp leavesUnderwatering or root rotCheck soil moisture and adjust watering
Slow growthLow light, depleted soilMove to brighter spot, fertilize during growing season
No plantletsInsufficient light or nutrientsIncrease light exposure, feed regularly during spring and summer

Air-Purifying Benefits of a Spider Plant

According to NASA’s Clean Air Study, Spider Plants are excellent at removing indoor air pollutants such as:

  • Formaldehyde
  • Carbon monoxide
  • Benzene

Having a Spider Plant indoors not only elevates your décor but also improves your indoor air quality naturally.


Extra Care Tips for a Thriving Spider Plant

  • Rotate the plant regularly to encourage even growth.
  • Avoid letting the roots stay waterlogged; Spider Plants dislike wet feet.
  • Use hanging baskets to showcase their arching leaves and baby plantlets.
  • Remove dead foliage promptly to keep the plant tidy and disease-free.
  • Don’t be alarmed by occasional plantlet production pauses — it’s normal based on light and season.

Final Thoughts

Caring for a Spider Plant properly is incredibly easy and rewarding. Its forgiving nature, fast growth, and air-purifying abilities make it a perfect choice for both novice and experienced plant lovers. By providing bright, indirect light, moderate watering, well-draining soil, and occasional feeding, you’ll keep your Spider Plant healthy, lush, and thriving for years.

So, whether you’re looking for a leafy roommate for your desk, kitchen shelf, or living room corner, a Spider Plant is a timeless, fuss-free choice that’ll never disappoint.