How to Care for Calla Lily Plants Efficiently - A Complete Gardener’s Guide

How to Care for Calla Lily Plants Efficiently – A Complete Gardener’s Guide

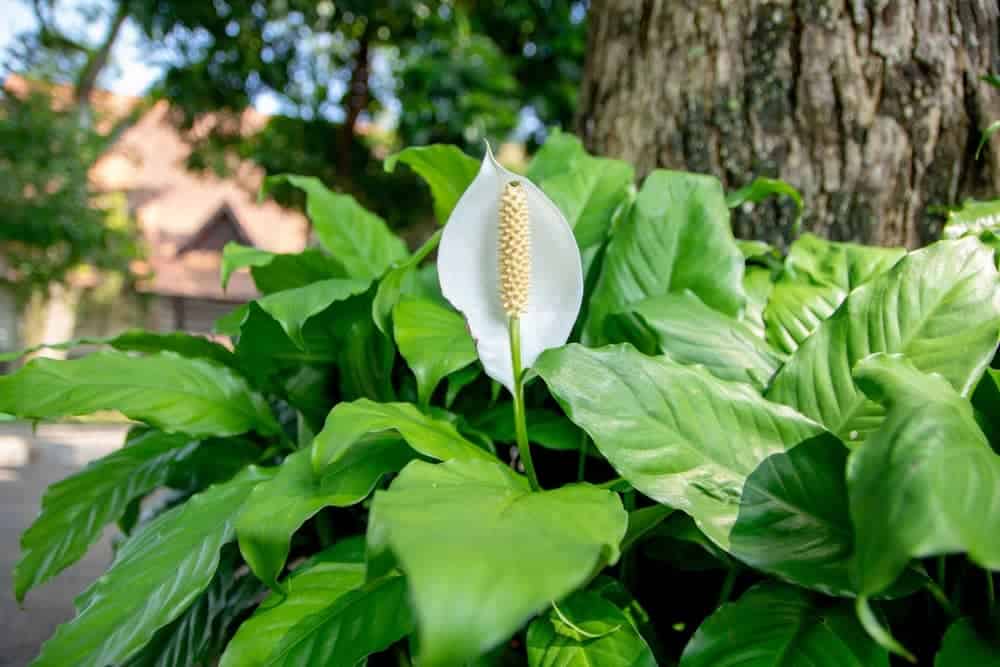
The Calla lily is a graceful and elegant flowering plant known for its striking, trumpet-shaped blooms and lush green foliage. Often associated with purity, rebirth, and elegance, Calla lilies have become a favorite in gardens, homes, and floral arrangements worldwide. While they might appear delicate, these plants are surprisingly resilient and easy to grow with the right care.

If you’ve recently added a Calla lily to your collection or are considering planting one, this comprehensive guide will teach you how to care for Calla lily plants efficiently — ensuring stunning blooms and vibrant foliage season after season.


Why Choose Calla Lilies?

Before diving into care tips, let’s appreciate why Calla lilies are such a cherished plant:

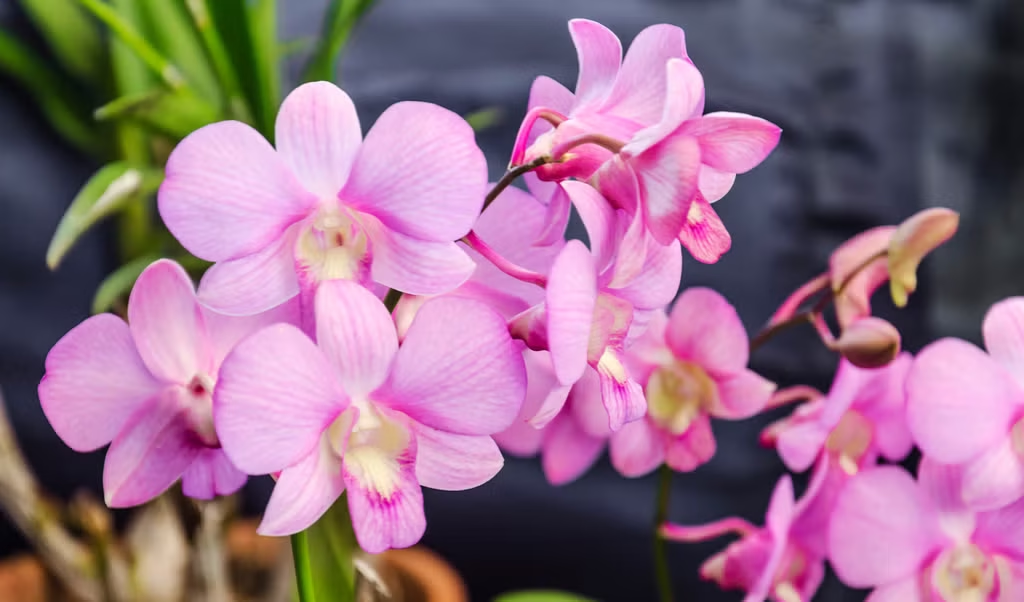
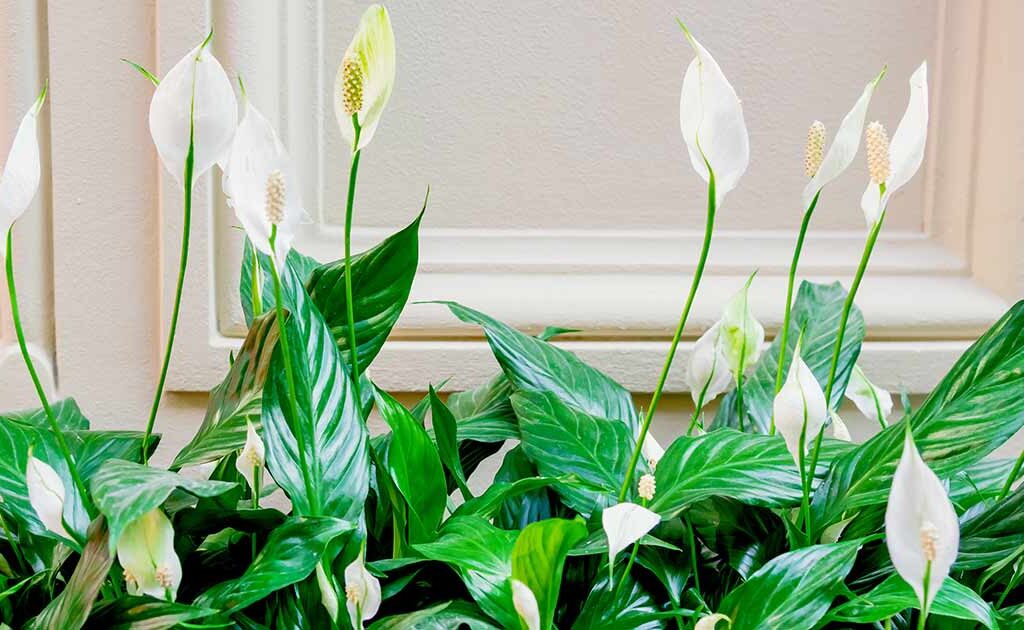
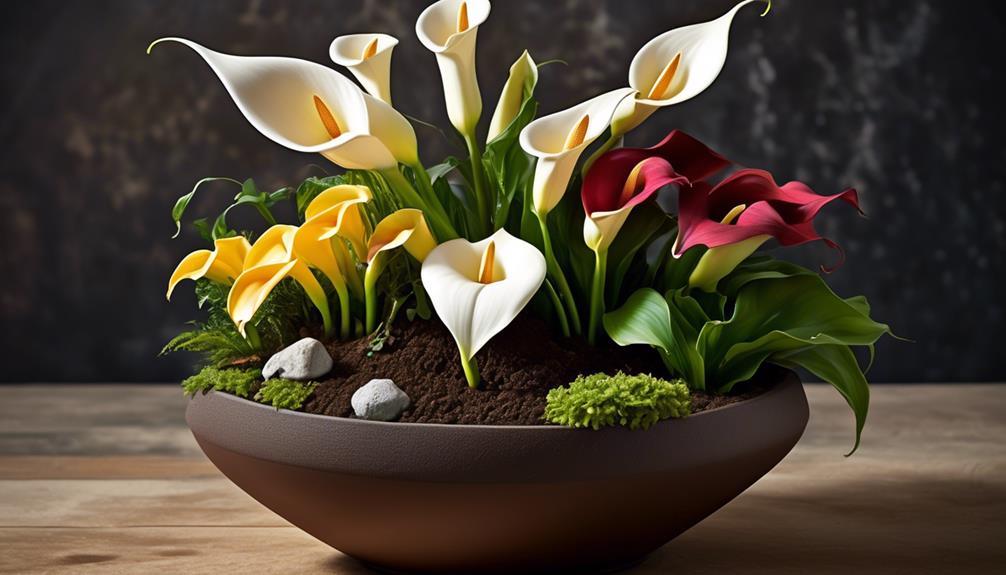
  • Elegant, sculptural blooms in white, pink, yellow, purple, orange, and even black.
  • Versatile growing options: suitable for garden beds, containers, or as indoor houseplants.
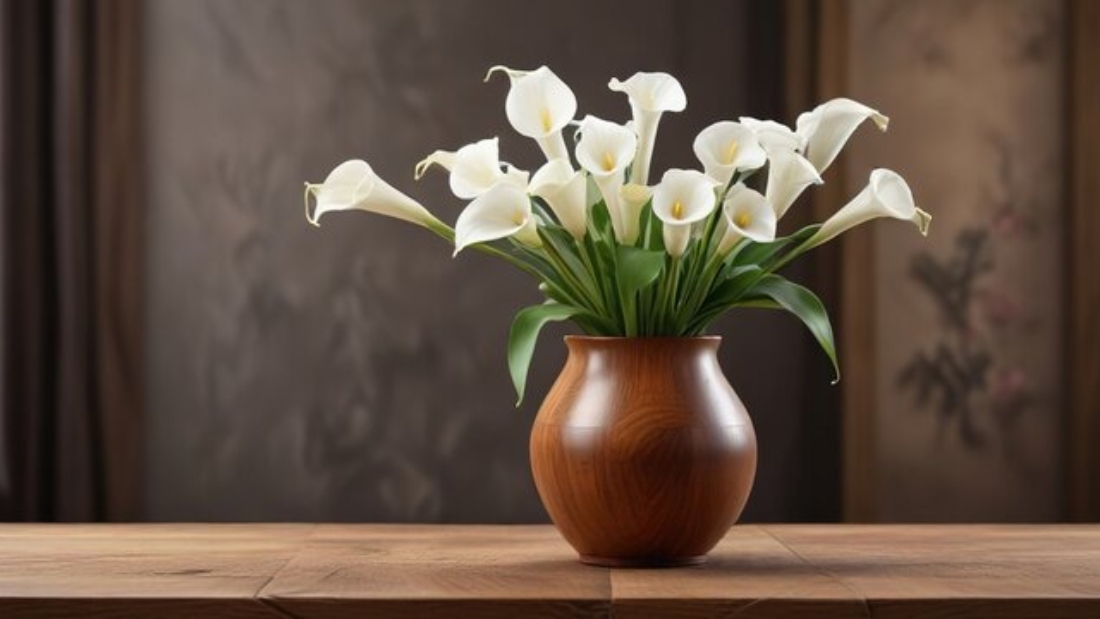
  • Long-lasting cut flowers for floral arrangements and bouquets.
  • Symbolic meaning: Associated with beauty, faith, and rebirth.
  • Easy maintenance with minimal effort for rewarding results.

Understanding Calla Lily Varieties

Calla lilies belong to the genus Zantedeschia, native to southern Africa. While they’re called “lilies,” they’re not true lilies. Popular types include:

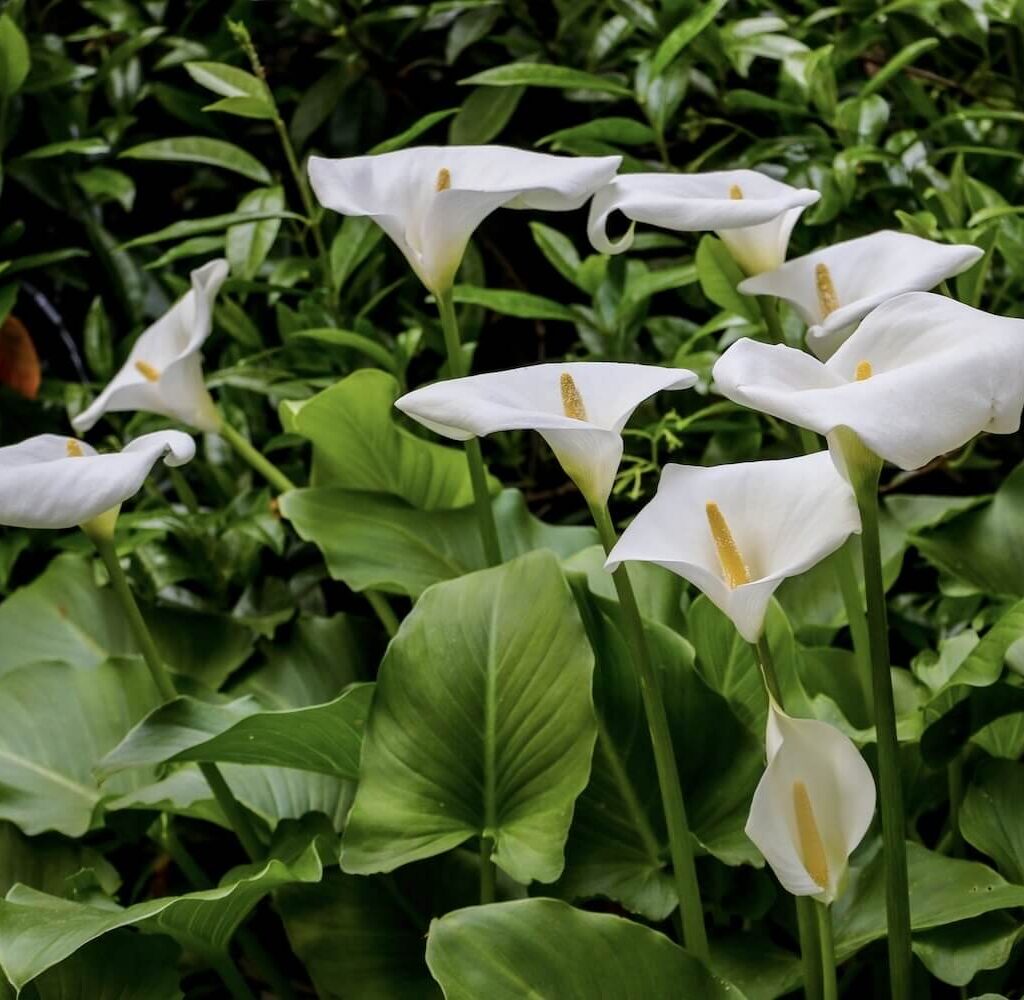
  • Zantedeschia aethiopica (Classic white calla lily, ideal for damp areas and ponds)
  • Zantedeschia rehmannii (Pink, purple, and red hues)
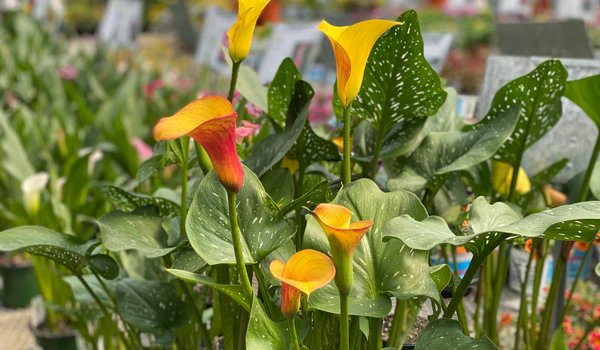
  • Zantedeschia elliottiana (Yellow blooms with spotted leaves)
  • Hybrid calla lilies (Available in striking modern colors like burgundy, orange, and black)

Different varieties have slightly varied care needs, but most thrive under similar conditions.


Where and When to Plant Calla Lilies

Best Location:

  • Outdoors: Sunny to partially shaded spots with well-draining soil.
  • Indoors: Bright, indirect sunlight, preferably near a south or west-facing window.

Ideal Time to Plant:

  • Spring after the danger of frost has passed.
  • Indoors or greenhouse planting can happen year-round, but spring is ideal for active growth.

Choosing the Right Soil for Calla Lilies

Soil is the foundation of efficient plant care, and Calla lilies have specific preferences.

Soil Type:

  • Well-draining, rich in organic matter.
  • Slightly acidic to neutral pH (6.0–7.0).

Ideal Soil Mix:

For container Calla lilies, mix:

  • 2 parts potting soil
  • 1 part compost or aged manure
  • 1 part perlite or coarse sand for drainage

Avoid heavy clay soils and overly sandy soils unless amended with compost.


Light and Temperature Requirements

Calla lilies thrive in bright conditions but don’t appreciate harsh, direct sunlight, especially during peak afternoon heat.

Light:

  • Outdoors: Full sun to partial shade.
  • Indoors: Bright, filtered light. Avoid placing directly against hot windows.

Temperature:

  • Prefer warm temperatures between 60°F to 80°F (15°C–26°C).
  • Protect from frost and cold drafts.
  • Bring outdoor potted plants inside before temperatures dip below 50°F (10°C).

How to Water Calla Lilies Efficiently

Watering is crucial for Calla lily health, especially during active growth and blooming phases.

Watering Guidelines:

  • During growth and flowering (spring to summer): Keep soil consistently moist but never waterlogged.
  • After flowering and during dormancy: Reduce watering as leaves yellow and die back.
  • Avoid soggy conditions, as Calla lilies are susceptible to root rot.

Tip: Outdoor Calla lilies near ponds or water features thrive with their moisture-loving nature.


Fertilizing Calla Lilies

Calla lilies benefit from regular feeding to fuel their lush growth and vivid blooms.

Fertilizer Type:

  • Use a balanced, water-soluble fertilizer with a ratio like 10-10-10 or 12-12-12.
  • For brighter, healthier flowers, opt for a slightly higher phosphorus formula (e.g., 10-20-10).

Feeding Schedule:

  • Fertilize every 2-4 weeks during the growing season.
  • Stop fertilizing as the plant enters dormancy (late summer to fall).

Calla Lily Dormancy Care

One of the unique aspects of Calla lily care is understanding its natural dormancy cycle.

How to Handle Dormancy:

  • After flowering, leaves will begin to yellow and die back.
  • Stop watering and feeding as the plant enters dormancy.
  • In colder climates, dig up the rhizomes (bulb-like structures) after frost and store them in a cool, dry place until spring.
  • In warmer regions, leave them in the ground, mulched over winter.

Storing Rhizomes:

  • Clean and dry the rhizomes.
  • Place in a paper bag or container filled with peat moss or vermiculite.
  • Store in a dark, cool area around 50°F–60°F (10°C–15°C).

Pruning and Deadheading Calla Lilies

Pruning:

  • Remove dead or yellowing leaves promptly to keep the plant healthy and tidy.
  • Cut back spent flower stems at the base to encourage more blooms.

Deadheading:

  • Regularly remove faded flowers to prolong blooming and prevent seed formation, which can sap plant energy.

Managing Common Pests and Diseases

Calla lilies are relatively hardy but can occasionally face pest and disease problems.

Common Pests:

  • Aphids
  • Spider mites
  • Thrips
  • Slugs and snails (outdoors)

Natural Remedies:

  • Wipe leaves with a damp cloth.
  • Use insecticidal soap or neem oil.
  • Introduce beneficial insects like ladybugs in the garden.

Common Diseases:

  • Root rot (caused by overwatering)
  • Bacterial soft rot
  • Powdery mildew

Prevention Tips:

  • Ensure good soil drainage.
  • Avoid overhead watering.
  • Improve air circulation around plants.
  • Remove and discard any affected leaves.

Calla Lilies as Indoor Houseplants

Calla lilies make stunning indoor plants with a bit of extra care.

Indoor Care Tips:

  • Provide bright, indirect light.
  • Maintain consistent moisture without waterlogging.
  • Rotate the pot occasionally for even light exposure.
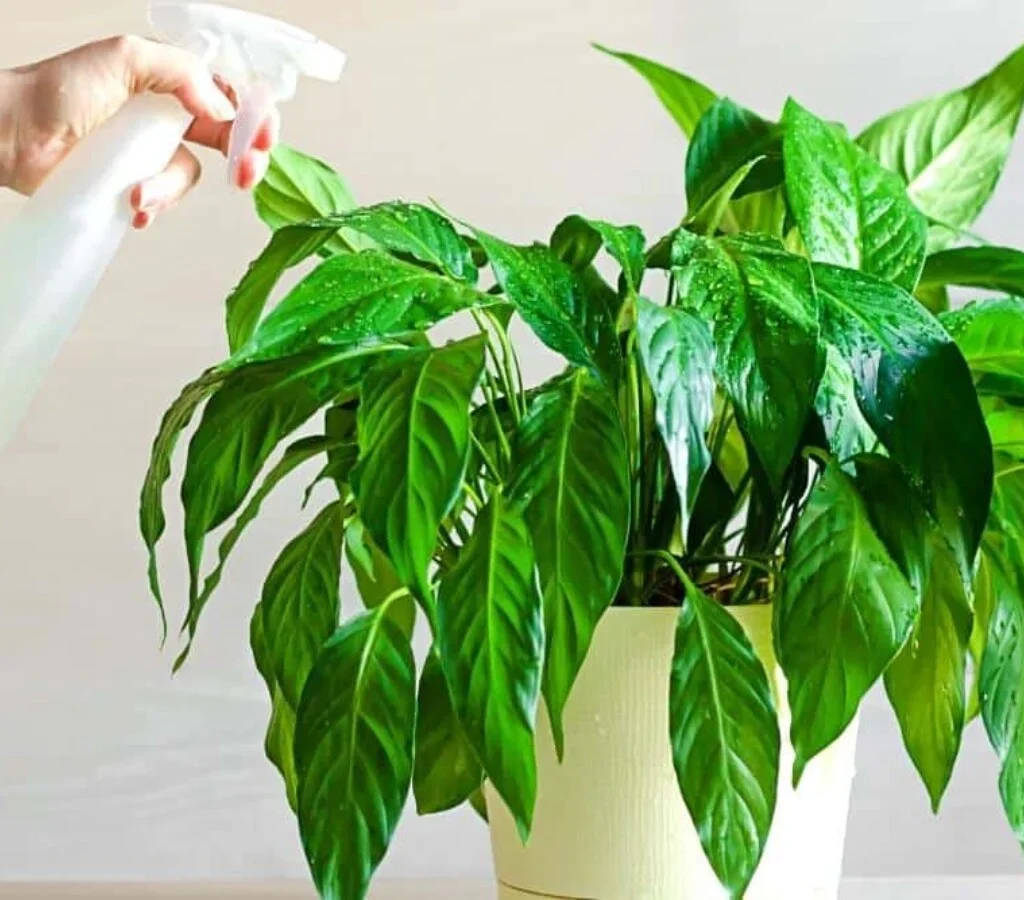
  • Mist leaves in dry environments to increase humidity.
  • Cut back on watering and feeding once leaves die back after blooming.

Propagating Calla Lilies

You can easily multiply your Calla lily collection through rhizome division.

How to Propagate:

  1. In late fall, after the plant goes dormant, dig up the rhizomes.
  2. Gently separate healthy, firm rhizomes with at least one growing eye (bud) each.
  3. Let them dry for a day.
  4. Replant them in spring or store until the following growing season.

Conclusion

Caring for Calla lily plants efficiently is a rewarding experience for gardeners of all levels. By providing the right balance of sunlight, moisture, warmth, and nutrients, you’ll enjoy spectacular blooms and lush, vibrant foliage. Understanding their natural cycles — from active growth to dormancy — allows you to work with the plant’s rhythm, ensuring health and beauty year after year.

Whether planted in garden beds, decorative containers, or used as elegant indoor plants, Calla lilies are a timeless favorite that bring sophistication and life to any space. With this guide, you’re now equipped to care for your Calla lilies like a pro.

Hibiscus Plant: How to Care for Effectively - A Complete Guide for Thriving Blooms

Hibiscus Plant: How to Care for Effectively – A Complete Guide for Thriving Blooms

The Hibiscus plant is a tropical beauty beloved for its large, vibrant flowers and glossy green foliage. Whether grown as a garden shrub, patio plant, or indoor specimen, Hibiscus can transform any space into a lively, colorful paradise. However, to enjoy its spectacular blooms and healthy growth, proper care is essential.

If you want your Hibiscus to flourish year-round, understanding its needs—from sunlight to watering, feeding to pruning—is key. In this comprehensive guide, we’ll walk you through everything you need to know to care for your Hibiscus plant effectively.


Why Choose a Hibiscus Plant?

Hibiscus plants aren’t just pretty flowers. They offer several benefits that make them a popular choice for gardeners and plant lovers:

  • Tropical flair: Large, trumpet-shaped flowers in bold reds, pinks, yellows, and whites.
  • Attract pollinators: Bees, butterflies, and hummingbirds love them.
  • Medicinal uses: Hibiscus tea is prized for antioxidants and health benefits.
  • Versatility: Suitable for containers, garden beds, and indoor growing.
  • Long blooming season: With the right care, they flower from spring through fall.

Understanding Hibiscus Plant Types

Before diving into care, it helps to know the most common types:

  • Tropical Hibiscus (Hibiscus rosa-sinensis): Popular as a houseplant or patio shrub in warm climates. Needs warm temperatures and humidity.
  • Hardy Hibiscus (Hibiscus moscheutos): Can survive colder winters and is grown outdoors in temperate zones. Blooms tend to be larger and more delicate.
  • Chinese Hibiscus: Often the same as tropical, known for showy flowers and frequent blooming.

The care guidelines below primarily apply to tropical Hibiscus but can be adapted for hardy varieties with slight modifications.


Location and Light: The First Step to Effective Hibiscus Care

Light Requirements

Hibiscus thrives in full sun — at least 6 hours of direct sunlight daily. Adequate light ensures abundant flowering and robust growth.

  • Indoors: Place your Hibiscus near a bright, south-facing window.
  • Outdoors: Plant in a sunny spot where it receives morning sun and some afternoon shade in very hot climates.

Temperature Preferences

Hibiscus prefers warm temperatures between 60°F and 90°F (15°C–32°C). It doesn’t tolerate frost or prolonged cold well.

  • Bring potted Hibiscus indoors if temperatures drop below 50°F (10°C).
  • Hardy Hibiscus can withstand cooler temps but thrives best in warmer summer months.

Soil and Potting Mix: The Foundation for Healthy Growth

Hibiscus prefers well-draining, fertile soil rich in organic matter.

Ideal Soil Composition

  • Loamy soil mixed with compost or aged manure.
  • Slightly acidic to neutral pH (around 6.0–7.0).
  • Avoid heavy clay soils that hold too much moisture.

Potting Mix for Container Plants

For potted Hibiscus, use a mix of:

  • 2 parts potting soil
  • 1 part perlite or coarse sand for drainage
  • 1 part compost for nutrients

Watering Hibiscus Properly

Watering is one of the most crucial factors in Hibiscus care.

How Often to Water:

  • Hibiscus likes consistent moisture but hates soggy roots.
  • Water thoroughly when the top inch of soil feels dry.
  • During hot summer months, you may need to water daily if planted outdoors.
  • Reduce watering in cooler months or when the plant is dormant.

Watering Tips:

  • Avoid waterlogging by ensuring pots have drainage holes.
  • Use room-temperature water to avoid shocking the roots.
  • Mulch outdoor plants to retain moisture and keep roots cool.

Feeding and Fertilizing Hibiscus

Hibiscus are heavy feeders, especially during active growth and blooming periods.

Fertilizer Type:

  • Use a balanced, water-soluble fertilizer with a ratio like 10-10-10 or one higher in potassium (e.g., 10-10-15) to encourage flowers.
  • Organic options include fish emulsion, seaweed extract, or compost tea.

Feeding Schedule:

  • Fertilize every 2 weeks during spring and summer.
  • Stop or reduce feeding in fall and winter when the plant’s growth slows.

Pruning and Deadheading: Boost Bloom Production

Pruning Tips:

  • Prune in early spring before new growth begins to maintain shape and encourage branching.
  • Remove weak, leggy, or dead stems to improve air circulation and overall health.
  • Regular pruning promotes fuller growth and more blooms.

Deadheading:

  • Remove spent flowers regularly to encourage more blooms.
  • Pinch off the faded flower stem just above a set of healthy leaves.

Managing Pests and Diseases Naturally

Hibiscus can attract common pests and sometimes fall victim to diseases.

Common Pests:

  • Aphids
  • Spider mites
  • Whiteflies
  • Mealybugs

Natural Pest Control:

  • Spray leaves with insecticidal soap or neem oil.
  • Wipe pests off with a damp cloth or blast them off with water.
  • Introduce beneficial insects like ladybugs if outdoors.

Disease Prevention:

  • Avoid overwatering to prevent root rot and fungal diseases.
  • Ensure good airflow around the plant.
  • Remove affected leaves promptly.

Repotting and Transplanting Hibiscus

  • Repot container plants every 2-3 years or when roots become crowded.
  • Choose a pot slightly larger than the current one with good drainage.
  • Repot in spring for best results.
  • For garden plants, transplant during early spring or fall.

Special Tips for Indoor Hibiscus Care

  • Keep humidity levels moderate by misting leaves or using a humidity tray.
  • Rotate the plant regularly to ensure even light exposure.
  • Avoid drafts and sudden temperature changes.

Encouraging Year-Round Blooms

Hibiscus can bloom multiple times a year with proper care.

  • Provide consistent sunlight and warmth.
  • Feed regularly during growth.
  • Deadhead and prune to stimulate new growth.
  • Avoid stressors like overwatering, underwatering, or sudden temperature shifts.

Troubleshooting Common Problems

Leaves Yellowing

  • Could indicate overwatering, poor drainage, or nutrient deficiency.

Flower Buds Dropping

  • Usually caused by sudden temperature changes, lack of humidity, or inconsistent watering.

Leggy Growth

  • Insufficient light or lack of pruning.

Conclusion

The Hibiscus plant is a stunning, rewarding plant that brings tropical beauty to any space. By providing plenty of light, warm temperatures, well-draining soil, consistent watering, and regular feeding, you’ll encourage healthy growth and spectacular blooms. Pruning and pest management will keep your Hibiscus thriving season after season.

With the right care approach, your Hibiscus can become a vibrant centerpiece, bursting with colorful flowers that delight you and attract pollinators. Whether you’re a beginner or experienced gardener, this guide will help you care for your Hibiscus plant effectively and enjoy its natural beauty for years to come.

Cyclamen Plant: How to Care for Naturally — A Complete Guide for Beautiful Blooms

Cyclamen Plant: How to Care for Naturally — A Complete Guide for Beautiful Blooms

If you’re searching for a plant that brings vibrant color and charm to your home or garden during the cooler months, Cyclamen is a fantastic choice. With their delicate, upswept blooms and variegated heart-shaped leaves, these elegant plants are surprisingly easy to care for when you understand their natural preferences.

Native to the Mediterranean region, Cyclamen naturally grow in cool, shady areas and go dormant during hot, dry summers. By mimicking these conditions and caring for your Cyclamen in a gentle, natural way, you can enjoy their flowers for weeks and encourage them to thrive for years to come.

In this article, we’ll guide you through everything you need to know about Cyclamen plant care — naturally. From light, water, and soil preferences to dormancy tips and natural pest control, let’s uncover the secrets to keeping your Cyclamen happy and healthy.


Why Grow Cyclamen?

Before we dive into care tips, here’s why Cyclamen are a favorite among plant lovers:

  • Elegant, long-lasting flowers in shades of pink, red, white, and purple.
  • Attractive, marbled foliage that looks beautiful year-round.
  • Naturally bloom during fall, winter, and early spring, brightening homes when many other plants are dormant.
  • Compact and perfect for windowsills, tabletops, and shaded garden spots.
  • Low maintenance when grown in natural, suitable conditions.

Types of Cyclamen

There are over 20 species of Cyclamen, but the most common and widely grown is Cyclamen persicum (Florist’s Cyclamen). Other varieties include:

  • Cyclamen hederifolium (ivy-leaved Cyclamen)
  • Cyclamen coum (round-leaved Cyclamen)
  • Cyclamen mirabile (noted for its pink blooms)

While care principles are generally similar, some varieties are better suited to outdoor gardens, while others thrive indoors.


Best Natural Growing Conditions for Cyclamen

To naturally care for Cyclamen, it’s essential to replicate the environment they enjoy in the wild.

1. Light Requirements

Cyclamen prefer bright, indirect light. Direct sunlight can scorch the leaves and flowers, while too little light results in poor blooming.

  • Indoors: Place near an east or north-facing window.
  • Outdoors: Grow in partial to full shade, under trees, or along shaded garden borders.

2. Temperature Preferences

These plants thrive in cool temperatures — ideal for fall and winter.

  • Optimal temperature: 50°F to 65°F (10°C to 18°C)
  • Avoid placing them near heaters, radiators, or south-facing windows where heat builds up.

Tip: Cyclamen are naturally dormant in summer. Don’t force them to grow in hot conditions.


The Right Soil and Potting Mix

Cyclamen need well-draining soil to avoid root and tuber rot.

1. Natural Potting Mix

Create a light, airy mix using:

  • 2 parts peat moss or coconut coir
  • 1 part perlite or coarse sand
  • 1 part leaf mold or organic compost

2. Outdoor Planting

Plant Cyclamen in a shady, sheltered spot with loamy, well-drained soil rich in organic matter.

Tip: Never use heavy, water-retentive soils for Cyclamen.


Watering Cyclamen: A Natural Approach

Cyclamen dislike both overwatering and drying out completely.

Watering Tips:

  • Water when the top inch of soil feels dry.
  • Use room-temperature, filtered water or rainwater.
  • Water around the edge of the pot, avoiding the crown and tuber to prevent rot.
  • Allow excess water to drain away completely.

Frequency: Every 5–7 days during active growth and flowering (fall–spring). Reduce watering when the plant begins to go dormant in late spring.

Signs of Overwatering:

  • Yellowing leaves
  • Drooping stems
  • Soft, mushy tuber

Signs of Underwatering:

  • Wilting leaves
  • Dry, crispy edges

Natural Fertilizing for Cyclamen

Cyclamen benefit from light, organic feeding during their growing season.

Natural Fertilizer Options:

  • Compost tea: A gentle, nutrient-rich liquid made by steeping compost in water.
  • Seaweed extract: Diluted and applied every two weeks.
  • Organic houseplant fertilizer: Low in nitrogen, high in potassium to support blooming.

Feeding Schedule: Every 2–3 weeks during active growth. Stop fertilizing as the plant enters dormancy.


Managing Cyclamen Dormancy

Cyclamen naturally go dormant in late spring to early summer. Recognizing and respecting this rest period is key to long-term plant health.

Signs of Dormancy:

  • Leaves yellow and wilt.
  • Flower production ceases.
  • The plant appears lifeless.

What to Do:

  • Stop watering once foliage dies back.
  • Move the pot to a cool, dry, shaded spot.
  • Leave the tuber undisturbed for 2–3 months.
  • Resume light watering when new growth appears in fall.

Tip: Don’t throw away a dormant Cyclamen — it’s just resting!


Natural Pest and Disease Management

Cyclamen are prone to a few common pests, especially indoors. Use natural, non-toxic solutions whenever possible.

Common Pests:

  • Aphids
  • Spider mites
  • Mealybugs
  • Cyclamen mites

Natural Remedies:

  • Wipe leaves with a damp cloth or cotton swab dipped in soapy water.
  • Spray with neem oil or diluted insecticidal soap.
  • Encourage natural predators outdoors, like ladybugs.

Disease Prevention:

  • Avoid overwatering.
  • Ensure good air circulation.
  • Remove yellow or dead leaves promptly.

Natural Ways to Encourage More Blooms

Want to enjoy an abundance of those charming Cyclamen flowers? Here’s how:

  1. Maintain cool temperatures.
  2. Provide bright, indirect light.
  3. Water regularly but don’t let the soil stay soggy.
  4. Feed naturally during the blooming season.
  5. Deadhead spent blooms and yellow leaves by gently twisting the stem near the base and removing it cleanly.

Tip: Cyclamen flowers can last several weeks if conditions remain cool.


Propagating Cyclamen Naturally

Though Cyclamen propagation requires patience, it’s a rewarding way to multiply your collection.

1. Seed Propagation

  • Collect ripe seed pods after flowers fade.
  • Sow seeds in a mix of compost and sand.
  • Keep in a cool, shaded area with consistent moisture.
  • Germination takes 1–3 months.

2. Tuber Division

  • During dormancy, carefully unearth large tubers.
  • Use a sterilized knife to divide, ensuring each piece has a growing point.
  • Replant in fresh, well-drained soil.

Final Thoughts

Cyclamen are a delightful addition to any home or garden, offering vibrant flowers and attractive foliage during the cool months when other plants retreat. While they’ve gained a reputation for being finicky, these charming plants are surprisingly easy to care for when nurtured naturally, following their seasonal rhythms.

By providing the right light, cool temperatures, natural soil mixes, and gentle organic care, you’ll enjoy lush foliage and elegant blooms year after year. Plus, the satisfaction of reviving a Cyclamen after its summer dormancy is one of the purest joys for any plant lover.

So, whether you’re new to Cyclamen or looking to better care for your existing plants, follow these natural care tips and watch your Cyclamen flourish.

How to Take Care of an Orchid Plant Properly: A Complete Guide for Lush Blooms and Healthy Growth

How to Take Care of an Orchid Plant Properly: A Complete Guide for Lush Blooms and Healthy Growth

Orchids are one of the most elegant and captivating plants you can grow at home. Their exotic, long-lasting flowers and graceful appearance make them a favorite among indoor plant enthusiasts and gardeners alike. Despite their reputation for being fussy, orchids are surprisingly resilient and can thrive with the right care.

If you’ve recently added an orchid to your plant collection or are considering growing one, this guide will walk you through everything you need to know about how to properly care for an orchid plant. From choosing the right pot to encouraging repeat blooms, you’ll learn how to keep your orchid healthy and beautiful year-round.


Why Choose Orchids?

Before diving into care tips, let’s explore why orchids are such a popular plant:

  • Elegant and long-lasting blooms that can last several weeks to months.
  • A wide variety of species and colors — over 25,000 species and 100,000 hybrids.
  • Air-purifying qualities that help freshen indoor environments.
  • Symbolic significance in many cultures, representing love, beauty, and strength.
  • Can be grown both indoors and outdoors in suitable climates.

Popular beginner-friendly orchid varieties include Phalaenopsis (Moth Orchid), Cattleya, Dendrobium, and Oncidium.


Best Growing Conditions for Orchids

While different orchid species have their preferences, most share similar environmental needs. Here’s how to create the perfect conditions for your orchid:

1. Light Requirements

Orchids need bright, indirect light to thrive.

  • Indoors: A south or east-facing window is ideal.
  • Avoid direct afternoon sunlight, which can scorch the leaves.
  • If your home lacks natural light, supplement with fluorescent grow lights.

Tip: Healthy orchid leaves should be bright green. Dark green leaves suggest too little light, while yellowish leaves indicate too much.

2. Temperature and Humidity

Orchids prefer a balance of warmth and humidity:

  • Daytime temperatures: 65°F to 80°F (18°C to 27°C)
  • Nighttime temperatures: 55°F to 65°F (13°C to 18°C)
  • Humidity: 50% to 70%

If your home is dry:

  • Use a humidity tray or room humidifier.
  • Group plants together to increase ambient moisture.
  • Mist the leaves occasionally, but avoid water sitting in the crown of the plant.

Choosing the Right Pot and Potting Medium

Unlike most houseplants, orchids are epiphytes in the wild, meaning they grow on trees and absorb moisture from the air. This unique habit means they need specific potting and drainage conditions.

1. Orchid Pots

Use a pot with:

  • Plenty of drainage holes
  • Good airflow around the roots

Clear plastic orchid pots are popular because they allow you to monitor root health and moisture levels.

2. Potting Medium

Orchids thrive in a well-draining, chunky mix. Ideal materials include:

  • Bark chips
  • Sphagnum moss
  • Perlite
  • Charcoal
  • Coconut husk

Avoid regular potting soil, as it retains too much moisture and can suffocate the roots.


Watering Orchids: The Key to Success

One of the most misunderstood aspects of orchid care is watering. Orchids need moisture but also require their roots to dry out between waterings.

Watering Tips:

  • Water your orchid once every 7 to 10 days, depending on your home’s humidity and temperature.
  • Always water in the morning to allow excess moisture to evaporate.
  • Use room temperature water and thoroughly soak the potting medium.
  • Allow water to drain completely — never let the pot sit in water.

Signs of Overwatering:

  • Yellow, limp leaves
  • Mushy, brown roots
  • Mold or rot in the pot

Signs of Underwatering:

  • Wrinkled, leathery leaves
  • Dry, brittle roots

Tip: Use the finger test — if the potting medium feels dry an inch below the surface, it’s time to water.


Fertilizing Your Orchid

Orchids need regular feeding to support their blooms and new growth.

Fertilizer Tips:

  • Use a balanced orchid-specific fertilizer (20-20-20) or one labeled for houseplants.
  • Apply every two weeks during the growing season (spring and summer).
  • Reduce fertilizing to once a month in fall and winter when growth slows.

Feeding Method:

  • Dilute the fertilizer to half the recommended strength.
  • Apply after watering, never to dry roots.

Pruning and Repotting Orchids

1. Pruning After Blooming

Once an orchid’s flowers fade:

  • Cut the flower spike down to the nearest node (small bump) for potential reblooming in Phalaenopsis orchids.
  • If the spike turns brown, trim it off completely at the base.

2. Repotting Orchids

Repot every 1 to 2 years or when:

  • The potting medium breaks down.
  • Roots outgrow the pot.
  • The plant appears unhealthy.

Repotting Steps:

  1. Remove the orchid from its pot and gently rinse the roots.
  2. Trim dead or rotting roots with sterilized scissors.
  3. Place the orchid in fresh orchid mix.
  4. Avoid watering for a day or two after repotting to let the roots adjust.

Common Orchid Problems and How to Fix Them

Even with the best care, orchids can occasionally face problems. Here’s how to troubleshoot common issues:

1. Yellow Leaves

  • Overwatering
  • Direct sunlight
  • Natural aging of lower leaves

Solution: Adjust light exposure and watering routine.

2. Root Rot

Caused by excess moisture.

Solution: Remove rotted roots and repot in fresh, dry orchid mix.

3. Pests

Common orchid pests include:

  • Mealybugs
  • Aphids
  • Spider mites
  • Scale insects

Solution: Wipe leaves with a damp cloth or spray with neem oil or insecticidal soap.

4. Failure to Bloom

If your orchid isn’t blooming:

  • Ensure it’s getting enough bright, indirect light.
  • Allow a slight temperature drop at night.
  • Maintain a regular watering and fertilizing schedule.

Seasonal Orchid Care

Spring and Summer:

  • Increase watering and fertilizing.
  • Move outdoors if temperatures stay between 60°F and 85°F.
  • Protect from direct sun and heavy rain.

Fall and Winter:

  • Reduce watering frequency.
  • Lower fertilizing to monthly.
  • Provide cooler nighttime temperatures to encourage blooming.

How to Encourage Orchids to Rebloom

Many people mistakenly discard orchids after their flowers drop, not realizing they can bloom again with proper care.

Tips to Trigger Reblooming:

  • Keep your orchid in bright, indirect light.
  • Maintain consistent humidity and airflow.
  • Allow cooler nighttime temperatures (around 55°F to 60°F) in fall.
  • Continue regular, diluted fertilizing during active growth.

Patience is key — some orchids can take several months to rebloom.


Final Thoughts

Orchids are stunning, rewarding plants that bring a touch of natural elegance to any home. While their care can seem intimidating at first, understanding their unique needs makes them surprisingly manageable.

By providing bright, indirect light, maintaining proper humidity, watering thoughtfully, and using the right potting medium, you can keep your orchid thriving and blooming for years to come. Plus, with a little practice and patience, you’ll find yourself eagerly awaiting each new, breathtaking bloom.

So, whether you’re nurturing your first orchid or expanding your collection, follow these care tips to enjoy vibrant, healthy orchids that steal the spotlight in any room.

How to Take Care of a Jade Plant Successfully: A Complete Guide for Beginners and Plant Lovers

How to Take Care of a Jade Plant Successfully: A Complete Guide for Beginners and Plant Lovers

Jade plants have long been treasured as a symbol of prosperity, good luck, and friendship. Native to South Africa and Mozambique, these hardy succulents have captured hearts worldwide with their fleshy, glossy leaves and tree-like structure. Known scientifically as Crassula ovata, jade plants are loved for their easy care, attractive appearance, and long lifespan — some can live for decades, even generations!

Whether you’re a seasoned plant enthusiast or a complete beginner, caring for a jade plant is simple with the right guidance. In this comprehensive guide, you’ll learn everything you need to know about how to successfully care for your jade plant, from choosing the right pot to handling pests and diseases.


Why Choose a Jade Plant?

Before we dive into care tips, let’s talk about why jade plants are so popular:

  • Low Maintenance: Perfect for beginners and busy homeowners.
  • Long-Lived: They can thrive for many years with minimal effort.
  • Attractive Appearance: Glossy, oval-shaped leaves with thick stems resemble miniature trees.
  • Air Purifying: Jade plants help improve indoor air quality.
  • Symbolic: In many cultures, they symbolize wealth, prosperity, and good fortune.

The Best Growing Conditions for Jade Plants

Like most succulents, jade plants thrive in bright, dry conditions. Let’s break down their preferred environment:

1. Light Requirements

Jade plants love sunlight. Place them in a spot that gets at least 4-6 hours of bright, indirect sunlight daily.

  • Indoors: A south-facing window is ideal.
  • Outdoors: Place in a sunny spot but protect from intense afternoon heat.

Tip: If the leaves start to turn red at the edges, that’s a sign they’re getting plenty of light — and it’s perfectly healthy!

2. Temperature Preferences

Jade plants prefer temperatures between 65°F to 75°F (18°C to 24°C) during the day, and no lower than 50°F (10°C) at night.

  • Avoid placing them near cold drafts, heaters, or air conditioners.
  • Bring outdoor plants indoors before the first frost.

3. Soil Type

Use a well-draining soil mix specifically designed for succulents or cacti.

  • A good jade plant soil mix contains coarse sand, perlite, and peat moss.
  • Avoid moisture-retentive soil to prevent root rot.

Choosing the Right Pot

A good pot is crucial for your jade plant’s health.

  • Use a ceramic or terracotta pot with drainage holes.
  • Terracotta is especially helpful because it allows excess moisture to evaporate.
  • Ensure the pot is slightly larger than the root ball to prevent overwatering.

Tip: Avoid decorative pots without drainage holes unless you’re using a cachepot method (keeping the plant in a nursery pot inside a decorative container).


Watering Jade Plants: The Most Important Care Factor

Overwatering is the number one cause of jade plant problems. These succulents store water in their thick leaves and stems, making them drought-tolerant.

Watering Tips:

  • Let the soil dry out completely between waterings.
  • Water thoroughly, allowing excess water to drain out.
  • In winter, reduce watering frequency to once a month or when leaves start to look slightly wrinkled.

Signs of Overwatering:

  • Yellowing, mushy leaves.
  • Root rot.
  • Dropping leaves.

Signs of Underwatering:

  • Wrinkled, shriveled leaves.

Fertilizing Jade Plants

Jade plants aren’t heavy feeders but benefit from occasional fertilizing, especially during the growing season (spring and summer).

Fertilizer Tips:

  • Use a balanced, water-soluble fertilizer diluted to half strength.
  • Fertilize once a month during active growth.
  • Avoid fertilizing in fall and winter when the plant is dormant.

Recommended Fertilizers:

  • Cactus or succulent fertilizers.
  • Balanced all-purpose houseplant fertilizer (10-10-10 or 20-20-20 diluted).

Pruning and Shaping Your Jade Plant

Jade plants can grow leggy or unbalanced without occasional pruning.

Pruning Benefits:

  • Encourages bushier, compact growth.
  • Removes dead or damaged leaves.
  • Helps shape the plant into an attractive form.

How to Prune:

  1. Use clean, sharp scissors or pruning shears.
  2. Remove leggy or awkwardly placed stems.
  3. Trim just above a leaf node (where leaves grow from the stem).
  4. Pinch off new tips to encourage branching.

Tip: Pruned cuttings can be propagated easily in soil or water.


Propagating Jade Plants

One of the joys of owning a jade plant is how effortlessly it propagates.

Leaf or Stem Cutting Method:

  1. Choose a healthy leaf or 3-4 inch stem cutting.
  2. Allow the cut end to callous over for 1-2 days.
  3. Plant it in dry, well-draining succulent soil.
  4. Lightly mist the soil until roots form in a few weeks.

Tip: New cuttings should be kept in bright, indirect light while rooting.


Common Pests and Problems

Though jade plants are hardy, they can occasionally fall prey to pests or diseases.

Common Pests:

  • Mealybugs: Look like tiny cotton balls on leaves and stems.
  • Spider Mites: Fine webbing and speckled leaves.
  • Scale Insects: Hard brown bumps on stems.

Natural Treatments:

  • Wipe leaves with a cotton swab dipped in rubbing alcohol.
  • Spray with insecticidal soap or neem oil.

Common Issues:

  • Root Rot: Caused by overwatering. Save by removing rotten roots and repotting in dry soil.
  • Leaf Drop: Can result from sudden temperature changes, overwatering, or underwatering.

Seasonal Care for Jade Plants

Spring and Summer:

  • Move outdoors gradually (if desired) once temperatures consistently stay above 55°F.
  • Increase watering frequency but always check soil moisture first.
  • Fertilize monthly.

Fall and Winter:

  • Bring plants indoors before the first frost.
  • Reduce watering to once every 4-6 weeks.
  • Avoid fertilizing.

Tip: Jade plants prefer cooler winter temperatures to encourage blooming, though blooms are rare indoors.


How to Encourage a Jade Plant to Bloom

While jade plants can bloom with small, star-shaped pink or white flowers, it’s a rare event, especially indoors. To increase your chances:

  • Provide cool nighttime temperatures (around 50°F) in winter.
  • Reduce watering in winter to trigger dormancy.
  • Ensure your plant gets plenty of bright light year-round.
  • Keep the plant slightly root-bound (don’t repot too frequently).

Final Thoughts

The jade plant is a timeless, easy-care houseplant that brings natural beauty, good fortune, and a touch of nature to your space. With its glossy, fleshy leaves and tree-like form, it’s a perfect addition to windowsills, desktops, and patios.

By following these care tips — giving your jade plant proper light, minimal water, good drainage, and occasional feeding — you’ll enjoy a thriving, healthy plant for years, perhaps even decades. Its resilience and charm make it one of the best houseplants for both beginners and experienced plant lovers alike.

So, whether you’ve just brought one home or you’re nurturing an older plant, you now have everything you need to keep your jade plant happy, healthy, and growing successfully.

How to Care for Orchid Plants Efficiently: A Complete Guide

How to Care for Orchid Plants Efficiently: A Complete Guide

Orchids are among the most elegant and exotic flowering plants, admired worldwide for their stunning blooms and intricate shapes. However, many people shy away from growing orchids indoors because they believe these plants are difficult to care for. The truth is, with the right knowledge and a little attention, orchids can flourish beautifully, rewarding you with long-lasting blooms and lush foliage.

In this article, we will explore the essential care tips, common challenges, and expert advice on how to care for orchid plants efficiently so that your orchids stay healthy, bloom often, and bring joy to your home.


Understanding Orchids: The Basics

Orchids belong to one of the largest plant families, with over 25,000 species globally. The most popular houseplant orchids belong to the genus Phalaenopsis, also called moth orchids, prized for their easy care and spectacular flowers.

Orchids are epiphytes in nature, meaning they grow on other plants (like tree trunks) and get their nutrients from the air, rain, and debris rather than soil. This unique growing habit shapes how we care for them indoors.


Choosing the Right Orchid for Your Home

Before diving into care tips, it’s essential to select the right orchid species that suits your environment and experience level.

  • Phalaenopsis (Moth Orchid): Best for beginners; blooms long and thrives in moderate light.
  • Dendrobium: Prefers bright light and has a longer blooming cycle.
  • Cattleya: Known for fragrant, large blooms; needs more light and humidity.
  • Oncidium: Requires cooler temps and good airflow.

For most indoor gardeners, Phalaenopsis orchids are the easiest to care for and the best choice to start with.


1. Light Requirements for Orchids

Orchids need bright, indirect light to thrive and bloom. Placing your orchid near an east-facing window is ideal, where it receives gentle morning light. Avoid harsh direct sunlight, especially from south or west-facing windows, as it can scorch the leaves.

Signs of insufficient light:

  • Dark green, limp leaves.
  • Lack of blooms or buds dropping prematurely.

Signs of too much light:

  • Yellowing leaves.
  • Brown or scorched leaf tips.

If natural light is inadequate, consider using fluorescent grow lights to provide 12–14 hours of light daily.


2. Watering Your Orchid Efficiently

Watering is one of the most common challenges in orchid care. Overwatering can lead to root rot, while underwatering stresses the plant and inhibits blooming.

How often to water?

  • Generally, water orchids once a week during growing season (spring and summer).
  • In winter, reduce watering to every 10-14 days as growth slows.
  • The exact frequency depends on your home’s temperature and humidity.

Best watering method:

  • Use room temperature water.
  • Water early in the day to allow leaves and crown to dry before night.
  • Thoroughly soak the potting medium and roots, then let excess water drain completely.
  • Avoid water pooling in the crown or leaf axils, which causes crown rot.

Tips to know when to water:

  • Feel the potting mix — water when it feels dry about an inch below the surface.
  • Use a moisture meter or lift the pot to judge its weight — lighter means dry.

3. Humidity and Temperature

Orchids thrive in high humidity environments, typically between 50-70%. Most homes are drier than that, especially in winter with heating systems running.

How to increase humidity:

  • Use a humidity tray: Place a shallow dish with water and pebbles under the orchid pot.
  • Mist the orchid daily or place a humidifier nearby.
  • Group plants together to create a microclimate.

Ideal temperature range:

  • Daytime: 65°F to 80°F (18°C to 27°C)
  • Nighttime: 55°F to 65°F (13°C to 18°C)

Orchids benefit from a temperature drop of about 10°F (5-6°C) at night to encourage blooming.


4. Orchid Potting Medium and Repotting

Unlike traditional plants, orchids grow best in aerated potting media like bark, sphagnum moss, or coconut husk chips that provide airflow around roots.

When to repot:

  • Every 1-2 years to refresh the medium and prevent root rot.
  • If the potting mix breaks down and becomes soggy.
  • After flowering or when the orchid outgrows its container.

How to repot efficiently:

  • Gently remove the orchid from its pot.
  • Trim any dead or rotted roots with sterilized scissors.
  • Place the orchid in a slightly larger pot with fresh orchid bark mix.
  • Do not bury the crown; roots should be spread out loosely.
  • Water lightly after repotting and avoid fertilizing for 2-3 weeks.

5. Fertilizing Your Orchid

Orchids benefit from regular fertilization to encourage blooming and healthy growth.

  • Use a balanced orchid fertilizer (20-20-20) or one specifically formulated for orchids.
  • Dilute the fertilizer to half or quarter strength to avoid overfeeding.
  • Fertilize every two weeks during the growing season (spring and summer).
  • Reduce feeding in fall and winter when growth slows.

6. Encouraging Your Orchid to Bloom

With proper care, orchids can bloom once or even twice a year.

Tips to encourage flowering:

  • Maintain proper light and temperature conditions.
  • Provide a nighttime temperature drop (10°F cooler) during fall.
  • Avoid overwatering and keep humidity levels consistent.
  • Fertilize regularly but carefully.
  • Remove spent flower spikes by cutting them just above a node to encourage reblooming.

7. Common Orchid Problems and How to Fix Them

  • Yellow leaves: Usually caused by too much light or overwatering.
  • Wrinkled leaves: Sign of underwatering or low humidity.
  • No blooms: Could mean insufficient light, nutrients, or improper temperature.
  • Pests: Watch for aphids, mealybugs, and spider mites; treat with insecticidal soap or neem oil.
  • Root rot: Result of soggy potting mix; improve drainage and watering habits.

8. Orchid Pests and Diseases

While orchids are generally resilient, they can occasionally attract pests like:

  • Mealybugs: White cottony clusters on leaves and roots.
  • Spider mites: Tiny webs and stippled leaves.
  • Scale insects: Brown, waxy bumps on leaves.

Prevent infestations by regularly inspecting your plants, maintaining good air circulation, and cleaning leaves gently.


9. Creative Ways to Display Your Orchid Indoors

Orchids look stunning when thoughtfully displayed:

  • Use decorative pots with drainage holes.
  • Place on bright windowsills with filtered light.
  • Mount orchids on wood or cork bark for a natural look.
  • Group orchids with other humidity-loving plants.
  • Use orchid stands or hangers to elevate their beauty.

10. Final Thoughts: Efficient Orchid Care Made Easy

Orchids are remarkable plants that add elegance and sophistication to any indoor space. With a few simple care routines — proper watering, lighting, humidity, and feeding — you can efficiently nurture your orchid to bloom again and again.

Don’t be discouraged if you face challenges early on; orchids are resilient and rewarding with patience and attention. Embrace their unique needs, and you’ll enjoy the spectacular floral displays that have enchanted gardeners worldwide.

How to Care for an Air Plant Indoors: The Ultimate Guide

How to Care for an Air Plant Indoors: The Ultimate Guide

Air plants, scientifically known as Tillandsia, are some of the most fascinating and versatile plants you can add to your indoor space. Unlike most plants, they don’t require soil to grow, which makes them perfect for creative displays and low-maintenance plant lovers.

If you’ve recently fallen in love with air plants or are thinking about bringing one home, understanding how to care for them indoors is essential to keeping them healthy and vibrant. This guide will take you through everything you need to know — from watering and light requirements to ideal temperature and creative display ideas.


What Are Air Plants?

Air plants belong to the bromeliad family and naturally grow in the wild attached to trees, rocks, and other surfaces. They absorb moisture and nutrients through their leaves from the air and rain, rather than from soil. This unique ability means they require a different kind of care than traditional potted plants.

There are over 600 species of Tillandsia, ranging in size from tiny 1-inch plants to larger varieties over a foot tall, with a wide variety of leaf shapes and colors.


Why Choose Air Plants for Your Indoor Garden?

  • Soil-free growth means less mess and more design freedom.
  • They require minimal care compared to many houseplants.
  • Perfect for small spaces, terrariums, wall mounts, or hanging displays.
  • They add a unique, modern aesthetic with their sculptural shapes.
  • Air plants are pet-friendly and safe for most households.

Essential Care Tips for Growing Air Plants Indoors

1. Light Requirements

Air plants thrive in bright, indirect light. Near an east, south, or west-facing window with filtered sunlight is ideal. Avoid harsh direct sunlight for prolonged periods, especially in summer, as it can scorch their leaves.

If natural light is limited in your home, you can use fluorescent or LED grow lights. Position the lights about 6-12 inches away and keep them on for 12 hours a day.


2. Watering Your Air Plant

Watering is the most crucial part of air plant care — get it right, and your plant will flourish.

How often to water:
Generally, water your air plant once a week. In dry or warm environments, twice a week may be necessary.

Watering methods:

  • Soaking: Submerge your air plant in room temperature water for about 20-30 minutes. After soaking, shake off excess water gently to avoid rot.
  • Misting: For a light hydration boost between soakings, mist your plant’s leaves 2-3 times a week.

Important: Always allow your air plant to dry completely within 4 hours after watering. Leaving water trapped in the leaves can cause rot.


3. Air Circulation

Good air circulation is essential for air plants since they absorb moisture from the air and need to dry properly after watering. Keep them in a spot with gentle airflow, such as near a fan or open window.


4. Temperature and Humidity

  • Temperature: Air plants prefer temperatures between 50°F and 90°F (10°C to 32°C). They are not frost-tolerant, so avoid exposing them to temperatures below 45°F.
  • Humidity: These plants enjoy moderate to high humidity, typical of many indoor environments. If your home is dry (especially during winter), increase humidity with regular misting or placing a humidifier nearby.

5. Fertilizing Air Plants

While air plants don’t need much fertilizer, feeding them monthly during their growing season can encourage healthier growth and blooming.

  • Use a bromeliad or air plant-specific fertilizer diluted to 1/4 strength.
  • Apply by adding fertilizer to the water when soaking.
  • Avoid over-fertilizing as it can damage the plant.

6. How to Identify a Healthy Air Plant

  • Leaves should be firm, vibrant, and free of spots or browning.
  • The plant should feel plump and not shriveled or dry.
  • New growth from the center indicates a happy, thriving plant.
  • Some species produce colorful blooms or pups (baby plants), which is a sign of maturity.

7. Common Problems and How to Fix Them

Brown or crispy leaf tips: Usually a sign of underwatering or too much direct sun. Increase watering or move to a less intense light spot.

Soft or mushy leaves: Indicates overwatering or poor drying. Adjust watering frequency and improve air circulation.

No growth or flowering: Could mean insufficient light or nutrients. Move your plant to brighter light and try fertilizing monthly.


Creative Ways to Display Air Plants Indoors

One of the joys of air plants is how versatile they are in home decor.

  • Terrariums: Glass containers with sand, pebbles, or driftwood create a mini-ecosystem.
  • Mounted displays: Attach air plants to driftwood, cork bark, or shells using non-toxic glue or wire.
  • Hanging orbs: Use clear glass globes hung from the ceiling or windows.
  • Wall art: Mount them on wooden boards or inside picture frames for living art pieces.
  • Table centerpieces: Place them in shallow bowls with decorative stones or moss.

How to Propagate Air Plants

Propagation happens naturally when air plants produce pups — small offsets growing at the base.

  • Wait until pups are about one-third the size of the mother plant.
  • Gently separate them by pulling or cutting with sterilized scissors.
  • Plant the pup just like an adult air plant, ensuring proper watering and light.

Seasonal Care and Dormancy

While air plants don’t have a strict dormancy like some plants, they do benefit from seasonal adjustments.

  • In winter, reduce watering slightly if indoor humidity is higher.
  • Avoid placing near heating vents or cold drafts.
  • During spring and summer, you may water more frequently due to warmer temperatures.

Air Plants and Pets: Are They Safe?

Air plants are non-toxic to cats, dogs, and other pets, making them a great option for pet-friendly households.


Troubleshooting: When to Replace Your Air Plant

While air plants are hardy, they don’t live forever.

  • If your plant becomes completely brown, mushy, or disintegrates, it’s time to replace it.
  • Dead plants won’t recover, but you can keep pups growing for new plants.

Final Thoughts: Why Air Plants Are Perfect Indoor Plants

Air plants combine minimal care with maximum style. Their unique growth habit and soil-free lifestyle open doors for creative displays in homes, offices, or classrooms.

By providing the right light, watering on schedule, good air circulation, and occasional feeding, your indoor air plants will reward you with beauty and intrigue for years to come.

If you want to start with easy care, air plants are among the best choices, especially if you’re short on space or time but still want a lush, green touch in your environment.

How to Care for a Venus Flytrap Plant Effectively

How to Care for a Venus Flytrap Plant Effectively

If you’re fascinated by unique and unusual plants, few are as intriguing as the Venus flytrap (Dionaea muscipula). Famous for its jaw-like leaves that snap shut to trap insects, this carnivorous plant is both a conversation starter and a rewarding challenge for plant enthusiasts.

Though Venus flytraps are often portrayed as difficult to care for, with the right knowledge and attention, you can successfully nurture one at home. This guide will cover everything you need to know—from understanding its natural habitat to watering, feeding, dormancy, and common pitfalls—so your Venus flytrap thrives and captivates for years.


Understanding the Venus Flytrap

Native to the subtropical wetlands of the Carolinas in the United States, Venus flytraps grow in nutrient-poor, acidic, and wet soils. To survive, they’ve evolved to trap and digest insects, gaining essential nutrients like nitrogen and phosphorus.

Key Features:

  • Trap Structure: The “trap” is actually a pair of modified leaves with tiny hair-like sensors. When an unsuspecting insect touches these hairs twice, the trap snaps shut in less than a second.
  • Size: Traps typically range from 1 to 3 inches wide.
  • Lifespan: Individual traps live about 3-4 months, but the plant itself can live for many years if cared for properly.

Because Venus flytraps grow in very specific conditions, replicating some of those elements is key to successful care.


Choosing the Right Location and Pot

Light Requirements

Venus flytraps love bright light and thrive best with at least 4-6 hours of direct sunlight daily. Outdoors, they flourish in sunny spots, while indoors, placing them near a south-facing window is ideal.

If natural sunlight is limited, consider using a full-spectrum grow light for 12-16 hours a day to simulate their native environment.

Potting Medium

The soil is crucial because Venus flytraps require poor, acidic, and well-draining soil. Avoid standard potting mixes that contain fertilizers or minerals.

Recommended soil mix:

  • 50% sphagnum peat moss
  • 50% perlite or silica sand (avoid quartz sand, as it can contain minerals harmful to the plant)

Avoid regular garden soil or compost, which can suffocate or poison your flytrap.

Pot Selection

Use a plastic or glazed ceramic pot with drainage holes. Terracotta pots are not recommended because they can leach minerals into the soil.


Watering Your Venus Flytrap Correctly

Venus flytraps are highly sensitive to water quality and moisture levels.

Water Quality

Use only distilled water, rainwater, or reverse osmosis water. Tap water usually contains minerals and chemicals like chlorine, fluoride, or salts that can harm your plant.

Watering Method

  • Keep the soil consistently moist but not waterlogged.
  • A popular method is the tray watering technique: Place your pot in a shallow tray filled with about 1 inch of water and let the plant absorb moisture from the bottom.
  • Refill the tray when dry, but avoid letting the plant sit in standing water for weeks.

Avoid Overwatering and Underwatering

  • Overwatering causes root rot and leaf blackening.
  • Underwatering will make traps shrivel and die prematurely.

Feeding Your Venus Flytrap

While Venus flytraps get some nutrients from photosynthesis, they rely on insects for vital minerals missing from their poor soil.

Natural Feeding

If your flytrap lives outdoors or near an open window, it will likely catch insects on its own.

Manual Feeding

If indoors without natural insect access, you can feed your Venus flytrap manually:

  • Use small live insects like flies, spiders, or ants.
  • The insect must be alive or freshly killed; dried or processed insects won’t trigger the trap.
  • Feed only one trap at a time to avoid stress.
  • Each trap can close 3-4 times before it dies off and is replaced by new leaves.

Important: Do not overfeed. Feeding once every 2-3 weeks is sufficient.

Avoid Human Food

Never feed your Venus flytrap meat, cheese, or any processed food. These can rot and cause fungus or bacteria buildup.


Providing Proper Humidity and Temperature

Humidity

Venus flytraps prefer moderate to high humidity, ideally around 50% or higher.

  • If indoor air is dry, especially in winter, consider using a humidity tray or a small humidifier.
  • Avoid misting the traps frequently, as this can lead to fungal issues.

Temperature

  • During the growing season, Venus flytraps thrive in temperatures between 70°F and 95°F (21°C–35°C).
  • They can tolerate short periods of cooler temperatures but should be protected from frost.

Understanding Dormancy: The Key to Long-Term Care

One of the most critical aspects of Venus flytrap care is its dormancy period in winter.

What is Dormancy?

In its natural habitat, the Venus flytrap experiences colder winter months when it slows down growth and sheds many leaves. This rest period is essential for the plant’s health and longevity.

How to Care for Dormancy

  • In late fall or early winter, reduce watering and stop feeding.
  • Move the plant to a cooler location, ideally between 35°F and 50°F (2°C–10°C), like an unheated garage or a cool basement.
  • Keep the soil slightly moist but not soggy.
  • Maintain low light levels during dormancy.

Duration

Dormancy lasts about 3-4 months. In early spring, return the plant to warmer temperatures, increase watering, and resume feeding.

Skipping dormancy can severely weaken or kill your Venus flytrap.


Common Problems and How to Fix Them

Brown or Black Traps

This is usually natural aging, but excessive browning could indicate overfeeding, too much fertilizer (which should never be used), or poor water quality.

Mold or Fungus

Caused by overwatering or poor air circulation. Increase ventilation, reduce humidity, and trim dead traps.

Traps Not Closing

This may be due to insufficient light, poor water quality, or overfeeding. Ensure bright light and proper water.

Pest Issues

Although Venus flytraps catch insects, they can still get pests like aphids or spider mites. Treat with insecticidal soap or neem oil carefully, avoiding contact with the traps.


Repotting Your Venus Flytrap

Repotting every 1-2 years is beneficial to refresh soil and provide more room for root growth.

  • Repot in early spring, just as the plant begins to grow.
  • Use fresh sphagnum peat moss and perlite mix.
  • Trim away any dead or rotted roots.
  • Handle traps carefully; damaged traps will die.

Fun Facts About Venus Flytraps

  • Venus flytraps can snap shut in under 1/10th of a second.
  • Each trap has tiny trigger hairs that must be touched twice within 20 seconds to close — this prevents false alarms.
  • The plant secretes digestive enzymes to break down prey, absorbing nutrients in about 5-12 days.
  • Venus flytraps have inspired biomimicry in robotics and sensor technology.

Conclusion

Caring for a Venus flytrap can be a fascinating and rewarding experience, combining a touch of nature’s mystery with the joy of nurturing a living, snapping marvel. While their care requires specific attention to light, water quality, feeding, and dormancy, the effort pays off with a unique plant that’s both beautiful and functional.

By providing bright sunlight, pure water, the right soil, and respecting its seasonal rhythms, your Venus flytrap will thrive and delight for years. Whether you’re a seasoned plant parent or a curious beginner, this carnivorous wonder is sure to add an extraordinary edge to your indoor garden.

How to Care for a Rubber Tree Plant Indoors

How to Care for a Rubber Tree Plant Indoors

Looking for a bold, striking indoor plant that’s both low-maintenance and dramatic? Meet the Rubber Tree (Ficus elastica) — a classic houseplant known for its glossy, deep green leaves and towering presence. This tropical beauty can elevate the look of any room with its rich foliage and adaptable nature.

Though it’s relatively easy to care for, the Rubber Tree has a few specific needs to thrive indoors. In this detailed guide, we’ll walk you through everything you need to know about growing and maintaining a healthy Rubber Tree plant indoors.


What is a Rubber Tree Plant?

The Rubber Tree plant, scientifically known as Ficus elastica, is a species native to Southeast Asia. In its natural habitat, it can grow over 100 feet tall, but when cultivated indoors, it typically reaches 6-10 feet — still an impressive height for a houseplant.

Rubber Trees are loved for their large, glossy, oval-shaped leaves that range from deep green to burgundy, depending on the variety. Some popular cultivars include:

  • ‘Burgundy’ – dark, almost black foliage
  • ‘Tineke’ – green leaves with creamy-white variegation
  • ‘Ruby’ – green and pink-tinged leaves

Aside from their stunning looks, Rubber Trees are known for their ability to purify indoor air, making them a popular choice for homes and offices.


Ideal Growing Conditions for a Rubber Tree Plant Indoors

Creating the right environment is the first step toward growing a thriving Rubber Tree indoors. Let’s look at the essentials:

1. Light Requirements

Rubber Trees love bright, indirect light. While they can tolerate medium light, insufficient lighting may cause the leaves to lose their vibrant color and slow down growth.

Ideal spot:

  • Near an east or south-facing window with filtered sunlight
  • Avoid harsh, direct afternoon sun, which can scorch the leaves

If your Rubber Tree’s leaves start dropping or turning dull, it might be craving more light.

2. Temperature and Humidity

Being a tropical plant, the Rubber Tree prefers warm, consistent temperatures and moderate to high humidity.

  • Ideal temperature: 65°F to 80°F (18°C to 27°C)
  • Avoid: Temperatures below 55°F (13°C), sudden drafts, or air conditioning vents

To boost humidity, consider misting the leaves, using a room humidifier, or placing the plant on a pebble tray filled with water.


How to Water a Rubber Tree Plant

Watering is a critical aspect of Rubber Tree care. They prefer soil that’s consistently moist but not soggy. Overwatering can lead to root rot, while underwatering causes leaf drop.

Watering Guidelines:

  • Water thoroughly when the top 1-2 inches of soil feels dry to the touch.
  • Use room-temperature, filtered water.
  • In spring and summer, water more frequently as the plant is actively growing.
  • In fall and winter, reduce watering as growth slows.

Pro Tip: Always check the soil before watering. If in doubt, it’s safer to underwater than overwater.


Best Soil for a Rubber Tree Plant

A well-draining, aerated soil mix is essential for Rubber Trees to prevent root rot and maintain healthy growth.

Recommended mix:

  • 2 parts peat-based potting soil
  • 1 part perlite or coarse sand
  • 1 part pine bark or orchid bark (for improved aeration)

Ensure your pot has good drainage holes to allow excess water to escape.


Fertilizing a Rubber Tree Plant

To support healthy foliage and steady growth, especially during the active growing season, regular fertilizing is beneficial.

Fertilizing Tips:

  • Use a balanced, water-soluble fertilizer (10-10-10 or 20-20-20)
  • Apply every 4-6 weeks in spring and summer
  • Stop fertilizing in fall and winter when the plant enters dormancy

Over-fertilizing can damage roots and cause leaf burn, so it’s better to under-feed than over-feed.


Pruning and Shaping a Rubber Tree Plant

Regular pruning helps maintain the shape, height, and fullness of your Rubber Tree. It also encourages branching, making the plant look lusher.

How to prune:

  • Use sharp, clean pruning shears.
  • Cut just above a leaf node (the point where a leaf joins the stem).
  • Remove dead, damaged, or leggy growth.
  • Wear gloves — the plant’s milky sap can irritate the skin.

Pro Tip: To control height, cut the main stem at your desired height, and side branches will grow below the cut.


Repotting a Rubber Tree Plant

As your Rubber Tree grows, it may outgrow its pot. Repotting ensures that the roots have enough space and the soil remains fresh and nutrient-rich.

Signs it’s time to repot:

  • Roots growing out of drainage holes
  • Water runs through the soil too quickly
  • Slow growth despite good care

How to repot:

  • Choose a pot 1-2 inches larger in diameter than the current one.
  • Refresh the potting mix.
  • Gently loosen the root ball before placing it in the new pot.
  • Water thoroughly after repotting.

Best time: Spring or early summer, during active growth.


Common Rubber Tree Plant Problems and Solutions

Even though Rubber Trees are generally hardy, occasional issues can arise. Here’s how to troubleshoot:

1. Yellowing Leaves

Cause: Overwatering or poor drainage
Solution: Check soil moisture, improve drainage, and allow soil to dry between waterings.

2. Dropping Leaves

Cause: Sudden temperature changes, low humidity, or underwatering
Solution: Keep the environment stable, boost humidity, and maintain consistent watering.

3. Brown Leaf Tips

Cause: Low humidity or underwatering
Solution: Increase humidity and adjust watering frequency.

4. Pests (Spider Mites, Mealybugs)

Cause: Dry indoor air and dust on leaves
Solution: Wipe leaves with a damp cloth, mist regularly, and treat infestations with neem oil or insecticidal soap.


Rubber Tree Propagation

If you’d like to multiply your Rubber Tree collection, propagation is easy through stem cuttings.

Propagation steps:

  1. Cut a healthy stem about 6 inches long with at least one leaf.
  2. Remove the lower leaf and dip the cut end in rooting hormone.
  3. Place the cutting in moist potting soil or water.
  4. Keep in a warm, bright spot with indirect light.
  5. Roots should develop in 4-6 weeks.

Rubber Tree in Home Decor and Feng Shui

The Rubber Tree’s bold, upright growth and lush foliage make it a natural focal point in any room. It works beautifully in modern, bohemian, or minimalist interiors.

In Feng Shui, Rubber Trees are believed to attract prosperity and positive energy. They’re often placed in wealth or career corners (southeast or north areas of a room).


Final Care Tips for a Thriving Indoor Rubber Tree

To keep your Rubber Tree looking its best, remember these quick tips:

  • Bright, indirect light is best.
  • Water when the top 1-2 inches of soil are dry.
  • Maintain warm temperatures and moderate humidity.
  • Fertilize every 4-6 weeks in growing season.
  • Prune regularly for shape and size control.
  • Clean leaves with a damp cloth to remove dust and pests.

Conclusion

The Rubber Tree plant is a stunning, easy-care houseplant that makes a bold statement in any indoor space. With its rich, glossy leaves and towering form, it’s an excellent addition to both homes and offices.

By providing the right amount of light, water, warmth, and occasional pruning, you can enjoy a vibrant, healthy Rubber Tree plant for years to come. It’s the perfect combination of beauty, air purification, and low-maintenance elegance — everything you could want in an indoor plant.

How to Care for a Peace Plant Successfully

How to Care for a Peace Plant Successfully

The Peace Lily (Spathiphyllum) is one of the most beloved houseplants around the world. Renowned for its graceful white blooms and lush, dark green foliage, this plant symbolizes peace, tranquility, and purity. Best of all — it’s relatively easy to care for, even for beginners. If you’re looking to add elegance and natural air purification to your home, a peace plant is a perfect choice.

In this guide, we’ll cover everything you need to know to care for your Peace Lily successfully, from light preferences and watering routines to troubleshooting common issues.


What is a Peace Plant?

Before diving into care tips, let’s get familiar with the plant itself.
Peace Lilies are native to tropical rainforests of Central and South America. They thrive in warm, humid environments and are part of the Araceae family. The plant produces beautiful white flowers (actually modified leaves called spathes) that elegantly curve around a spadix — a spike covered in tiny flowers.

Besides their aesthetic appeal, Peace Lilies are celebrated for their ability to improve indoor air quality by filtering out toxins like formaldehyde, benzene, and carbon monoxide.


Ideal Growing Conditions for a Peace Plant

Creating the right environment is key to keeping your Peace Lily healthy and happy. Here’s what it needs:

1. Light Requirements

Peace Lilies thrive in bright, indirect light. Direct sunlight can scorch their leaves, while too little light will result in poor growth and no flowers.

Ideal spot:

  • Near a north or east-facing window
  • A few feet away from a bright window in other directions

If your Peace Lily isn’t blooming, it may need a bit more light. But remember — always avoid direct midday sun.

2. Temperature and Humidity

These tropical plants love consistent warmth and high humidity.

  • Ideal temperature: 65°F to 85°F (18°C to 29°C)
  • Avoid: Cold drafts, air conditioners, or heaters

Since they enjoy humid conditions, misting the leaves occasionally or placing the plant on a pebble tray filled with water can help, especially during dry winter months.


How to Water a Peace Plant

Watering is arguably the trickiest part of Peace Lily care — too much or too little water can both harm the plant. The goal is to keep the soil consistently moist but not soggy.

Watering Guidelines:

  • Check the top inch of soil with your finger; if it feels dry, it’s time to water.
  • Use room temperature, filtered water. Tap water with chlorine and fluoride can cause brown leaf tips.
  • Water thoroughly until it drains from the bottom, then discard excess water to prevent root rot.

Pro Tip: Peace Lilies are good at letting you know when they need water. Their leaves will droop when they’re thirsty but typically perk back up within a few hours of watering.


Best Soil for Peace Plant

Peace Lilies prefer a well-draining, aerated soil mix. A good potting mix should retain moisture but not become waterlogged.

Recommended mix:

  • 2 parts peat-based potting soil
  • 1 part perlite or coarse sand
  • 1 part orchid bark (optional for added drainage)

This combination ensures roots receive enough air while holding sufficient moisture.


Fertilizing a Peace Plant

Peace Lilies aren’t heavy feeders, but occasional fertilizing will encourage healthy growth and blooms.

Fertilizing Tips:

  • Use a balanced, water-soluble houseplant fertilizer (20-20-20)
  • Apply once a month during the growing season (spring and summer)
  • Avoid fertilizing in fall and winter when the plant’s growth slows

Over-fertilizing can cause brown leaf tips and damage, so always follow label instructions and err on the side of caution.


Repotting Peace Lily

As your Peace Lily grows, it may become root-bound — meaning its roots outgrow the pot. Signs of this include roots peeking through the drainage holes or frequent drooping despite regular watering.

Repotting guide:

  • Repot every 1-2 years in early spring
  • Choose a pot 1-2 inches larger in diameter than the current one
  • Use fresh potting mix and gently loosen the root ball before placing it in the new pot

Common Peace Plant Problems and Solutions

Even though Peace Lilies are relatively easy to care for, a few issues can arise. Here’s how to tackle them:

1. Yellow Leaves

Cause: Overwatering, poor drainage, or old age
Solution: Check soil moisture and drainage, remove affected leaves

2. Brown Leaf Tips

Cause: Low humidity, fluoride in tap water, or over-fertilizing
Solution: Increase humidity, use filtered water, and fertilize sparingly

3. Drooping Leaves

Cause: Usually due to underwatering, occasionally overwatering
Solution: Check soil moisture and adjust watering schedule

4. No Flowers

Cause: Insufficient light, poor nutrition, or maturity
Solution: Move plant to a brighter location, fertilize during growing season, or be patient as young plants may take time to bloom


Peace Lily Propagation

If you’d like to expand your collection or share with friends, Peace Lilies are easily propagated through division.

Propagation steps:

  1. Remove the plant from its pot and gently separate sections of the root ball.
  2. Ensure each section has at least 2-3 healthy leaves and a portion of the root system.
  3. Plant each division in a new pot with fresh soil.
  4. Water thoroughly and place in a warm, indirect light spot.

Peace Lily in Home Decor and Feng Shui

Apart from being a low-maintenance houseplant, Peace Lilies are said to bring positive energy and tranquility to your space. In Feng Shui, they’re associated with balance and harmony, making them ideal for bedrooms, offices, and meditation areas.

Their ability to purify indoor air by absorbing harmful toxins also adds practical benefits to their aesthetic and spiritual appeal.


Final Peace Plant Care Tips

To wrap it up, here are some quick care reminders:

  • Keep in bright, indirect light
  • Water when the top inch of soil feels dry
  • Maintain high humidity and avoid cold drafts
  • Fertilize once a month during growing season
  • Repot every 1-2 years
  • Use filtered, room temperature water

Conclusion

Caring for a Peace Plant is a rewarding experience. With its serene white blooms, lush foliage, and air-purifying qualities, it’s a wonderful addition to any home. By following these simple but essential care practices — proper lighting, watering, humidity, and soil — you’ll enjoy a thriving, beautiful Peace Lily for years to come.

Whether you’re a beginner plant parent or a seasoned indoor gardener, the Peace Lily’s elegant beauty and forgiving nature make it an indispensable member of your indoor plant family.