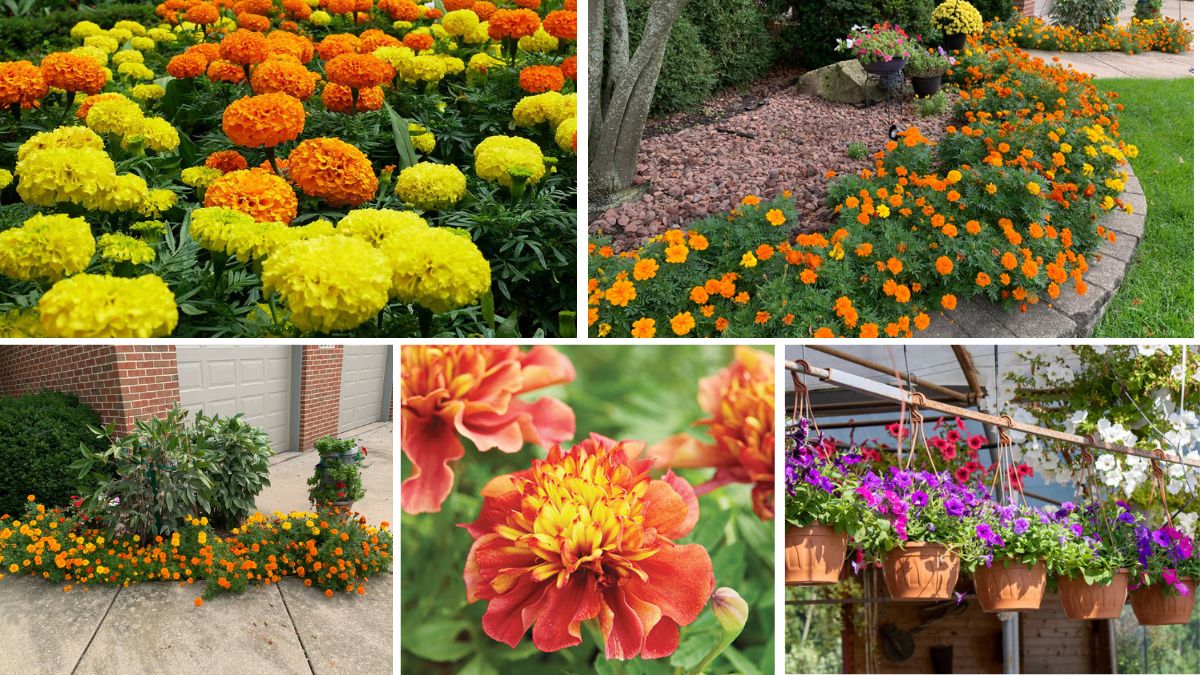
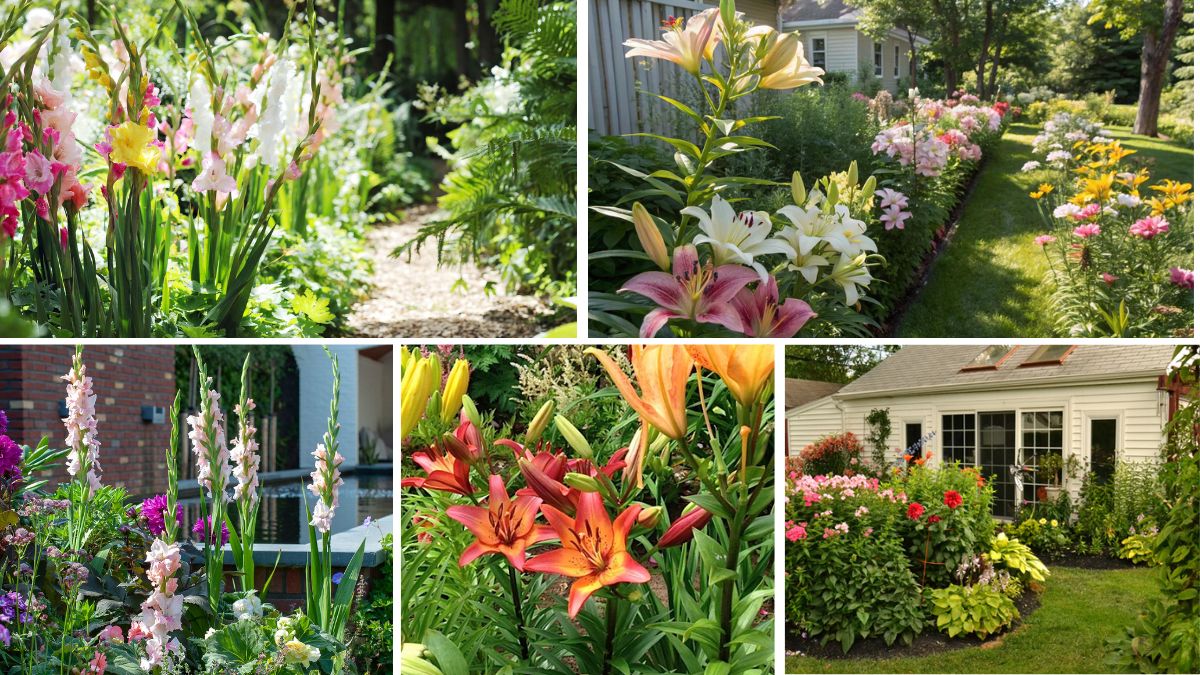
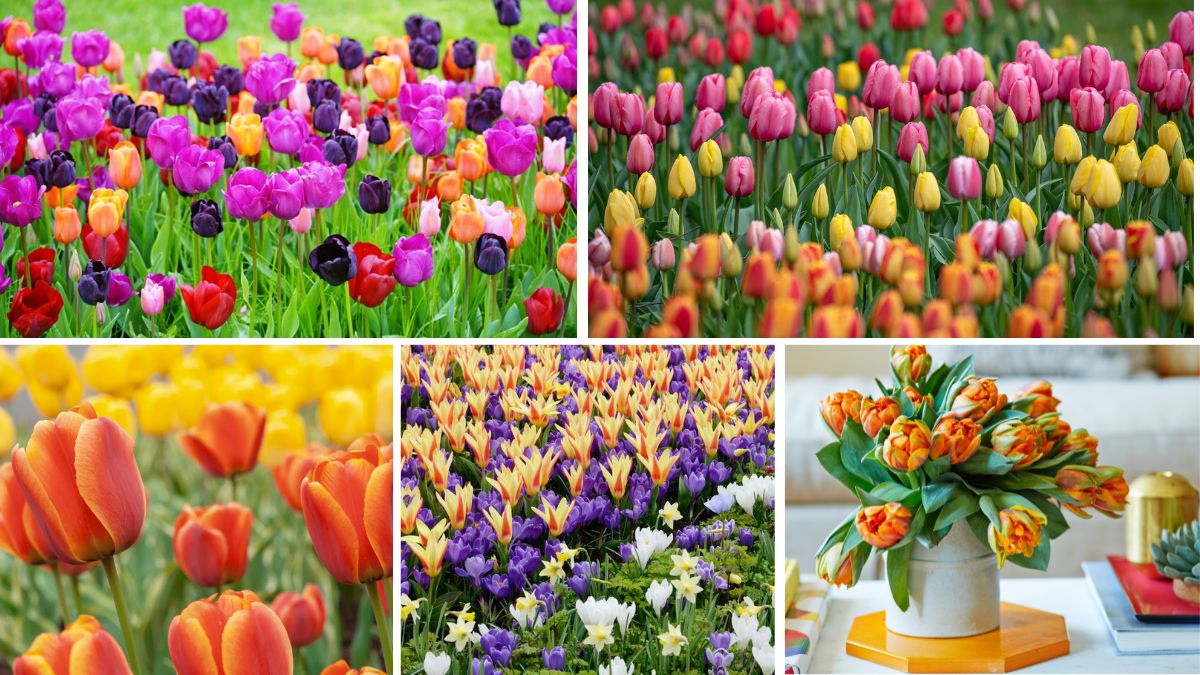
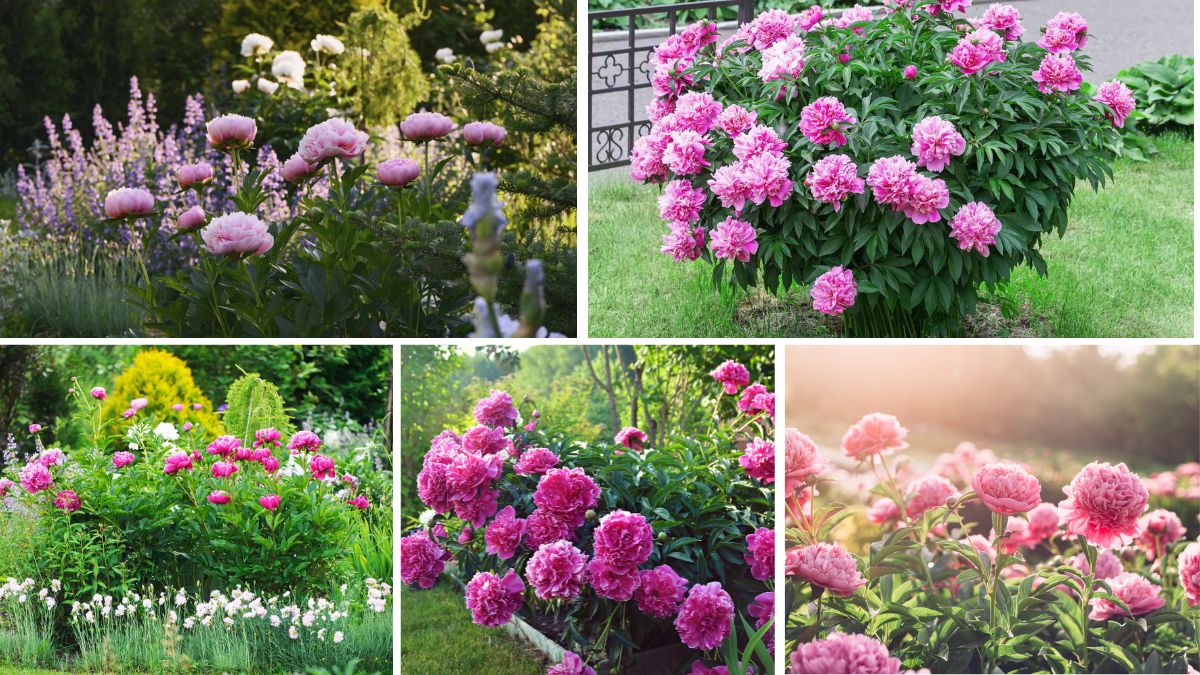
A Complete Guide to Growing Juicy Watermelons: From Seed to Sweet Harvest

A Complete Guide to Growing Juicy Watermelons: From Seed to Sweet Harvest

Few things capture the essence of summer better than biting into a slice of crisp, juicy watermelon. This refreshing fruit, packed with natural sweetness and hydrating goodness, is a favorite at picnics, family gatherings, and backyard barbecues. The good news? You don’t need a commercial farm to grow your own watermelons. With the right care and growing conditions, anyone can successfully cultivate juicy watermelons at home — whether in a spacious garden, raised bed, or even a large container.

In this comprehensive guide, you’ll learn everything you need to know about growing watermelons, from choosing the best varieties and planting techniques to watering, fertilizing, and knowing when it’s time to harvest.


Why Grow Your Own Watermelons?

Watermelons aren’t just a summertime treat — they’re surprisingly rewarding to grow. Homegrown melons often taste sweeter and fresher than store-bought varieties, and you’ll have full control over the growing conditions, soil quality, and pesticide use. Plus, watching those sprawling vines and round fruits develop in your yard or on your patio is a satisfying experience for any gardener.


Best Watermelon Varieties for Home Gardens

Not all watermelons are created equal. Some are better suited for large open spaces, while others thrive in compact gardens or containers. When choosing your seeds, consider your available space, climate, and the fruit size you prefer.

Popular home-garden watermelon varieties:

Sugar Baby

  • Small, round fruits (6–12 lbs)
  • Deep red, super-sweet flesh
  • Compact vines, ideal for small gardens and containers

Crimson Sweet

  • Medium to large size (20–25 lbs)
  • Classic striped rind with bright red flesh
  • Known for its sweetness and disease resistance

Charleston Gray

  • Large, oblong fruits (20–35 lbs)
  • Pale green rind, crisp red flesh
  • Good for areas with longer growing seasons

Golden Midget

  • Early maturing, small fruits (3–5 lbs)
  • Golden-yellow rind when ripe
  • Perfect for patio containers

When to Plant Watermelons

Watermelons love warm weather. To thrive, they need both warm soil and consistently warm air temperatures.

Ideal planting time:

  • After the last frost date in your region
  • When soil temperatures are above 65–70°F (18–21°C)
  • In most regions, this falls between late spring and early summer

For a head start, you can sow seeds indoors 3–4 weeks before the last frost and transplant seedlings outdoors when conditions are ideal.


Soil Preparation and Planting

Watermelons prefer light, sandy loam soil that’s rich in organic matter and drains well.

Soil tips:

  • Ideal pH: 6.0–6.8
  • Mix in plenty of compost or aged manure before planting
  • Avoid heavy clay soils that retain too much water

Planting guide:

  • Create mounds or raised rows to improve drainage
  • Plant 2–3 seeds per hill, about 1 inch deep
  • Space hills 3–5 feet apart, with rows 6–8 feet apart
  • Thin to the healthiest seedling per hill when they’re 2–3 inches tall

In containers: Use at least a 5–10 gallon pot per plant, with rich, well-draining soil and a sunny position.


Light and Temperature Requirements

Watermelons thrive under full sun. They need a minimum of 6–8 hours of direct sunlight daily, though 10–12 hours is even better for optimal growth and fruit sweetness.

Temperature tips:

  • Best daytime temperatures: 70–90°F (21–32°C)
  • Nighttime temperatures: Above 60°F (16°C)
  • Use black plastic mulch or floating row covers in cooler regions to warm the soil

Watering for Juicy, Sweet Fruits

Watermelons have high water needs, especially during flowering and fruit development.

Watering tips:

  • Keep soil evenly moist — avoid letting it dry out or get waterlogged
  • Water deeply 1–2 times per week, more during hot, dry spells
  • Use drip irrigation or a soaker hose to water at the base of the plant
  • Reduce watering slightly as fruits near maturity to concentrate sugars

Avoid overhead watering to prevent diseases like powdery mildew.


Fertilizing for Healthy Growth

Watermelons are heavy feeders, so regular fertilization is crucial for strong vines and juicy fruits.

Fertilizing schedule:

  • At planting: Mix in a balanced organic fertilizer or compost
  • When vines begin growing rapidly: Use a high-nitrogen fertilizer
  • At flowering: Switch to a fertilizer high in phosphorus and potassium

Apply liquid or granular fertilizer every 2–3 weeks during the growing season.


Training and Supporting Vines

Watermelon vines can quickly take over your garden space. While they naturally sprawl along the ground, you can train smaller varieties up a trellis to save space.

Trellising tips:

  • Use strong, vertical supports
  • Secure growing vines gently with garden twine
  • Use slings made from fabric or mesh to support growing fruits

This improves air circulation, reduces pests, and keeps fruits clean.


Pest and Disease Management

Common watermelon pests include:

  • Aphids
  • Cucumber beetles
  • Squash bugs
  • Spider mites

Natural pest solutions:

  • Insecticidal soap or neem oil sprays
  • Floating row covers
  • Handpicking pests early

Common diseases include:

  • Powdery mildew
  • Fusarium wilt
  • Anthracnose

Prevention:

  • Rotate crops yearly
  • Maintain good air circulation
  • Avoid overhead watering

How to Know When Your Watermelons Are Ripe

Patience is key when waiting for your melons to ripen. Picking too early means bland, watery fruit.

Signs of ripeness:

  • The tendril nearest the fruit turns dry and brown
  • The underside (ground spot) turns creamy yellow
  • The rind changes from shiny to dull
  • A deep, hollow sound when tapped

Check your seed packet for expected maturity time — most varieties take 70–100 days from planting.


Harvesting and Storing Watermelons

Use a sharp knife or garden shears to cut the fruit from the vine, leaving about 1 inch of stem attached.

Storage tips:

  • Whole watermelons can stay at room temperature for about a week
  • Refrigerate for up to 2–3 weeks
  • Once cut, cover and refrigerate slices, consuming within a few days

Enjoying Your Harvest

Your homegrown watermelons are perfect for:

  • Chilled slices at picnics
  • Fruit salads and salsas
  • Smoothies and juices
  • Frozen watermelon popsicles
  • Grilled watermelon skewers

Nothing beats the satisfaction of biting into a sweet, homegrown watermelon on a hot summer’s day.


Final Thoughts

Growing juicy watermelons isn’t just a task for large farms. With the right care, timing, and environment, any home gardener can produce sweet, plump melons bursting with flavor. Whether you plant them in your backyard, a raised bed, or a large container, this fruit thrives under full sun, well-draining soil, and regular watering.

By following this complete guide — from selecting the perfect variety to harvesting at peak ripeness — you’ll enjoy a rewarding, refreshing summer harvest straight from your own garden.

How to Plant Watermelon Seeds at Home: A Beginner’s Complete Growing Guide

How to Plant Watermelon Seeds at Home: A Beginner’s Complete Growing Guide

Watermelons are the quintessential summer fruit — juicy, sweet, and refreshing. Growing them at home is not only rewarding but also surprisingly simple when you understand their basic needs. Whether you have a spacious backyard or a sunny patio with large containers, you can successfully plant and harvest your own homegrown watermelons.

In this comprehensive guide, you’ll learn how to plant watermelon seeds at home, from choosing the right varieties to seed starting, planting, and caring for your plants for a delicious summer harvest.


Why Grow Watermelons at Home?

Growing watermelons at home lets you:

  • Enjoy fresher, sweeter fruits with no chemicals
  • Choose from a variety of unique heirloom or seedless types
  • Experience the joy of growing a giant, rewarding crop
  • Control the growing conditions for healthier, organic produce

Plus, it’s a great project for families and beginner gardeners.


Best Watermelon Varieties for Home Gardens

There are several types of watermelons you can grow at home, depending on your space, climate, and taste preference:

Sugar Baby

  • Small, round fruits (6-10 pounds)
  • Sweet and deep red flesh
  • Ideal for small spaces and container gardens

Crimson Sweet

  • Classic striped variety
  • Large, oval melons (20-25 pounds)
  • Excellent disease resistance

Charleston Gray

  • Oblong, pale green rind
  • Juicy, sweet red flesh
  • Thrives in warm, sunny climates

Yellow Doll

  • Small, yellow-fleshed melon
  • Crisp and sweet flavor
  • Early maturing

Choose a variety based on your available space, climate, and harvest time preferences.


When to Plant Watermelon Seeds

Watermelons are warm-weather crops that thrive in hot conditions. The ideal time to plant is:

  • After the last frost date in your region
  • When soil temperatures consistently reach 70°F (21°C) or higher

In most areas, this falls between late spring and early summer.

If you live in a cooler climate, start seeds indoors 3–4 weeks before transplanting them outdoors.


Tools and Materials You’ll Need

  • Quality watermelon seeds
  • Compost-rich soil or potting mix
  • Organic fertilizer (high in phosphorus and potassium)
  • Trowel or small shovel
  • Large containers (if growing in pots)
  • Mulch (straw, grass clippings, or plastic mulch)
  • Garden hose or watering can

Step-by-Step Guide to Planting Watermelon Seeds at Home


Step 1: Choose a Sunny Spot

Watermelons require full sun exposure for at least 8 hours a day.
Pick a location with:

  • Well-draining soil
  • Plenty of space for vines to sprawl (6–10 feet or more per plant)
  • Shelter from strong winds

Tip: Use raised beds or large containers (at least 5 gallons) if space is limited.


Step 2: Prepare the Soil

Watermelons thrive in light, sandy, nutrient-rich soil with a pH of 6.0–6.8.

Improve soil by:

  • Adding compost or well-rotted manure for organic matter
  • Mixing in a balanced organic fertilizer before planting
  • Removing weeds, rocks, and debris

If planting in containers, use a quality potting mix with added compost and slow-release fertilizer.


Step 3: Sow the Seeds

Watermelon seeds can be sown directly in the ground or indoors for an early start.

Direct Sowing

  • Create small hills or mounds, 3–5 feet apart
  • Sow 3–4 seeds per hill, about 1 inch deep
  • Lightly cover with soil and gently water

When seedlings reach 2–3 inches tall, thin them by removing weaker ones, leaving the strongest 1–2 plants per hill.

Indoor Sowing

  • Use peat pots or seedling trays
  • Plant 1 seed per pot, 1 inch deep
  • Place in a warm, sunny location or under grow lights
  • Transplant outdoors after 3–4 weeks when seedlings have 2–3 leaves and outdoor temperatures are suitable

Step 4: Water Consistently

Watermelons need regular, deep watering, especially during germination and early growth:

  • Keep the soil evenly moist but not waterlogged
  • Water early in the day to avoid fungal issues
  • Reduce watering as fruits begin to mature to concentrate sugars and improve flavor

Tip: Use a soaker hose or drip irrigation to water directly at the base of the plants.


Step 5: Mulch and Support Growth

Applying mulch helps:

  • Retain soil moisture
  • Suppress weeds
  • Keep fruits clean and disease-free

Use straw, grass clippings, or plastic mulch around the plants.
For container-grown or small-space gardens, train vines vertically using trellises, cages, or fences, and support growing fruits in slings made from fabric or netting.


Step 6: Fertilize for Healthy Growth

Watermelons are heavy feeders. Apply fertilizer:

  • When vines start growing rapidly
  • Again at flowering stage

Use a fertilizer rich in phosphorus and potassium for flowering and fruiting.
Avoid high-nitrogen fertilizers after flowering, as they encourage leaf growth over fruit production.


Common Pests and Diseases

Be mindful of these common watermelon issues:

  • Aphids: Small insects that suck sap from leaves
  • Cucumber beetles: Chew leaves and spread disease
  • Powdery mildew: White, powdery fungal growth on leaves

Combat pests with neem oil, insecticidal soap, or hand-picking. Improve air circulation and avoid overhead watering to prevent mildew.


When and How to Harvest Watermelons

Most watermelons are ready for harvest 70–100 days after planting, depending on the variety.

Signs your watermelon is ripe:

  • Tendril nearest the fruit turns brown and dries up
  • The spot where the fruit touches the ground turns yellow or creamy
  • The skin color becomes dull, and the surface resists scratching
  • A dull, hollow sound when tapped

Use garden shears to cut the melon from the vine, leaving a few inches of stem attached.


Storing and Enjoying Homegrown Watermelons

Store harvested watermelons:

  • At room temperature for up to a week
  • In the refrigerator for 2–3 weeks

Once cut, wrap the flesh tightly and refrigerate.

Enjoy them:

  • Fresh in slices
  • In fruit salads
  • Blended into smoothies
  • As frozen watermelon pops

Final Thoughts

Growing watermelons at home is easier than it seems — all you need is a sunny spot, the right seeds, and a little patience. With these beginner-friendly tips, you can enjoy the satisfaction of harvesting your own juicy, sweet melons by mid to late summer.

Whether you grow compact varieties in containers or sprawling vines in your backyard, watermelon-growing adds a fun and fruitful touch to your garden space.

How to Plant an Avocado Pit and Watch It Grow: A Complete At-Home Guide

How to Plant an Avocado Pit and Watch It Grow: A Complete At-Home Guide

Avocados aren’t just delicious and packed with nutrients — they’re also one of the easiest and most fascinating plants to grow from a seed at home. Have you ever scooped out the creamy flesh, tossed aside the pit, and wondered if you could turn it into a lush, green houseplant? Good news: you can!

Planting an avocado pit and watching it grow is a simple, rewarding project perfect for gardeners of all skill levels. It’s a fun experiment for kids, a charming houseplant for your windowsill, and — if you’re patient — a potential future fruiting tree.

In this detailed guide, we’ll show you how to plant an avocado pit step-by-step, how to care for your growing plant, and what to expect as it transforms from seed to seedling.


Why Grow an Avocado from a Pit?

Before we get started, let’s cover why you might want to try this:

  • It’s free and fun. All you need is a pit from an avocado you’ve already enjoyed.
  • It makes a beautiful houseplant. The plant’s glossy leaves and graceful growth habit brighten up any indoor space.
  • It’s educational. Watching a seed sprout is a great hands-on lesson in plant biology.
  • It’s a long-term project. While it may take years to bear fruit (if ever), caring for your avocado plant is a rewarding journey in itself.

What You’ll Need

To grow an avocado plant from a pit, gather:

  • 1 ripe avocado pit (seed)
  • 4 sturdy toothpicks
  • 1 clear glass or jar
  • Clean, fresh water
  • A small plant pot with drainage holes (for later)
  • Well-draining potting soil
  • A sunny windowsill or bright indoor spot

How to Plant an Avocado Pit: Step-by-Step


Step 1: Remove and Clean the Pit

After slicing open your avocado:

  • Carefully remove the pit without cutting or damaging it.
  • Rinse it under lukewarm water to remove any remaining flesh.
  • Gently pat it dry with a paper towel.

Tip: Leave the thin brown seed coat intact — it protects the seed as it germinates.


Step 2: Identify the Top and Bottom

An avocado pit has two ends:

  • The top (pointy end) — where the stem will grow.
  • The bottom (flat end) — where roots will emerge.

It’s important to orient the seed correctly so it sprouts successfully.


Step 3: Insert Toothpicks

Insert 4 toothpicks into the middle of the pit at a slight downward angle. These will suspend the pit over a glass of water, keeping the bottom submerged and the top dry.

Space the toothpicks evenly around the seed.


Step 4: Suspend in Water

  • Fill a glass or jar with clean, room-temperature water.
  • Rest the seed in the glass so that the bottom half of the pit is submerged.
  • Place the glass in a warm, bright spot like a windowsill — but avoid direct, harsh sunlight.

Tip: Keep the water level consistent, ensuring the bottom of the pit is always submerged.


Step 5: Change the Water Regularly

  • Replace the water every 2–3 days to keep it fresh and prevent mold or bacteria.
  • Use lukewarm water for best results.

Step 6: Wait for Sprouting

This is where patience comes in.
Avocado pits typically sprout within 2–8 weeks.

Here’s what to watch for:

  1. The pit’s outer layer will dry and crack.
  2. A root will emerge from the bottom.
  3. A shoot will sprout from the top.
  4. Leaves will unfurl as the plant grows.

If your pit hasn’t sprouted after 8 weeks, try again with a new, fresh pit.


How to Pot Your Avocado Seedling

Once the stem grows to about 6–8 inches tall and has a few leaves:

  1. Trim the top down to about 3 inches. This encourages bushier, stronger growth.
  2. When new leaves appear and roots are around 3–4 inches long, it’s time to plant it in soil.

How to Plant the Sprouted Pit:

  • Choose a small pot (6–8 inches deep) with good drainage.
  • Fill it with light, well-draining potting mix (a mix for houseplants or citrus works well).
  • Plant the seed so the top half remains exposed above the soil.
  • Water gently but thoroughly.

Avocado Plant Care Tips

Light

  • Avocado plants love bright, indirect sunlight.
  • Place near a sunny window.
  • Move outdoors during summer months if possible, but protect from strong midday sun.

Watering

  • Keep soil consistently moist, but not waterlogged.
  • Water when the top inch of soil feels dry to the touch.
  • In winter, reduce watering as growth slows.

Temperature

  • Ideal temperature: 65–85°F (18–29°C).
  • Protect from cold drafts and temperatures below 50°F (10°C).

Feeding

  • Fertilize monthly in spring and summer using a balanced liquid houseplant fertilizer.
  • Skip feeding in fall and winter.

Pruning

  • Pinch or prune back leggy stems to encourage bushier growth.
  • Remove yellowing or dead leaves to keep the plant tidy.

How Long Until Your Avocado Bears Fruit?

While it’s possible for a homegrown avocado plant to eventually bear fruit, it typically takes 5–10 years or more — and even then, it’s not guaranteed.
Most fruiting avocado trees you see in orchards or nurseries are grafted plants, which mature and produce fruit much sooner.

That said — many gardeners grow avocado plants purely for their lush, tropical foliage as attractive houseplants.


Common Problems and Solutions

ProblemCauseSolution
No germinationOld, damaged, or improperly placed seedTry a fresh, healthy pit, ensure proper placement
Yellow leavesOverwatering or poor drainageLet soil dry between watering; improve drainage
Brown leaf tipsDry air, underwatering, or salt build-upIncrease humidity, flush soil with clean water
Root rotWaterlogged soilUse well-draining soil and pot with drainage holes

Fun Avocado Plant Facts

  • The avocado tree is native to Central and South America.
  • Avocado belongs to the laurel family (Lauraceae).
  • The word “avocado” comes from the Aztec word “ahuacatl,” meaning testicle, due to its shape.
  • Avocado trees can grow up to 60 feet tall in the wild.

Final Thoughts

Planting an avocado pit and watching it grow is a simple, inexpensive, and surprisingly rewarding home gardening project. While it takes a little patience, the excitement of seeing a sprout emerge and leaves unfurl makes it all worth it.

Even if your plant never produces fruit, it will add a touch of lush greenery and tropical charm to your indoor or outdoor space.

So next time you slice into a ripe avocado, don’t toss that pit — turn it into a beautiful living plant. With care, sunlight, and patience, you’ll soon have your very own avocado tree-in-the-making!

How to Plant Ginger Root in Your Backyard: A Complete Beginner’s Guide

How to Plant Ginger Root in Your Backyard: A Complete Beginner’s Guide

Ginger is a prized culinary and medicinal plant known for its bold, aromatic flavor and powerful health benefits. Used in teas, curries, desserts, and natural remedies for centuries, ginger (Zingiber officinale) is surprisingly easy to grow right in your own backyard — even if you’re new to gardening!

Unlike many common herbs and vegetables, ginger grows from rhizomes (a type of underground stem), and with the right care, one piece can yield multiple fresh, fragrant ginger roots. Best of all, it requires minimal effort, thrives in partial shade, and can even be grown in containers for small spaces.

In this comprehensive guide, we’ll show you exactly how to plant ginger root in your backyard, care for it, and harvest fresh ginger for your kitchen.


Why Grow Ginger at Home?

Growing ginger in your backyard is a rewarding, sustainable practice. Here’s why you should try it:

  • Easy to Grow: Low-maintenance and beginner-friendly.
  • Compact Plant: Ideal for small gardens, raised beds, or containers.
  • Health Benefits: Fresh ginger boosts immunity, aids digestion, and fights inflammation.
  • Cost-Effective: One store-bought piece of ginger can produce multiple new rhizomes.
  • Tropical Beauty: Attractive foliage with bright green leaves adds visual appeal.

What You’ll Need

Before you begin, gather the following:

  • Fresh ginger root (organic preferred)
  • Raised bed, garden plot, or large container with drainage holes
  • Nutrient-rich, well-draining soil
  • Compost or aged organic manure
  • Garden trowel
  • Watering can or hose with a gentle spray nozzle
  • Mulch (optional but helpful)

Step-by-Step: How to Plant Ginger Root in Your Backyard


Step 1: Select Fresh, Healthy Ginger Rhizomes

Choose ginger rhizomes (roots) with:

  • Firm, plump bodies
  • Light brown skin
  • Visible ‘eyes’ or growth buds (small yellow-green points on the surface)

Pro Tip: Organic ginger from a grocery store or farmer’s market is best since conventionally grown ginger may be treated with growth inhibitors.


Step 2: Prepare the Ginger for Planting

  • Cut large ginger rhizomes into 1–2 inch pieces.
  • Ensure each piece has at least one visible growth bud.
  • Leave the cut pieces in a shaded, dry area for 24–48 hours. This allows the cut surfaces to callous over and reduces the risk of rot.

Step 3: Choose the Right Location

Ginger loves warm, humid environments with indirect sunlight.

Ideal growing conditions:

  • Partial shade or dappled sunlight.
  • Sheltered from strong winds.
  • Temperature range: 68–86°F (20–30°C).

Avoid planting ginger in waterlogged or heavy clay soil.


Step 4: Prepare the Soil

Ginger thrives in light, loamy, well-draining soil rich in organic matter.

Best soil mix:

  • 60% garden soil
  • 20% sand or perlite for drainage
  • 20% well-rotted compost or aged manure

Loosen the soil to a depth of 8–10 inches and mix in compost evenly.


Step 5: Plant the Ginger

  • Dig shallow holes or trenches 2–4 inches deep and 8 inches apart.
  • Place each ginger piece with the growth buds facing upward.
  • Cover gently with soil, leaving about 1 inch of soil above the rhizome.
  • Water lightly to settle the soil.

Container tip: Use a wide, shallow container at least 12 inches deep, with plenty of drainage holes.


Step 6: Watering and Mulching

Ginger needs consistent moisture but hates waterlogged soil.

Watering tips:

  • Keep soil evenly moist but not soggy.
  • Water deeply once or twice a week.
  • Reduce watering in cooler months when the plant’s growth slows.

Mulching: Apply a 2–3 inch layer of straw, dry leaves, or compost mulch around the plants to retain soil moisture, suppress weeds, and regulate temperature.


Ginger Plant Care Essentials

Sunlight:

  • Prefers partial shade or filtered sunlight.
  • Avoid full, harsh midday sun, which can scorch leaves.

Temperature:

  • Ideal: 68–86°F (20–30°C).
  • Protect from frost or temperatures below 50°F (10°C).

In colder climates, plant ginger in containers and move them indoors during winter.


Feeding:

  • Apply a balanced organic liquid fertilizer or compost tea every 4–6 weeks during active growing season (spring to early fall).
  • Top-dress with compost every couple of months to replenish soil nutrients.

Pests and Problems:

Ginger is generally pest-resistant but watch out for:

  • Aphids and mealybugs: Remove by spraying with water or neem oil.
  • Root rot: Prevent by ensuring good drainage and avoiding overwatering.

Harvesting Your Homegrown Ginger

Ginger is typically ready for harvest 8–10 months after planting, once the leaves turn yellow and begin to dry.

Early Harvest:

You can gently dig up a small section of rhizome after 4–6 months for tender, young ginger with mild flavor.

Full Harvest:

  • Carefully dig up the entire plant after 8–10 months.
  • Shake off soil and remove the leafy tops.
  • Save a few healthy rhizomes with growth buds for replanting next season.

Storing Freshly Harvested Ginger

  • Fresh: Store in a cool, dry place for up to 3 weeks.
  • Refrigerated: Wrap in paper towels and place in a plastic bag in the fridge for up to 3 months.
  • Frozen: Peel and freeze for up to 6 months.
  • Dried: Slice thinly and dry in a dehydrator for long-term storage.

Can You Grow Ginger Year-Round?

In tropical and subtropical regions, yes — ginger can be grown year-round outdoors.

In temperate or cooler climates:

  • Grow in containers.
  • Move indoors when temperatures drop.
  • Resume regular watering and feeding in spring.

Health Benefits of Homegrown Ginger

  • Boosts immunity and fights colds
  • Aids digestion and relieves nausea
  • Reduces inflammation and joint pain
  • Improves circulation and heart health
  • Rich in antioxidants

Adding fresh ginger to your diet enhances both flavor and wellness.


Final Thoughts

Growing ginger in your backyard is a simple, sustainable, and highly rewarding gardening project. With minimal care, even beginners can enjoy a steady supply of aromatic, homegrown ginger for cooking, teas, and natural remedies.

By following this easy guide — selecting quality rhizomes, planting in rich, well-draining soil, providing indirect sunlight, and maintaining consistent moisture — you’ll soon be savoring the distinctive taste of freshly harvested ginger straight from your own garden.

So, the next time you see a plump, fresh piece of ginger at the market, don’t just cook with it — plant it, and start your own backyard spice garden adventure!

Beginner’s Guide to Growing Sweet Potatoes in Pots: Easy, Productive, and Beautiful

Beginner’s Guide to Growing Sweet Potatoes in Pots: Easy, Productive, and Beautiful

Sweet potatoes aren’t just delicious and packed with nutrients — they’re also one of the easiest edible plants to grow at home, even if you don’t have garden space. With their beautiful, trailing vines and edible leaves, sweet potatoes thrive wonderfully in pots and containers. If you’ve ever wanted to grow your own harvest on a balcony, patio, or sunny corner of your home, this guide will show you exactly how to do it.

In this beginner-friendly guide, we’ll cover everything you need to know about growing sweet potatoes in pots — from choosing the right containers and soil to planting, caring for, and harvesting your crop.


Why Grow Sweet Potatoes in Pots?

There are plenty of good reasons to grow sweet potatoes in containers:

  • Space-saving: Perfect for patios, balconies, and small yards.
  • Easy soil control: You can create the ideal growing medium for tubers.
  • Portable: Move pots to sunnier or protected spots as needed.
  • Pest control: Reduced risk of soil-borne pests and diseases.
  • Beautiful foliage: Their trailing vines double as attractive ornamental plants.

Best of all, the process is simple, and you don’t need to be a seasoned gardener to enjoy homegrown sweet potatoes.


What You’ll Need

Before getting started, gather these essentials:

  • Organic sweet potatoes (for slips)
  • Large containers or pots (minimum 12–18 inches deep and wide)
  • Quality potting mix for vegetables or a well-draining soil blend
  • Compost or aged manure
  • Watering can
  • Toothpicks and glass jars (for slip propagation)

How to Grow Sweet Potatoes in Pots: Step-by-Step

Step 1: Choose the Right Sweet Potato Variety

Look for varieties suitable for containers or compact spaces. Some popular options include:

  • ‘Beauregard’ — quick-growing and high-yield.
  • ‘Vardaman’ — compact, bushy growth, ideal for pots.
  • ‘Georgia Jet’ — excellent flavor and fast maturing.

Make sure to select organic, untreated sweet potatoes as many store-bought ones are coated with sprout inhibitors.


Step 2: Grow Sweet Potato Slips

Sweet potatoes are propagated from slips — shoots grown from mature tubers.

How to make slips:

  1. Cut a sweet potato in half or leave it whole.
  2. Insert 3–4 toothpicks around its middle.
  3. Suspend the cut end in a glass of water, leaving the top exposed.
  4. Place the glass in a warm, sunny location.
  5. Change the water every 2–3 days.

Within 2–4 weeks, shoots (slips) will sprout. When they’re about 6 inches long with leaves, they’re ready for planting.

Tip: Plan this process 6–8 weeks before your area’s last frost date.


Step 3: Remove and Root the Slips

Once slips are long enough:

  1. Twist or cut them off the tuber.
  2. Remove the lower leaves.
  3. Place them in a glass of water to root.
  4. In about a week, roots will develop.

When the slips have healthy roots about 1–2 inches long, it’s time to plant them.


Step 4: Select the Right Pot and Soil

Pot Requirements:

  • Minimum size: 12–18 inches deep and wide
  • Drainage holes: Essential to prevent waterlogging

Best Soil Mix:

  • Use well-draining, sandy loam or cactus mix.
  • Mix in organic compost or aged manure for added nutrients.
  • Avoid heavy, clay-based soil that retains water.

Ideal soil pH: 5.5–6.5


Step 5: Planting the Slips

Planting method:

  1. Fill the pot with your soil mix, leaving about 2 inches from the rim.
  2. Plant each slip 4 inches deep, spacing them about 12 inches apart if multiple slips in a large container.
  3. Gently firm the soil around the base.
  4. Water thoroughly after planting.

Pro tip: If your container is small, plant just one slip to avoid overcrowding.


How to Care for Sweet Potatoes in Pots

Sunlight:

Place your pots in a sunny spot with 6–8 hours of direct sunlight daily. Sweet potatoes love warmth.

Watering:

  • Keep the soil evenly moist but not soggy.
  • Water deeply when the top inch of soil feels dry.
  • Increase watering during hot, dry spells.

Important: Avoid letting the soil dry out completely, especially during tuber formation.

Fertilizing:

Use a balanced or low-nitrogen, high-potassium fertilizer every 3–4 weeks. Too much nitrogen promotes leaf growth at the expense of tubers.

Mulching:

Add a thin layer of mulch (like straw or coco peat) to retain moisture and keep soil temperatures steady.


Common Pests and Problems

Though container gardening reduces pest risks, watch out for:

  • Aphids: Wash off with water or apply neem oil.
  • Whiteflies: Sticky traps or organic sprays.
  • Fungal issues: Avoid overhead watering and ensure proper airflow.

Pro tip: Healthy, vigorous plants are naturally more pest-resistant.


When and How to Harvest

Sweet potatoes grown in pots usually mature in 90–120 days.

Signs they’re ready:

  • Leaves and vines begin to yellow and die back.
  • Tubers feel firm and have reached desired size.

How to harvest:

  1. Gently tip the pot on its side.
  2. Loosen soil and carefully remove the tubers.
  3. Shake off excess dirt — don’t wash yet.

Cure harvested tubers by storing them in a warm (85°F / 29°C), humid place for 7–10 days. Then move them to a cool, dark, ventilated area for storage.


Extra Tips for Success

  • Rotate container position if needed for optimal sun exposure.
  • Avoid overcrowding slips in a single pot.
  • Prune vines sparingly if space is limited but don’t remove too much foliage.
  • Use a moisture meter to avoid over- or underwatering.
  • Use a sturdy, heavy pot to prevent tipping as vines grow.

Can You Eat Sweet Potato Leaves?

Yes — and they’re delicious! Sweet potato leaves are edible, rich in vitamins, and can be stir-fried, sautéed, or added to soups.

Harvest leaves lightly to avoid reducing tuber production.


Conclusion

Growing sweet potatoes in pots is one of the easiest and most rewarding ways to enjoy fresh, homegrown food even in limited spaces. With the right container, soil, and care routine, you can successfully grow a beautiful, lush vine and a generous crop of nutrient-packed tubers right on your balcony, patio, or sunny kitchen corner.

Whether you’re a beginner gardener or someone looking for a new DIY gardening project, following this guide will ensure a healthy harvest and the joy of growing your own sweet potatoes at home.

How to Plant Sweet Potatoes at Home: Easy DIY Guide for Beginners

How to Plant Sweet Potatoes at Home: Easy DIY Guide for Beginners

Sweet potatoes are not only a delicious, nutrient-rich food source but also one of the easiest and most rewarding crops to grow at home. Whether you have a spacious backyard, a balcony garden, or a few large containers, you can enjoy growing your own harvest of these versatile tubers. The process is beginner-friendly, cost-effective, and surprisingly fun — plus, the lush vines make a beautiful addition to your home garden.

In this easy, step-by-step guide, we’ll walk you through how to plant sweet potatoes at home, from selecting the right variety and preparing slips to planting, caring for the crop, and harvesting your sweet rewards.


Why Grow Sweet Potatoes at Home?

Sweet potatoes are one of the most low-maintenance and productive plants you can grow in a home garden. Here’s why you should try it:

  • Rich in nutrients: High in vitamins A, C, fiber, and antioxidants.
  • Beautiful ornamental vines: Their lush green (or purple) leaves are stunning in gardens or containers.
  • Easy propagation: Grown from slips (sprouts from mature tubers) rather than seeds.
  • Thrives in various conditions: Suitable for warm, sunny spots, and large containers.
  • Long shelf-life: Properly cured sweet potatoes store for months.

What You’ll Need

Before you begin, gather these basic supplies:

  • Healthy, organic sweet potatoes
  • A sharp knife
  • Glass jars or cups
  • Toothpicks
  • Water
  • Well-draining garden soil or potting mix
  • Large pots (if container gardening)
  • A sunny growing area (6+ hours of sunlight)

Step-by-Step: How to Plant Sweet Potatoes at Home

Step 1: Choose the Right Sweet Potatoes

Start with organic, untreated sweet potatoes from a grocery store, farmers market, or nursery. Non-organic varieties are often treated with sprout inhibitors that prevent slips from growing.

Tip: Choose firm, healthy tubers without signs of rot or disease.


Step 2: Grow Sweet Potato Slips

Sweet potatoes are grown from slips, which are sprouts that grow from a mature tuber. You can easily produce slips at home.

How to make slips:

  1. Cut sweet potatoes in half or leave them whole.
  2. Insert 3–4 toothpicks around the middle of each tuber.
  3. Suspend the cut end or narrow tip in a glass of water, leaving the upper part above the water line.
  4. Place the glass in a warm, sunny window.
  5. Change the water every 2–3 days to prevent rot.
  6. In 2–4 weeks, green sprouts (slips) will start to grow.

When slips reach about 6 inches long with several leaves, they’re ready to be separated and planted.


Step 3: Remove and Root the Slips

Once the slips are long enough:

  1. Gently twist or cut them off from the tuber.
  2. Place the slips in a glass of clean water with the bottom leaves removed.
  3. Within a week, they’ll develop roots.

When the slips have a good root system, they’re ready for planting.


Step 4: Prepare the Planting Area

Sweet potatoes prefer loose, well-draining, slightly acidic soil (pH 5.5–6.5) in a sunny location.

Options:

  • Garden beds: Work compost or organic matter into the soil.
  • Raised beds: Great for better drainage and soil control.
  • Containers: Choose pots at least 12–18 inches deep and wide, with drainage holes.

Pro tip: Sweet potatoes thrive in warm soil temperatures (above 65°F / 18°C). Plant them outdoors after the last frost date in your area.


Step 5: Plant the Slips

How to plant:

  1. Dig holes about 4 inches deep and 12 inches apart.
  2. Place each slip into a hole, burying it up to the top leaves.
  3. Firm the soil gently around the base.
  4. Water thoroughly to settle the soil.

If using containers, plant 1–2 slips per large pot.


How to Care for Sweet Potato Plants

Sunlight:

Sweet potatoes need at least 6–8 hours of direct sunlight daily for healthy tuber development.

Watering:

  • Keep soil consistently moist but not waterlogged.
  • Avoid letting the soil dry out, especially during the early weeks and tuber formation.
  • Water deeply once or twice a week, depending on heat and rain.

Fertilizing:

  • Use a low-nitrogen, high-potassium fertilizer to encourage root and tuber growth.
  • Too much nitrogen leads to lush vines but poor tuber production.

Mulching:

  • Apply a 2–3 inch layer of organic mulch (straw, grass clippings, or shredded leaves) around the plants.
  • This conserves moisture, suppresses weeds, and keeps the soil temperature stable.

Managing Pests and Problems

Common issues when growing sweet potatoes at home:

  • Aphids: Rinse off with water or apply neem oil.
  • Sweet potato weevils: Remove affected plants and use crop rotation.
  • Fungal diseases: Avoid overhead watering and overcrowding.

Tip: Healthy, well-spaced plants are less likely to attract pests and disease.


When and How to Harvest Sweet Potatoes

Sweet potatoes are usually ready for harvest 90–120 days after planting. Watch for these signs:

  • Vines begin to yellow and die back.
  • The days grow cooler, signaling harvest time.

How to harvest:

  1. Gently dig around the base of each plant with a garden fork or hands.
  2. Carefully lift the tubers to avoid bruising or cutting.
  3. Shake off excess soil but don’t wash them yet.

Curing and Storing Sweet Potatoes

Curing improves the sweetness and shelf-life of your harvest.

To cure:

  1. Place sweet potatoes in a warm (85°F / 29°C) and humid environment for 5–10 days.
  2. If indoors, use a ventilated box or warm room.

After curing:

  • Store in a cool (55–60°F / 13–16°C), dry, and dark place.
  • Avoid refrigerating raw sweet potatoes.

Properly cured sweet potatoes can last up to 6 months.


Final Tips for Success

  • Start slips early: Begin the sprouting process 6–8 weeks before your area’s last expected frost.
  • Use loose soil: Compact soil restricts tuber growth.
  • Rotate crops: Avoid planting sweet potatoes in the same soil each year to prevent soil-borne diseases.
  • Enjoy edible leaves: Sweet potato leaves are nutritious and can be used in stir-fries or salads.

Conclusion

Growing sweet potatoes at home is easier than you might think. With a bit of patience and care, you can produce a generous harvest of these versatile, nutrient-packed tubers. From sprouting slips to harvesting and curing, the process is a rewarding experience for beginner and seasoned gardeners alike.

So, why not give it a try? Follow this easy DIY guide, and you’ll soon enjoy the satisfaction of growing your very own sweet potatoes — right in your backyard, balcony, or kitchen garden.

How to Know When Your Snake Plant Needs Water: A Complete Care Guide

How to Know When Your Snake Plant Needs Water: A Complete Care Guide

Snake plants (Sansevieria trifasciata), also known as Mother-in-Law’s Tongue, are popular houseplants renowned for their upright, sword-like leaves and incredible resilience. Not only do they add a modern touch to any interior, but they’re also air-purifying champions, removing harmful toxins from indoor air.

However, even with their hardy nature, snake plants have one major weakness: improper watering. Overwatering is the most common mistake plant owners make, often leading to root rot. On the other hand, underwatering for too long can cause stunted growth and dried-out leaves.

So how do you know when your snake plant actually needs water? In this ultimate guide, we’ll explain all the reliable signs, methods to check soil moisture, seasonal watering tips, and common mistakes to avoid — so you can confidently care for your snake plant and keep it thriving.


Why Proper Watering Matters for Snake Plants

Snake plants are succulents by nature, native to West Africa’s arid regions. Their thick, fleshy leaves store water, enabling them to endure long dry periods. Because of this adaptation, snake plants prefer less frequent watering than most indoor plants.

The challenge:
While snake plants are drought-tolerant, both overwatering and underwatering can cause issues. Finding the right balance is the key to:

  • Promoting steady, healthy growth
  • Preventing leaf yellowing and wilting
  • Avoiding dangerous root rot
  • Keeping foliage firm and upright

How Often Do Snake Plants Need Water?

The watering frequency for snake plants isn’t fixed — it depends on several factors:

  • Season
  • Temperature
  • Humidity
  • Light conditions
  • Soil type
  • Pot material

As a general guideline:

  • In spring and summer: Every 10–14 days
  • In fall and winter: Every 3–5 weeks

But more important than following a calendar is checking for signs your snake plant needs water.


Reliable Signs Your Snake Plant Needs Water

Here’s how to know when it’s time to water:

The Soil Feels Completely Dry

The simplest and most reliable way is by checking the soil moisture.

How to check:

  • Stick your finger 1–2 inches into the soil.
  • If it feels dry at that depth, it’s time to water.
  • If there’s any moisture, wait a few days and check again.

Pro tip:
You can also use a soil moisture meter for more accuracy, especially for larger pots.


Leaves Appear Wrinkled or Curling

When snake plants get too thirsty, their leaves will start to wrinkle or curl inward to conserve moisture.

Signs to look for:

  • Faint horizontal wrinkling
  • Slight leaf curling toward the center
  • Dry, brittle texture at the edges

This is a clear signal your snake plant is due for a drink.


Leaf Tips Turn Brown or Dry

If you notice brown, crispy tips on your snake plant’s leaves, it may be a result of underwatering (though overwatering and low humidity can also cause this).

How to tell:
If the soil is bone-dry and leaves feel papery or brittle, it’s underwatering.


The Pot Feels Noticeably Light

If your snake plant is in a small to medium pot, pick it up occasionally. When the soil is completely dry, the pot feels much lighter than when the soil is moist.

Good practice:
Lift it before and after watering once to learn the weight difference.


Leaves Start to Lose Rigidity

Healthy snake plant leaves should stand tall and firm. When thirsty:

  • Leaves droop slightly
  • Lose their firmness
  • Feel less plump to the touch

If your plant seems a little limp, check the soil and water if it’s dry.


How to Test Soil Moisture Effectively

Several methods can help you accurately gauge your snake plant’s water needs:

The Finger Test

Stick your finger about 2 inches into the soil:

  • Dry? Time to water.
  • Moist? Wait a few more days.

Use a Moisture Meter

A simple tool that provides an immediate reading of moisture at root depth. Aim for readings in the dry zone before watering.

Wooden Skewer Test

Insert a wooden skewer or chopstick into the soil for 5–10 minutes:

  • If it comes out clean and dry — water.
  • If it has moist soil clinging to it — hold off.

Seasonal Watering Adjustments

Watering frequency should change with the seasons.

Spring & Summer

  • Active growing season.
  • Soil dries faster.
  • Water every 10–14 days, depending on heat and light.

Fall & Winter

  • Dormant season.
  • Growth slows.
  • Water sparingly — every 3–5 weeks.

Tip:
Overwatering in winter is a top cause of root rot. Reduce frequency as daylight hours shorten and indoor humidity drops.


Factors Affecting Snake Plant Watering Needs

Besides season, several environmental and care factors affect how often your snake plant needs water:

  • Light exposure: More light = faster soil drying.
  • Room temperature: Warmer rooms increase evaporation.
  • Humidity: High humidity slows soil drying.
  • Pot size/material: Terracotta pots dry faster than plastic.
  • Soil type: Well-draining succulent soil dries quicker than regular potting mix.

Adjust your watering habits based on these conditions.


Common Watering Mistakes to Avoid

To keep your snake plant thriving, steer clear of these mistakes:

  • Watering on a rigid schedule without checking soil dryness.
  • Leaving water in the saucer after watering.
  • Using non-draining pots, which trap excess moisture.
  • Overcompensating during hot weather without testing soil.
  • Neglecting to adjust in fall/winter when the plant’s needs decrease.

Signs of Overwatering

Just as important as recognizing thirst signals is spotting signs of overwatering:

  • Yellowing leaves
  • Mushy, soft foliage
  • Brown or black leaf spots
  • Mushy plant base
  • Foul-smelling, soggy soil

If you notice these signs:
Stop watering, remove the plant from its pot, trim any rotting roots, let it dry, and repot in fresh, dry soil.


Final Thoughts: Listen to Your Plant

Snake plants are resilient and forgiving, but paying attention to their natural cues helps them thrive. Rather than following a strict calendar, use these signs and methods to know when your snake plant needs water:

  • Dry soil
  • Wrinkled, curling leaves
  • Light pot weight
  • Drooping foliage
  • Dry, brown tips

By observing your plant and adjusting to seasonal and environmental changes, you’ll prevent overwatering, avoid root rot, and keep your snake plant lush, upright, and air-purifying for years to come.

The Ultimate Guide to Watering Snake Plants: Keep Yours Thriving for Years

The Ultimate Guide to Watering Snake Plants: Keep Yours Thriving for Years

Snake plants (Sansevieria trifasciata), also affectionately called Mother-in-Law’s Tongue, are among the most popular houseplants in the world. Valued for their striking, upright leaves and ability to thrive in neglect, these hardy plants can live for years in various indoor and outdoor settings. They’re also excellent air purifiers, removing toxins like formaldehyde and benzene from indoor air.

While snake plants are incredibly resilient, one thing even seasoned plant parents get wrong is watering. Overwatering is the most common reason snake plants become unhealthy or die. Mastering a proper watering routine is essential for maintaining lush, upright, and healthy foliage — and avoiding the dreaded root rot.

This ultimate guide covers everything you need to know about how, when, and how much to water your snake plant, along with troubleshooting tips and best practices for every season.


Why Watering Matters So Much for Snake Plants

Unlike tropical houseplants, snake plants are succulents native to West Africa. They naturally grow in arid, rocky environments and store water in their thick, fleshy leaves to survive drought. As a result, their water needs are much lower than most indoor plants.

The problem? Many indoor gardeners tend to treat snake plants like their leafy, water-loving counterparts — leading to overwatering, soggy soil, and root rot. On the flip side, underwatering too much can slow growth and cause leaf shriveling.

A balanced, thoughtful watering approach is essential for:

  • Supporting maximum growth
  • Preserving firm, upright leaves
  • Preventing disease and rot
  • Ensuring long-term plant health

How Often Should You Water a Snake Plant?

The perfect watering schedule depends on several factors:

  • Season
  • Light exposure
  • Room temperature
  • Humidity
  • Soil type
  • Pot material and size

General Watering Frequency

SeasonFrequency
Spring/SummerEvery 10–14 days
Fall/WinterEvery 3–5 weeks

Golden Rule:
Always check soil dryness before watering — never water on a strict calendar.


How to Check if Your Snake Plant Needs Water

Snake plants hate soggy soil, so it’s vital to ensure the top inches of soil are dry before adding more water.

Methods:

  • Finger Test: Stick your finger 1–2 inches deep into the soil. If it’s dry at that depth, it’s safe to water.
  • Soil Moisture Meter: A reliable, affordable tool that reads moisture levels at root depth.
  • Lift the Pot: For smaller pots, lift it to check the weight — dry soil feels much lighter than wet soil.

If unsure, it’s better to wait a few more days than to risk overwatering.


How to Water Snake Plants the Right Way

The way you water is just as important as how often. Here’s a step-by-step watering routine:

Top Watering (Preferred Method)

  1. Use room-temperature filtered water.
  2. Slowly pour water around the inner edges of the pot.
  3. Continue until water drains from the bottom.
  4. Empty the saucer after 10–15 minutes.
  5. Let soil dry completely before the next watering.

Bottom Watering (Optional)

  1. Place the pot in a tray of water about 2 inches deep.
  2. Leave it for 15–20 minutes, allowing roots to soak up moisture.
  3. Remove and let excess water drain out.

Note: Avoid frequent bottom watering to prevent consistently damp soil.


The Best Type of Water for Snake Plants

Snake plants are relatively unfussy but prefer:

  • Filtered water
  • Rainwater
  • Distilled water

Avoid using softened or chlorinated tap water regularly, as high salt and mineral content can accumulate in the soil and harm the plant over time.


Choosing the Right Soil and Pot for Watering Success

Watering frequency directly depends on the soil’s ability to drain and the type of pot you use.

Ideal Soil Mix:

  • 60% cactus/succulent soil
  • 30% perlite or coarse sand
  • 10% compost

This well-aerated mix ensures water drains quickly while providing enough nutrients for healthy growth.

Best Pot Types:

  • Terracotta pots: Highly breathable, promoting faster soil drying.
  • Pots with drainage holes: Always essential to prevent standing water.

Avoid decorative pots without drainage, as these are the leading cause of root rot.


Seasonal Watering Adjustments

Snake plants’ water needs fluctuate throughout the year:

Spring & Summer:

  • Growth is active.
  • Water every 10–14 days as soil dries faster.
  • Check soil frequently in hot or bright conditions.

Fall & Winter:

  • Growth slows.
  • Water sparingly — about every 3–5 weeks.
  • Ensure soil is completely dry between waterings.

Pro tip: Place plants away from cold drafts and heating vents in winter.


Common Watering Mistakes to Avoid

  • Overwatering on a fixed schedule.
  • Leaving water in saucers.
  • Using soil that’s too dense or heavy.
  • Not adjusting for seasonal or room conditions.

Signs of Overwatering and Root Rot

Recognizing early warning signs can save your plant:

Overwatering Symptoms:

  • Yellowing leaves
  • Soft, mushy foliage
  • Brown or black spots on leaves
  • Soggy, foul-smelling soil
  • Wilting, despite wet soil

Root Rot Indicators:

  • Mushy, brown, or blackened roots
  • Foul odor from the soil
  • Collapsing plant from the base

Immediate Fix:
Remove the plant from its pot, trim rotten roots, and repot in dry, fresh succulent soil.


Tips for Watering in Different Environments

Low Light or Humid Rooms:

  • Water less frequently (every 4–5 weeks).
  • Soil dries slowly in shaded, humid spaces.

Bright, Sunny Locations:

  • Water every 10–14 days in summer.
  • Ensure soil doesn’t dry out too quickly.

Outdoor Snake Plants:

  • Only water during extended dry spells.
  • Avoid exposing to heavy rains or soggy soil.

How to Water Propagated Snake Plants

New cuttings are especially vulnerable to rot.

Watering Tips:

  • Allow cut ends to callous for 1–2 days before planting.
  • Use a well-draining mix.
  • Water lightly once every 2–3 weeks until roots develop.
  • Avoid overwatering during early propagation stages.

Final Thoughts: Find the Balance

Snake plants are hardy, but their one vulnerability is overwatering. By following a thoughtful, seasonally adjusted watering schedule and using well-draining soil with a breathable pot, you can keep your plant healthy and beautiful for years to come.

Recap:

  • Water every 10–14 days in summer, every 3–5 weeks in winter.
  • Always check soil moisture before watering.
  • Use a cactus/succulent soil mix in a pot with drainage holes.
  • Never leave water in saucers.
  • Adjust watering for light, temperature, and humidity changes.
  • Recognize early signs of overwatering to prevent root rot.

Master this routine, and you’ll enjoy a thriving, air-purifying snake plant that’s virtually maintenance-free.

Snake Plant Watering Schedule: Avoid Root Rot and Keep Your Plant Thriving

Snake Plant Watering Schedule: Avoid Root Rot and Keep Your Plant Thriving

Snake plants (Sansevieria trifasciata), also known as Mother-in-Law’s Tongue, are some of the most forgiving, low-maintenance indoor plants you can grow. Their upright, sword-like leaves and air-purifying benefits make them a popular choice for homes, offices, and shaded spaces alike. However, while snake plants can survive a bit of neglect, improper watering — especially overwatering — is the number one reason they develop root rot and ultimately fail.

Understanding the right snake plant watering schedule is key to keeping these hardy beauties in perfect health. In this guide, we’ll explain exactly how often to water, how to check for moisture, seasonal adjustments, and how to avoid the dreaded root rot.


Why Snake Plants Are Prone to Root Rot

Though snake plants belong to the cactus and succulent family and naturally store water in their leaves, many indoor growers accidentally over-care for them. Unlike many tropical houseplants, snake plants prefer drier conditions and are particularly vulnerable to sitting in soggy soil, which quickly leads to root rot.

Root rot occurs when:

  • Water is applied too frequently
  • Soil lacks good drainage
  • Water sits in the pot or saucer
  • Roots are starved of oxygen

Once rot sets in, roots become mushy, discolored, and unable to absorb water or nutrients. If left unchecked, the plant will collapse from the base.

Good news: With a proper watering routine, root rot is 100% preventable.


General Snake Plant Watering Schedule

The exact frequency to water a snake plant depends on several factors, including the time of year, temperature, humidity, and light levels.

In general:

SeasonWatering Frequency
Spring/SummerEvery 10–14 days
Fall/WinterEvery 3–5 weeks

Important:
Snake plants prefer their soil to dry out almost completely before the next watering.


How to Check When Your Snake Plant Needs Water

Before watering, always check the soil’s moisture level. Never water on a fixed calendar schedule without verifying the soil conditions.

Easy methods:

  • Finger test: Stick your finger 2 inches into the soil. If it feels dry, it’s time to water.
  • Soil moisture meter: A small, affordable tool that measures moisture at root level.
  • Lift test (for small pots): If the pot feels noticeably light, the soil has dried out.

Rule of thumb:
If in doubt, wait a few more days. Snake plants are drought-tolerant and prefer underwatering over overwatering.


How to Water a Snake Plant Properly

Step-by-step:

  1. Use room-temperature filtered or distilled water.
  2. Slowly pour water evenly around the edge of the pot.
  3. Continue until water starts to drain from the bottom.
  4. Discard any water that collects in the saucer after 10–15 minutes.
  5. Allow the soil to dry completely before watering again.

Tip:
Avoid splashing water on the leaves to prevent fungal problems.


Ideal Soil and Pot for Water Control

A well-draining soil mix is crucial to avoid water buildup around roots.

Recommended soil mix:

  • 60% cactus or succulent soil
  • 30% coarse sand or perlite
  • 10% compost or organic matter

Best pot types:

  • Terracotta pots: Porous and allow soil to dry faster.
  • Ensure pots have drainage holes at the bottom.

Avoid:
Plastic or glazed ceramic pots without drainage holes.


Seasonal Adjustments for Snake Plant Watering

Snake plants’ water needs change with the seasons. Adjust your routine based on environmental conditions:

Spring & Summer (Active Growth)

  • Water every 10–14 days
  • Soil dries faster in warm weather
  • Resume light fertilizing once a month

Fall & Winter (Dormancy)

  • Water every 3–5 weeks
  • Growth slows, and soil dries more slowly
  • Stop fertilizing and reduce watering

Pro tip:
Keep snake plants away from radiators, fireplaces, and drafty windows in winter to maintain stable conditions.


Signs of Overwatering and Root Rot

Recognizing early signs of overwatering:

  • Soft, mushy leaves
  • Yellowing foliage
  • Black or brown spots on leaves
  • Mushy plant base
  • Sour-smelling, waterlogged soil

Signs of advanced root rot:

  • Wilting despite wet soil
  • Collapsing plant from the base
  • Roots appear brown, mushy, or stringy

How to Treat Root Rot in Snake Plants

If you suspect root rot:

  1. Remove the plant from its pot.
  2. Gently rinse away soil from the roots.
  3. Cut off all mushy, discolored, or rotten roots with sterilized scissors.
  4. Let healthy roots and leaves dry for 24 hours.
  5. Repot into fresh, dry cactus mix in a clean pot.
  6. Wait 7–10 days before watering again.

Optional: Apply a fungicide on healthy roots before replanting.


Watering in Different Environments

Low Light or Humid Rooms

  • Soil dries slower; extend watering intervals.
  • Water every 4–5 weeks in winter.

Bright, Sunny Spots

  • Soil dries faster; water every 10–14 days in summer.

Outdoor Snake Plants

  • Rely on rainwater unless in drought conditions.
  • Avoid letting them sit in wet soil for prolonged periods.

Extra Watering Tips for Snake Plant Success

  • Use filtered, rain, or distilled water to avoid fluoride and chlorine buildup.
  • Avoid misting snake plants — they dislike excess leaf moisture.
  • Use bottom watering (placing the pot in a shallow water tray) once a month to deeply hydrate roots.
  • Avoid letting the plant sit in standing water, even briefly.

Final Thoughts

Snake plants are famous for being “impossible to kill,” but the one mistake even experienced plant owners make is overwatering. With a sensible, seasonally adjusted watering schedule and the right soil and pot setup, your snake plant can thrive for years, growing tall, vibrant, and air-purifying.

Recap:

  • Water every 10–14 days in warm months, and 3–5 weeks in cooler seasons.
  • Always test soil before watering.
  • Use fast-draining soil and pots with drainage holes.
  • Avoid standing water in saucers.
  • Recognize early signs of overwatering and act quickly.

Follow this guide, and you’ll keep your snake plant not just surviving, but thriving beautifully in any room of your home.

Which Country Is the Largest Anemone Producer in the World?

Which Country Is the Largest Anemone Producer in the World?

Anemones — often called windflowers — are among the most enchanting blooms in the ornamental flower world. Known for their delicate, poppy-like blossoms and a stunning palette of colors ranging from deep reds to purples, pinks, whites, and blues, anemones hold a special place in gardens, bouquets, and floral designs across the globe.

But have you ever wondered where these charming flowers come from in large numbers? Which nation leads the world in anemone cultivation and export? In this article, we’ll explore the origins of anemones, their growing popularity in floriculture, and identify the largest anemone producer in the world — with fascinating details about the global flower industry along the way.


A Brief Introduction to Anemones

Anemones belong to the Ranunculaceae family, which also includes buttercups, clematis, and delphiniums. The name “anemone” comes from the Greek word for “windflower,” referencing the ancient belief that the wind could cause these delicate blossoms to open.

There are over 120 species of anemones worldwide, but the most commercially significant for floriculture is Anemone coronaria, also known as the poppy anemone. These varieties, with their bold, simple blooms and striking central eyes, are favored in cut flower markets across Europe, Asia, and North America.


Global Overview of Anemone Production

Anemones thrive in mild, Mediterranean-type climates — preferring cool, wet winters and warm, dry summers. As a result, most of the world’s commercial anemone cultivation occurs in countries with these growing conditions.

Some of the major anemone producers globally include:

  • China
  • Italy
  • Israel
  • Turkey
  • Greece
  • France
  • The Netherlands (as a major flower trade hub)

Among these, one country stands out as the clear leader in terms of production scale and international influence.


Israel: The Largest Anemone Producer in the World

While China has historically cultivated large quantities of anemones, it is Israel that has emerged as the world’s largest commercial producer of anemones for the cut flower market, especially of premium-quality Anemone coronaria varieties.

Why Israel Leads:

  1. Ideal Climate
    Israel’s Mediterranean climate — characterized by mild, rainy winters and dry, sunny summers — provides perfect conditions for growing anemones in open fields and greenhouses. Coastal plains like those near Netanya and Ashkelon are particularly suited for floriculture.
  2. Advanced Horticultural Techniques
    Israeli growers are known for their innovation in agriculture, using drip irrigation, greenhouse technology, and precision fertilization. These methods ensure high-quality blooms with a long vase life, which is critical for international cut flower markets.
  3. Exclusive Varieties
    Israel is famous for developing popular anemone varieties like the ‘Mistral’ series — known for their large, vividly colored flowers with contrasting dark centers. The country’s flower breeding companies export both cut flowers and bulbs globally.
  4. Strong Export Infrastructure
    Israel has a well-developed cold-chain logistics system and direct trade agreements with the European Union, Russia, North America, and Japan, ensuring fresh, high-quality anemones reach distant markets efficiently.
  5. Market Dominance
    Israel exports millions of anemone stems annually, particularly during the European winter and early spring seasons when flower demand surges. The country has consistently led in anemone exports over the last decade, with The Netherlands acting as a key distribution hub for Israeli flowers into wider European markets.

Other Major Anemone Producers

Italy

Italy has a long tradition of anemone cultivation, especially in Southern regions like Sicily and Liguria. Italian growers specialize in Anemone coronaria de Caen and St. Brigid varieties. While much of the production caters to local and regional markets, Italy also exports to neighboring countries like France, Germany, and the UK.

China

China remains a significant grower of anemones, particularly for domestic floral markets and regional export. Provinces like Yunnan and Sichuan benefit from suitable climates for open-field anemone cultivation. However, Chinese production focuses more on volume over premium quality, with the majority destined for local consumption.

Turkey and Greece

Both Turkey and Greece boast favorable climates for anemones. Turkish growers, especially in Antalya and Izmir, produce cut flowers for regional markets, while Greece’s output is often sold within Southern Europe.

France

In regions like Provence and the Côte d’Azur, French farmers cultivate anemones as part of their rich floriculture heritage. While France doesn’t match Israel’s or Italy’s scale, it remains a valuable player in the luxury floral trade.

The Netherlands

The Netherlands is the world’s largest flower exporter overall. Although not a primary producer of anemones, Dutch flower auctions like Royal FloraHolland in Aalsmeer handle and distribute vast quantities of imported Israeli and Italian anemones to global markets.


Global Demand for Anemones

Anemones enjoy strong demand globally, especially in:

  • European winter and spring cut-flower markets
  • Wedding and event floral arrangements
  • Luxury home décor trends
  • Florist chains and supermarkets across Europe, Japan, and North America

Their affordability, striking appearance, and broad color range make them favorites for Valentine’s Day, Mother’s Day, and Easter arrangements.


Market Trends and Innovations

  • Year-Round Cultivation: Israel leads in off-season anemone production through advanced greenhouse and climate control techniques.
  • Bulb Export Growth: Israeli companies export millions of anemone bulbs annually to Europe, the USA, and Japan.
  • New Hybrids: Breeders are developing disease-resistant, longer-lasting varieties with unusual colors like deep purple, blush pink, and bicolor patterns.
  • Eco-Friendly Cultivation: Sustainable farming practices like reduced pesticide use and water-saving drip irrigation systems are on the rise, especially in Israel and Italy.

Conclusion

So, which country is the largest anemone producer in the world?

Israel holds the top position in commercial anemone production, particularly in the premium-quality cut-flower sector. With its ideal growing conditions, advanced agricultural technology, and dominant export infrastructure, Israel consistently supplies some of the highest-quality anemones to global markets.

While countries like Italy, China, Turkey, and Greece also contribute to worldwide production, Israel’s leadership in both export volume and flower quality ensures its position as the undisputed leader in the anemone trade.


Final Thought

Whether you’re admiring a fresh bouquet at a European flower market, placing a delicate anemone arrangement in your home, or sowing bulbs in your spring garden, chances are those flowers — or their origins — trace back to Israel. And as global floriculture continues to evolve with innovations and eco-friendly practices, the story of the anemone’s global journey promises to remain as beautiful and vibrant as the flower itself.