How to Grow Huckleberries in the Wild Garden: A Complete Growing Guide

How to Grow Huckleberries in the Wild Garden: A Complete Growing Guide

If you’re a lover of berries and rustic garden spaces, huckleberries should be at the top of your planting list. These flavorful, antioxidant-rich berries have long been cherished in North America, especially in forested and mountainous regions. Growing huckleberries in a wild garden setting not only adds a delicious, native plant to your landscape but also nurtures pollinators and wildlife.

In this detailed guide, we’ll walk you through how to grow huckleberries in the wild garden, from choosing the right species to planting, care, harvesting, and even troubleshooting common problems.


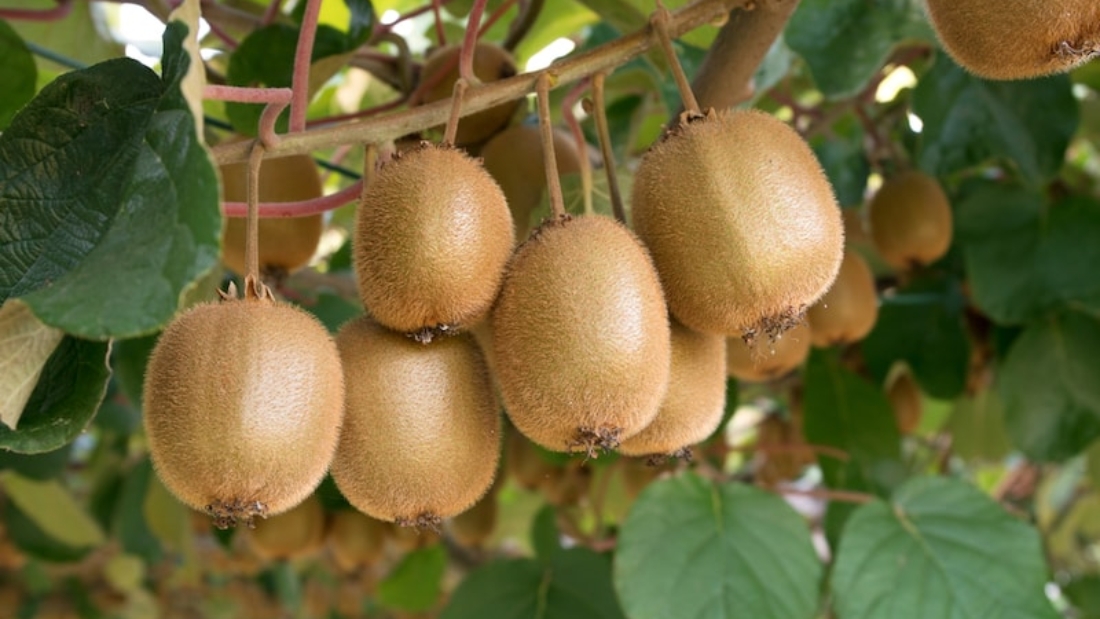
What Are Huckleberries?

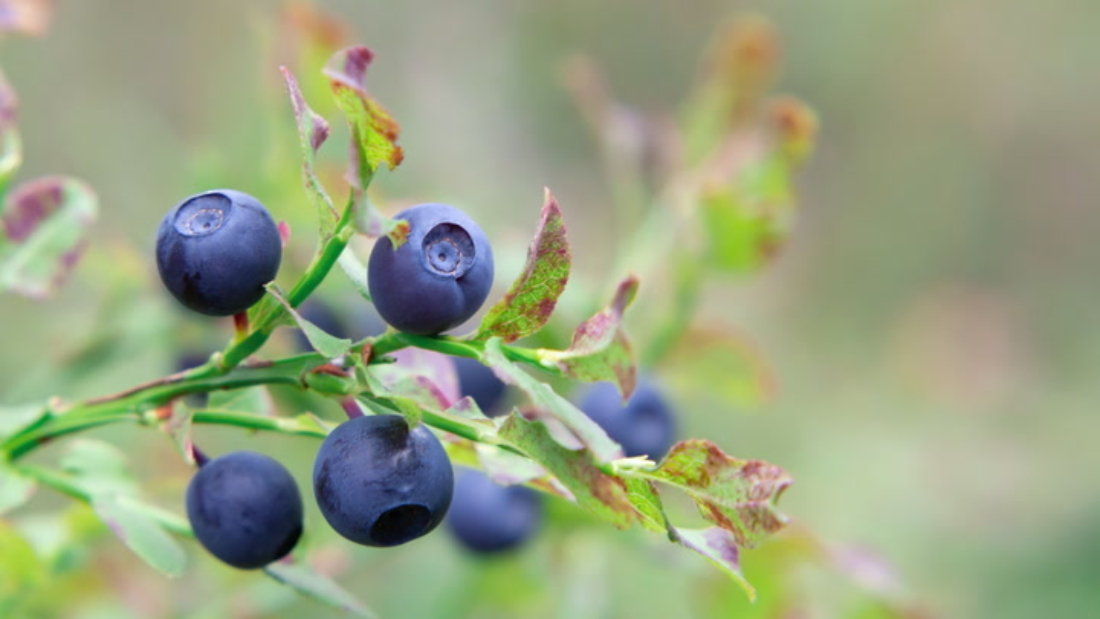
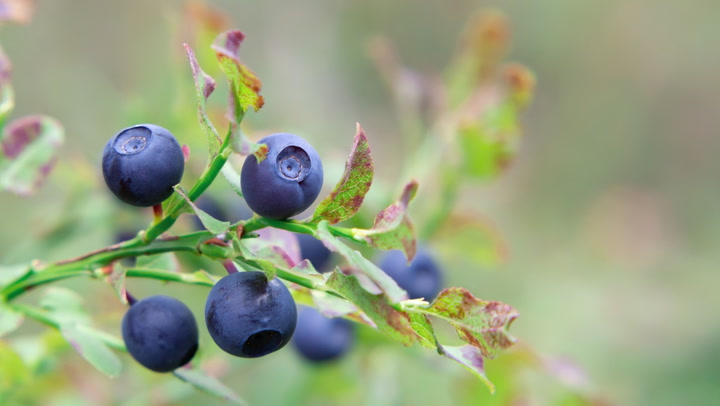
Huckleberries belong to the Ericaceae family, the same family as blueberries, and are primarily native to the United States and Canada. While often confused with blueberries, huckleberries are distinct in flavor, texture, and habitat preference.

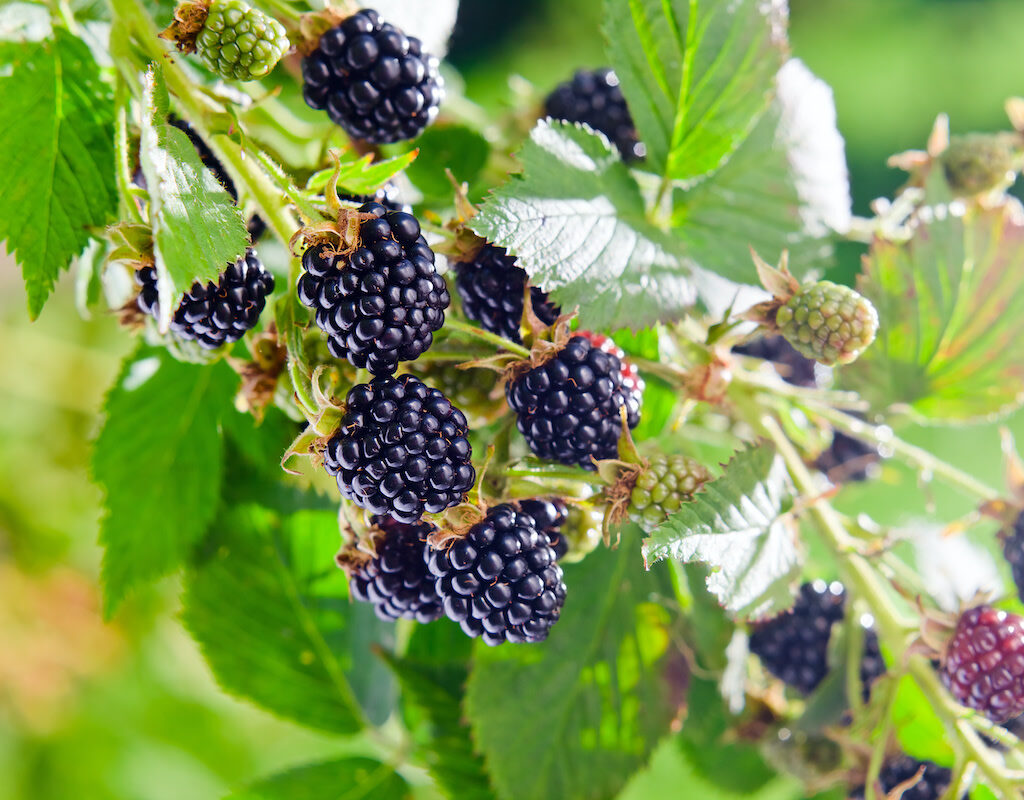
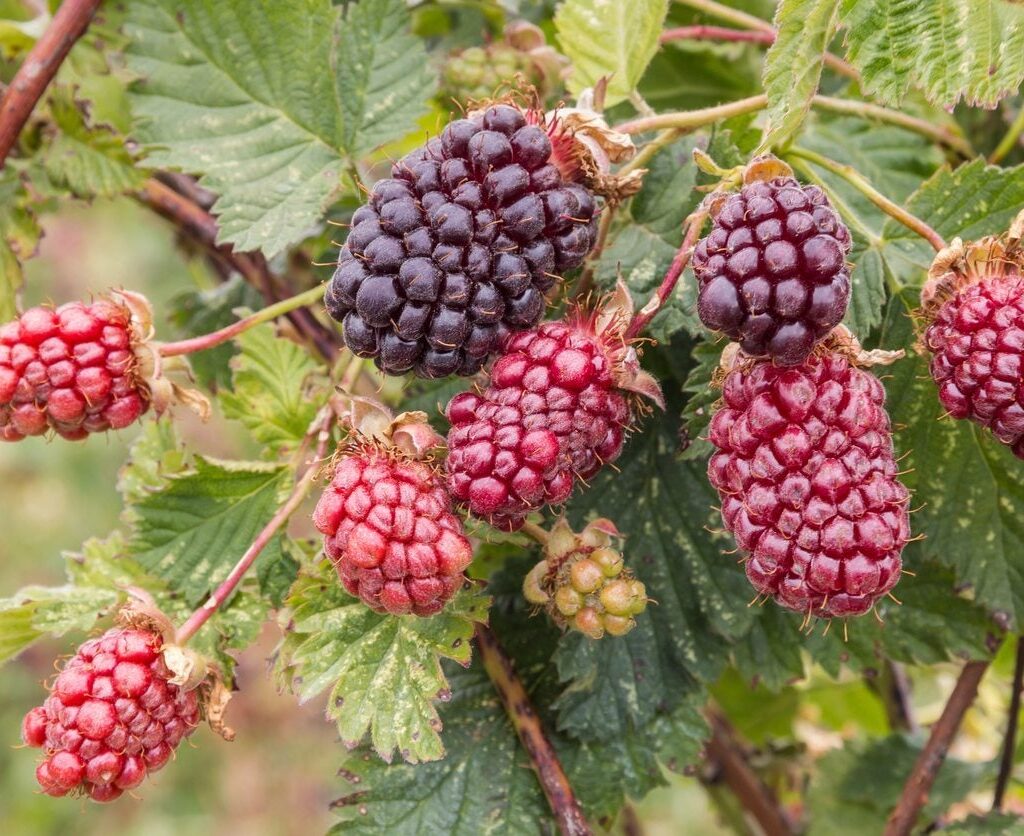
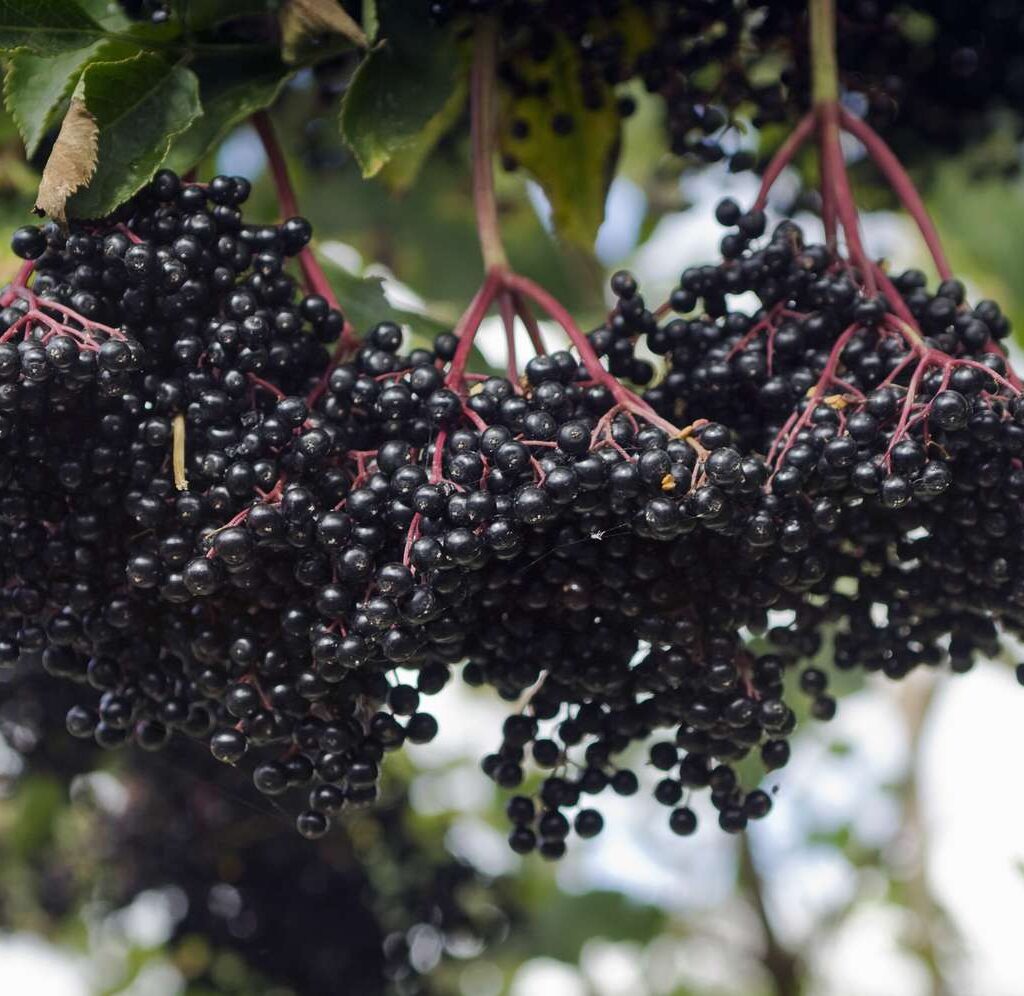
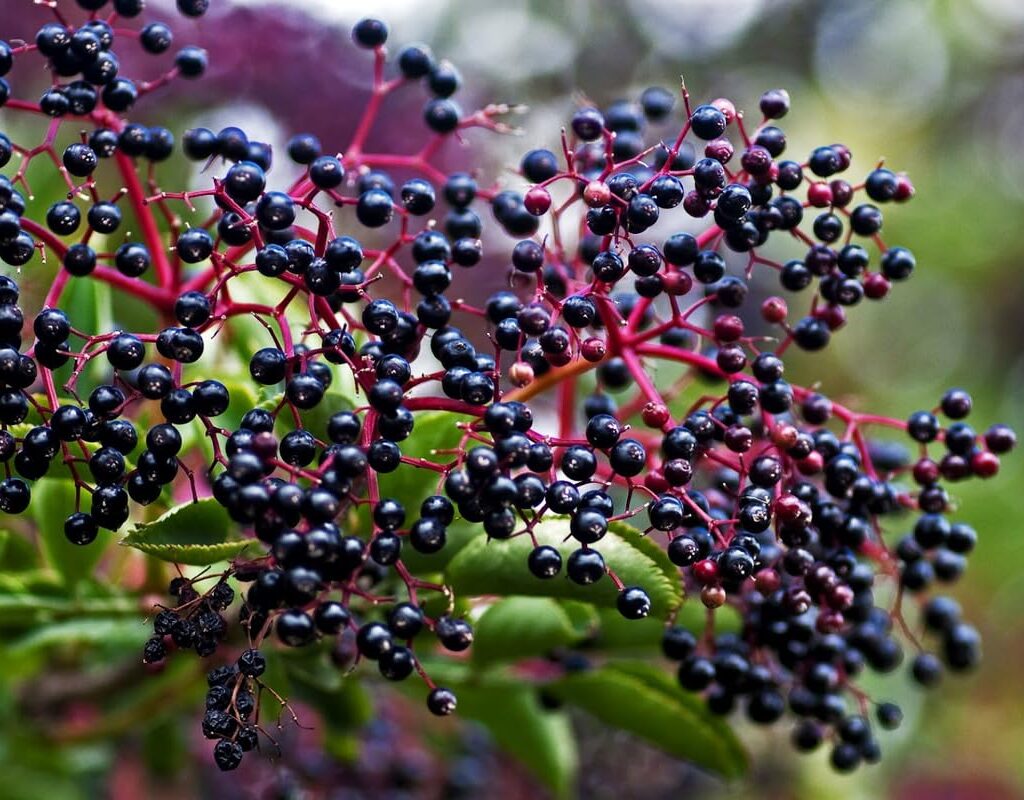
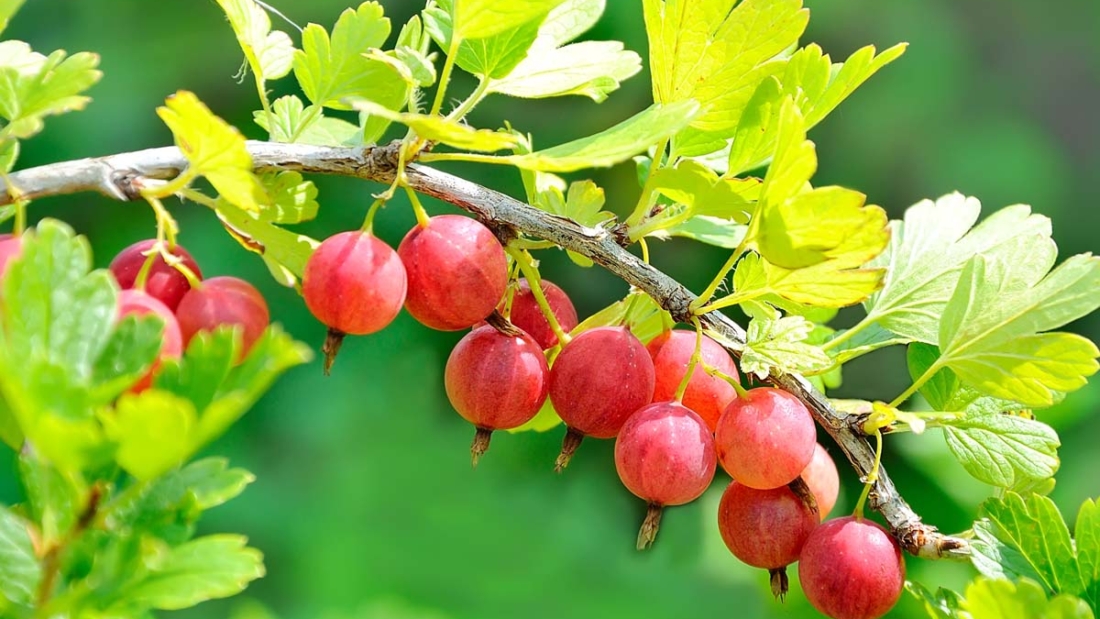
They thrive in wild, acidic soils and offer berries ranging in color from bright red to deep purple-black depending on the variety.

Notable characteristics:

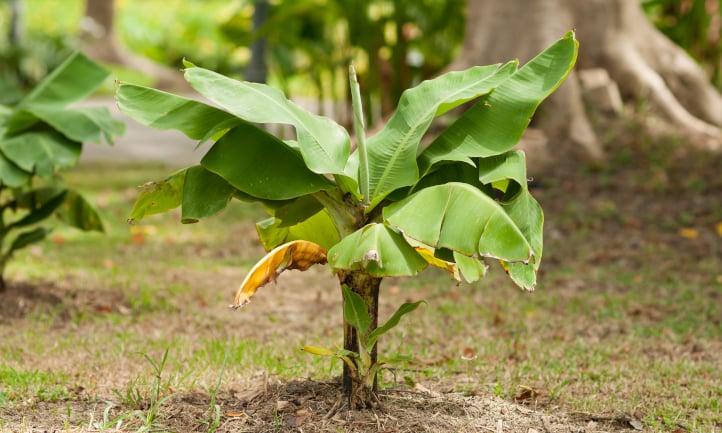
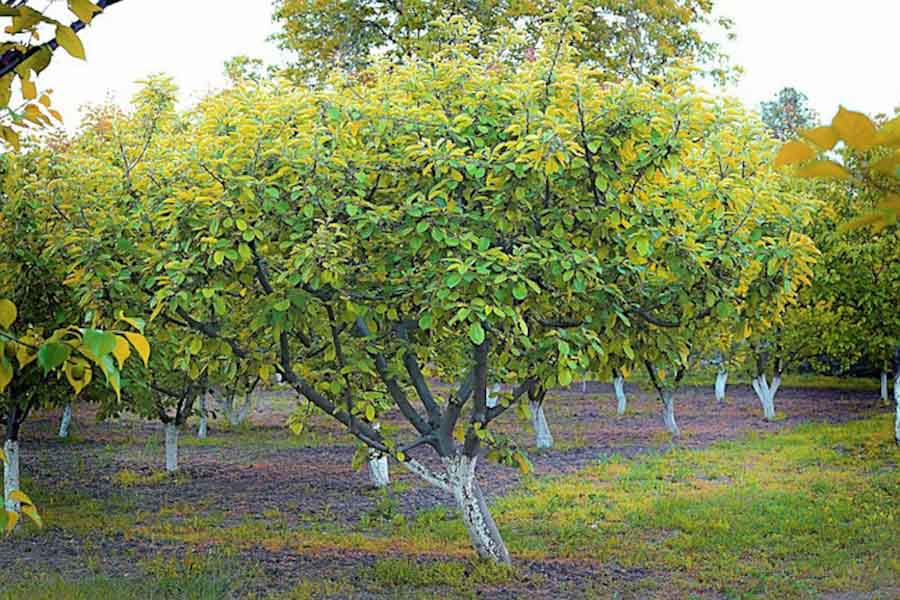
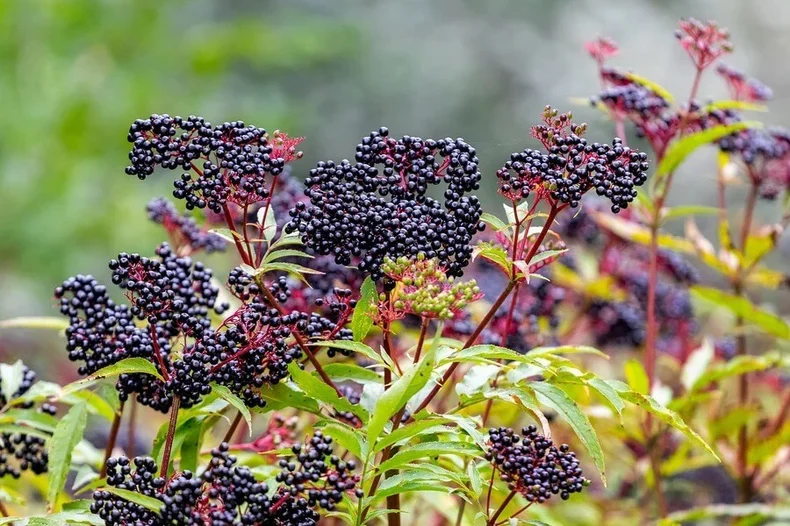
  • Small to medium-sized shrubs.
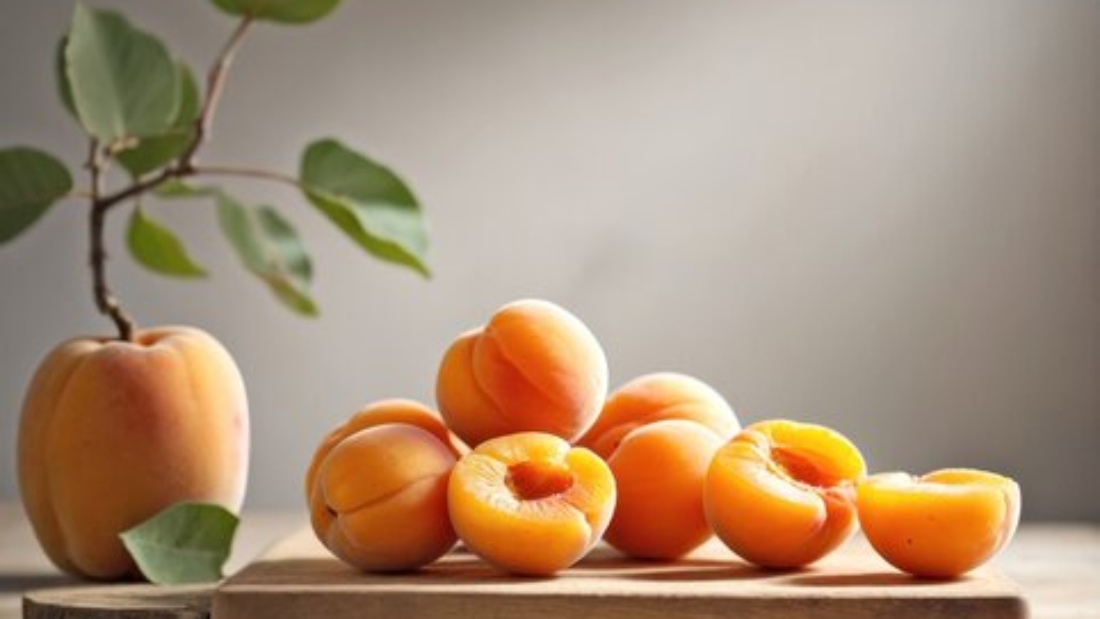
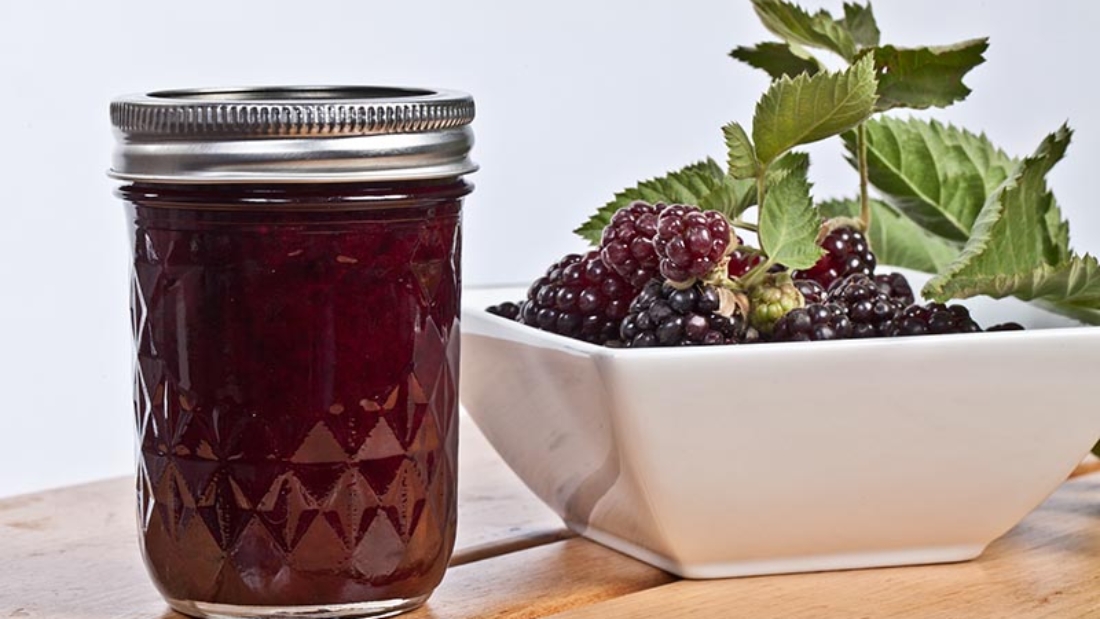
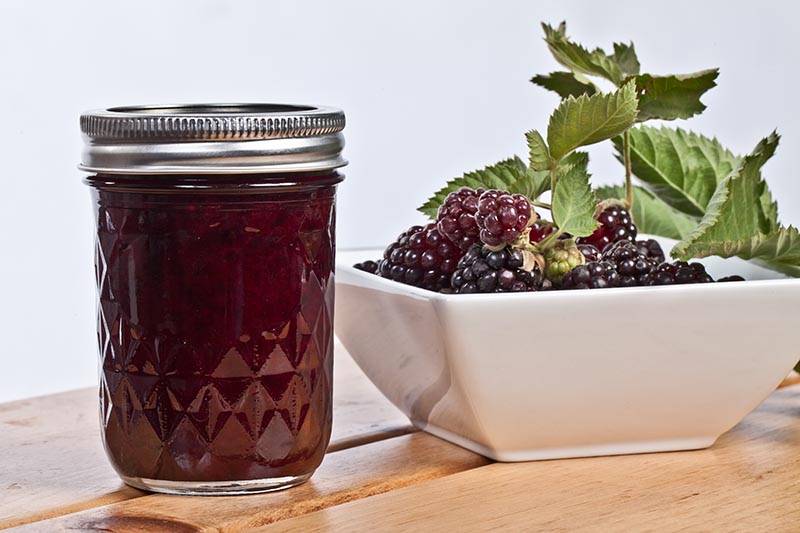
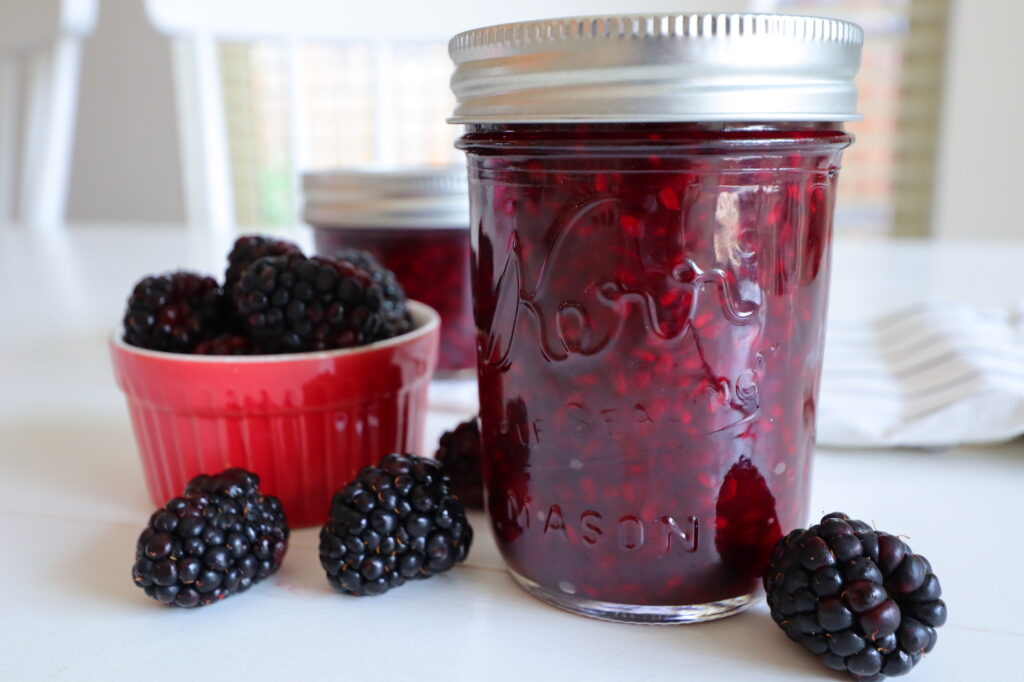
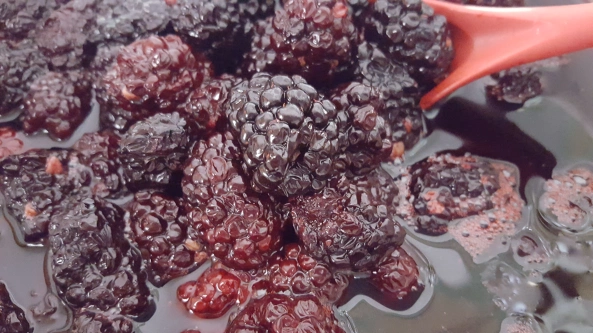
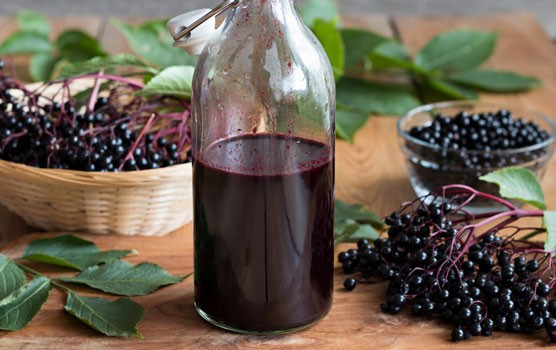
  • Produces sweet-tart berries ideal for jams, pies, syrups, and fresh eating.
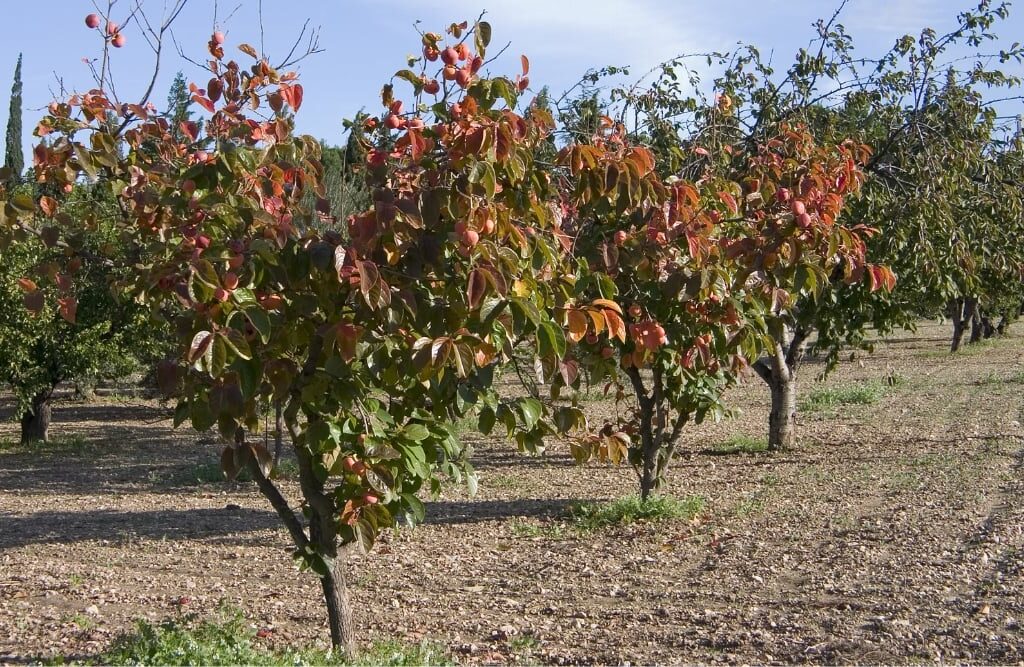
  • Excellent for native and wild-style gardens.
  • Attracts bees, birds, and butterflies.

Best Huckleberry Varieties for Wild Gardens

Several huckleberry species can be cultivated, but a few stand out for home gardeners and wild landscapes:

Top Huckleberry Types:

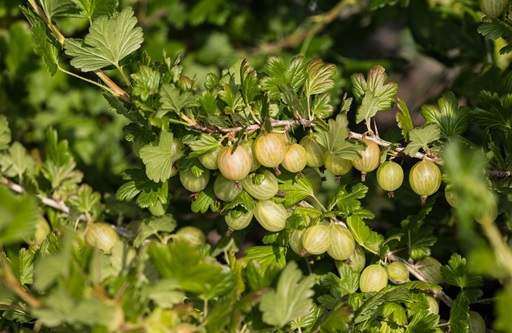
  • Vaccinium membranaceum (Mountain Huckleberry):
    Found in mountainous regions of the Pacific Northwest. Produces dark purple, sweet-tart berries.
  • Vaccinium ovatum (Evergreen Huckleberry):
    Native to coastal areas. Grows well in shade and produces small, glossy berries.
  • Gaylussacia baccata (Black Huckleberry):
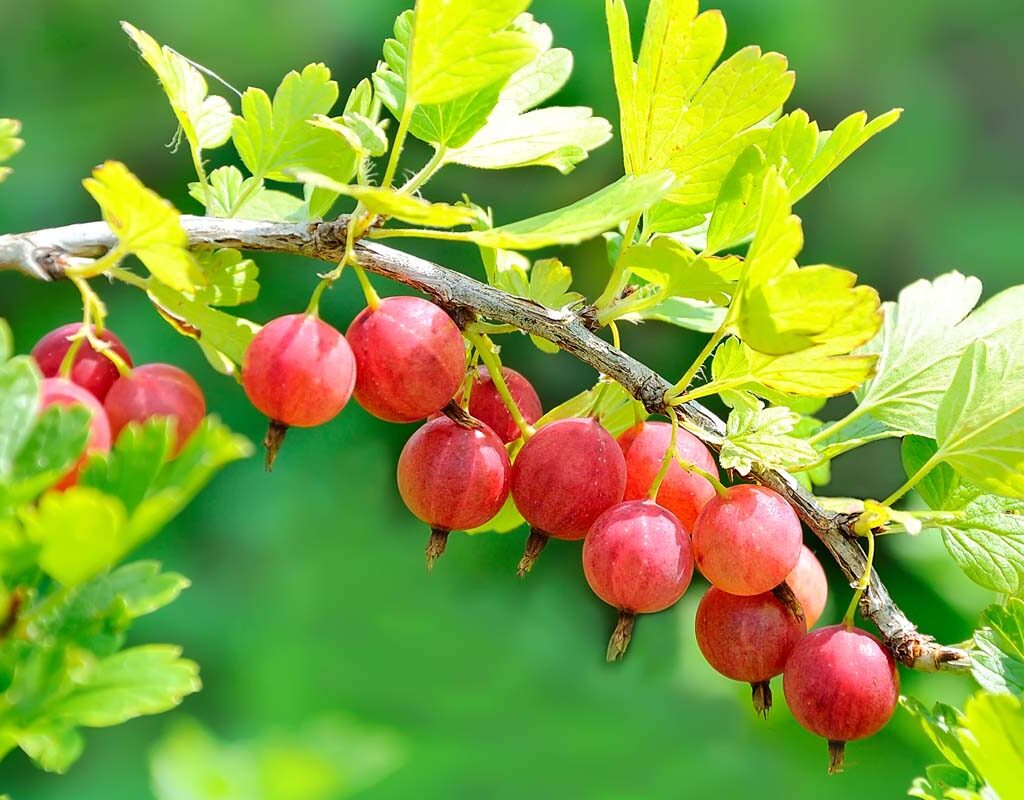
    Native to the eastern U.S., thriving in woodlands and sandy soils. Sweet, flavorful berries.
  • Vaccinium parvifolium (Red Huckleberry):
    Prefers acidic, moist soils in shaded areas. Produces bright red, tangy berries.

Ideal Conditions for Growing Huckleberries

Huckleberries naturally thrive in wild, acidic, and well-drained soil environments. To replicate this in your garden, keep the following conditions in mind:
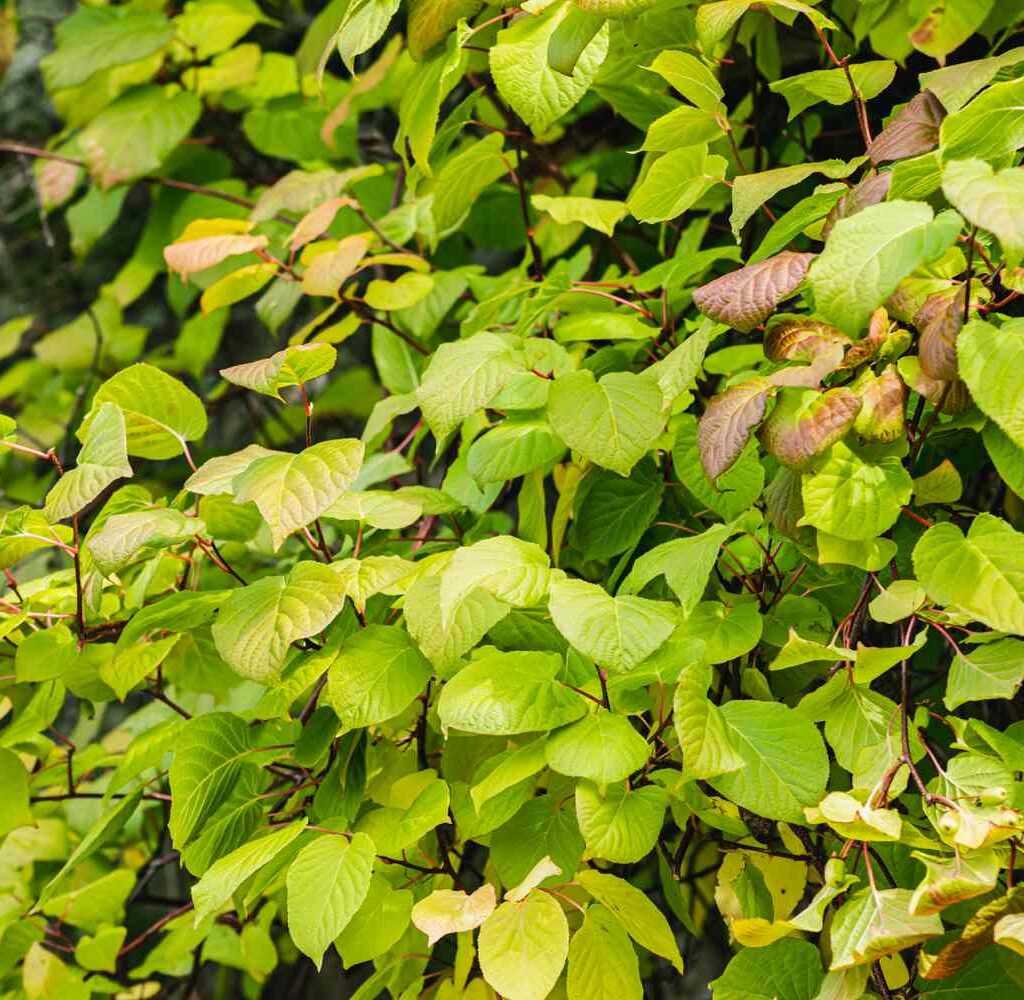
Light Requirements

Most huckleberries prefer partial shade to full sun. Mountain huckleberries and black huckleberries do well in full sun, while evergreen and red huckleberries appreciate dappled light or partial shade.

Temperature

They prefer cool, temperate climates with cold winters and mild summers. Ideal for USDA zones 4–8 depending on the variety.

Soil Preferences

The key to healthy huckleberry growth is acidic, well-drained soil with a pH of 4.5 to 5.5.

Tips for preparing soil:

  • Incorporate peat moss, pine needles, or leaf mold to increase acidity.
  • Avoid clay-heavy, alkaline soils unless heavily amended.
  • Ensure excellent drainage to prevent root rot.

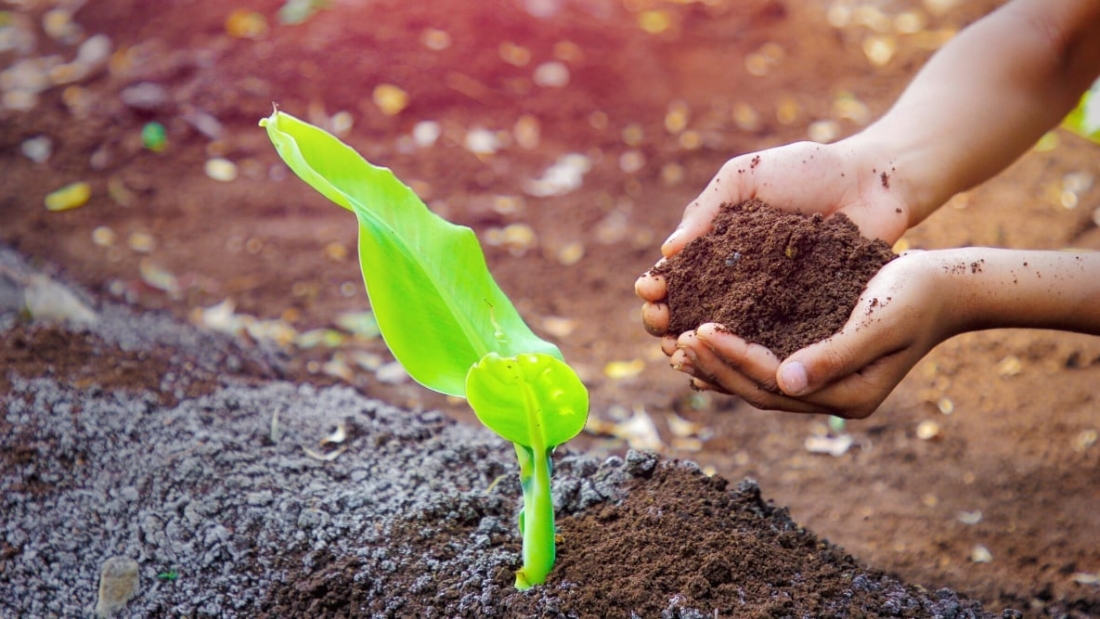
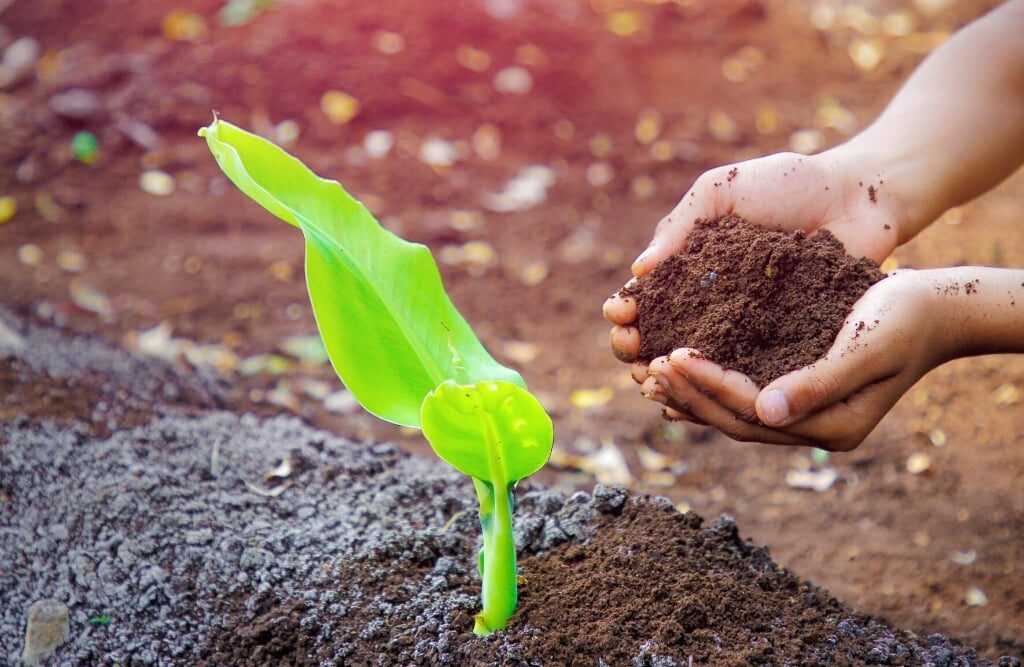
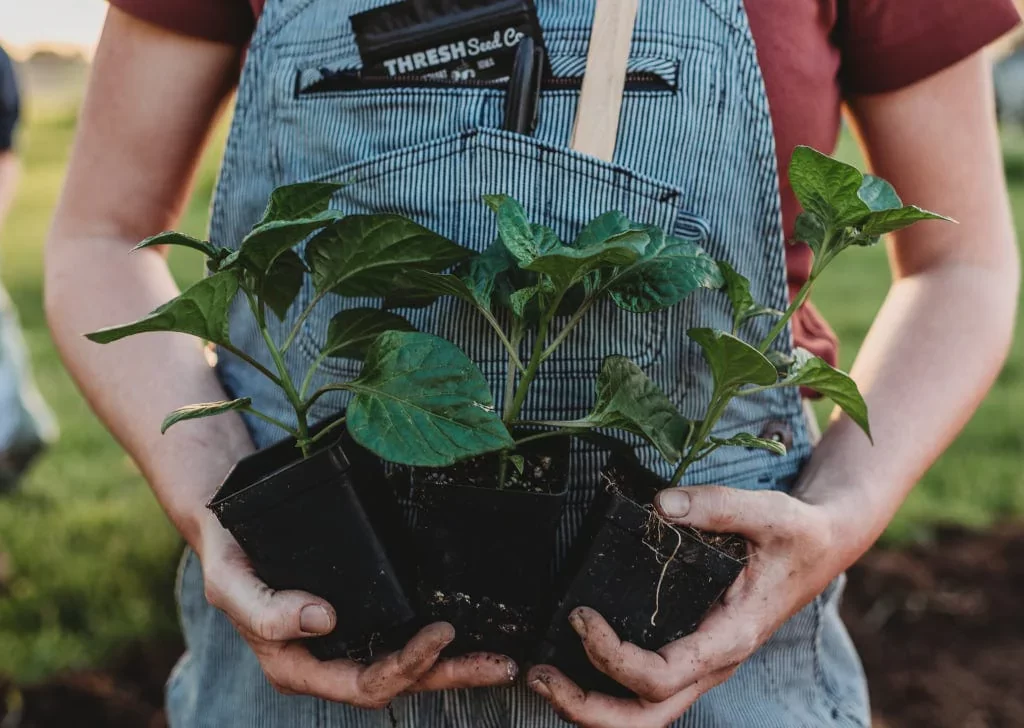
How to Plant Huckleberries in a Wild Garden

Best Planting Time

Plant huckleberries in early spring or fall, when temperatures are mild and moisture is abundant.

Planting Steps:

  1. Select a Location: Choose a spot that mimics their natural habitat — partial shade with acidic, well-draining soil.
  2. Test and Amend Soil: Use a soil test kit to check pH. Lower it using soil acidifiers like sulfur or organic materials if needed.
  3. Dig Planting Holes: Holes should be twice the width of the root ball and the same depth.
  4. Set Plants in Soil: Place the plant so that the top of the root ball is level with the ground surface.
  5. Backfill and Water: Fill in with soil, gently tamp down, and water deeply.
  6. Mulch Heavily: Apply a 2–3 inch layer of pine needles or wood chips to retain moisture and improve soil acidity.

Caring for Huckleberries

Once planted, huckleberries are fairly low-maintenance, especially when planted in a wild garden setting.

Watering

While drought-tolerant once established, young huckleberry plants need consistent moisture. Water deeply once or twice a week during dry spells.

Avoid waterlogged soil, as these plants hate standing water.

Fertilizing

Huckleberries don’t require heavy fertilizing. Use a balanced, acid-loving plant fertilizer (like one for azaleas or rhododendrons) in early spring and again in mid-summer.
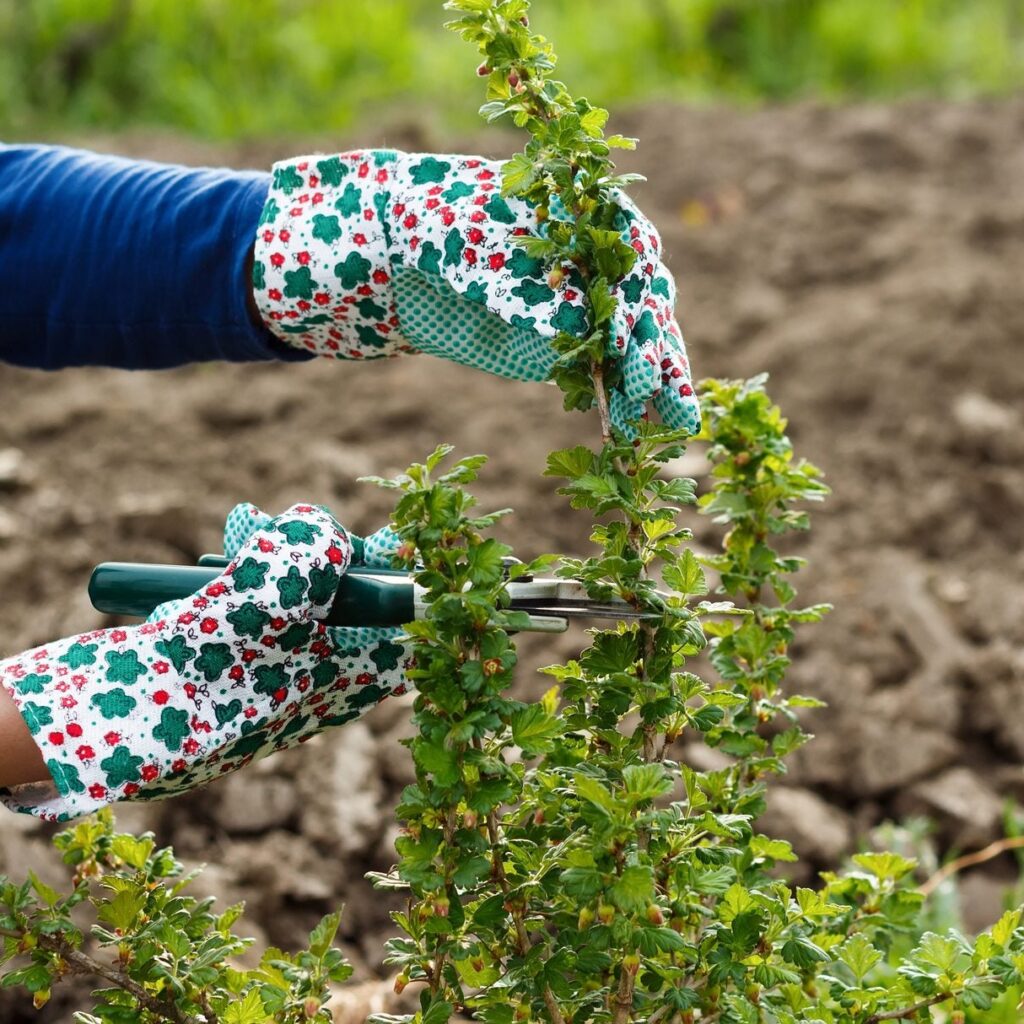
Pruning

Pruning is minimal. Remove:

  • Dead or damaged wood in late winter.
  • Older, unproductive branches after fruiting to encourage new growth.

This maintains the plant’s shape and vigor.

Pollination

Huckleberries are pollinated by bees, butterflies, and other native pollinators. Planting multiple shrubs together encourages cross-pollination and boosts berry yields.


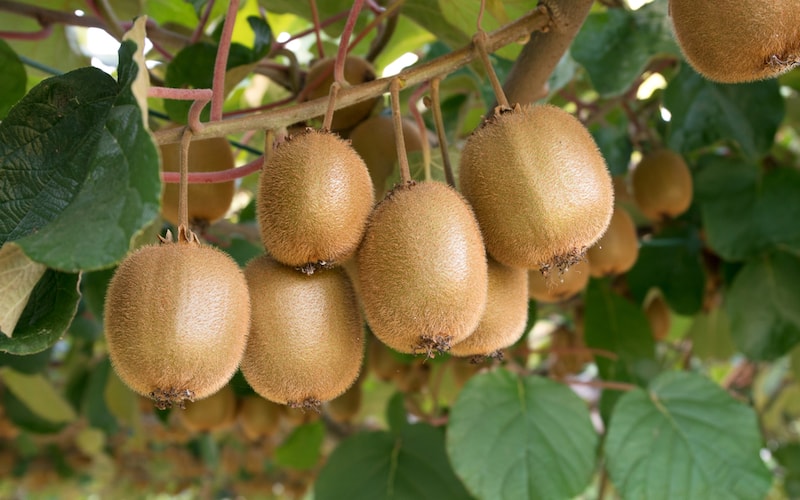
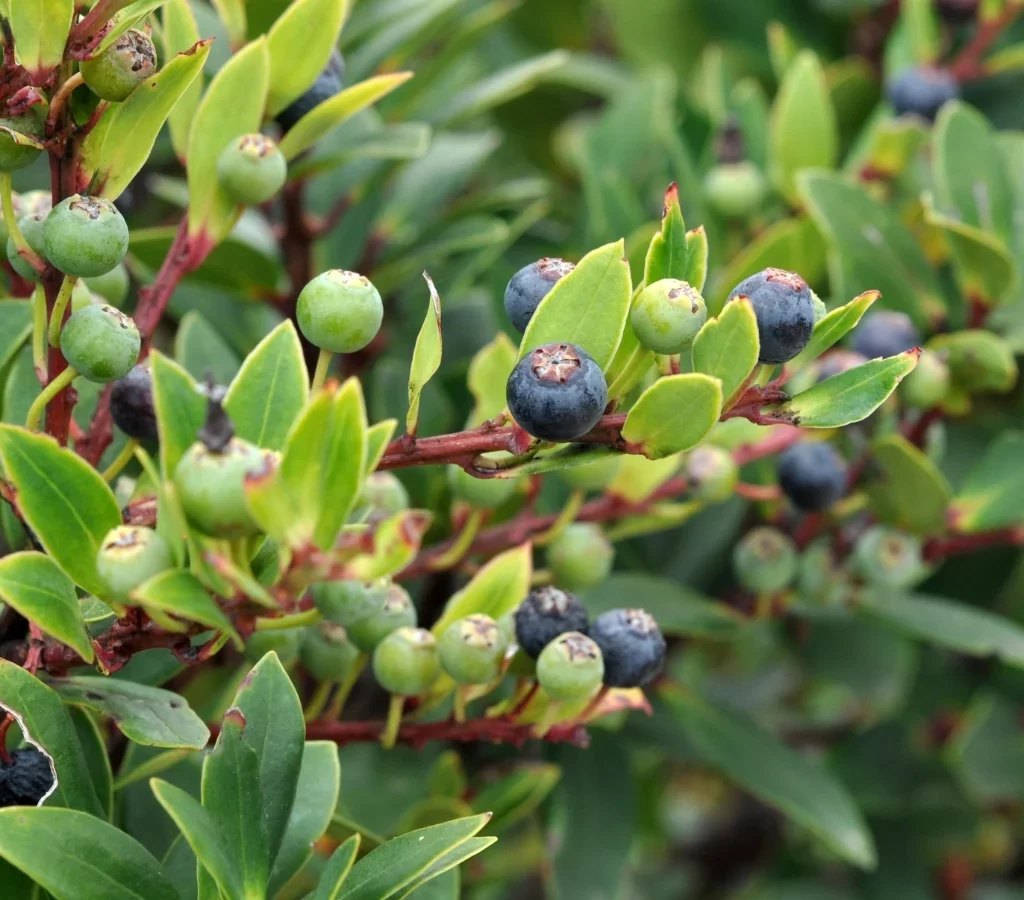
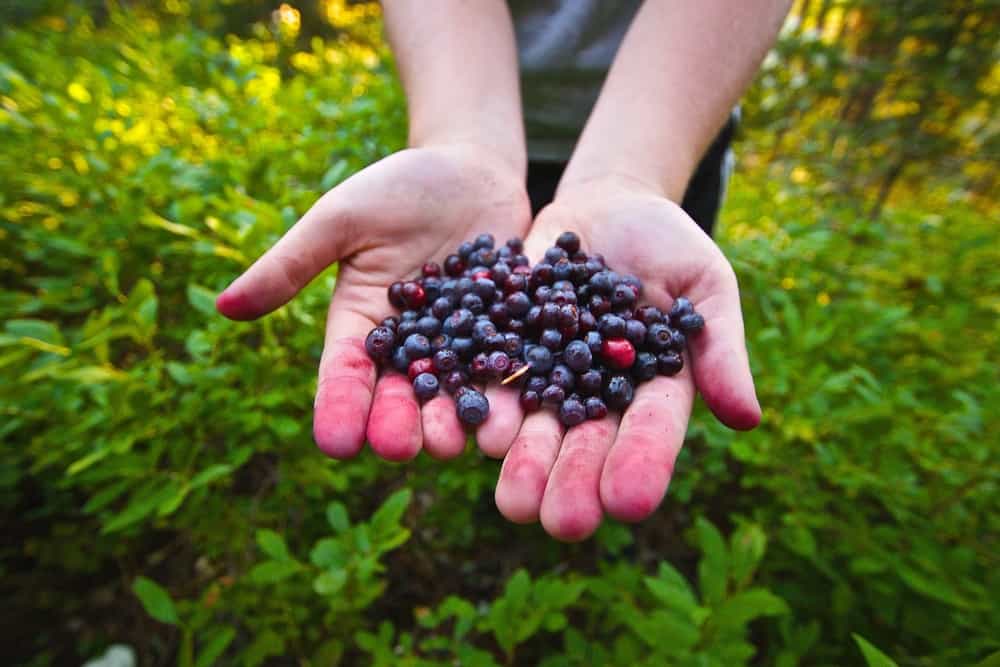
Harvesting Huckleberries

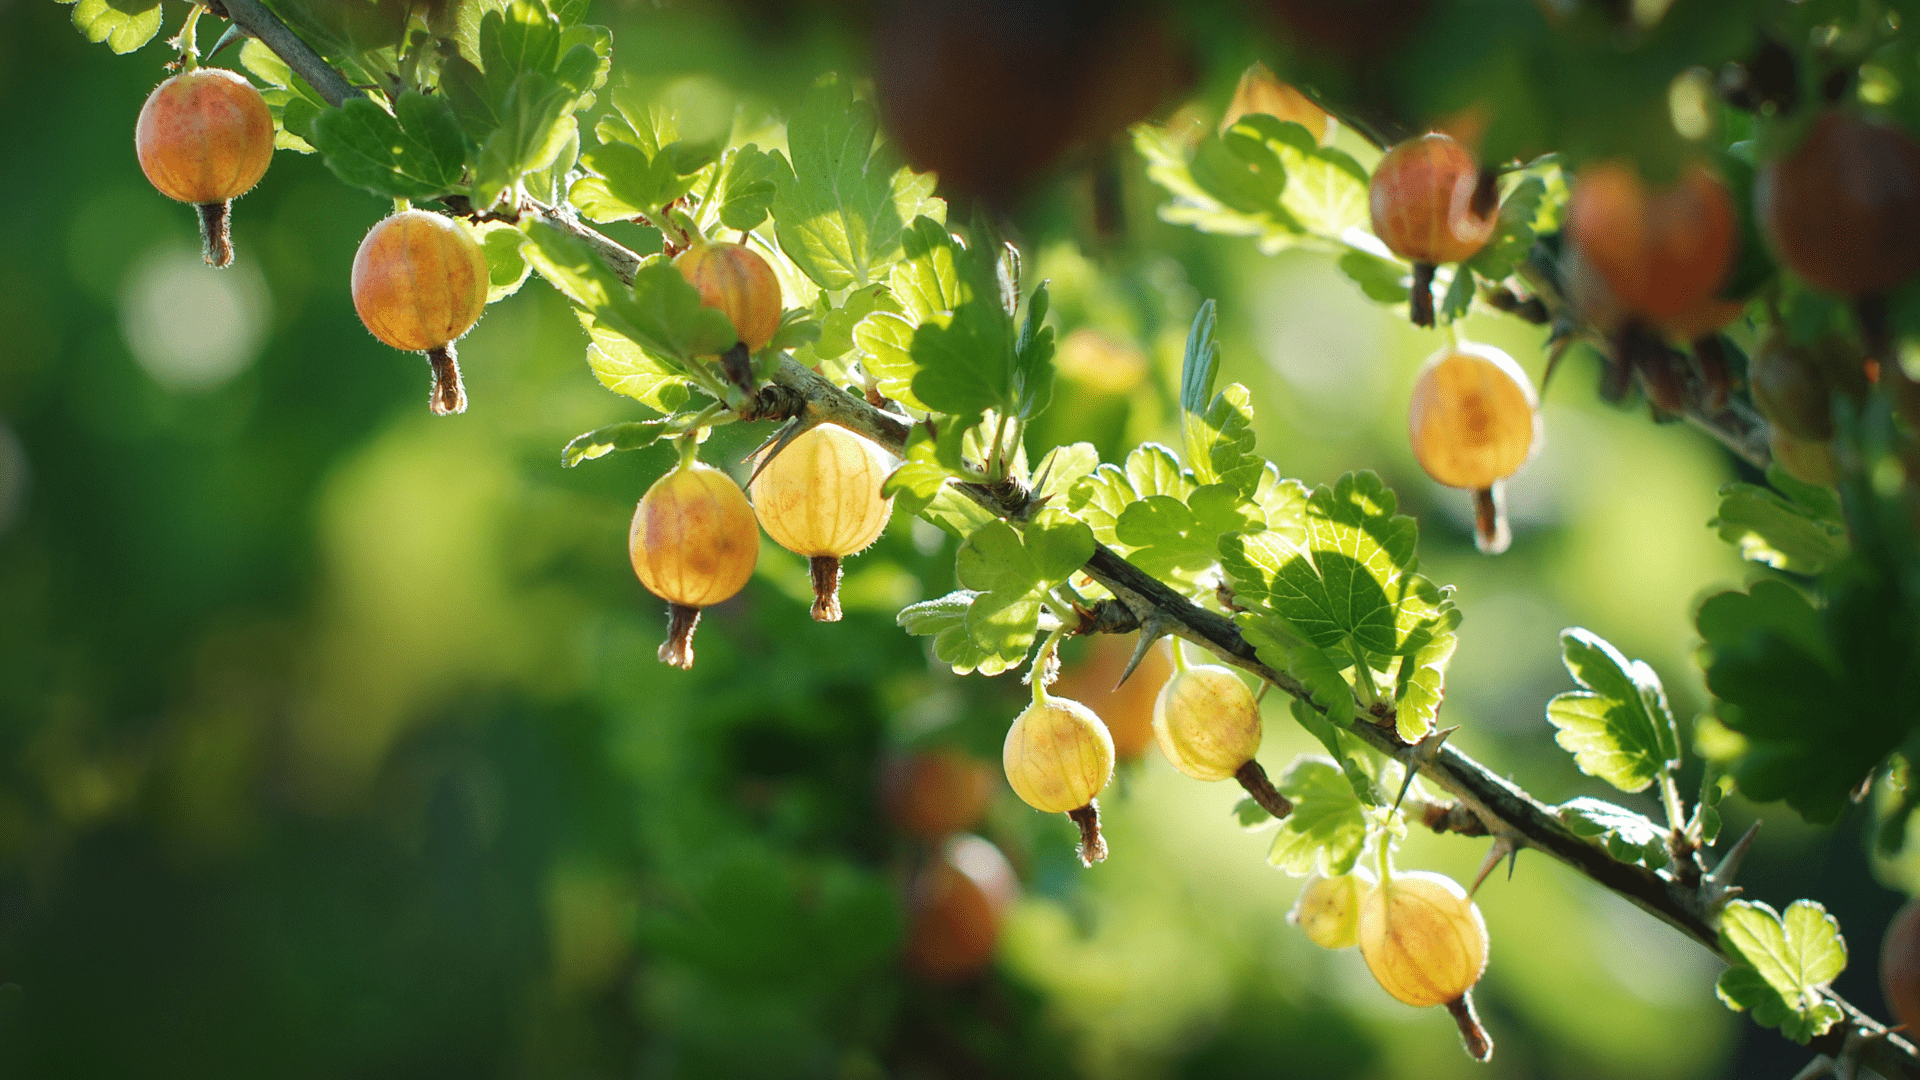
Depending on the variety and region, huckleberries typically ripen from mid to late summer.

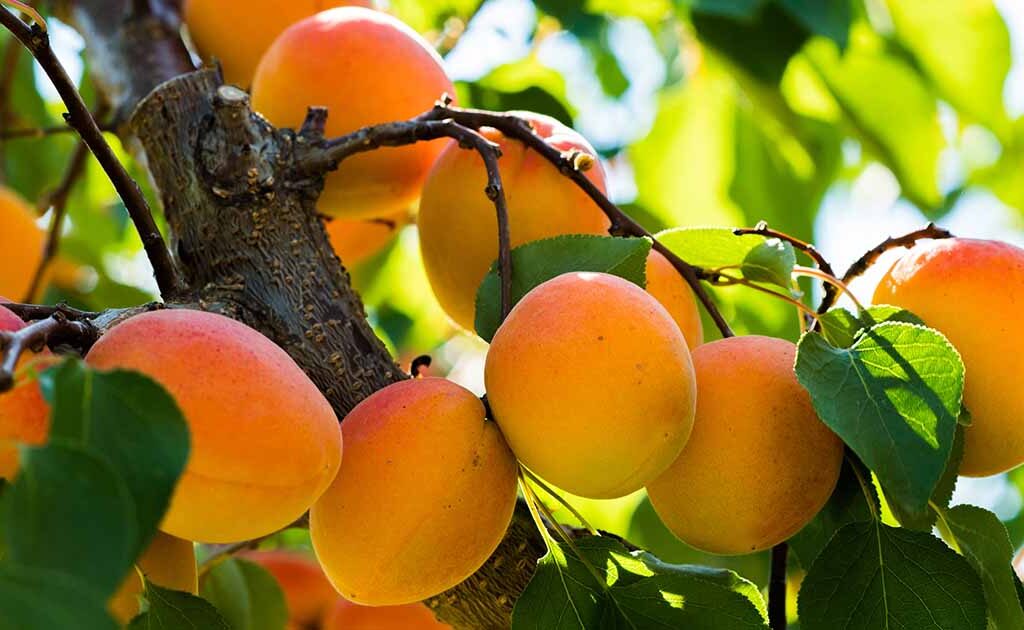
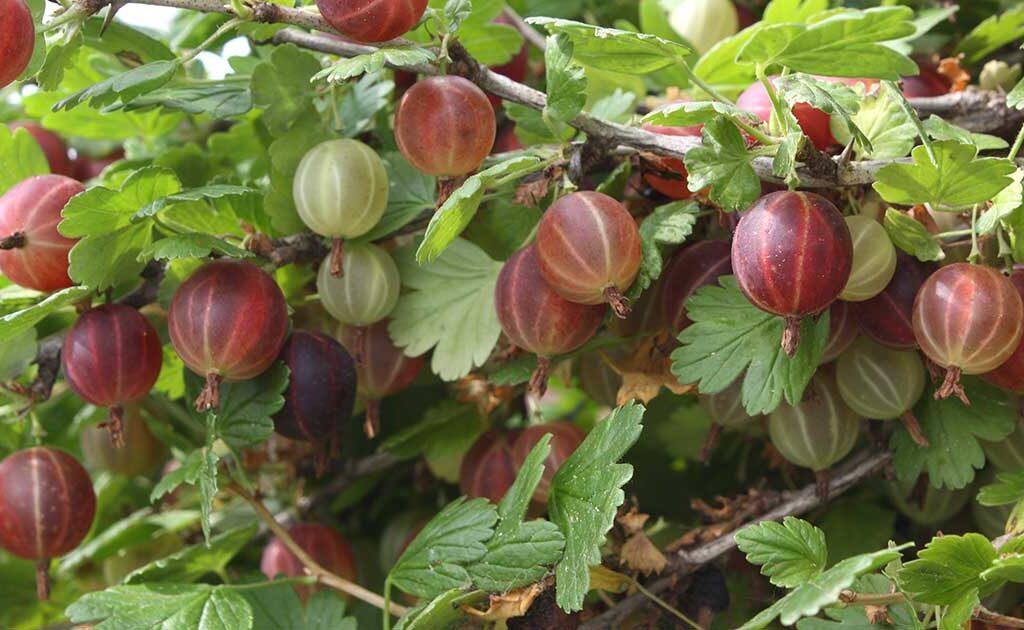
Signs they’re ready to harvest:

  • Fully colored, dark purple, black, or red (depending on type).
  • Easily detach when gently tugged.
  • Juicy and sweet-tart flavor.

Harvesting Tips:

  • Use your hands or berry combs for picking.
  • Harvest in the morning for best freshness.
  • Store berries in a cool place or freeze for long-term use.

Common Problems and Solutions

Though hardy, huckleberries can face a few challenges:

Leaf Yellowing

Cause: Poor soil drainage or alkaline soil.
Solution: Improve drainage and lower soil pH with acidifying materials.

Pests

While generally pest-resistant, watch for:

  • Aphids: Control with insecticidal soap or neem oil.
  • Birds: Protect ripening berries with bird netting.

Fungal Issues

In overly wet, poorly drained soils, root rot and mildew can occur. Avoid overwatering and ensure good air circulation.


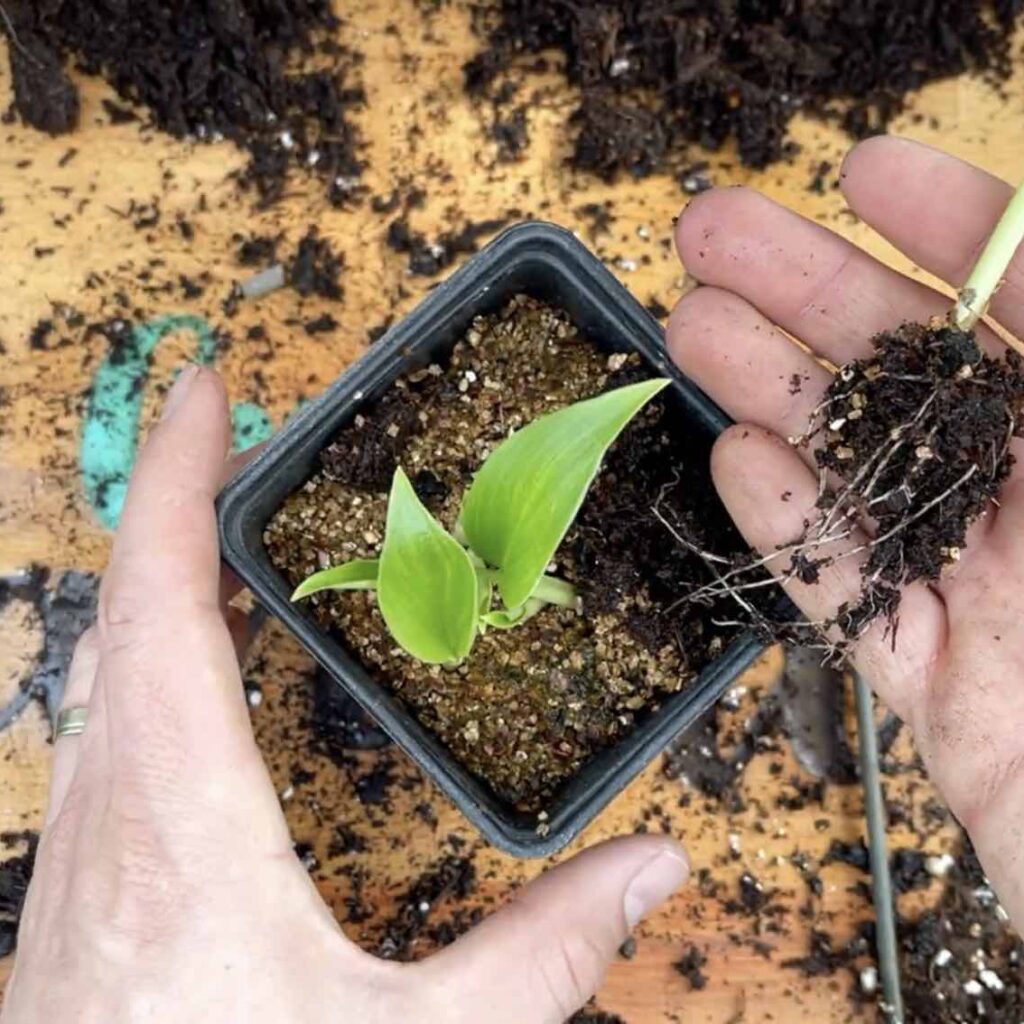
How to Propagate Huckleberries

Huckleberries can be propagated from:

  • Seed: Slow, requires stratification (cold exposure) for 2–3 months.
  • Cuttings: Take 6-inch semi-hardwood cuttings in summer.
  • Suckers: Separate and transplant young shoots from established plants.

Propagation by cuttings or suckers is faster and more reliable for home gardeners.


Companion Planting Ideas

In a wild garden, huckleberries pair beautifully with other native and woodland plants:

  • Ferns
  • Salal
  • Rhododendrons
  • Azaleas
  • Wild blueberries
  • Elderberries

These companions share similar soil and moisture preferences, creating a harmonious and ecologically beneficial planting.


Final Thoughts

Growing huckleberries in a wild garden is a deeply rewarding project for nature lovers and home gardeners alike. These native shrubs not only provide delicious, antioxidant-packed berries but also enhance the biodiversity and natural charm of your outdoor space.

With a little attention to soil acidity, water, and shade, your huckleberry patch can thrive for years — offering a steady harvest and an inviting haven for pollinators and wildlife.

So if you’re dreaming of foraging in your own backyard, plant a few huckleberries this season and watch your wild garden flourish.


FAQs

Q: Are huckleberries easy to grow in home gardens?
A: Yes — as long as you can replicate their preferred acidic, well-drained soil and partial shade conditions.

Q: How long do huckleberry bushes take to fruit?
A: Typically 2–4 years after planting, depending on the age of the plant and growing conditions.

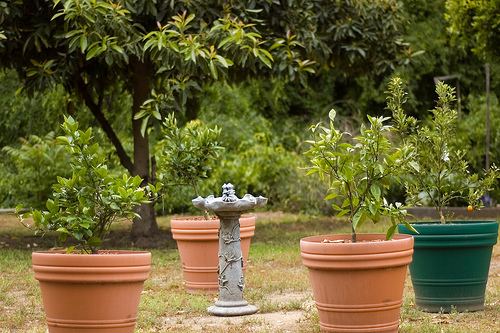
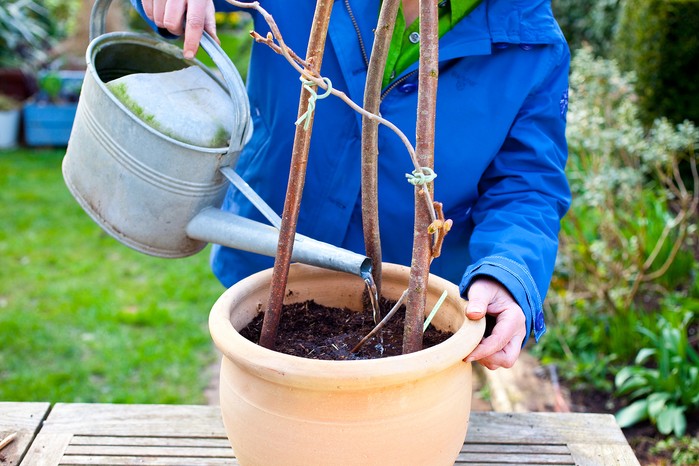
Q: Can I grow huckleberries in containers?
A: Yes, especially dwarf or evergreen varieties, provided the container is large, acidic soil is used, and proper drainage is maintained.

Q: Are huckleberries invasive?
A: No — they spread moderately through suckers but are not considered invasive in their native regions.

How to Grow Bananas Indoors: A Complete Guide for Lush, Tropical Greenery

How to Grow Bananas Indoors: A Complete Guide for Lush, Tropical Greenery

When you think of banana plants, you probably imagine sprawling groves in tropical climates — but did you know you can successfully grow bananas indoors too? With their lush, oversized leaves and exotic presence, indoor banana plants can instantly transform a room into a tropical paradise. And while it takes some care and attention, growing bananas indoors is entirely doable with the right conditions.

In this comprehensive guide, we’ll show you how to grow bananas indoors, from choosing the right variety to planting, caring, and even harvesting your own homegrown bananas.


Why Grow Bananas Indoors?

Banana plants (Musa species) are prized for more than just their fruit. Their large, paddle-like leaves add dramatic greenery to any indoor space, making them a favorite among houseplant enthusiasts and urban gardeners alike.

Benefits of growing bananas indoors:

  • Adds vibrant, tropical aesthetics to your home.
  • Purifies indoor air by removing toxins.
  • Fast-growing and easy to maintain with the right setup.
  • Some dwarf varieties can produce edible bananas indoors.

Even if you don’t grow them for fruit, indoor banana plants are beautiful foliage plants that can thrive with proper care.


Best Banana Varieties for Indoor Growing

Not all banana plants are suited for indoor conditions. For best results, choose dwarf or compact varieties bred specifically for container growing.

Top Indoor Banana Varieties:

  • Dwarf Cavendish (Musa acuminata ‘Dwarf Cavendish’)
    Compact, fast-growing, and capable of producing edible bananas indoors with the right care.
  • Super Dwarf Cavendish
    Even smaller than the Dwarf Cavendish, maxing out at 4–5 feet tall — perfect for smaller spaces.
  • Musa ‘Truly Tiny’
    The tiniest banana plant variety, ideal for tabletops or windowsills.
  • Musa basjoo
    Typically grown outdoors, but can adapt to large indoor containers as an ornamental foliage plant.

Ideal Conditions for Indoor Banana Plants

To thrive indoors, banana plants need to mimic their native tropical environment as closely as possible.

Light

Banana plants are sun-loving tropicals that need at least 6–8 hours of bright, indirect sunlight daily. Place your plant near a south or east-facing window. You can supplement with a full-spectrum grow light during darker winter months.

Temperature

Maintain indoor temperatures between 75°F and 95°F (24°C to 35°C) for optimal growth. Avoid placing your banana plant near drafts, air conditioners, or cold windows in winter.

Humidity

High humidity is essential. Aim for 50–70% humidity. Boost indoor moisture by:

  • Misting the leaves daily.
  • Using a pebble tray with water beneath the pot.
  • Running a room humidifier nearby.

Soil

Use a well-draining, fertile potting mix rich in organic matter. A mix of peat moss, perlite, and compost works well.

Tip: Ensure your pot has good drainage holes to prevent root rot.


How to Plant a Banana Indoors

Best Planting Time

You can plant a banana tree indoors any time of year, though spring and summer allow for faster establishment thanks to natural warmth and light.

Planting Steps:

  1. Choose a Large Pot: Start with a container at least 12–14 inches in diameter and deep enough to accommodate growing roots.
  2. Add Potting Mix: Fill the pot with your prepared soil mix.
  3. Plant the Banana: Place the banana plant so its root ball is level with the soil surface.
  4. Water Thoroughly: After planting, give it a good soak until water drains from the bottom.
  5. Position in Bright Light: Place the plant in a spot with plenty of bright, indirect sunlight.

Caring for Indoor Banana Plants

Bananas are fast growers and respond well to consistent care.

Watering

Banana plants like consistently moist but not soggy soil. Water when the top inch of soil feels dry. In summer, you may need to water every 2–3 days. Reduce watering in winter when growth slows.

Tip: Use room-temperature, filtered water if your tap water is heavily chlorinated.

Fertilizing

Feed your indoor banana plant every 2–3 weeks during the growing season (spring to early fall) using a balanced 10-10-10 liquid fertilizer or organic plant food.

Stop fertilizing in winter when the plant goes dormant.

Pruning

Remove old, yellowing, or damaged leaves at the base with clean scissors. This helps the plant focus energy on new growth.

Repotting

As fast growers, bananas quickly outgrow their containers. Repot every 1–2 years into a slightly larger pot with fresh soil.


Encouraging Indoor Banana Fruit Production

While many grow bananas indoors for their foliage, some dwarf varieties like Dwarf Cavendish can produce fruit under ideal conditions.

For best chances:

  • Provide maximum light via natural sunlight and supplemental grow lights.
  • Maintain consistent warmth and humidity.
  • Fertilize regularly during active growth.
  • Ensure your plant isn’t rootbound — it needs room to grow.

Note: It may take 2–3 years for indoor bananas to flower and fruit.


Common Indoor Banana Plant Problems

Brown Leaf Edges

Cause: Low humidity or inconsistent watering.
Solution: Mist daily, use a humidifier, and maintain even soil moisture.

Spider Mites & Aphids

Bananas can attract common indoor pests. Wipe leaves with a damp cloth and use insecticidal soap or neem oil for infestations.

No Fruit

Lack of sufficient light, warmth, or space can prevent flowering. Ensure ideal tropical-like conditions year-round.


How to Propagate Banana Plants

Banana plants propagate through suckers or pups — small shoots that emerge at the base of the mother plant.

Propagation Steps:

  1. Wait until pups are at least 12 inches tall.
  2. Use a sharp, sterile knife to separate the pup with a portion of roots attached.
  3. Plant the pup in a separate container with well-draining soil.
  4. Water thoroughly and place in bright light.

This is the easiest way to grow multiple banana plants indoors.


Final Thoughts

Growing bananas indoors may sound ambitious, but with the right care, it’s both rewarding and visually stunning. These tropical beauties brighten up any space with their dramatic leaves and fast growth. And while harvesting bananas indoors can be tricky, it’s not impossible — especially with compact dwarf varieties and careful attention to light, warmth, and humidity.

Whether you’re aiming for tropical decor or hoping to taste your own homegrown bananas, following this guide will set you up for indoor banana-growing success.


FAQs

Q: Can you grow bananas indoors year-round?
A: Yes! With consistent warmth, humidity, and light, bananas can grow indoors year-round.

Q: How big do indoor banana plants get?
A: Dwarf varieties like Super Dwarf Cavendish grow to 4–5 feet, while Dwarf Cavendish can reach 6–8 feet indoors.

Q: Are indoor bananas edible?
A: Yes — if your indoor banana plant flowers and fruits, the bananas are edible.

Q: Do banana plants purify indoor air?
A: Absolutely. Like many large-leafed plants, bananas help filter indoor air and add humidity.

How to Grow Quince Trees in the USA: A Complete Guide for Gardeners

How to Grow Quince Trees in the USA: A Complete Guide for Gardeners

If you’re searching for a unique fruit tree to add charm and flavor to your home orchard, consider the beautiful and aromatic quince. Though lesser-known than apples or pears, quince trees produce delightfully fragrant, pear-shaped fruits used in jellies, jams, and desserts. The good news is — quince trees are relatively easy to grow in many parts of the USA, especially in temperate and warm climates.

In this detailed guide, we’ll cover everything you need to know about how to grow quince trees in the USA — from selecting the right variety to planting, caring, and harvesting your very own quince fruits.


What is a Quince Tree?

The quince tree (Cydonia oblonga) is a deciduous fruit tree native to the Caucasus and parts of Southwest Asia. It belongs to the Rosaceae family, making it a relative of apples and pears. Quince trees are known for their beautiful, pale-pink blossoms in spring and golden-yellow fruits in late summer to fall.

Though the fruit is usually too hard and astringent to eat raw, it transforms into a fragrant, amber-hued delight when cooked — perfect for preserves, pies, syrups, and even savory dishes.


Why Grow Quince Trees?

Besides their culinary uses, quince trees offer several advantages:

  • Attractive ornamental value with lush green leaves and delicate pink blooms.
  • Low maintenance needs compared to other fruit trees.
  • Self-pollinating, meaning you usually don’t need multiple trees for fruit production.
  • Long lifespan, often bearing fruit for decades when properly cared for.

Best Quince Varieties for the USA

While quince is relatively adaptable, choosing a variety suited to your climate ensures success. Popular cultivars for American gardens include:

  • ‘Smyrna’: One of the most common varieties, produces large, aromatic fruits ideal for preserves.
  • ‘Pineapple’: Known for its pineapple-like fragrance and smooth-textured fruits.
  • ‘Rich’s Smyrna’: Hardy and dependable, suitable for many regions.
  • ‘Orange’: A reliable variety with golden-yellow fruits and high yields.

If you live in a colder USDA zone, look for cold-hardy types and consider planting in a sheltered location.


Ideal Growing Conditions for Quince Trees

To ensure healthy growth and abundant harvests, it’s important to provide your quince tree with the right growing environment:

Sunlight

Quince trees thrive in full sun. Aim for at least 6-8 hours of direct sunlight daily to encourage flowering and fruiting.

Soil

Well-drained, fertile soils with a pH between 6.0 and 7.0 are ideal. Loamy soil is best, though quince can tolerate clay if it drains well.

Tip: Avoid planting in areas prone to waterlogging, as standing water can lead to root rot.

Climate

Quince trees prefer temperate to warm climates. They grow well in USDA zones 5-9, though they may need protection from harsh winter winds in colder areas.


How to Plant a Quince Tree

Best Planting Time

Plant quince trees in early spring or late fall when the tree is dormant. This allows the roots to establish before active growth begins.

Step-by-Step Planting Guide

  1. Choose a Location: Select a sunny, sheltered spot with well-draining soil.
  2. Prepare the Soil: Enrich the planting site with compost or well-rotted manure to improve fertility.
  3. Dig a Hole: Make the hole twice as wide and just as deep as the root ball.
  4. Position the Tree: Place the quince tree in the hole, ensuring the graft union (swollen area near the base of the trunk) is slightly above soil level.
  5. Backfill: Refill the hole with soil, firming gently to eliminate air pockets.
  6. Water Thoroughly: Give the tree a good soak after planting.
  7. Mulch: Apply a 2-3 inch layer of organic mulch around the base to retain moisture and suppress weeds.

Caring for Quince Trees

Once planted, quince trees require regular care to thrive:

Watering

Keep the soil consistently moist, especially during the first year. Mature trees can tolerate short dry spells but benefit from deep watering during fruit development.

Fertilizing

Feed your quince tree in early spring using a balanced 10-10-10 fertilizer or organic compost. Avoid excessive nitrogen, as it promotes leafy growth over fruit production.

Pruning

Prune quince trees in late winter to:

  • Remove dead, diseased, or crossing branches.
  • Maintain an open center for better air circulation.
  • Shape the tree and encourage new fruiting wood.

Pest & Disease Management

Common quince issues include:

  • Fire blight: A bacterial disease causing blackened, withered branches.
  • Aphids: Can distort leaves and weaken growth.
  • Codling moth: Larvae burrow into fruits.

Prevention Tips:

  • Remove fallen fruit and leaves.
  • Use horticultural oil in early spring.
  • Practice good pruning and sanitation.

How to Harvest and Use Quince

When to Harvest

Quince fruits are typically ready in late summer to early fall when they turn from green to golden yellow and emit a sweet, floral aroma.

How to Use Quince

Since raw quince is too hard and tart, it’s best used cooked:

  • Quince jelly or jam
  • Poached quince
  • Quince paste (membrillo) served with cheese
  • Baked into tarts and pies
  • Added to stews for a fragrant twist

Pro tip: Storing quince for a few weeks after harvest can mellow its flavor and increase aroma.


Propagating Quince Trees

If you’d like to grow more quince trees, you can propagate them through:

  • Grafting (most reliable)
  • Softwood cuttings in summer
  • Root suckers from the parent tree

Seed propagation is possible but not recommended for fruiting trees, as offspring may not resemble the parent.


Final Thoughts

Quince trees are a rewarding addition to American home orchards, offering beauty, fragrance, and flavorful fruits perfect for preserving and cooking. With their hardy nature and relatively simple care requirements, they’re ideal for gardeners seeking something a little different from the usual apple or pear tree.

Whether you’re looking to create jars of golden quince jelly or simply enjoy a tree adorned with spring blossoms, following the guidance in this article will help you grow healthy, productive quince trees in the USA.


FAQs

Q: How long does it take for a quince tree to bear fruit?
A: Most quince trees start producing fruit 3-5 years after planting.

Q: Can quince trees tolerate frost?
A: Mature quince trees can handle light frosts, but late spring frosts may damage blossoms and reduce fruit set.

Q: Are quince fruits good for fresh eating?
A: Typically no — quince is best enjoyed cooked as it’s hard and astringent when raw.

How to Grow Apricots in Warmer Zones: A Complete Gardener’s Guide

How to Grow Apricots in Warmer Zones: A Complete Gardener’s Guide

If you’ve ever tasted a sun-ripened apricot fresh from the tree, you’ll know it’s a world apart from store-bought varieties. Sweet, juicy, and bursting with flavor, apricots are one of the most rewarding fruits to grow at home. The good news? If you live in a warmer zone — USDA zones 7–10 — you’re in a prime position to successfully grow these golden, fragrant fruits in your own backyard.

In this guide, we’ll walk you through how to grow apricots in warmer zones, from choosing the right variety to planting, caring, and harvesting your fruit for seasons to come.


Why Grow Apricots at Home?

Growing apricots offers a host of benefits beyond the pleasure of fresh, organic fruit:

  • Chemical-free, homegrown produce
  • Beautiful spring blossoms that attract pollinators
  • Versatile fruit for fresh eating, jams, drying, and baking
  • Compact tree options for small gardens or patio containers

If you’re in a warm region with plenty of sunshine and mild winters, apricots are a natural fit for your edible garden.


Best Apricot Varieties for Warmer Zones

The key to apricot-growing success lies in choosing varieties that thrive in your climate. In warmer regions, you’ll want types that require fewer chilling hours (the cumulative number of hours between 32–45°F in winter necessary to set fruit).

Top Apricot Varieties for Warm Zones:

  1. Katy – Early ripening, low-chill variety needing around 300 chilling hours.
  2. Blenheim (Royal) – Classic, flavorful, and reliable in mild-winter climates.
  3. Gold Kist – Requires about 300 chilling hours and produces early, sweet fruit.
  4. Tropic Gold – A great apricot for hot summers and mild winters, needing only 300–400 chilling hours.
  5. Autumn Glo – Late-harvest apricot perfect for extending the fruit season.

Tip: Opt for self-pollinating varieties like Katy and Tropic Gold if you have limited space.


Where and How to Plant Apricot Trees

Site Selection:

Apricots love full sun and well-drained soil. Choose a location that receives at least 6–8 hours of direct sunlight daily and is protected from strong winds.

Ideal Soil:

  • Sandy loam or loamy soil
  • pH between 6.0–7.5
  • Good drainage is essential to prevent root rot

Tip: If you have heavy clay soil, amend it with organic matter or consider planting in a raised bed or large container.


Planting Steps:

  1. Timing:
    Plant bare-root trees in late winter or early spring. Container-grown trees can go in any time the soil is workable.
  2. Prepare the Soil:
    Dig a hole twice the width of the root ball and as deep. Mix in compost and aged manure for added nutrients.
  3. Plant the Tree:
    Set the tree at the same depth it grew in the nursery. Backfill with soil, gently firming it in.
  4. Water Thoroughly:
    Water deeply after planting and keep the soil evenly moist, especially in the first year.
  5. Mulch:
    Apply a 2–3 inch layer of organic mulch, keeping it a few inches away from the trunk to deter pests and prevent rot.

Growing Apricots in Containers

If space is tight, or you want a portable option, apricots do well in large containers.

You’ll need:

  • A pot at least 20–24 inches wide and deep
  • Well-draining potting mix with added organic compost
  • A low-chill, self-fertile dwarf variety

Care Tips:

  • Place in a sunny, sheltered spot
  • Water more frequently than in-ground trees
  • Feed with a balanced fertilizer in spring and summer

Watering and Feeding Apricot Trees

Watering:

  • Water young trees deeply once or twice a week during dry spells
  • Mature trees need consistent moisture during fruit development, but avoid waterlogged soil
  • Reduce watering in late summer to help harden new growth for winter

Feeding:

  • Feed in early spring with a balanced fertilizer (10-10-10)
  • Apply compost or well-rotted manure around the base annually
  • Use a potassium-rich feed (like tomato fertilizer) during fruiting for better yields

Pruning Apricot Trees

Pruning is essential for maintaining a manageable size, improving airflow, and boosting fruit production.

When to Prune:

  • In late spring or early summer, after harvesting
  • Avoid pruning in winter to reduce the risk of disease like silver leaf

How to Prune:

  • Remove any dead, diseased, or crossing branches
  • Thin out crowded growth to let light into the canopy
  • Aim for an open, vase-like shape to improve air circulation and fruit access

Protecting Apricots from Pests and Diseases

Apricots are fairly resilient in warmer climates, but they can still face a few challenges.

Common Pests:

  • Aphids: Control with insecticidal soap or neem oil
  • Fruit borers: Remove affected fruit and prune out damaged limbs
  • Birds: Use netting as fruit ripens to protect your harvest

Common Diseases:

  • Brown Rot: A fungal disease causing fruit to rot. Prevent with good pruning and by removing any fallen fruit.
  • Bacterial Canker: Look for sunken, gumming lesions on branches. Prune affected areas and improve air circulation.

Tip: Practice good garden hygiene by clearing fallen leaves and debris to reduce disease risks.


When and How to Harvest Apricots

Apricots generally ripen in early to mid-summer, depending on your variety and location.

Signs of ripeness:

  • Full golden-orange color
  • Slight softness to the touch
  • A sweet, aromatic scent

Harvesting Tips:

  • Gently twist the fruit off the branch
  • Handle carefully — apricots bruise easily
  • Harvest over several days as they ripen in batches

Storing and Using Apricots

Fresh apricots are best enjoyed within a few days of harvesting but can be preserved in various ways.

Storage Options:

  • Refrigerate for up to 5 days
  • Freeze for smoothies or baking
  • Dry using a dehydrator for healthy snacks
  • Make jams, jellies, chutneys, or fruit leather

Tips for Success in Warmer Zones

  • Choose low-chill varieties
  • Protect from hot, dry winds with a fence or windbreak
  • Use mulch to retain soil moisture during scorching summers
  • Plant in a spot with good air circulation to prevent disease
  • Avoid excessive nitrogen fertilizers, which can lead to soft, disease-prone fruit

Final Thoughts

Growing apricots in warmer zones is both achievable and rewarding. With the right variety selection, sunny planting site, and consistent care, you’ll be enjoying baskets of luscious, homegrown apricots in just a few seasons. Whether you have a generous backyard or a sunny patio, apricots can easily find a home in your edible landscape.

Why settle for store-bought when you can pick your own sun-warmed fruit right outside your door? Start planting today — your future summer harvest is waiting.

How to Grow Nectarines in a Small Garden: A Complete Guide for Home Gardeners

How to Grow Nectarines in a Small Garden: A Complete Guide for Home Gardeners

There’s something wonderfully satisfying about growing your own fruit, and nectarines — with their smooth skin, sweet fragrance, and juicy flesh — are a beautiful addition to any home garden. The best part? You don’t need a sprawling orchard to enjoy homegrown nectarines. With careful planning, proper care, and a little creativity, nectarines can thrive in small gardens, patios, or even containers.

In this guide, we’ll walk you through everything you need to know about how to grow nectarines in a small garden, from choosing the right variety to planting, pruning, and harvesting these sun-kissed fruits.


Why Grow Nectarines at Home?

Aside from their irresistible flavor, growing nectarines in your own space offers plenty of perks:

  • Chemical-free, homegrown fruit you can trust
  • Attractive trees that add beauty to small gardens
  • Compact, dwarf, or patio varieties perfect for limited space
  • The satisfaction of harvesting sun-ripened nectarines at their peak

If you’ve never tried growing nectarines before, you might be surprised at how achievable it can be — even in a small backyard or balcony.


Choosing the Right Nectarine Variety

When gardening in a limited space, selecting the right tree variety is crucial. Fortunately, many dwarf and semi-dwarf nectarine trees are available that stay compact while still producing generous harvests.

Best Nectarine Varieties for Small Gardens:

  1. ‘Necta Zee’ – A dwarf, self-pollinating variety with rich, sweet fruit. Perfect for containers or tight spaces.
  2. ‘Golden Prolific’ – Compact, heavy-cropping, and ideal for small patios.
  3. ‘Arctic Star’ – Early ripening, sweet, and self-pollinating with beautiful red-skinned fruit.
  4. ‘Flavortop’ – Semi-dwarf, known for large, juicy nectarines.

Tip: Choose a self-fertile variety for small gardens to avoid needing multiple trees for pollination.


Where to Plant Nectarines

Nectarine trees need full sun and protection from harsh winds to thrive and produce the sweetest fruit.

Ideal Conditions:

  • At least 6–8 hours of sunlight daily
  • Well-drained, fertile soil with a pH of 6.0–7.0
  • A sheltered spot against a wall or fence to absorb warmth and shield from wind

If your garden is especially small, espalier training against a fence or growing in a large container are excellent options.


How to Plant Nectarines in a Small Garden

Planting in the Ground:

  1. Timing:
    Plant bare-root trees in late winter or early spring. Potted trees can be planted any time.
  2. Prepare the soil:
    Dig a hole twice as wide and as deep as the root ball. Mix in compost and well-rotted manure for added nutrients.
  3. Plant the tree:
    Place it at the same depth as it was in the nursery pot. Backfill with soil, firm gently, and water well.
  4. Mulch:
    Apply a 2–3 inch layer of organic mulch to retain moisture and suppress weeds, keeping it away from the trunk.

Planting in a Container:

Growing nectarines in pots is perfect for patios and balconies.

You’ll need:

  • A container at least 18–24 inches wide and deep
  • Well-draining potting mix with added organic matter
  • A dwarf or patio nectarine variety

Steps:

  1. Ensure good drainage by adding gravel or crocks to the base.
  2. Plant the tree at the same depth as in its nursery container.
  3. Top up with compost, firm gently, and water thoroughly.
  4. Position in a sunny, sheltered spot.

Watering and Feeding Nectarines

Watering:

  • Keep the soil evenly moist, especially during dry spells and fruit development.
  • Avoid overwatering or letting the soil dry out completely.

Tip: Container-grown trees will need more frequent watering, especially in hot weather.

Feeding:

  • Feed in early spring with a balanced, slow-release fertilizer.
  • Supplement with liquid seaweed or tomato feed during the growing season for a nutrient boost.
  • Add compost or organic mulch annually to enrich soil health.

Pruning Nectarines for a Small Garden

Regular pruning is essential for keeping nectarine trees compact, productive, and healthy in small spaces.

When to Prune:

  • Prune in late spring to early summer, after flowering and fruit set.
  • Avoid winter pruning to reduce the risk of silver leaf disease.

How to Prune:

  • Remove any dead, damaged, or diseased branches.
  • Thin out crowded growth to allow light and air to reach the fruit.
  • Maintain an open center shape, especially for espalier-trained trees.
  • Shorten vigorous shoots to encourage fruit-bearing spurs.

Espalier trees can be pruned into attractive horizontal shapes along a fence, saving space while boosting yields.


Protecting Nectarines from Pests and Diseases

Like all fruit trees, nectarines can be susceptible to certain pests and diseases.

Common Pests:

  • Aphids: Spray with insecticidal soap or neem oil.
  • Spider mites: Increase humidity and use water sprays or horticultural oil.
  • Birds: Cover trees with netting as fruit ripens.

Common Diseases:

  • Peach Leaf Curl: A fungal disease causing puckered, reddish leaves. Prevent with a copper-based fungicide spray in winter and again before bud break in spring.
  • Brown Rot: Causes fruit to rot on the tree. Remove affected fruit and prune regularly for air circulation.

Tip: Clean up fallen leaves and fruit promptly to prevent disease spread.


When and How to Harvest Nectarines

Nectarines are typically ready for harvest in mid to late summer, depending on the variety.

Signs nectarines are ripe:

  • Fully colored skin with no green patches
  • A slight give when gently pressed
  • A sweet, fruity aroma

Harvesting Tips:

  • Twist the fruit gently from the branch.
  • Avoid pulling to prevent damaging the tree.
  • Handle nectarines carefully — they bruise easily.

Pro tip: Pick nectarines as they ripen. Unlike some fruits, they don’t continue to ripen much off the tree.


Storing and Enjoying Your Nectarines

Fresh nectarines are best enjoyed within a few days of picking, but you can also store them:

  • In the fridge for 3–5 days
  • Freeze for smoothies, desserts, or winter use
  • Make jams, chutneys, or pies

Nothing beats the taste of homegrown nectarines — sweet, juicy, and grown with love.


Final Thoughts

Growing nectarines in a small garden is a delightful, achievable project for any home gardener. With the right variety, a sunny spot, good soil, and careful care, you can enjoy baskets of sun-ripened nectarines straight from your own backyard or balcony.

Whether you plant in the ground, espalier against a fence, or nurture a dwarf variety in a container, nectarines will reward you with lush greenery, beautiful blossoms, and irresistible summer fruit.

So why not give it a try this season? Your garden — and your tastebuds — will thank you.

How to Grow Boysenberries for Homemade Jams: A Complete Gardener’s Guide

How to Grow Boysenberries for Homemade Jams: A Complete Gardener’s Guide

There’s nothing quite like the taste of homemade boysenberry jam — sweet, slightly tart, and bursting with deep, rich flavor. But did you know you can easily grow boysenberries right in your own backyard? Whether you’re a seasoned gardener or a beginner looking to dive into berry cultivation, boysenberries are a rewarding and fruitful addition to your garden.

In this comprehensive guide, we’ll walk you through everything you need to know about how to grow boysenberries, from planting and caring for them to harvesting and turning those luscious berries into delicious homemade jams.


What Are Boysenberries?

Boysenberries are a unique and flavorful hybrid fruit, a cross between blackberries, raspberries, and loganberries. They produce large, dark purple berries with a juicy, sweet-tart taste perfect for jams, jellies, pies, and fresh eating.

Fun Fact: The boysenberry was popularized in the 1930s by Walter Knott of Knott’s Berry Farm in California, and it remains a favorite among berry lovers today.


Why Grow Boysenberries?

Growing boysenberries at home is not only fun and satisfying but also practical:

  • Fresh, chemical-free harvest right from your garden
  • Perfect for making homemade jams, syrups, and desserts
  • Beautiful plants that add rustic charm to your landscape
  • A productive berry that yields up to 10–20 pounds per plant

Choosing the Right Boysenberry Variety

When selecting boysenberries for your home garden, you’ll typically find two types:

1. Thorny Boysenberries

  • Traditional variety with sharp thorns
  • Often considered more flavorful and slightly hardier

2. Thornless Boysenberries

  • Easier to handle and harvest
  • Produces similarly delicious berries

Both thrive in USDA zones 5–9, though they’ll appreciate a little winter protection in colder climates.


Where and When to Plant Boysenberries

Best Planting Time:

  • Early spring after the danger of frost passes, or late fall in mild climates

Ideal Site Conditions:

  • Full sun (at least 6–8 hours daily)
  • Well-drained, loamy soil rich in organic matter
  • Slightly acidic soil with a pH of 5.5–7.0
  • A location sheltered from strong winds

Avoid planting where tomatoes, peppers, eggplants, or potatoes have recently grown, as these can carry soil-borne diseases harmful to boysenberries.


How to Plant Boysenberries

Planting Instructions:

  1. Prepare the site:
    Loosen the soil to a depth of 12–18 inches and mix in compost or aged manure.
  2. Dig holes:
    Twice the width and depth of the plant’s root ball.
  3. Spacing:
    Space plants 4–6 feet apart, with rows about 8–10 feet apart.
  4. Plant:
    Set the boysenberry plant at the same depth it grew in its nursery pot.
  5. Backfill:
    Use a mix of native soil and compost, firming gently.
  6. Water thoroughly after planting.
  7. Mulch:
    Apply a 2–3 inch layer of mulch to retain moisture and suppress weeds.

Supporting Boysenberry Vines

Boysenberries grow as trailing vines, which means they need support to stay healthy and productive.

Trellis or Wire Support:

  • Install sturdy wooden posts 6–8 feet apart.
  • Run wires horizontally at 2, 4, and 6-foot heights.
  • Tie vines loosely to the wires with garden twine or plant ties.

This keeps the fruit clean, improves air circulation, and makes harvesting easier.


Watering and Fertilizing Boysenberries

Watering:

  • Boysenberries need 1–2 inches of water per week.
  • Keep the soil consistently moist, especially during flowering and fruiting.
  • Avoid waterlogged soil to prevent root rot.

Fertilizing:

  • Apply a balanced fertilizer (like 10-10-10) in early spring as new growth appears.
  • Side-dress with compost or organic mulch during the growing season.
  • Avoid high-nitrogen fertilizers, which can promote excessive leafy growth at the expense of fruit.

Pruning Boysenberries

Proper pruning improves fruit production and keeps your plants healthy.

Types of Canes:

  • Primocanes: First-year growth (will bear fruit the next year)
  • Floricanes: Second-year canes (produce fruit, then die)

When and How to Prune:

  1. Summer (after harvest):
    Cut all spent floricanes to the ground.
    Tie new primocanes to the trellis.
  2. Winter (dormant season):
    Thin out weak or overcrowded primocanes, leaving 5–7 of the strongest per plant.
  3. During the growing season:
    Train canes along the trellis as they grow, and pinch back the tips of lateral branches to encourage side shoots and more fruit.

Common Pests and Diseases

While relatively hardy, boysenberries can occasionally encounter pests and diseases.

Common Pests:

  • Aphids: Spray with neem oil or insecticidal soap.
  • Spider mites: Control with water sprays or horticultural oil.
  • Birds: Use bird netting during ripening season.

Common Diseases:

  • Botrytis (gray mold): Avoid overcrowding and water at the base.
  • Powdery mildew: Improve air circulation and treat with organic fungicides.
  • Root rot: Ensure well-drained soil and avoid overwatering.

When and How to Harvest Boysenberries

Boysenberries are ready for harvest in early to mid-summer when they turn a deep purple-black and are soft to the touch.

Harvesting Tips:

  • Pick berries early in the morning when they’re cool and firm.
  • Gently twist berries off the vine — they should detach easily.
  • Handle with care, as boysenberries are delicate and bruise easily.

Note: Boysenberries don’t continue to ripen after picking, so harvest when fully ripe.


Making Homemade Boysenberry Jam

Once you’ve gathered your juicy harvest, it’s time for the fun part — turning them into homemade jam!

Simple Boysenberry Jam Recipe:

Ingredients:

  • 4 cups fresh boysenberries
  • 2 cups granulated sugar (adjust to taste)
  • 2 tablespoons lemon juice

Instructions:

  1. Rinse berries gently and remove stems.
  2. In a saucepan, combine berries, sugar, and lemon juice.
  3. Mash berries slightly and bring to a boil over medium-high heat.
  4. Stir frequently and simmer for 15–20 minutes until thickened.
  5. Test consistency by placing a small spoonful on a chilled plate — it should set after cooling.
  6. Pour into sterilized jars and seal.

Enjoy your jam on toast, in pastries, or as a topping for yogurt and desserts!


Final Thoughts

Growing boysenberries at home is a deeply rewarding gardening adventure that offers not only beautiful, productive plants but also baskets of sweet, tangy berries perfect for jams, desserts, and fresh eating. With the right care — plenty of sun, rich soil, regular pruning, and sturdy supports — your boysenberry vines will reward you year after year.

Whether you’re new to gardening or an experienced grower, boysenberries are a must-have for any backyard berry patch. So roll up your sleeves, plant a few canes this season, and get ready for the delightful experience of making your very own homemade boysenberry jam.

How to Grow Kiwi Vines at Home: A Complete Gardener’s Guide

How to Grow Kiwi Vines at Home: A Complete Gardener’s Guide

If you’ve ever dreamed of harvesting your own juicy, sweet, and slightly tangy kiwis right from your backyard, you’ll be delighted to know that growing kiwi vines at home is entirely possible — and surprisingly rewarding. While most people think of kiwis as tropical fruit, many hardy and semi-hardy varieties thrive in a range of U.S. climates.

This guide will walk you through everything you need to know, from choosing the right variety to planting, caring, pruning, and harvesting kiwi vines. By the end, you’ll be well-equipped to cultivate your own productive and beautiful kiwi vines at home.


Why Grow Kiwi Vines?

Kiwi vines aren’t just about the fruit — they’re fast-growing, ornamental climbers that can add lush, green beauty to your garden while offering nutrient-packed fruit loaded with vitamin C, antioxidants, and fiber. A single mature vine can produce up to 100 pounds of fruit in a season, making it a worthwhile addition for home gardeners.

Bonus: Kiwi vines also make a stunning natural shade covering for pergolas, fences, and trellises.


Types of Kiwi Vines

There are several types of kiwis suitable for home gardening, each with unique characteristics:

1. Hardy Kiwi (Actinidia arguta)

  • Tolerates colder climates (USDA Zones 4–9)
  • Smaller, smooth-skinned fruits (can be eaten whole)
  • Vigorous and productive
  • Popular varieties: ‘Anna’, ‘Geneva’, ‘Issai’ (self-fertile)

2. Super Hardy Kiwi (Actinidia kolomikta)

  • Withstands extreme cold (Zones 3–8)
  • Produces tiny, grape-sized fruits
  • Attractive foliage with pink, white, and green variegation
  • Typically requires male and female plants

3. Fuzzy Kiwi (Actinidia deliciosa)

  • Traditional supermarket kiwi
  • Larger, fuzzy-skinned fruits
  • Thrives in warmer regions (Zones 7–9)
  • Popular varieties: ‘Hayward’ (needs both male and female plants)

Choosing the Right Variety for Your Region

Before planting, select a kiwi variety compatible with your climate and available garden space:

  • Northern states (cold winters): Hardy or super hardy kiwi
  • Southern states (mild winters): Fuzzy kiwi
  • Limited space: ‘Issai’ (self-fertile, compact)

Pro Tip: Most kiwi vines are dioecious — meaning they have separate male and female plants. You’ll need at least one male for every 6–8 female vines for successful pollination, unless you plant a self-fertile variety like ‘Issai’.


Where and When to Plant Kiwi Vines

Best Planting Time:

  • Early spring (after the last frost) or fall (in mild climates)

Ideal Site Conditions:

  • Full sun (at least 6–8 hours daily)
  • Sheltered spot protected from strong winds and late frosts
  • Well-drained, loamy soil rich in organic matter
  • pH between 5.5–7.0

Kiwis need space to climb and spread — plan for a sturdy trellis, arbor, or fence.


How to Plant Kiwi Vines

Planting Instructions:

  1. Prepare the site:
    Loosen the soil to a depth of 12–18 inches, mixing in compost or aged manure.
  2. Dig a hole:
    Twice as wide and as deep as the root ball.
  3. Position the vine:
    Plant at the same depth as it grew in the nursery container.
  4. Backfill:
    With soil and compost mix, firming gently.
  5. Water thoroughly after planting.
  6. Mulch:
    Apply a 2–3 inch layer of mulch to retain moisture and suppress weeds, keeping it away from the base of the stem.

Spacing:

  • Hardy/super hardy kiwis: 10–15 feet apart
  • Fuzzy kiwis: 15–20 feet apart
  • Self-fertile types: 8–10 feet apart

Building a Support System

Kiwi vines grow vigorously and need strong support structures like:

  • Trellises
  • Arbors
  • Pergolas
  • Wires stretched between sturdy posts

Construct supports before planting to avoid damaging roots later.

Training Tip:
Tie young vines loosely to the structure and encourage one main leader stem upward, removing side shoots until it reaches the top.


Watering and Feeding Kiwi Vines

Watering:

  • Keep soil consistently moist, especially during the first two years.
  • Mature vines require 1–2 inches of water per week, more during hot, dry spells.
  • Avoid waterlogged soil, which can lead to root rot.

Fertilizing:

  • In early spring, apply a balanced fertilizer (like 10-10-10) or compost.
  • Side-dress with compost or organic mulch in summer.
  • Avoid over-fertilizing with nitrogen, which promotes leaf growth over fruit production.

Pruning Kiwi Vines

Regular pruning is crucial for healthy, productive kiwi vines.

When to Prune:

  • Winter (dormant season): Remove dead, damaged, or overcrowded branches.
  • Summer: Thin out excess new growth and train remaining shoots.

Pruning Tips:

  • Maintain one strong central leader.
  • Remove any weak side shoots.
  • Keep fruiting canes (last year’s growth) well-spaced for good air circulation.
  • Trim back vines to 6–8 leaves beyond the last fruit cluster during the growing season.

Proper pruning increases fruit quality and prevents tangled, overgrown vines.


Common Pests and Problems

Kiwi vines are generally hardy, but watch for:

  • Aphids: Control with insecticidal soap or water sprays.
  • Spider mites: Treat with neem oil or horticultural oil.
  • Root rot: Avoid waterlogged soil and improve drainage.
  • Late frost damage: Protect young shoots in early spring with row covers.

Good airflow and pruning help prevent fungal diseases like powdery mildew.


When and How to Harvest Kiwi Fruit

Hardy & Super Hardy Kiwis:

  • Harvest late summer to early fall when fruits soften slightly and taste sweet.
  • Can be picked firm and ripened indoors at room temperature.

Fuzzy Kiwis:

  • Harvest in fall (before the first frost) when seeds turn black and fruit softens.
  • Store firm fruit in a cool, dark place for ripening over several weeks.

Pro Tip: Ripe kiwis yield slightly to gentle pressure and detach easily from the vine.


Propagating Kiwi Vines

Eager to grow more kiwis? They can be propagated from:

Softwood Cuttings (Early Summer):

  • Take 6–8 inch cuttings from new, green growth.
  • Remove lower leaves and dip the cut end in rooting hormone.
  • Plant in moist potting mix under partial shade.

Hardwood Cuttings (Winter):

  • Cut 8–12 inch sections of dormant, one-year-old wood.
  • Plant directly in prepared beds or pots until new growth appears.

Final Thoughts

Growing kiwi vines at home is a rewarding gardening project that offers both tropical-style beauty and a bounty of sweet, nutritious fruit. With the right variety selection, a sunny site, sturdy supports, and consistent care, you can enjoy lush greenery and homegrown kiwis for years to come.

So whether you have a sprawling backyard, a sunny fence line, or a cozy pergola, why not give kiwi vines a try this season? Not only will your garden look stunning, but you’ll have baskets of fresh, vitamin-rich kiwis to share with family and friends.

How to Grow Elderberries for Immune-Boosting Syrups: A Complete Gardener’s Guide

How to Grow Elderberries for Immune-Boosting Syrups: A Complete Gardener’s Guide

Elderberries have long been cherished for their health benefits, especially as the key ingredient in immune-boosting syrups used to ward off colds and flu. These beautiful, hardy shrubs are easy to grow in many parts of the United States, producing clusters of fragrant white flowers in spring followed by rich, purple-black berries in late summer.

If you’ve ever wanted to grow your own medicinal plants or create homemade elderberry syrups, this guide will walk you through how to grow elderberries successfully, from planting to harvesting, along with tips on how to turn those berries into a delicious, health-boosting syrup.


Why Grow Elderberries?

Beyond their ornamental appeal, elderberries (Sambucus nigra, Sambucus canadensis) offer a range of benefits:

  • Rich in antioxidants, vitamin C, and flavonoids
  • Renowned for their immune-supporting properties
  • Used in syrups, teas, wines, jams, and natural remedies
  • Easy to grow in various climates
  • Attractive, fast-growing shrubs ideal for hedgerows or wildlife gardens

A single mature elderberry shrub can yield up to 12–15 pounds of fruit per season!


Where Do Elderberries Grow Best?

Elderberries thrive in USDA hardiness zones 3–9, making them suitable for a wide range of climates, from cooler northern regions to milder southern states.

Ideal Growing Conditions:

  • Sunlight: Full sun to partial shade (more sun = more berries)
  • Soil: Moist, well-drained, loamy soil rich in organic matter
  • pH: Slightly acidic to neutral (5.5–6.5)
  • Water: Prefer consistent moisture but tolerate occasional drought once established

Elderberries naturally grow along riverbanks, woodlands, and fence lines, but they adapt well to home gardens.


Choosing the Right Elderberry Varieties

While wild elderberries grow throughout much of North America, cultivated varieties produce larger, more flavorful fruit. Here are popular choices for home gardeners:

  • ‘Adams’ – Large fruit clusters, cold-hardy, ripens mid-late summer
  • ‘York’ – Very large berries, excellent for syrup and jam, late season
  • ‘Nova’ – Early-bearing, good flavor, less vigorous (ideal for smaller spaces)
  • ‘Bob Gordon’ – Heavy yields, excellent syrup quality, upright habit
  • ‘Wyldewood’ – Large clusters, hardy and productive

Tip: Plant at least two different varieties for cross-pollination and higher yields.


How to Plant Elderberries

When to Plant:

The best time to plant elderberries is early spring or fall, when temperatures are cool and soil moisture is consistent.

Where to Plant:

Select a spot that offers:

  • At least 6 hours of sun per day
  • Protection from harsh winds
  • Moist, fertile soil with good drainage

Planting Instructions:

  1. Space plants 6–10 feet apart in rows or clusters
  2. Dig a hole twice as wide and as deep as the root ball
  3. Mix organic compost or aged manure into the planting hole
  4. Place the plant at the same depth it grew in the nursery pot
  5. Backfill with soil and water thoroughly
  6. Apply a 2–3 inch layer of organic mulch around the base to retain moisture

Note: Elderberries spread via underground suckers — leave room for growth or install root barriers if needed.


How to Care for Elderberries

Elderberries are relatively low-maintenance but benefit from regular care in their early years.

Watering:

  • Water young plants deeply and consistently for the first two years
  • Mature shrubs need about 1–2 inches of water per week
  • Use mulch to conserve moisture and suppress weeds

Fertilizing:

  • In early spring, apply a balanced 10-10-10 fertilizer or composted manure
  • Avoid excessive nitrogen, which encourages leaf growth over fruiting

Pruning:

Prune elderberries in late winter or early spring before new growth appears.

How to prune:

  • Remove dead, weak, or damaged canes
  • Cut back older canes after 3–4 years to encourage new growth
  • Thin the plant to improve air circulation and light penetration

Pro tip: Elderberries fruit best on 1- to 3-year-old canes.


Elderberry Pests and Problems

Elderberries are hardy and relatively pest-resistant, but watch for:

  • Aphids: Control with insecticidal soap or strong water sprays
  • Elder shoot borers: Prune and destroy infested stems
  • Birds: Protect ripening berries with bird netting

Diseases like powdery mildew or leaf spot are rare in healthy, well-spaced plants.


Harvesting Elderberries

When to Harvest:

Elderberries ripen in mid to late summer (July–September), depending on your region and variety.

Signs of ripeness:

  • Deep purple-black color
  • Clusters droop slightly under the weight
  • Berries detach easily from stems

Important: Only harvest fully ripe, dark berries — unripe berries and other plant parts contain compounds that can cause nausea if consumed raw.


How to Harvest:

  • Use sharp pruners or scissors to cut entire clusters
  • Handle gently to avoid crushing
  • Remove berries from stems immediately after picking
  • Store fresh elderberries in the refrigerator for up to 3 days or freeze for later use

How to Make Immune-Boosting Elderberry Syrup

Homemade elderberry syrup is a popular, natural way to support immunity. Here’s a simple, effective recipe using fresh or frozen berries:

Ingredients:

  • 1 cup fresh or ½ cup dried elderberries
  • 3 cups water
  • 1 tablespoon fresh ginger (grated)
  • 1 cinnamon stick
  • 3–5 cloves
  • 1 cup raw honey (adjust to taste)

Instructions:

  1. In a saucepan, combine elderberries, water, ginger, cinnamon, and cloves
  2. Bring to a boil, then reduce heat and simmer for 45 minutes
  3. Remove from heat and let cool slightly
  4. Mash berries to release juices, then strain through a fine mesh or cheesecloth
  5. Stir in honey while mixture is still warm (but not hot)
  6. Pour into sterilized glass jars and refrigerate

Dosage:
Adults: 1 tablespoon daily
Children: 1 teaspoon daily

Increase frequency to 2–3 times daily at the onset of cold symptoms.

Note: Never consume raw elderberries or leaves as they may cause digestive upset.


Propagating Elderberries

Want to grow more elderberries? It’s easy!

Softwood Cuttings (Early Summer):

  • Take 6–8 inch cuttings from new green growth
  • Remove lower leaves and dip cut ends in rooting hormone
  • Plant in moist potting mix and keep humid until rooted

Hardwood Cuttings (Late Winter):

  • Cut 8–12 inch sections from dormant canes
  • Plant directly outdoors or in containers before spring bud break

Final Thoughts

Growing elderberries is a rewarding addition to any edible landscape, offering not just beauty but practical health benefits. With just a little care, you can enjoy abundant harvests of nutrient-rich berries perfect for making your own immune-boosting elderberry syrups, teas, and preserves.

Whether you have a spacious backyard or a small garden border, these hardy, fast-growing shrubs are well worth the effort. So why not start your own elderberry patch this season and enjoy a natural, homegrown remedy for years to come?

How to Grow Pawpaw Trees in the USA: A Complete Guide for Home Gardeners

How to Grow Pawpaw Trees in the USA: A Complete Guide for Home Gardeners

Pawpaw trees (Asimina triloba) are one of America’s best-kept horticultural secrets. Native to the eastern United States, these small, deciduous fruit trees produce the largest edible native fruit in North America. Often described as a cross between a banana, mango, and custard apple, pawpaws deliver a unique tropical flavor in a tree hardy enough to survive in temperate climates.

If you’ve ever wanted to grow a rare, delicious, and low-maintenance fruit tree, this guide will show you exactly how to grow pawpaw trees in the USA, from choosing the right variety to planting, caring for, and harvesting your own homegrown pawpaws.


Why Grow Pawpaw Trees?

Pawpaw trees aren’t just a curiosity; they’re valuable for several reasons:

  • Native to the USA, making them naturally adapted to local pests and weather
  • Low-maintenance and disease-resistant
  • Unique, custard-like fruit with a tropical flavor
  • Attractive trees with large, tropical-looking leaves
  • Perfect for backyard orchards, food forests, or native plant gardens

Plus, pawpaws are rich in vitamins A and C, magnesium, iron, and antioxidants.


Where Do Pawpaw Trees Grow Best?

Pawpaw trees are native to the eastern and midwestern United States, ranging from New York to Florida and as far west as Nebraska and Texas. They thrive in USDA hardiness zones 5–9.

Ideal Conditions:

  • Climate: Temperate with cold winters and humid summers
  • Soil: Deep, fertile, well-draining soil rich in organic matter
  • pH: Slightly acidic to neutral (5.5 to 7.0)
  • Sunlight: Partial shade when young, full sun as mature trees

Fun fact: In the wild, pawpaws often grow as understory trees, but in cultivation, they produce better fruit yields in full sun.


Choosing the Right Pawpaw Variety

There are dozens of pawpaw cultivars available, each offering different flavors, fruit sizes, and ripening times. Here are some popular choices for home gardeners:

  • ‘Sunflower’ – Large fruit, self-fertile, excellent flavor
  • ‘Shenandoah’ – Mild, sweet taste with few seeds
  • ‘Susquehanna’ – Big, rich-flavored fruit and heavy producer
  • ‘Overleese’ – Creamy texture, very sweet
  • ‘KSU-Atwood’ – Early ripening with high yields

Pro tip: While some pawpaws are partially self-fertile, it’s best to plant at least two different cultivars for reliable cross-pollination and heavier fruiting.


How to Plant Pawpaw Trees

When to Plant:

The best time to plant pawpaw trees is in spring or fall when the soil is cool and moist.

Where to Plant:

Choose a spot with:

  • Full sun for mature trees (partial shade when young)
  • Sheltered from strong winds
  • Rich, well-drained soil with good moisture retention

Planting Instructions:

  1. Dig a hole twice as wide and as deep as the tree’s root ball
  2. Loosen surrounding soil and mix in organic compost
  3. Gently remove the tree from its container, keeping the delicate roots intact
  4. Place the tree in the hole at the same depth it grew in the nursery
  5. Backfill with soil and firm gently
  6. Water deeply and apply a 3-inch layer of mulch to conserve moisture and suppress weeds

Important: Pawpaw trees have sensitive taproots, so be careful not to disturb them during planting.


How to Care for Pawpaw Trees

Pawpaw trees are relatively low-maintenance but benefit from some basic care:

Watering:

  • Water deeply and regularly, especially during the first 2–3 years
  • Aim to keep the soil consistently moist but not soggy
  • Mature trees are drought-tolerant but produce better with steady moisture

Mulching:

Apply a 2–3 inch layer of organic mulch (like wood chips or leaf mold) around the base, keeping it a few inches from the trunk. This maintains soil moisture and regulates temperature.


Fertilizing:

  • Year 1: No fertilizer needed if planted in fertile soil
  • After Year 2: Apply a balanced organic fertilizer (10-10-10) in early spring
  • Avoid over-fertilizing, which can cause excessive leafy growth at the expense of fruit production

Pruning:

Minimal pruning is needed. Remove:

  • Dead, damaged, or crossing branches in late winter
  • Low, weak growth and suckers at the base

Light shaping can improve airflow and light penetration, boosting fruit yields.


Pollination and Fruit Production

Unlike most fruit trees, pawpaws have unusual, insect-pollinated flowers. Natural pollinators include flies, beetles, and carrion insects, which are attracted by the flowers’ earthy scent.

How to Improve Pollination:

  • Plant at least two different varieties within 30 feet for cross-pollination
  • Hand-pollinate using a small paintbrush, transferring pollen from one flower to another
  • Plant companion flowers (like marigolds or dill) nearby to attract pollinating insects

Harvesting Pawpaw Fruit

When to Harvest:

Pawpaws ripen in late summer to early fall (August–October), depending on your region and variety.

Signs of ripeness:

  • Fruit turns from green to yellowish or brownish
  • Slightly soft to the touch (like a ripe avocado)
  • Sweet, fruity aroma
  • Easily detaches from the branch

How to Harvest:

Gently twist the fruit from the tree or clip with pruning shears. Handle carefully, as ripe pawpaws bruise easily.


Storing and Enjoying Pawpaws

Fresh pawpaws have a short shelf life:

  • Refrigerate immediately and use within 2–3 days for peak flavor
  • Flesh can be frozen for smoothies, baked goods, or ice cream

The custard-like pulp tastes like a blend of banana, mango, and melon — perfect for eating fresh, making pudding, jam, or even craft beer.


Common Problems and Pests

While generally trouble-free, pawpaw trees can encounter a few issues:

  • Pawpaw Peduncle Borer: Larvae that damage flower stems; prune affected stems
  • Deer and Rabbits: May nibble young trees — use tree guards
  • Poor Pollination: Plant multiple varieties or hand-pollinate

Most pawpaws are resistant to serious diseases and insect pests.


Growing Pawpaws in Containers

Yes — you can grow pawpaw trees in large containers if you lack garden space!

Container Tips:

  • Use a deep 15–20 gallon pot with excellent drainage
  • Fill with a rich, well-draining potting mix
  • Provide full sun and regular watering
  • Protect from frost in colder regions
  • Consider dwarf or compact varieties like ‘Sunflower’

Final Thoughts

If you’re looking for a unique, native fruit tree that’s both delicious and ornamental, pawpaw trees are a fantastic choice. With a little patience — trees begin fruiting in 4–7 years — you’ll be rewarded with generous harvests of luscious, tropical-flavored fruit right in your backyard.

By choosing the right variety, providing well-drained soil, ensuring good pollination, and following basic care guidelines, you can successfully grow pawpaw trees anywhere in USDA zones 5–9.

How to Grow Gooseberries in Your Backyard: A Complete Step-by-Step Guide

How to Grow Gooseberries in Your Backyard: A Complete Step-by-Step Guide

Gooseberries may not be the most common backyard crop, but they certainly deserve a spot in your home garden. These small, tart-sweet fruits are packed with nutrients, brimming with flavor, and surprisingly easy to grow. With their charming arching branches, decorative foliage, and vibrant fruits ranging from green to red and even purple, gooseberries make a beautiful and productive addition to any outdoor space.

Whether you’re an experienced gardener or just starting out, this guide will walk you through everything you need to know about growing gooseberries in your backyard — from choosing the right variety and planting to pruning and harvesting your delicious homegrown berries.


Why Grow Gooseberries?

Gooseberries offer several perks for home gardeners:

  • Nutrient-Rich: High in vitamin C, antioxidants, and fiber.
  • Easy to Grow: Adaptable to a variety of climates and soils.
  • Compact Size: Perfect for small gardens, patios, or raised beds.
  • Deliciously Versatile: Ideal for jams, pies, cordials, chutneys, and fresh eating.

They’re also relatively pest-resistant and can live for 15 years or more with proper care, making them a long-lasting garden investment.


Choosing the Right Gooseberry Variety

Before planting, select a variety that suits your climate and taste preferences. Gooseberries come in green, yellow, red, and purple shades, each with unique flavor profiles.

Popular Varieties:

  • Invicta: Heavy-cropping, green-fruited variety with excellent disease resistance.
  • Hinnonmaki Red: Sweet, tangy red berries with a dessert-like flavor.
  • Captivator: Nearly thornless, pinkish-red fruits, and very sweet.
  • Pixwell: Compact, hardy, pinkish berries, ideal for colder climates.

Tip: Choose disease-resistant, thornless, or nearly thornless varieties if you’re new to gooseberry growing for easier handling and care.


Best Time to Plant Gooseberries

The ideal time to plant gooseberries is in late fall or early spring while the plant is dormant. This allows the roots to establish before the growing season.


How to Plant Gooseberries in Your Backyard

Step 1: Select a Suitable Spot

Gooseberries thrive in:

  • Full sun to partial shade. In hotter regions, some afternoon shade helps prevent sun scorch.
  • Well-draining, fertile soil with a pH of 6.0–6.5.
  • A location sheltered from strong winds and late spring frosts.

Avoid planting in frost pockets or areas prone to waterlogging.


Step 2: Prepare the Soil

Gooseberries prefer slightly acidic to neutral, well-aerated soil.

  • Dig in plenty of organic compost or well-rotted manure to enrich the planting site.
  • Remove stones, weeds, and debris.
  • If soil is heavy clay, amend with grit or sand for better drainage.

Step 3: Planting Your Gooseberry Bush

  1. Dig a hole twice the width and depth of the root ball.
  2. Position the plant so the base of the stems sits 1–2 inches below soil level to encourage new growth.
  3. Spread the roots out gently.
  4. Backfill with soil, firming gently as you go.
  5. Water thoroughly.

Spacing: Leave 4–5 feet (1.2–1.5 meters) between bushes to ensure good airflow and reduce the risk of fungal diseases.


Caring for Your Gooseberries

Once planted, regular care will ensure your gooseberries thrive and produce heavy crops for years to come.

Watering

  • Keep the soil consistently moist, especially during dry spells.
  • Avoid waterlogging, which can lead to root rot.
  • Water deeply to encourage deep root growth.

Mulching

  • Apply a 2–3 inch layer of organic mulch (like compost, leaf mold, or straw) around the base of the plant.
  • Helps retain moisture, suppress weeds, and improve soil structure.

Feeding

  • In early spring, feed with a balanced granular fertilizer (10-10-10) or a high-potassium fertilizer to encourage fruiting.
  • Top-dress with compost or well-rotted manure in autumn.

How to Prune Gooseberries

Proper pruning improves air circulation, reduces disease risk, and enhances fruit production.

When to Prune:

  • Late winter or early spring before new growth starts.

How to Prune:

  • Remove dead, damaged, or weak branches.
  • Thin out congested growth to allow sunlight into the center.
  • Aim for an open-centered goblet shape with 4–6 strong framework branches.
  • Cut back side shoots to 2–4 buds from the base to encourage fruit spurs.

Tip: Wear gloves, especially with thorny varieties.


Common Pests and Problems

Gooseberries are relatively hardy but may occasionally face a few issues:

Diseases:

  • Powdery mildew: White, powdery coating on leaves and fruit. Prune for airflow and use a sulfur-based spray if needed.
  • Leaf spot: Remove affected leaves and apply organic fungicide.

Pests:

  • Gooseberry sawfly: Strips foliage rapidly. Inspect leaves regularly and remove larvae by hand or use an organic insecticidal soap.
  • Aphids: Control with neem oil or beneficial insects like ladybugs.

Harvesting Gooseberries

When to Harvest:

  • Late June to August, depending on the variety and climate.
  • Berries can be harvested underripe (for cooking) or fully ripe (for fresh eating).

How to Harvest:

  • Use gloves or long sleeves if handling thorny plants.
  • Pick underripe berries early for jams and pies.
  • Allow remaining berries to fully ripen for fresh eating — they should feel slightly soft and come off easily.

Yield: A mature gooseberry bush can produce 8–10 pounds (3.5–4.5 kg) of fruit annually.


Storing and Using Gooseberries

Freshly picked gooseberries can be:

  • Refrigerated for up to a week.
  • Frozen on trays and then bagged for long-term storage.
  • Turned into jams, chutneys, jellies, pies, wines, or savory sauces.

They pair beautifully with elderflower, strawberries, mackerel, or in crumbles.


Propagating Gooseberries

Once your bush is established, you can easily propagate new plants through:

Hardwood Cuttings:

  • Take 8–10 inch cuttings in late fall.
  • Plant them in a sheltered nursery bed or pot.
  • Leave them for a year before transplanting.

Final Thoughts

Gooseberries are a delightful addition to any backyard — attractive, productive, and wonderfully versatile in the kitchen. With just a bit of preparation and care, you’ll be rewarded with lush harvests of vitamin-rich berries for years to come.

Whether you crave tart preserves, fresh garden fruit, or simply love growing something a little different, gooseberries deserve a prime spot in your backyard garden.