How to Care for a Peace Lily Plant Naturally

How to Care for a Peace Lily Plant Naturally

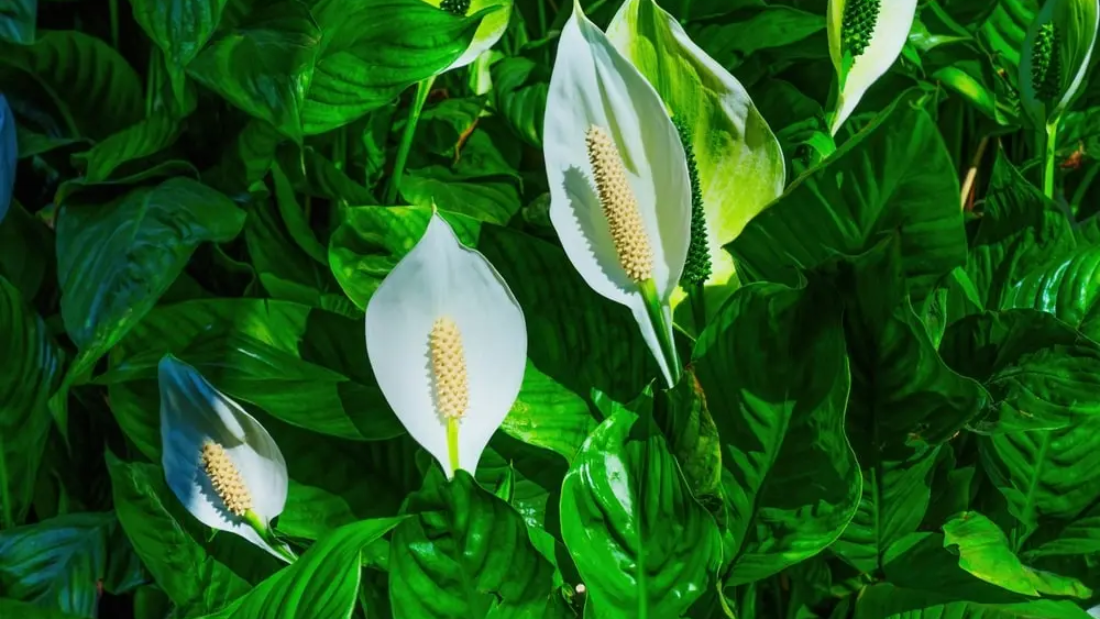
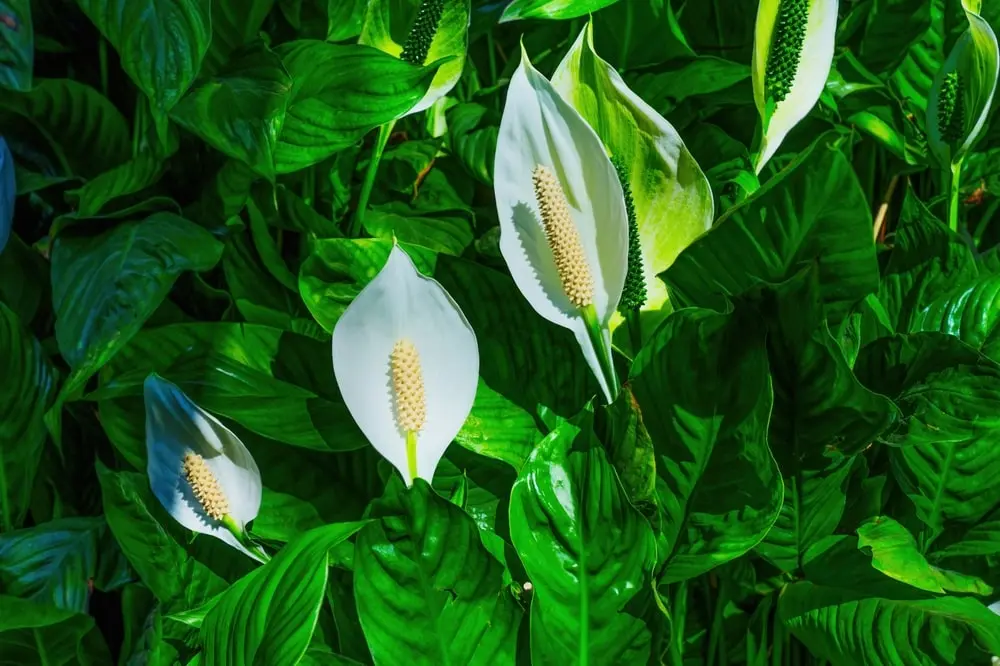
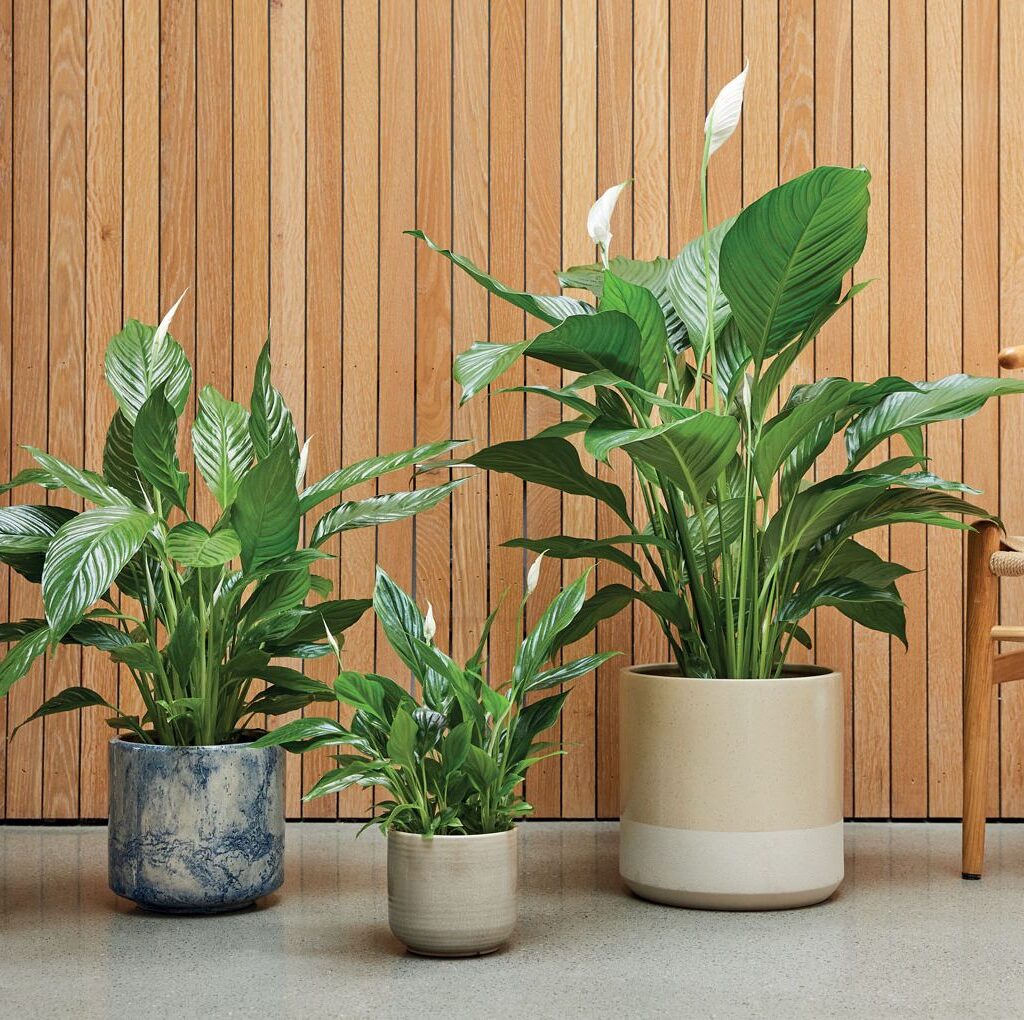
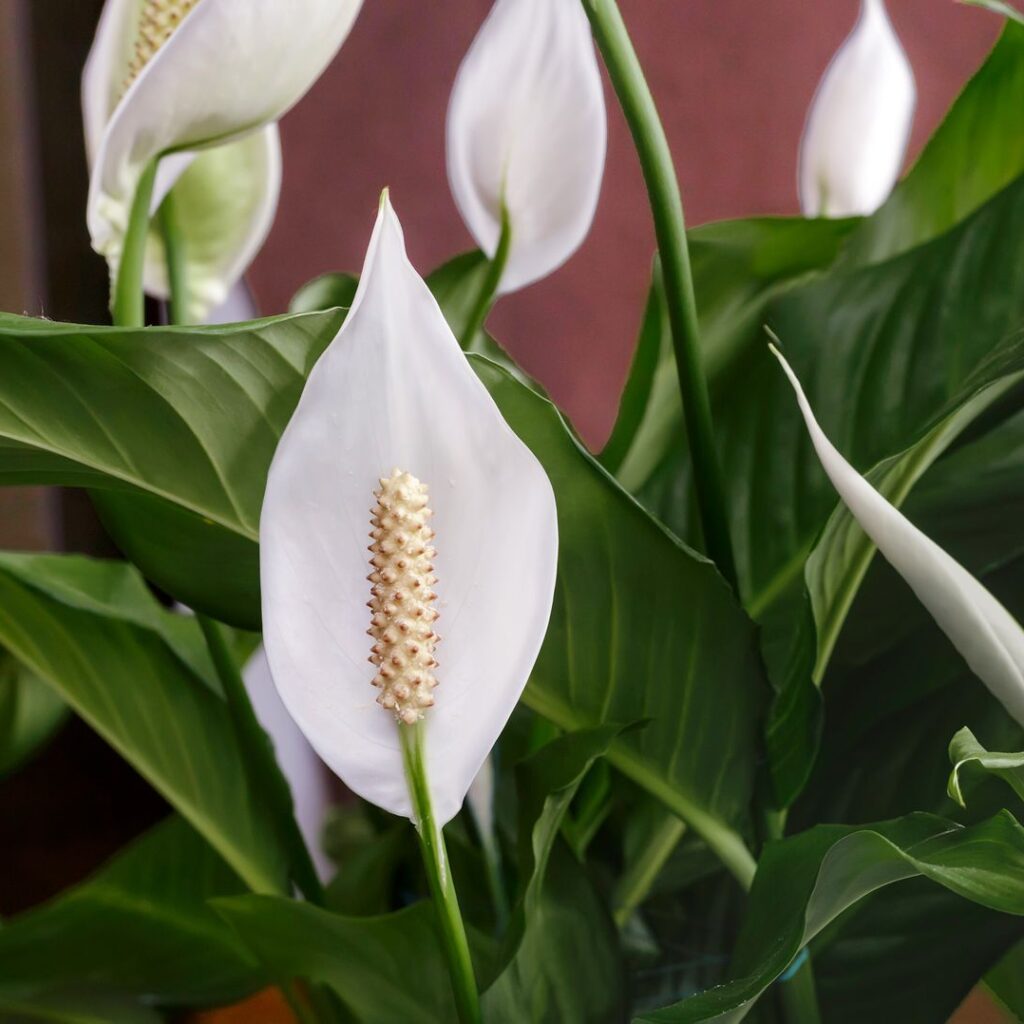
The Peace Lily (Spathiphyllum) is one of the most popular houseplants around the world — and for good reason. Its graceful dark green leaves, elegant white blooms, and air-purifying abilities make it a favorite for homes and offices alike. Even better, Peace Lilies are relatively easy to care for, thriving in indoor conditions and requiring minimal maintenance when compared to many other flowering plants.

If you’re interested in growing this beautiful plant using natural methods, you’re in the right place. In this comprehensive guide, we’ll cover everything you need to know about how to care for a Peace Lily plant naturally — from sunlight and watering to soil health, natural fertilizers, pest control, and more.


What Makes Peace Lilies Special?

Before we dive into the care tips, let’s understand what makes the Peace Lily so desirable:

  • Natural air purifier: NASA’s Clean Air Study found that Peace Lilies help remove indoor toxins like benzene, formaldehyde, and carbon monoxide.
  • Low-light tolerant: They flourish in shaded indoor spaces.
  • Symbolic plant: Peace Lilies are often associated with peace, purity, and tranquility.
  • Minimal care: With the right natural care, they thrive for years and bloom regularly.

Choose the Right Location

One of the essential parts of caring for your Peace Lily naturally is choosing the right spot in your home.

  • Light: Peace Lilies love bright, indirect light. Avoid placing them in direct sunlight, which can scorch their leaves. North or east-facing windows are ideal.
  • Temperature: Keep them in a room where temperatures range between 65°F and 85°F (18°C–29°C). Avoid cold drafts and sudden temperature changes.
  • Humidity: As a tropical plant, Peace Lilies prefer a humid environment. Bathrooms, kitchens, or grouping plants together can help maintain humidity.

Natural Tip:

Place a shallow tray filled with pebbles and water beneath the plant’s pot. As the water evaporates, it naturally increases humidity around your plant.


Use Organic, Well-Draining Soil

The right soil mix makes a world of difference. Peace Lilies prefer soil that’s rich in organic matter and drains well.

  • Ideal soil mix: Combine equal parts of organic potting soil, coco coir or peat moss, and perlite or coarse sand. This ensures good drainage and keeps roots healthy.
  • Avoid chemical-laden commercial soils with synthetic fertilizers. Opt for organic, pesticide-free soil blends.

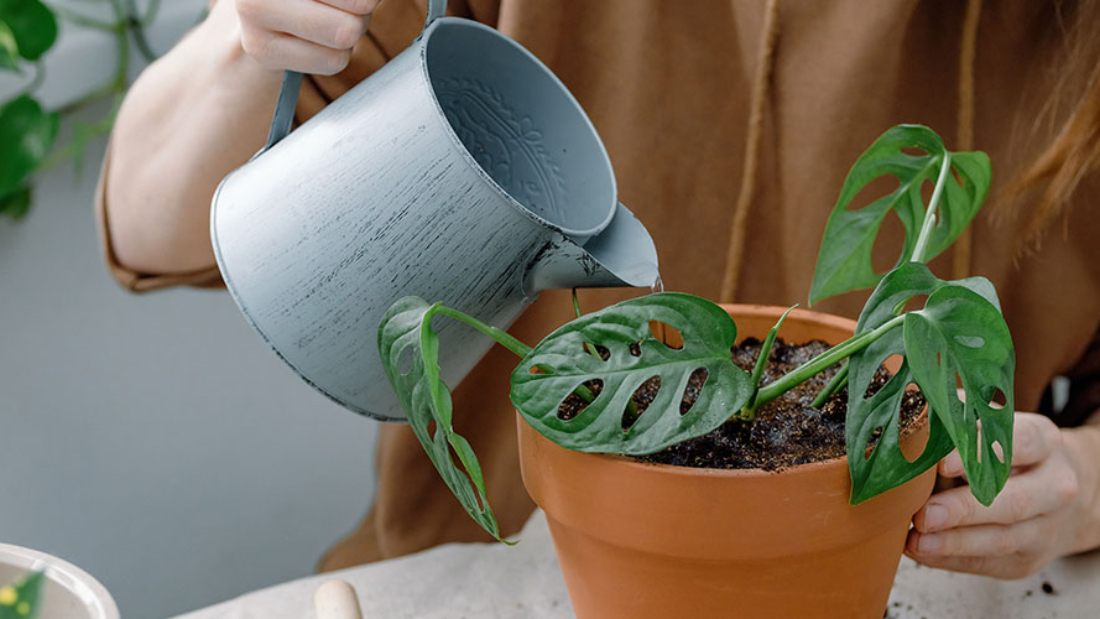
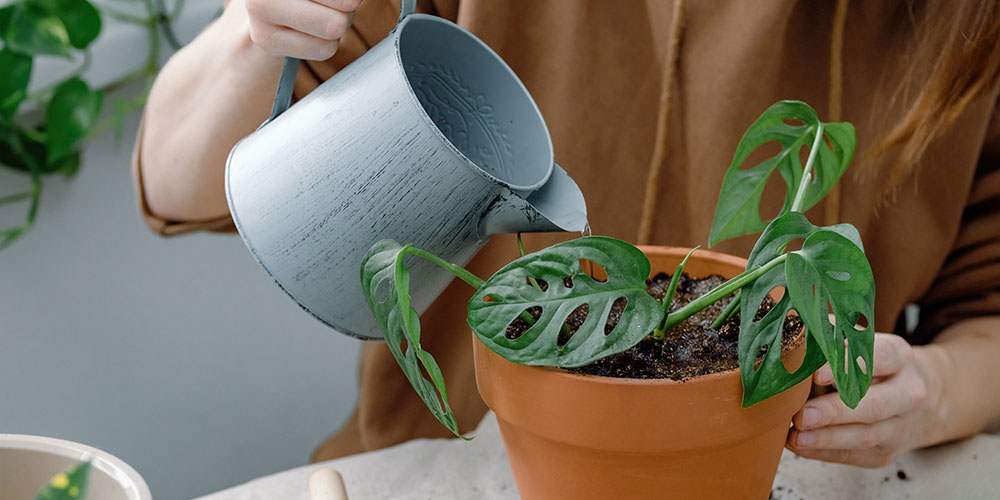
Watering Naturally and Correctly

Improper watering is one of the most common mistakes with Peace Lilies. They like consistently moist (but not soggy) soil.

  • When to water: Check the soil with your finger. If the top inch feels dry, it’s time to water.
  • Water type: Use room-temperature, filtered, or rainwater whenever possible. Tap water with chlorine or fluoride can harm the plant.
  • How to water: Water thoroughly until excess runs out the drainage holes, then empty the saucer to avoid root rot.

Natural Tip:

Place rainwater collectors in your garden or balcony and use this naturally soft water for your Peace Lily.


Feed with Natural Fertilizers

Your Peace Lily will benefit from occasional feeding, especially during the growing season (spring and summer).

  • Homemade compost tea: Soak compost in water overnight, strain it, and use the liquid as a gentle fertilizer.
  • Banana peel water: Soak banana peels in water for 24 hours and use the water to feed your plant — it’s rich in potassium and phosphorus.
  • Diluted fish emulsion: Apply monthly for a natural nutrient boost.

Avoid chemical fertilizers, which can cause salt buildup and damage your plant over time.


Natural Pest Control

Peace Lilies are generally hardy but can sometimes attract pests like aphids, spider mites, or mealybugs.

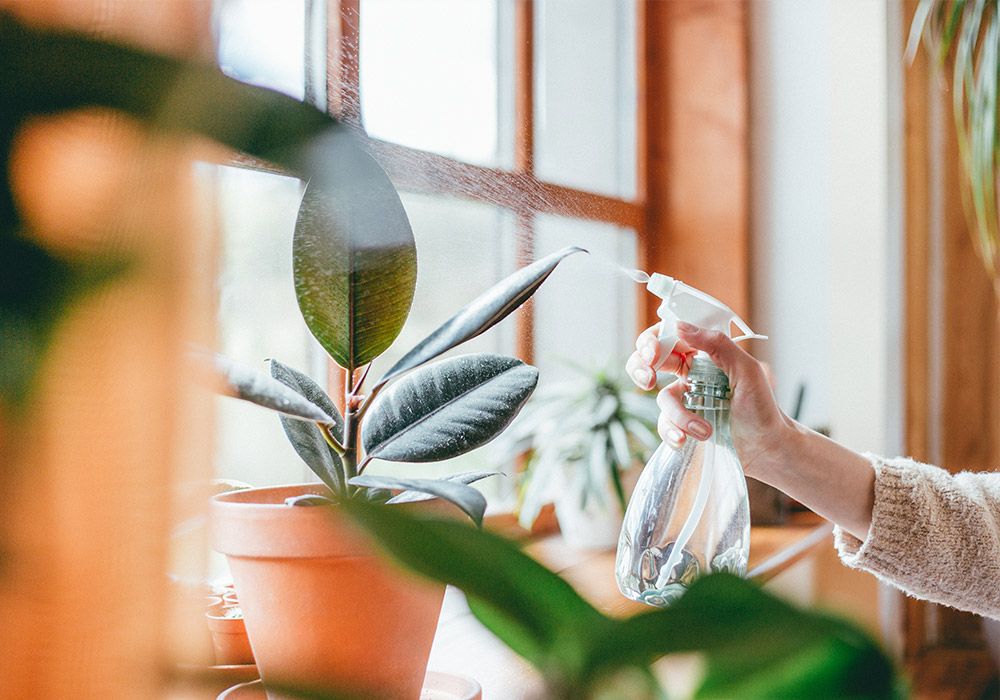
  • Neem oil spray: Mix 1 teaspoon of neem oil with 1 liter of water and a few drops of mild natural soap. Spray on leaves every 2–3 weeks as a preventive measure.
  • Manual cleaning: Wipe leaves with a soft, damp cloth to remove dust and any visible pests.
  • Garlic spray: Boil a few crushed garlic cloves in water, let it cool, strain, and mist your plant to deter insects.

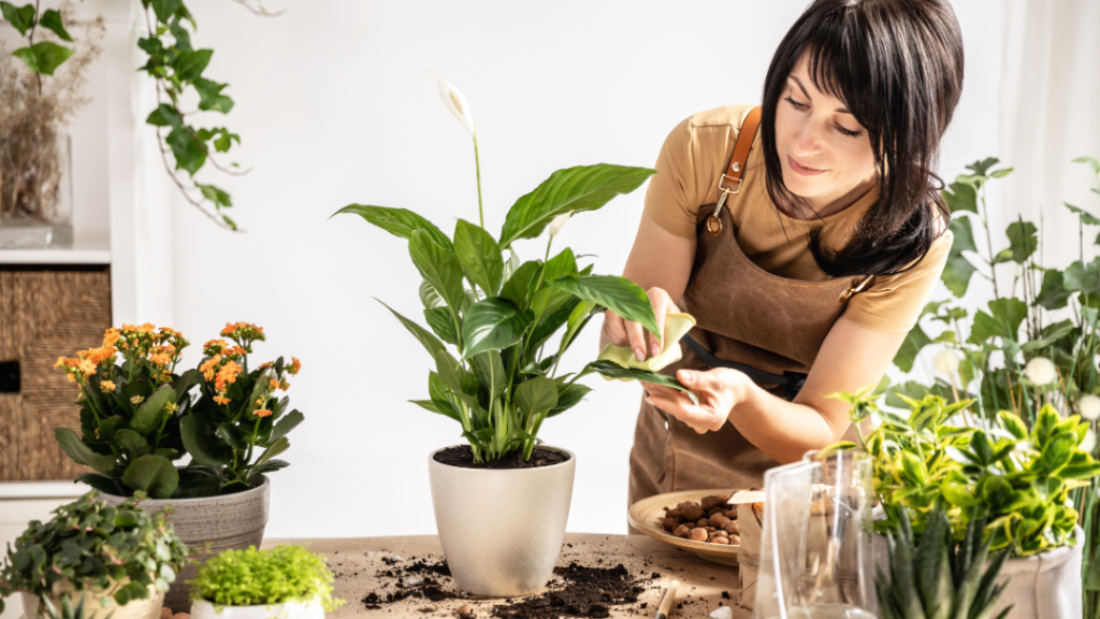
Maintain Leaf Health Naturally

Keeping the leaves clean and dust-free helps your Peace Lily breathe and photosynthesize efficiently.

  • Use a soft, damp cloth to wipe each leaf gently.
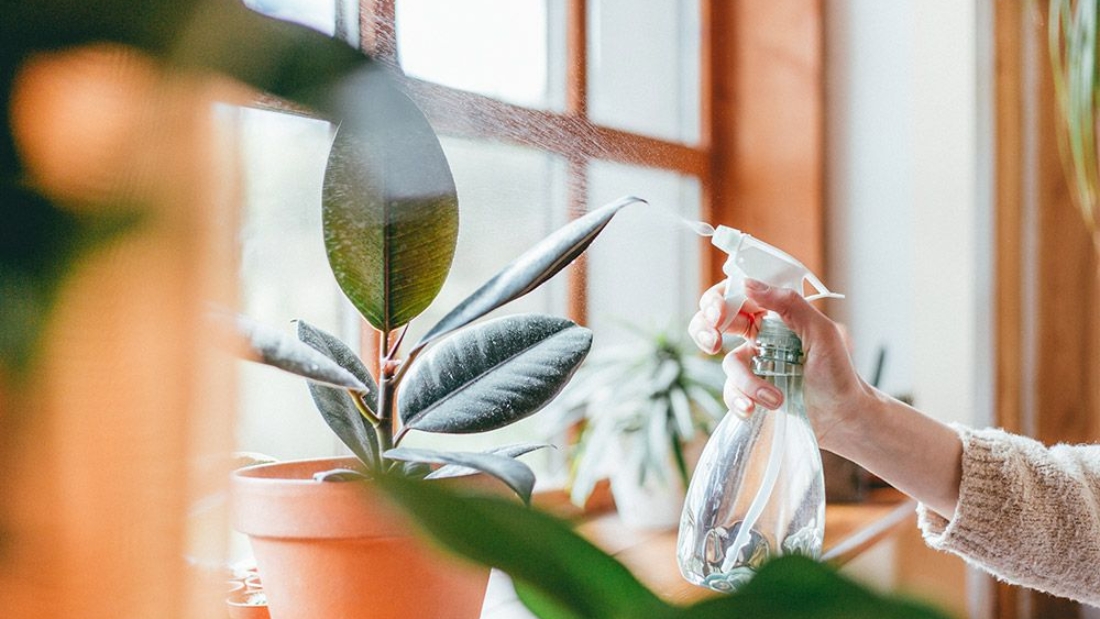
  • Mist with clean water to freshen leaves and increase humidity.
  • Avoid using leaf shine products, as they block the leaf pores and reduce the plant’s ability to clean the air.

Natural Ways to Encourage Blooming

Peace Lilies usually bloom in spring and early summer, but with proper care, you can encourage year-round blooms naturally.

  • Consistent light: Ensure your plant receives bright, indirect light. Lack of light is the most common reason for no blooms.
  • Right-sized pot: Don’t over-pot. Peace Lilies prefer being slightly root-bound to produce flowers.
  • Natural bloom booster: Use diluted banana peel water or weak compost tea every month during the blooming season.

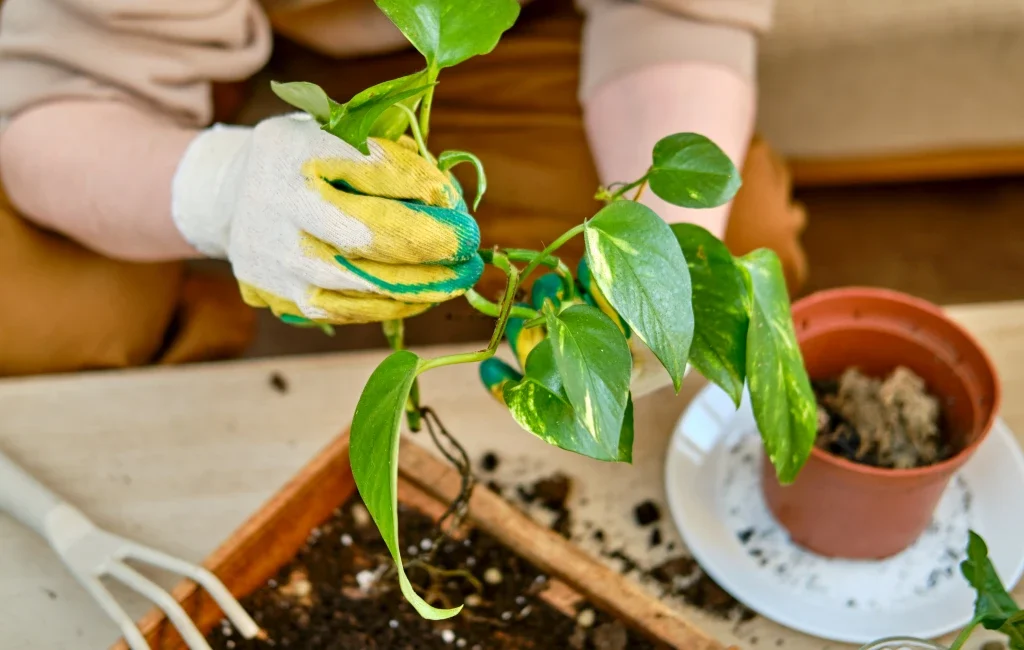
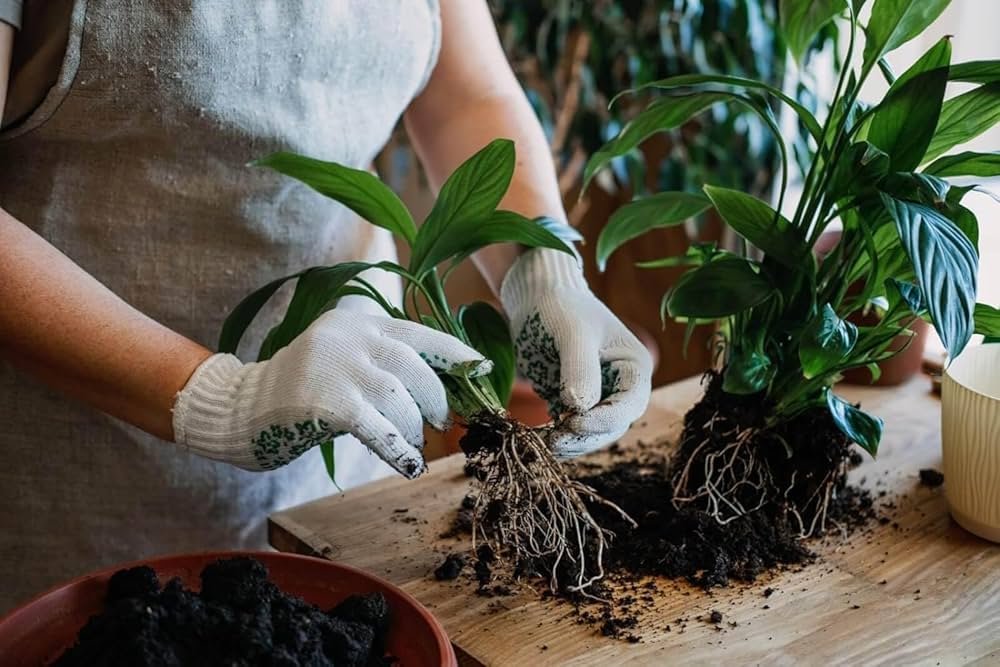
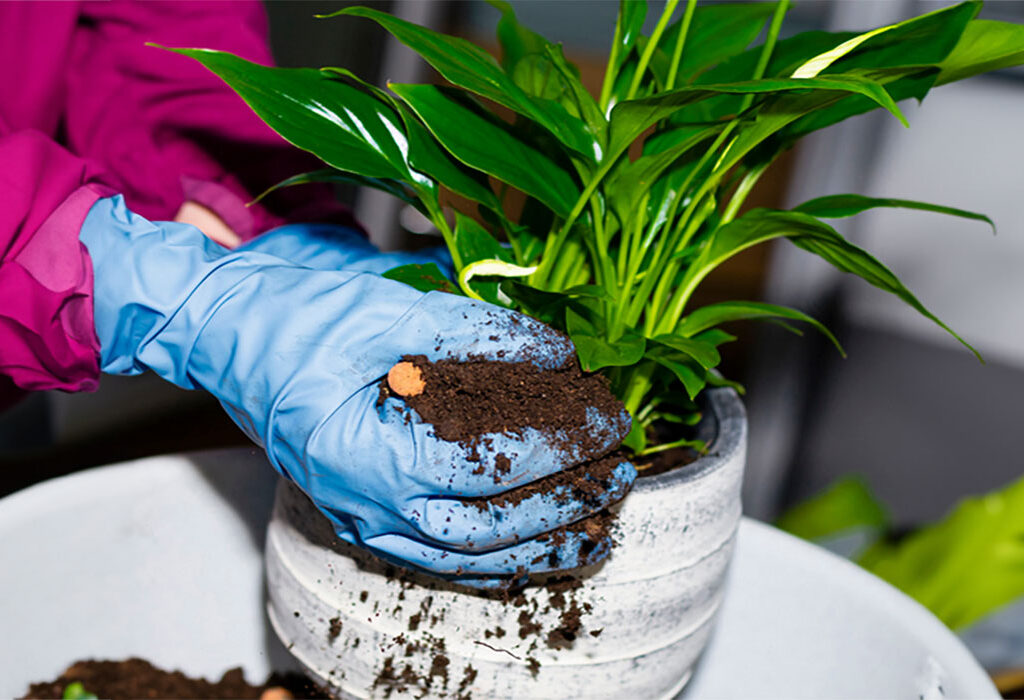
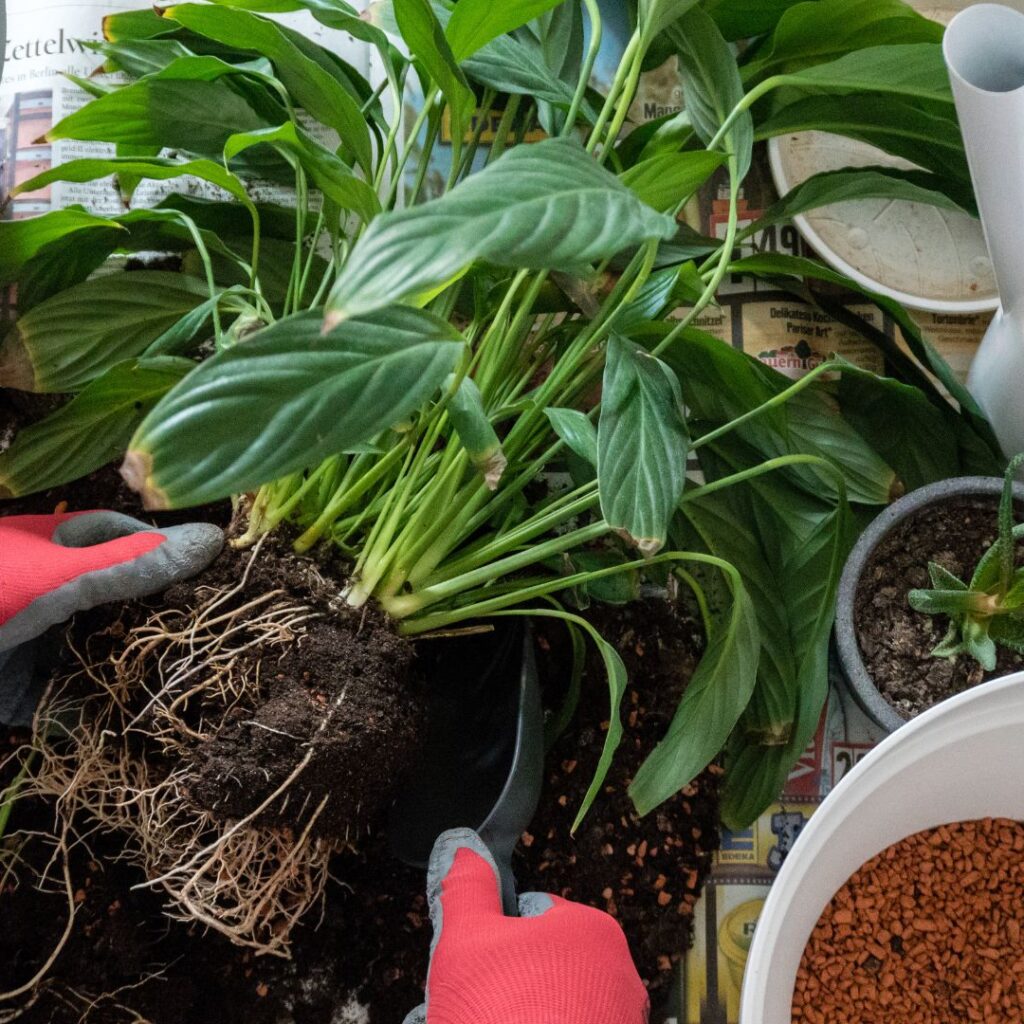
Repotting Peace Lily the Natural Way

Peace Lilies should be repotted every 2–3 years to refresh soil and encourage growth.

  • When to repot: When roots start circling the pot or growing out of drainage holes.
  • Use natural, organic soil mix as mentioned earlier.
  • Choose a pot one size larger with good drainage.
  • Gently loosen the roots and remove old soil before placing it in the new pot.

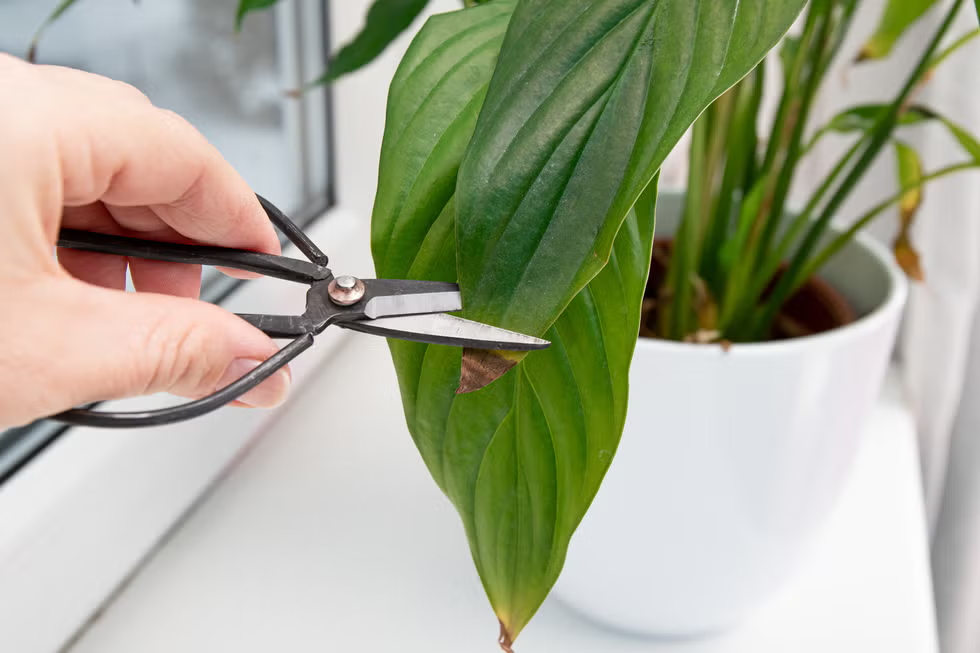
Natural Pruning and Deadheading

Regularly trimming dead or yellowing leaves helps keep your plant healthy and encourages new growth.

  • Use clean, sharp scissors or pruning shears.
  • Cut leaves at the base where they meet the stem.
  • Remove spent flower stalks to allow the plant to focus its energy on new leaves and blooms.

Winter Care Tips

During colder months, Peace Lilies naturally slow down. Adjust care accordingly:

  • Reduce watering frequency—let the soil dry slightly more between waterings.
  • Keep away from cold drafts and heaters.
  • Mist leaves occasionally to combat dry indoor air from heating systems.
  • Hold off on fertilizing until spring.

Common Issues and Natural Solutions

ProblemNatural Solution
Yellow leavesReduce watering and trim affected leaves.
Brown leaf tipsUse filtered water, increase humidity.
Drooping leavesCheck soil moisture — water if dry or repot if root-bound.
No bloomsIncrease light exposure, use natural fertilizers, trim old flowers.

Conclusion

Caring for a Peace Lily naturally isn’t complicated — it’s all about creating a balanced, healthy environment that mimics the plant’s tropical origins. With bright, indirect light, consistent watering with natural water sources, organic soil, and gentle natural fertilizers, your Peace Lily will thrive and beautify your indoor space for years to come.

Plus, using natural care practices not only benefits your plant but also promotes a healthier, chemical-free home environment. Whether you’re a first-time plant parent or a seasoned indoor gardener, Peace Lilies are a joy to grow, bringing beauty, tranquility, and cleaner air to any room.

How to Care for Monstera Plant Indoors: The Ultimate Guide for Thriving Greenery

How to Care for Monstera Plant Indoors: The Ultimate Guide for Thriving Greenery

The Monstera plant, often called the “Swiss Cheese Plant” because of its unique perforated leaves, has surged in popularity as a stunning indoor plant that adds a tropical vibe to any space. With its lush, dramatic foliage, the Monstera deliciosa is not just a plant — it’s a statement piece. However, while it’s admired for its beauty, many new plant parents wonder how to care for a Monstera indoors properly.

If you want your Monstera to flourish and become a vibrant focal point in your home, this detailed guide will help you master the art of Monstera care indoors. From lighting and watering tips to humidity, feeding, pruning, and troubleshooting common issues, learn how to nurture your Monstera efficiently and effortlessly.


Understanding the Monstera Plant

Native to the tropical rainforests of Central America, the Monstera deliciosa thrives in warm, humid environments with indirect sunlight. In its natural habitat, it climbs trees and develops large, fenestrated leaves — the characteristic holes and splits that make it so eye-catching.

Indoors, Monstera adapts well as a houseplant, but replicating its natural environment with the right care is key to keeping it healthy and promoting those signature leaf holes.


Choosing the Right Spot: Lighting for Indoor Monsteras

Ideal Light Conditions

  • Monstera plants prefer bright, indirect light.
  • Avoid direct sunlight, especially harsh afternoon rays, which can scorch the leaves and cause browning.
  • A spot near an east-facing window is perfect, where they receive gentle morning sun.
  • If natural light is limited, Monsteras can tolerate lower light but may grow more slowly and produce fewer fenestrations.

Signs of Lighting Issues

  • Too much direct light: Leaves develop yellow or brown scorch marks.
  • Too little light: Leaves become small, solid (no holes), and the plant may become leggy.

Tip: Rotate your Monstera every few weeks to ensure even growth and light exposure on all sides.


Watering Your Monstera: Getting It Just Right

Watering is one of the most crucial parts of Monstera care. Overwatering or underwatering can cause stress or even kill the plant.

When to Water

  • Water your Monstera when the top 2 inches (5 cm) of soil feels dry.
  • Typically, this means watering about once a week during growing seasons (spring and summer) and less frequently in winter.
  • Check the soil moisture by sticking your finger into the soil or using a moisture meter.

How to Water

  • Water thoroughly until excess water drains out the bottom of the pot.
  • Empty any water from the saucer to prevent root rot.
  • Use room-temperature water for best results.

Common Watering Mistakes

  • Overwatering: Leads to root rot; symptoms include yellowing leaves and mushy stems.
  • Underwatering: Causes drooping, dry, crispy leaves.

Humidity and Temperature: Creating a Tropical Environment

Because Monsteras are tropical plants, they thrive in higher humidity levels.

Ideal Humidity

  • Aim for 40% to 60% humidity.
  • If your home is dry (especially in winter), increase humidity by:
    • Using a humidifier nearby.
    • Placing the plant on a humidity tray with water and pebbles.
    • Grouping it with other plants to create a moist microclimate.
    • Lightly misting the leaves occasionally, but avoid soaking.

Temperature Range

  • Monsteras prefer temperatures between 65°F to 85°F (18°C to 29°C).
  • Avoid cold drafts, sudden temperature drops, and heating vents.
  • Protect your Monstera from temperatures below 50°F (10°C).

Choosing the Right Pot and Soil for Monstera

Potting Mix

  • Use a well-draining, aerated potting mix designed for aroids or tropical plants.
  • Ideal mixes contain a blend of peat moss, pine bark, perlite, and sometimes orchid bark.
  • Good drainage is essential to prevent waterlogging.

Pot Selection

  • Choose a pot with drainage holes.
  • Monsteras can grow large, so select a pot size that accommodates root growth but doesn’t overwhelm the plant.
  • Repot every 1-2 years or when roots become crowded.

Feeding Your Monstera: Fertilization Tips

Monsteras are moderate feeders and benefit from regular fertilization during the growing season.

Fertilizer Type

  • Use a balanced, water-soluble fertilizer (e.g., 20-20-20) or one formulated specifically for foliage plants.
  • Organic options like fish emulsion or seaweed extract are gentle and effective.

Feeding Schedule

  • Fertilize once a month in spring and summer.
  • Reduce feeding in fall and winter when the plant’s growth slows.

Pruning and Training Your Monstera

Why Prune?

  • Pruning helps maintain the plant’s shape and encourages bushier growth.
  • Remove yellow, damaged, or dead leaves to keep the plant healthy.
  • Trim long aerial roots if they become unruly or guide them towards the soil for extra support.

Supporting Growth

  • Monsteras are natural climbers. Use a moss pole or trellis to support vertical growth.
  • Tying vines gently to a moss pole encourages larger leaves with more fenestrations.

Common Monstera Problems and How to Fix Them

ProblemSymptomsSolutions
Yellow LeavesOverwatering or poor drainageReduce watering, improve drainage, repot if needed
Brown Leaf TipsLow humidity, underwatering, or fluoride in waterIncrease humidity, water properly, use filtered water
Leggy GrowthInsufficient lightMove to brighter indirect light
Pests (Spider mites, mealybugs)Small webs, sticky residue, or white cottony spotsWipe leaves with soapy water, use neem oil spray
No Leaf FenestrationsYoung plant or lack of lightProvide more indirect light, patience

Propagating Your Monstera Indoors

One of the fun parts of Monstera care is propagation. You can multiply your plant easily using stem cuttings.

How to Propagate:

  1. Select a healthy vine with at least one node (where the leaf meets the stem).
  2. Cut just below the node.
  3. Place the cutting in water or moist soil.
  4. Roots typically appear in 2-4 weeks.
  5. Once roots are a few inches long, plant the cutting in soil.

Additional Tips for Thriving Monstera Plants

  • Clean the leaves: Dust blocks sunlight, so wipe leaves gently with a damp cloth every few weeks.
  • Avoid sudden changes: Monsteras like consistent conditions. Avoid moving them frequently.
  • Watch for stress signs: Drooping leaves, browning, or stunted growth often signal environmental issues.
  • Enjoy the process: Monsteras grow quickly and can become large, dramatic plants — patience and regular care pay off!

Conclusion

The Monstera deliciosa is a versatile, beautiful houseplant that can transform any indoor space with its lush, tropical leaves. With the right care — providing bright, indirect light, balanced watering, proper humidity, and occasional feeding — you can keep your Monstera thriving for years.

Whether you’re a beginner or a seasoned plant enthusiast, understanding your Monstera’s needs and replicating its natural environment indoors is the secret to success. Embrace the journey, and enjoy the beauty and vitality your Monstera brings to your home.

How to Care for an Orchid Plant Indoors Efficiently

How to Care for an Orchid Plant Indoors Efficiently

Orchids are one of the most beloved and elegant indoor plants worldwide, known for their stunning blooms and exotic appeal. However, many people find orchids intimidating to care for due to their reputation as “high maintenance.” The truth is, with the right knowledge and efficient care routines, growing orchids indoors can be a rewarding and enjoyable experience — even for beginners!

In this comprehensive guide, we’ll walk you through everything you need to know about how to care for an orchid plant indoors efficiently. From choosing the right orchid variety to watering, light, humidity, feeding, repotting, and troubleshooting common issues, you’ll learn how to keep your orchid healthy and blooming year after year.


Window flower in the livingroom.

Understanding Your Orchid: The Basics

Orchids belong to the Orchidaceae family, one of the largest and most diverse families of flowering plants, with over 25,000 species! Indoor orchids are typically from the Phalaenopsis (Moth Orchid) genus, prized for their long-lasting flowers and ease of care.

Orchids are epiphytes in nature, meaning they grow on trees and absorb moisture and nutrients from the air and surrounding debris rather than soil. This unique growth habit influences how we care for them indoors.


Choosing the Right Orchid for Indoor Care

If you’re new to orchids, the Phalaenopsis orchid is a perfect choice because:

  • It blooms for several months.
  • It tolerates indoor conditions well.
  • It’s relatively easy to care for compared to other orchids.

Other popular indoor orchids include:

  • Dendrobium
  • Cattleya
  • Oncidium

Selecting a healthy orchid from a reputable nursery is crucial. Look for vibrant leaves without spots, firm roots visible through the pot, and at least one healthy flower spike or bud.


Light Requirements: Finding the Perfect Spot

One of the biggest factors for orchid success is light. Orchids need bright, indirect light to thrive.

  • Ideal locations: Near an east-facing or north-facing window, where they receive gentle morning sunlight.
  • Avoid direct, harsh afternoon sun, which can scorch their delicate leaves.
  • If your home is low-light, consider supplementing with a grow light designed for orchids.

Tip: Leaves that turn yellowish or develop dark spots may indicate too much light, while dark green, limp leaves could mean insufficient light.


Watering Orchids Efficiently

Overwatering is the most common mistake people make with orchids, leading to root rot and plant decline. To water orchids efficiently indoors, follow these guidelines:

How Often to Water

  • Typically, water orchids once every 7-10 days.
  • The frequency depends on factors such as the potting medium, indoor humidity, and temperature.
  • Allow the potting medium to dry out slightly between waterings. Orchids do not like soggy roots.

How to Water

  • Water early in the day to allow excess moisture to evaporate.
  • Use room temperature water — rainwater or filtered water is preferred because tap water may contain chemicals harmful to orchids.
  • Water thoroughly, letting water flow through the drainage holes. Avoid letting the orchid sit in water.

Checking for Water Needs

  • Stick your finger into the potting medium about an inch deep; if it feels dry, it’s time to water.
  • If roots appear silvery or white, the orchid likely needs watering.

Humidity and Air Circulation

Orchids thrive in humidity levels between 40% to 60%, which can be challenging in dry indoor environments.

Ways to Increase Humidity Naturally:

  • Place a humidity tray beneath the orchid (a shallow tray filled with pebbles and water).
  • Group orchids with other houseplants to create a microclimate.
  • Use a room humidifier during dry seasons.
  • Mist orchids lightly with water once a day — but avoid wetting flowers.

Air Circulation

Good air circulation is essential to prevent fungal infections and keep your orchid healthy. Avoid stagnant air by placing a small fan in the room or ensuring windows can open periodically.


Potting Medium and Repotting

Unlike most houseplants, orchids do not grow in regular soil. They require a specialized potting medium that mimics their natural epiphytic environment.

Common Potting Mix Ingredients:

  • Bark chips
  • Coconut husk
  • Sphagnum moss
  • Perlite

When to Repot:

  • Every 1-2 years or when the potting medium breaks down and becomes soggy.
  • When roots outgrow the pot.
  • After flowering is over, to avoid disturbing the bloom cycle.

How to Repot Efficiently:

  • Gently remove the orchid from its pot.
  • Trim any dead or rotted roots with sterilized scissors.
  • Place the plant in fresh orchid mix and a pot with good drainage.
  • Water lightly after repotting.

Feeding Your Orchid: Fertilizing Naturally and Efficiently

Orchids are light feeders but benefit from regular fertilization during their active growing season.

Best Fertilizers for Orchids:

  • Use a balanced orchid fertilizer with equal parts nitrogen, phosphorus, and potassium (e.g., 20-20-20).
  • Organic options like seaweed extract or fish emulsion are gentle and effective.

Fertilizing Schedule:

  • Feed orchids every two weeks during spring and summer.
  • Reduce feeding to once a month or stop during the dormant fall and winter months.
  • Always dilute fertilizer to half or quarter strength to avoid root burn.

Supporting Healthy Growth and Encouraging Blooming

Pruning

  • After flowers fade, trim the flower spike just above a node to encourage reblooming.
  • Remove yellow or damaged leaves to keep the plant tidy.

Temperature

  • Orchids like daytime temperatures between 70°F to 85°F (21°C to 29°C) and slightly cooler nights around 60°F to 65°F (16°C to 18°C).
  • A small temperature drop at night can stimulate flower production.

Stress and Dormancy

  • Orchids may enter dormancy after blooming. During this time, reduce watering and feeding slightly.
  • Patience is key — many orchids bloom once a year, often in winter or early spring.

Common Problems and Efficient Natural Solutions

ProblemSymptomsNatural Solutions
Yellowing leavesOverwatering or poor lightReduce watering; improve lighting
Root rotMushy, black rootsRepot in fresh medium; cut away rotten roots
Leaf spotsFungal or bacterial infectionImprove air circulation; remove affected leaves
No bloomingLack of light or incorrect temperatureIncrease light; provide cooler nights
Pests (mealybugs, spider mites)Sticky residue, webbingUse neem oil spray or insecticidal soap

Final Tips for Efficient Indoor Orchid Care

  • Use orchid pots with good drainage, like clear plastic pots that allow root inspection.
  • Avoid moving orchids frequently; they like stable environments.
  • Keep orchids away from drafts, heating vents, and cold windows.
  • Clean leaves occasionally with a soft damp cloth to remove dust.

Conclusion

Caring for orchids indoors efficiently isn’t about overcomplicating their needs but understanding and meeting their natural preferences. By providing the right light, watering with care, ensuring proper humidity and air circulation, feeding smartly, and paying attention to their unique potting needs, you can enjoy stunning, long-lasting blooms that add beauty and elegance to your home.

With patience and consistent care, your indoor orchid will reward you with spectacular flowers year after year, making it one of the most gratifying plants to nurture.

How to Care for a Rubber Plant Naturally

How to Care for a Rubber Plant Naturally

If you’re searching for an easy-to-grow, air-purifying, and visually striking houseplant, the Rubber Plant (Ficus elastica) deserves a spot on your list. With its broad, glossy leaves and tall, elegant structure, it makes an impressive statement in any indoor space. And the best part? You don’t need harsh chemicals or complicated routines to keep it healthy and thriving — you can care for your Rubber Plant naturally with simple, eco-friendly practices.

In this complete guide, we’ll dive into everything you need to know about caring for a Rubber Plant naturally, including lighting, watering, natural pest control, soil requirements, pruning, propagation, and common problem fixes.


What Is a Rubber Plant?

The Rubber Plant, scientifically known as Ficus elastica, is a member of the fig family (Moraceae). Native to the tropical regions of Southeast Asia, it earned its name from the milky latex sap it produces, once used in the early days of rubber manufacturing.

Rubber Plants are loved for their thick, leathery leaves, which range in color from deep green to burgundy or even variegated shades. In their native habitats, these trees can grow up to 100 feet tall, but indoors, they typically reach between 4 to 10 feet, depending on care and container size.

Popular varieties include:

  • Ficus elastica ‘Robusta’ – classic deep green leaves.
  • Ficus elastica ‘Burgundy’ – dark purple-brown foliage.
  • Ficus elastica ‘Tineke’ – variegated cream, green, and pink leaves.

Ideal Growing Conditions for a Rubber Plant

To care for a Rubber Plant naturally, the goal is to mimic its tropical origins while keeping your methods safe, sustainable, and chemical-free.

Light Requirements

Rubber Plants love bright, indirect light. Too much direct sun can scorch the leaves, while too little light causes leggy, weak growth.

Best Locations:

  • Near an east or west-facing window with sheer curtains.
  • A few feet from a bright south-facing window.

If light levels drop too low, your plant’s lower leaves may turn yellow and fall off.

Natural Tip: Rotate the plant every few weeks to ensure even light exposure and balanced growth.

Temperature and Humidity

Being a tropical plant, it thrives in warm, slightly humid conditions.

  • Ideal temperature: 65°F to 80°F (18°C to 27°C)
  • Avoid: Cold drafts, sudden temperature changes, or proximity to heaters and air conditioners.

Natural Tip: Increase humidity naturally by placing the pot on a pebble-filled tray of water, grouping it with other plants, or occasionally misting with filtered or rainwater.


Watering a Rubber Plant Naturally

Rubber Plants prefer their soil to dry out slightly between waterings but never completely.

When to Water

  • Stick your finger 1-2 inches into the soil. If it feels dry, it’s time to water.
  • Water more often in spring and summer when the plant is actively growing, and reduce in fall and winter.

How to Water

  • Use filtered, distilled, or rainwater to avoid mineral buildup from tap water.
  • Water thoroughly until it drains from the bottom, then discard excess water to prevent root rot.

Signs of Overwatering:

  • Yellowing leaves
  • Droopy stems
  • Mushy soil

Signs of Underwatering:

  • Curling leaves
  • Dry, crispy edges
  • Leaf drop

Natural Tip: Use room-temperature water to avoid shocking the roots.


The Best Natural Soil for Rubber Plants

Rubber Plants prefer well-draining, nutrient-rich soil that retains moisture without becoming soggy.

DIY Natural Soil Mix:

  • 2 parts organic potting soil
  • 1 part coarse sand or perlite for drainage
  • 1 part compost or coconut coir for moisture retention and nutrients

Natural Tip: Adding a handful of worm castings to the soil mix can naturally enrich it with nutrients and beneficial microbes.


Natural Fertilizing Methods

Skip the synthetic fertilizers — you can keep your Rubber Plant thriving with natural, organic options.

Natural Fertilizers:

  • Diluted compost tea: Rich in nutrients and beneficial bacteria.
  • Banana peel water: Soak banana peels in water for a few days and use the liquid to water your plant.
  • Worm castings: Sprinkle a small amount on top of the soil every few months.
  • Liquid seaweed or fish emulsion: Use monthly during the growing season for a gentle nutrient boost.

Fertilizing Schedule:

  • Every 4-6 weeks in spring and summer.
  • Skip fertilizing in fall and winter when growth slows down.

Natural Pest Prevention and Treatment

While Rubber Plants are relatively resistant to pests, they can occasionally attract spider mites, mealybugs, or scale insects.

Natural Prevention:

  • Wipe leaves regularly with a damp cloth to remove dust and deter pests.
  • Mist the plant with water to raise humidity and discourage spider mites.

Natural Treatments:

  • Neem oil spray: Mix 1 teaspoon neem oil with 1 quart of water and a few drops of mild natural soap. Spray the plant’s leaves and stems.
  • Insecticidal soap: Use a gentle, organic soap solution to wipe down affected areas.
  • Isopropyl alcohol: Dab mealybugs or scale with a cotton swab dipped in diluted alcohol (one part alcohol to two parts water).

Pruning and Grooming Naturally

Regular pruning keeps your Rubber Plant looking tidy and encourages fuller growth.

How to Prune:

  • Use clean, sharp pruning shears.
  • Cut just above a leaf node to encourage branching.
  • Remove yellowing or damaged leaves.

Natural Tip: Use the pruned stems for propagation or add them to your compost pile to reduce waste.


Propagating a Rubber Plant

Rubber Plants are easy to propagate naturally through stem cuttings.

Steps for Propagation:

  1. Cut a healthy stem below a leaf node, about 6 inches long.
  2. Remove lower leaves, leaving 2-3 at the top.
  3. Dip the cut end in natural rooting hormone (like cinnamon powder).
  4. Place in water or directly into moist soil.
  5. Keep in bright, indirect light and maintain high humidity until roots develop.

Roots usually form within 4-6 weeks.


Common Rubber Plant Problems and Natural Solutions

ProblemSymptomsNatural Solution
Yellowing LeavesOverwatering, poor drainageLet soil dry out, check for clogged drainage holes
Brown Leaf TipsLow humidity, inconsistent wateringIncrease humidity, water regularly
Leaf DropStress from moving, drafts, or sudden changesKeep conditions consistent, avoid moving plant often
Pests (spider mites, mealybugs)Tiny webbing, sticky residue, visible insectsSpray neem oil or wipe leaves with insecticidal soap

Styling and Display Ideas

Rubber Plants make stunning statement pieces, whether as a single tall specimen or in a group with other tropical plants.

Natural Styling Tips:

  • Place in woven baskets or clay pots for an earthy, organic look.
  • Combine with plants like Monstera, Snake Plant, or Pothos for a natural, indoor jungle vibe.
  • Display near a window with indirect light to highlight the plant’s glossy leaves.

Is the Rubber Plant Safe for Pets?

Unfortunately, Rubber Plants are mildly toxic to cats, dogs, and humans if ingested, causing mouth irritation and stomach upset. Keep the plant out of reach of curious pets and children.


Final Thoughts

Caring for a Rubber Plant naturally is not only achievable but incredibly rewarding. By using organic methods, eco-friendly practices, and natural products, you can maintain a healthy, beautiful plant while creating a safer, greener indoor environment.

Whether you’re a seasoned plant parent or a beginner, with a bit of attention to light, water, and humidity — plus some natural TLC — your Rubber Plant can thrive for years, growing tall and lush as a vibrant, air-purifying centerpiece in your home.

How to Care for a Prayer Plant Efficiently

How to Care for a Prayer Plant Efficiently

If you’re searching for a unique, eye-catching houseplant that’s both beautiful and interactive, the Prayer Plant is an ideal choice. Known for its striking, colorful foliage and its habit of folding its leaves upward at night (like praying hands), this plant adds personality and life to any indoor space.

While Prayer Plants (scientifically called Maranta leuconeura) aren’t as carefree as some other houseplants, with the right care, they’ll reward you with lush, healthy leaves and dynamic movement that makes them feel almost alive.

In this complete guide, we’ll explain how to care for a Prayer Plant efficiently — covering everything from lighting, watering, and soil needs to troubleshooting common problems and propagation tips.


What Is a Prayer Plant?

The Prayer Plant belongs to the Marantaceae family and originates from the tropical forests of Central and South America, particularly Brazil. It’s named for its unique leaf movement, known as nyctinasty — where leaves fold up at night and reopen in the morning.

Several popular varieties exist, including:

  • Maranta leuconeura ‘Erythroneura’ (Red Prayer Plant): Deep green leaves with red veins and light green patches.
  • Maranta leuconeura ‘Kerchoveana’ (Green Prayer Plant): Light green leaves with dark green blotches.
  • Maranta leuconeura ‘Massangeana’: Silver-blue leaves with dark green patches and a velvety texture.

Each variety brings vibrant patterns and colors that make it a show-stopper in any room.


Ideal Growing Conditions for a Prayer Plant

To efficiently care for your Prayer Plant, you’ll need to replicate its native tropical environment as closely as possible. Let’s break down the ideal conditions.

Light Requirements

Prayer Plants prefer bright, indirect light. Too much direct sunlight can scorch the leaves and cause colors to fade, while too little light may slow growth and reduce the vibrancy of its patterns.

Best Locations:

  • Near an east or north-facing window.
  • A few feet away from a bright south or west window, protected by sheer curtains.

Tip: Yellowing leaves can signal too much direct light, while faded, leggy growth might mean it needs a brighter spot.

Temperature and Humidity

Being tropical natives, Prayer Plants thrive in warm, humid environments.

  • Ideal temperature: 65°F to 80°F (18°C to 27°C)
  • Avoid: Drafty windows, air conditioners, and sudden temperature drops.

They love high humidity (50% or higher). In dry indoor air, leaves might curl or develop brown tips.

Ways to Increase Humidity:

  • Use a room humidifier.
  • Place the pot on a tray filled with water and pebbles.
  • Group with other tropical plants to create a humid microclimate.
  • Mist the leaves occasionally with room-temperature water.

Watering a Prayer Plant

One of the trickiest parts of Prayer Plant care is getting the watering right. They like their soil consistently moist but not soggy.

When to Water

  • Check the top inch of soil. When it feels slightly dry, it’s time to water.
  • Water more frequently during the growing season (spring and summer) and reduce in fall and winter.

How to Water

  • Use lukewarm, filtered, or distilled water if possible. Tap water with high chlorine or fluoride can cause leaf tips to brown.
  • Water thoroughly until it drains out of the pot’s base.
  • Never let the plant sit in standing water.

Signs of Overwatering:
Yellowing leaves, root rot, and mushy stems.

Signs of Underwatering:
Crispy, brown leaf edges and drooping leaves.


The Best Soil for Prayer Plants

Prayer Plants thrive in light, airy, and well-draining soil. A mix that retains moisture without becoming waterlogged is essential.

Recommended Soil Mix:

  • 2 parts peat moss or coco coir
  • 1 part perlite or coarse sand
  • 1 part potting soil

You can also use a high-quality indoor plant mix labeled for tropical plants.


Fertilizing Your Prayer Plant

Regular feeding helps keep your Prayer Plant lush and colorful.

  • Use a balanced, water-soluble houseplant fertilizer (10-10-10 or 20-20-20).
  • Dilute the fertilizer to half the recommended strength.
  • Feed every 2-4 weeks during spring and summer.
  • Avoid fertilizing in fall and winter when growth naturally slows.

Tip: Over-fertilizing can cause salt buildup in the soil, leading to leaf burn. Flush the soil with water every few months to prevent this.


Pruning and Grooming

Prayer Plants benefit from occasional pruning, which encourages bushier, healthier growth.

How to Prune

  • Use clean, sharp scissors or pruning shears.
  • Trim back any leggy stems, yellowing, or damaged leaves.
  • Cut just above a leaf node to promote new growth.

Regularly wipe leaves with a damp cloth to remove dust and keep their patterns vibrant.


Propagating a Prayer Plant

Propagation is a simple and rewarding way to multiply your Prayer Plant.

Propagation by Stem Cuttings

  1. Cut a healthy stem just below a leaf node, making sure it has at least 2-3 leaves.
  2. Place the cutting in water, ensuring the node is submerged.
  3. Keep it in bright, indirect light.
  4. Change the water every few days.
  5. Once roots reach about 1 inch, plant the cutting in soil.

Tip: You can also propagate by division when repotting a mature plant.


Common Prayer Plant Problems and Solutions

Even with careful attention, Prayer Plants can run into a few issues. Here’s how to diagnose and fix them.

ProblemSymptomsSolution
Leaf CurlingDry soil, low humidity, or temperature stressWater consistently, raise humidity, avoid drafts
Brown Leaf TipsLow humidity or poor water qualityIncrease humidity, use filtered or distilled water
Yellowing LeavesOverwatering or too much sunAdjust watering schedule, relocate to indirect light
Leggy GrowthInsufficient lightMove to a brighter location
Pests (Spider mites, mealybugs)Webbing, sticky residue, small insectsWipe leaves with neem oil or insecticidal soap

Styling and Display Ideas

Prayer Plants are excellent for adding color and movement to indoor spaces. Here are a few creative ways to display them:

  • Hanging baskets: Showcase their trailing vines.
  • Tabletop centerpiece: A single Prayer Plant brightens a kitchen or coffee table.
  • Grouped with other tropical plants: Create a lush, mini jungle.
  • Terrariums: Their humidity-loving nature makes them ideal candidates.

Is the Prayer Plant Safe for Pets?

Good news! Prayer Plants are non-toxic to cats, dogs, and humans according to the ASPCA. However, it’s always best to discourage pets from nibbling on houseplants.


Final Thoughts

While Prayer Plants may require a bit more attention than your average pothos or snake plant, their breathtaking foliage, interactive nature, and air-purifying qualities make them worth the effort.

By providing the right balance of light, warmth, humidity, and consistent watering, you can care for a Prayer Plant efficiently and enjoy its beautiful, dynamic display for years to come.

And remember — those graceful evening prayers, with leaves folding gently upward at night, are your plant’s way of saying thank you.

How to Care for a Pothos Plant Successfully

How to Care for a Pothos Plant Successfully

If you’re looking for a low-maintenance, fast-growing, and incredibly forgiving houseplant, the pothos (Epipremnum aureum) is a perfect choice. Known for its trailing vines and heart-shaped leaves, pothos is beloved by both beginners and seasoned plant parents alike. Not only is it easy to grow, but it also purifies the air and adds a lush, tropical vibe to any indoor space.

In this comprehensive guide, we’ll cover everything you need to know about caring for a pothos plant successfully — from choosing the right environment and watering schedule to propagation tips and dealing with common problems.


What is a Pothos Plant?

Before diving into care tips, let’s get to know this plant a little better. Pothos, often called Devil’s Ivy, is a tropical vine native to the Solomon Islands. It’s one of the most popular houseplants worldwide thanks to its attractive foliage and adaptability. The plant comes in several stunning varieties, including:

  • Golden Pothos: Green leaves with golden-yellow variegation.
  • Marble Queen: White and green marbled leaves.
  • Neon Pothos: Bright, chartreuse-green leaves.
  • Jade Pothos: Solid deep green leaves.

Pothos can be grown in hanging baskets, trailing from shelves, or even trained to climb a trellis or moss pole.


Ideal Environment for Pothos

One of the main reasons pothos are so easy to care for is their adaptability. However, providing an ideal environment will help your plant truly thrive.

Light Requirements

Pothos prefer bright, indirect light but can tolerate low-light conditions, making them ideal for offices, bedrooms, and bathrooms. Direct sunlight can scorch their leaves, while too little light may cause variegated varieties to lose their unique coloring.

Tip: If your pothos leaves turn pale or the variegation fades, it’s a sign your plant may need more light.

Temperature and Humidity

Pothos are tropical plants and flourish in temperatures between 65°F to 85°F (18°C to 29°C). They can survive in slightly cooler environments but are sensitive to cold drafts and sudden temperature drops.

While they tolerate average indoor humidity, pothos love slightly higher humidity levels. Placing your plant in a bathroom or kitchen, or misting it occasionally, can encourage lush growth.


How to Water a Pothos

Proper watering is key to pothos care, and it’s better to underwater than overwater these plants.

When to Water

Let the top 1-2 inches of soil dry out before watering. You can test this by sticking your finger into the soil or using a moisture meter. Pothos are susceptible to root rot if left sitting in waterlogged soil.

How to Water

  • Water thoroughly until it drains out of the bottom of the pot.
  • Discard any excess water from saucers to prevent root rot.
  • Reduce watering frequency during the winter months when plant growth slows.

Tip: If your pothos leaves start to droop, it’s often a sign that it needs water — though it will usually perk up quickly after a drink.


Choosing the Right Soil and Pot

Pothos aren’t picky about soil but do best in a well-draining, peat-based potting mix. A mix designed for indoor plants or one containing perlite or orchid bark for extra aeration is ideal.

Always choose a pot with drainage holes to prevent excess moisture from accumulating at the bottom.


Fertilizing Your Pothos

While pothos can survive without frequent feeding, regular fertilizing encourages vigorous growth.

  • Use a balanced, water-soluble houseplant fertilizer (like a 10-10-10 or 20-20-20 formula).
  • Feed your pothos every 4-6 weeks during the growing season (spring through early fall).
  • Reduce or stop fertilizing during winter when plant growth slows.

Over-fertilizing can cause salt buildup in the soil and damage the plant’s roots, so always follow package instructions.


Pruning and Training Your Pothos

Pruning helps maintain your pothos’s shape, encourages fuller growth, and prevents it from becoming too leggy.

When and How to Prune

  • Use clean, sharp scissors or pruning shears.
  • Trim stems just above a leaf node (the point where a leaf attaches to the vine).
  • Remove any yellowing, dead, or damaged leaves to keep the plant healthy.

Tip: Pruned vines can be propagated easily to create new plants!


Propagating Pothos

One of the joys of owning a pothos is how easy it is to propagate. You can multiply your plant collection or share cuttings with friends.

Steps to Propagate Pothos in Water

  1. Cut a vine below a node (the small bump where leaves and aerial roots form).
  2. Remove the leaf closest to the cut end.
  3. Place the cutting in a jar of clean water, ensuring the node is submerged.
  4. Place the jar in a bright, indirect light.
  5. Change the water every few days.
  6. Once roots grow 2-3 inches long, transfer the cutting to soil.

Pothos can also be propagated directly in soil, though water propagation is a fun and visible way to watch the roots develop.


Common Pothos Problems and Solutions

Even though pothos are hardy plants, they can occasionally run into problems. Here’s how to identify and fix them:

ProblemSymptomsSolution
OverwateringYellowing leaves, mushy stems, wiltingAllow soil to dry out; repot if necessary
UnderwateringDrooping, dry or crispy leavesWater thoroughly and regularly
Pests (Spider mites, mealybugs)Webbing, sticky residue, tiny insectsWipe leaves with insecticidal soap or neem oil
Loss of VariegationLeaves turn solid greenMove to a brighter location
Leggy GrowthLong, bare stemsPrune back to encourage bushier growth

Is Pothos Toxic to Pets?

Yes — while pothos is safe for handling, it’s considered toxic to cats, dogs, and humans if ingested. It contains calcium oxalate crystals, which can cause irritation, vomiting, and difficulty swallowing. Always keep pothos out of reach of curious pets and children.


Fun Styling Ideas for Your Pothos

Pothos plants are incredibly versatile and can be styled in various ways to enhance your home décor:

  • Hanging baskets: Let the vines cascade gracefully.
  • Macrame plant hangers: Add a bohemian touch.
  • Mounted on a moss pole: Train vines upward for a vertical display.
  • Trailing from a shelf: Soften sharp corners and add greenery to empty spaces.
  • Water propagation displays: Showcase cuttings in glass jars or vases.

Final Thoughts

Caring for a pothos plant successfully doesn’t require a green thumb — just a little attention to light, water, and occasional pruning. These adaptable, fast-growing vines are perfect for beginners and plant lovers alike, offering endless possibilities for decorating your home while improving indoor air quality.

Whether you grow them in hanging baskets, train them up a moss pole, or propagate them into new plants, pothos will reward you with their lush, trailing foliage for years to come.

How to Care for a Peace Lily Plant Indoors

How to Care for a Peace Lily Plant Indoors

The Peace Lily (Spathiphyllum spp.) is one of the most cherished and enduring houseplants around the world. With its lush, deep green foliage and graceful white blooms, this plant brings elegance and serenity to any interior space. Beyond its beauty, it’s also known for its excellent air-purifying qualities, making it a perfect addition to homes and offices alike.

Whether you’re a beginner plant enthusiast or an experienced indoor gardener, understanding the specific needs of a Peace Lily is essential to keep it healthy and blooming. In this comprehensive guide, we’ll walk you through everything you need to know about how to care for a Peace Lily plant indoors.


About the Peace Lily Plant

Despite its name, the Peace Lily is not a true lily. It belongs to the Araceae family and originates from the tropical rainforests of Central and South America. Its most recognizable feature is the white “flower,” which is actually a spathe — a modified leaf — that wraps around a central spadix containing tiny flowers.

Peace Lilies are prized for their:

  • Elegant white blooms
  • Deep green, glossy leaves
  • Air-purifying abilities, removing toxins like benzene, formaldehyde, and carbon monoxide

They’re low-maintenance and forgiving, making them ideal for indoor environments.


Light Requirements for Indoor Peace Lilies

Peace Lilies prefer bright, indirect light, mimicking the filtered sunlight they receive under the rainforest canopy. While they’re tolerant of lower light levels, their growth and blooming may slow in dim conditions.

Best Placement:

  • Near an east- or north-facing window
  • Avoid harsh, direct sunlight which can scorch the leaves
  • In lower light, the plant will focus on foliage growth rather than blooms

Pro Tip: If your Peace Lily isn’t flowering, it likely needs more light.


How to Water a Peace Lily Indoors

Watering is one of the most important aspects of Peace Lily care. They prefer consistently moist soil but are highly sensitive to overwatering, which can cause root rot.

Watering Guidelines:

  • Water when the top 1–2 inches of soil feel dry
  • Use room-temperature, filtered, or distilled water to avoid chlorine and fluoride buildup
  • Pour water evenly until it begins to drain from the bottom of the pot
  • Reduce watering frequency in the winter months

Pro Tip: Peace Lilies are known for their dramatic droop when thirsty. If you notice your plant wilting, water it promptly — it typically perks up within hours.


Best Soil for Peace Lilies

Peace Lilies thrive in a well-draining, rich, and aerated soil that holds some moisture but doesn’t stay soggy.

Ideal Soil Mix:

  • 2 parts peat-based potting mix
  • 1 part perlite or coarse sand
  • 1 part orchid bark (optional for extra drainage)

This blend ensures good moisture retention and root aeration.


Choosing the Right Pot

Always use a pot with good drainage holes.
Terracotta, ceramic, or plastic pots work well, provided excess water can escape freely.

Size Tip: Peace Lilies prefer slightly snug pots. Only repot when you notice roots circling the pot’s base or poking through the drainage holes — typically every 1–2 years.


Fertilizing a Peace Lily Plant Indoors

While Peace Lilies aren’t heavy feeders, providing nutrients during the growing season supports healthy foliage and encourages blooming.

Fertilizing Guidelines:

  • Use a balanced, water-soluble houseplant fertilizer (20-20-20)
  • Apply at half-strength every 6–8 weeks during spring and summer
  • Avoid fertilizing in fall and winter when the plant’s growth slows

Pro Tip: Over-fertilizing can lead to brown leaf tips — always dilute your fertilizer appropriately.


How to Encourage Blooms

A common question among Peace Lily owners is how to encourage their plant to flower indoors.

Blooming Tips:

  • Provide bright, indirect light
  • Fertilize regularly during the growing season
  • Avoid overwatering and root-bound conditions
  • Maintain humidity levels between 50–60%

Remember: Peace Lilies naturally bloom in spring and early summer. After flowers fade, cut the spent blooms at the base to encourage new growth.


Pruning and Maintenance

Peace Lilies are low-maintenance but benefit from occasional grooming.

Pruning Tips:

  • Remove yellowing or brown leaves at the base using clean, sharp scissors
  • Cut spent flower stalks once they fade to promote new blooms
  • Wipe leaves regularly with a damp cloth to remove dust and maintain glossy foliage

Common Pests and Problems

Though generally resilient, Peace Lilies can face occasional pest and disease issues.

Common Pests:

  • Spider mites: Fine webbing and tiny speckles on leaves. Wipe with soapy water or neem oil.
  • Mealybugs: White cottony masses on stems. Remove with a cotton swab dipped in rubbing alcohol.
  • Aphids: Cluster on new growth. Rinse with water or treat with insecticidal soap.

Common Problems:

  • Yellow leaves: Typically caused by overwatering or underwatering.
  • Brown leaf tips: Often due to dry air, fluoride in tap water, or fertilizer buildup.
  • Wilting: A sign of either dry soil or root rot from overwatering.

Pro Tip: Ensure good air circulation and avoid placing your Peace Lily in drafty or extremely dry areas.


Ideal Temperature and Humidity

Peace Lilies prefer the warm, humid conditions of their tropical origins.

Ideal Conditions:

  • Temperature: 65–85°F (18–29°C)
  • Humidity: 50–60% or higher

Tips to Increase Humidity Indoors:

  • Use a humidifier near the plant
  • Group plants together to create a humid microclimate
  • Place the pot on a pebble tray filled with water
  • Mist leaves occasionally with distilled water

Propagating a Peace Lily

Peace Lilies are easily propagated through division — separating the plant at the roots.

Propagation Steps:

  1. Remove the plant from its pot.
  2. Gently separate clumps of roots, ensuring each division has several leaves.
  3. Plant each division in a new pot with fresh soil.
  4. Water thoroughly and keep in a warm, shaded spot for a week before returning to bright, indirect light.

This is best done in spring when the plant begins active growth.


Benefits of Growing a Peace Lily Indoors

Besides its beauty and ease of care, a Peace Lily offers multiple benefits:

  • Air Purification: Removes harmful indoor toxins like benzene, formaldehyde, and carbon monoxide.
  • Mood-Boosting: Its lush greenery and elegant flowers promote calm and relaxation.
  • Petite or Large Varieties: Suitable for tabletops or large floor displays.
  • Natural Humidifier: Its transpiration helps raise indoor humidity.

Final Thoughts

Caring for a Peace Lily plant indoors is simple and deeply rewarding. With its glossy leaves, elegant white blooms, and air-purifying abilities, it’s no wonder this plant remains a household favorite.

By following the guidelines in this article — from providing the right light and water to encouraging blooms and maintaining humidity — you’ll enjoy a vibrant, healthy Peace Lily that brings beauty and tranquility to your indoor space for years to come.

How to Care for a Monstera Plant Properly

How to Care for a Monstera Plant Properly

Monstera plants, with their bold, split leaves and tropical vibes, have become one of the most sought-after houseplants in homes and offices worldwide. Their dramatic foliage adds character and a lush jungle feel to any space. But while Monstera plants are relatively easy to maintain, understanding their specific care needs will keep them thriving, growing large, and looking their best.

Whether you’re a first-time Monstera owner or a seasoned plant lover hoping to perfect your care routine, this guide covers everything you need to know about how to care for a Monstera plant properly.


What Is a Monstera Plant?

The Monstera genus belongs to the Araceae family and originates from the tropical rainforests of Central and South America. The most popular species for houseplant enthusiasts is the Monstera deliciosa, also known as the Swiss Cheese Plant because of the natural holes and splits (fenestrations) in its leaves.

Other popular varieties include:

  • Monstera adansonii (smaller, heart-shaped leaves with holes)
  • Monstera obliqua (rare, with more holes than leaf)
  • Monstera siltepecana (silvery markings on juvenile leaves)

These plants are natural climbers in the wild, using aerial roots to anchor themselves to trees and absorb moisture.


Ideal Light for Monstera Plants

Monsteras love bright, indirect light. In their native habitat, they grow under the rainforest canopy, enjoying dappled sunlight.

Indoor Placement:

  • Place near a south- or east-facing window with filtered light.
  • Avoid direct afternoon sun, which can scorch their leaves.
  • Too little light results in slower growth, smaller leaves, and fewer fenestrations (splits and holes).

Pro Tip: If your Monstera isn’t getting enough natural light, supplement with a grow light to maintain healthy growth.


How to Water a Monstera Plant

Monsteras prefer evenly moist, but not waterlogged, soil. Overwatering is one of the most common mistakes.

Watering Guidelines:

  • Water when the top 2 inches of soil feel dry.
  • Ensure water drains freely from the pot’s drainage holes.
  • Reduce watering during the winter months when growth slows down.

Signs of Overwatering:

  • Yellowing leaves
  • Wilting despite wet soil
  • Mushy roots or stems

Signs of Underwatering:

  • Crispy brown leaf edges
  • Drooping leaves
  • Slowed growth

Pro Tip: Use room-temperature, filtered, or distilled water to avoid leaf spotting caused by fluoride or chlorine.


Best Soil for Monstera Plants

Monsteras thrive in well-draining, rich, and aerated soil that retains some moisture without becoming waterlogged.

Ideal Soil Mix:

  • 1 part potting soil
  • 1 part orchid bark
  • 1 part perlite or pumice

This mixture mimics the loose, organic-rich forest floor of their native habitat and provides airflow to the roots.


Choosing the Right Pot

Select a pot with good drainage holes.
Terracotta pots are a great choice for Monsteras because they wick moisture from the soil, reducing the risk of overwatering.

Size Tip: Repot your Monstera every 1–2 years, or when roots begin circling the pot’s base, moving up one pot size at a time.


How to Fertilize a Monstera Plant

To keep your Monstera growing lush and healthy, feed it during the active growing season.

Fertilizing Guidelines:

  • Use a balanced liquid fertilizer (20-20-20) diluted to half-strength.
  • Apply every 4–6 weeks from spring to early fall.
  • Hold off on fertilizing during late fall and winter.

Over-fertilizing can cause leaf tip burn and soil salt buildup.


Pruning and Training

Regular pruning keeps your Monstera looking tidy and encourages fuller growth.

Pruning Tips:

  • Trim yellow, damaged, or dead leaves as needed.
  • Cut back leggy stems to encourage branching.
  • Always use clean, sharp pruning shears.

Supporting Growth:

Monsteras are natural climbers. Provide a moss pole, trellis, or sturdy stake to support their aerial roots and help them grow upward.


Propagating a Monstera Plant

Monsteras are easy and fun to propagate, making it simple to expand your collection or share cuttings with friends.

Propagation by Stem Cuttings:

  1. Select a healthy stem with at least one node (where leaves and aerial roots grow).
  2. Cut just below the node.
  3. Place the cutting in water or moist soil.
  4. If propagating in water, change it weekly.
  5. Roots will appear in 2–4 weeks.

Once the roots are a few inches long, plant in soil.


Common Pests and Problems

Although generally resilient, Monsteras can encounter a few issues:

Pests:

  • Spider Mites: Fine webs and yellowing leaves. Wipe leaves with soapy water or neem oil.
  • Mealybugs: White cottony spots. Remove with a cotton swab dipped in rubbing alcohol.
  • Scale Insects: Brown, hard bumps on stems and leaves. Scrape off gently and treat with horticultural oil.

Diseases:

  • Root Rot: Caused by overwatering. Trim affected roots and repot in fresh soil.
  • Leaf Spot: Brown or yellow spots with dark borders. Improve air circulation and avoid wetting the leaves during watering.

Ideal Temperature and Humidity

Monsteras love warm, humid environments, mimicking tropical rainforests.

Ideal Conditions:

  • Temperature: 65–85°F (18–29°C)
  • Humidity: 50–80%

Tips to Increase Humidity:

  • Mist leaves occasionally.
  • Place a humidifier nearby.
  • Group plants together to create a microclimate.
  • Place the pot on a tray of pebbles and water.

Encouraging Leaf Fenestrations

One of the most attractive features of Monstera plants is their leaf fenestrations (splits and holes).

How to Encourage Them:

  • Provide bright, indirect light.
  • Fertilize regularly during the growing season.
  • Support the plant with a moss pole.
  • Keep humidity above 50%.
  • Ensure the plant is mature enough — young Monsteras often have solid leaves.

Seasonal Care Tips

Spring & Summer:

  • Water more frequently.
  • Fertilize every 4–6 weeks.
  • Provide bright light.

Fall:

  • Reduce watering.
  • Prepare to stop fertilizing by late fall.

Winter:

  • Keep away from cold drafts.
  • Reduce watering to prevent root rot.
  • Maintain humidity with misting or a humidifier.

Benefits of Growing a Monstera Plant

Aside from their beauty, Monsteras offer several advantages:

  • Air-Purifying: Removes indoor pollutants like formaldehyde.
  • Mood-Boosting: Their lush greenery creates a calming, uplifting environment.
  • Statement Decor: A single Monstera can instantly elevate any room’s aesthetic.

Final Thoughts

Caring for a Monstera plant properly involves striking a balance between moisture, light, and humidity while providing adequate support for their climbing nature. With the right care, these stunning plants can grow impressively large, producing show-stopping leaves that become the centerpiece of any room.

By following the tips in this guide — from watering wisely to encouraging leaf splits — you’ll enjoy a healthy, thriving Monstera for years to come.

How to Care for a Kalanchoe Plant Effectively

How to Care for a Kalanchoe Plant Effectively

Kalanchoe plants are a popular favorite among houseplant enthusiasts and gardeners alike. Known for their vibrant blooms, thick succulent leaves, and easy-care nature, these versatile plants bring life and color to any indoor space or garden. But while Kalanchoes are generally low-maintenance, a few essential care tips will keep them blooming beautifully and thriving for years.

Whether you’re a first-time plant parent or a seasoned indoor gardener, this comprehensive guide will walk you through everything you need to know about how to care for a Kalanchoe plant effectively.


What Is a Kalanchoe Plant?

The Kalanchoe genus is part of the Crassulaceae family, native to Madagascar and tropical Africa. With over 125 known species, Kalanchoes are famous for their succulent leaves and eye-catching clusters of small, colorful flowers.

The most popular variety is Kalanchoe blossfeldiana, often seen in homes and garden centers with vivid red, pink, orange, yellow, or white flowers that can last for several weeks. Some other striking varieties include:

  • Kalanchoe tomentosa (Panda Plant)
  • Kalanchoe daigremontiana (Mother of Thousands)
  • Kalanchoe beharensis (Velvet Elephant Ear)

Kalanchoes are often gifted around holidays like Christmas, Valentine’s Day, and Easter because of their festive blooms and easy care.


Ideal Light for Kalanchoe Plants

Kalanchoes thrive in bright, indirect sunlight. As a succulent plant, they need plenty of light to maintain their compact shape and encourage flowering.

Indoor Care

Place your Kalanchoe near a south- or west-facing window where it can enjoy at least 6 hours of filtered sunlight daily. Too little light will result in leggy growth and fewer blooms.

Tip: Avoid placing them in direct midday sun for extended periods, especially in summer, as this can scorch the leaves.

Outdoor Care

In warmer climates, Kalanchoes do well outdoors in partially shaded spots. If moving them outside during summer, gradually acclimate them to prevent sunburn.


How to Water a Kalanchoe Plant

Like most succulents, Kalanchoes prefer a “soak and dry” watering method.

Watering Guidelines:

  • Water thoroughly when the top 1–2 inches of soil feel dry.
  • Allow excess water to drain out, and never let the plant sit in water.
  • Reduce watering frequency during the fall and winter months when the plant enters a resting period.

Signs of Overwatering:

  • Yellowing, mushy leaves
  • Root rot
  • Fungal growth at the soil surface

Signs of Underwatering:

  • Wilted, shriveled leaves
  • Drooping stems

Pro Tip: It’s better to underwater a Kalanchoe than to overwater it.


Best Soil for Kalanchoe Plants

Kalanchoes require well-draining soil to prevent root rot.

Recommended Soil Mix:

  • Cactus or succulent potting mix
    Or
  • DIY mix: 2 parts regular potting soil + 1 part perlite + 1 part coarse sand

Avoid moisture-retentive soils or those with high peat content, as they retain too much water.


Choosing the Right Pot

Select a pot with drainage holes to allow excess water to escape easily.
Terracotta pots are ideal as they allow the soil to dry faster than plastic or ceramic containers.

Size Tip: Choose a pot slightly larger than the root ball. Too much extra soil can retain moisture and lead to rot.


How to Encourage Kalanchoe Blooms

One of the best features of a Kalanchoe is its long-lasting, colorful blooms — but these flowers need the right conditions to appear.

Key Blooming Tips:

  • Provide bright, indirect sunlight.
  • Keep in temperatures between 60–85°F (15–29°C).
  • Avoid overwatering.
  • Use a balanced liquid fertilizer (10-10-10) once a month during the growing season (spring and summer).

Encouraging Reblooming:
Kalanchoes are short-day plants, meaning they bloom when daylight hours decrease.

How to Trigger Blooms:

  • In fall, give your plant 14–16 hours of darkness daily for about 6 weeks.
  • Move the plant to a dark closet or cover it with a box each evening.
  • Resume normal light after flower buds appear.

Pruning and Grooming

Regular pruning keeps your Kalanchoe healthy, tidy, and encourages more blooms.

Pruning Tips:

  • Remove spent flowers and stems after blooming to direct energy into new growth.
  • Trim leggy stems to maintain a compact shape.
  • Remove dead or damaged leaves at the base.

Propagating Kalanchoe Plants

Propagation is simple and rewarding, making it easy to expand your collection or share with friends.

Common Methods:

  1. Stem Cuttings
    • Cut a healthy stem about 4 inches long.
    • Let it dry for 1–2 days.
    • Plant in dry, well-draining soil.
    • Mist lightly until roots form.
  2. Leaf Cuttings
    • Detach a healthy leaf.
    • Allow it to callous over for a day.
    • Place on soil, mist occasionally.
    • New plantlets will sprout from the base.
  3. Offsets (Baby Plants)
    • Some Kalanchoe varieties, like Mother of Thousands, produce small plantlets along leaf edges.
    • Gently separate and plant these in individual pots.

Common Pests and Problems

Though generally hardy, Kalanchoes can encounter a few issues:

1. Pests

  • Mealybugs: White, cottony spots on leaves. Remove with a cotton swab dipped in alcohol.
  • Aphids: Tiny green, black, or white insects. Treat with insecticidal soap.
  • Spider Mites: Fine webbing and yellowing leaves. Increase humidity and wipe leaves with soapy water.

2. Diseases

  • Root rot: Caused by overwatering. Remove affected parts and repot in fresh, dry soil.
  • Powdery mildew: White powdery patches on leaves. Improve air circulation and treat with a fungicide if necessary.

Seasonal Care Tips

Spring & Summer:

  • Fertilize monthly.
  • Increase watering frequency.
  • Place in bright, indirect light.

Fall:

  • Reduce watering.
  • Begin reblooming light treatment (optional).

Winter:

  • Keep away from drafts and cold windows.
  • Water sparingly.
  • Avoid fertilizing.

Ideal Temperature Range:
60–85°F (15–29°C). Kalanchoes dislike temperatures below 50°F (10°C).


Why You’ll Love Growing Kalanchoe

Kalanchoe plants are more than just pretty faces. They’re:

  • Low-maintenance and drought-tolerant
  • Petite and perfect for small spaces
  • Long-blooming and colorful
  • Easy to propagate and share
  • Air-purifying and mood-lifting

Whether you’re decorating a sunny windowsill, adding charm to your patio, or looking for a thoughtful plant gift, Kalanchoes are a delightful choice.


Final Thoughts

Caring for a Kalanchoe plant effectively boils down to a few key practices: providing bright, indirect sunlight, watering only when the soil is dry, using well-draining soil and pots, and pruning spent blooms to encourage new growth.

With minimal effort, these cheerful plants will reward you with months of vibrant blooms and rich, fleshy foliage. Try adding one (or several) to your collection — you’ll soon see why Kalanchoes are such beloved houseplants around the world.

Succulent Plants: How to Take Care of Them Successfully

Succulent Plants: How to Take Care of Them Successfully

Succulent plants have earned a special place in homes and gardens around the world. Their plump, fleshy leaves and striking shapes make them an irresistible choice for plant enthusiasts and beginners alike. Beyond their beauty, succulents are known for their resilience and low-maintenance care routines — making them perfect for busy lifestyles and novice gardeners.

If you’ve ever wanted to grow succulents successfully but weren’t sure how to start, this guide is for you. Let’s dive deep into everything you need to know about taking care of succulent plants and helping them thrive.


What Are Succulent Plants?

Succulent plants are a diverse group of species that store water in their leaves, stems, or roots. This adaptation allows them to survive in arid and dry conditions where water is scarce. The word “succulent” comes from the Latin word sucus, meaning juice or sap, referring to their water-retaining abilities.

Succulents come in countless shapes, sizes, and colors — from the charming rosettes of Echeveria to the geometric beauty of Haworthia and the trailing elegance of String of Pearls.

Some of the most popular succulents include:

  • Aloe Vera
  • Echeveria
  • Sedum
  • Crassula ovata (Jade Plant)
  • Haworthia
  • Kalanchoe
  • String of Pearls (Senecio rowleyanus)

Light Requirements for Succulents

Succulents love light — but not all types of light are created equal. Proper lighting is key to maintaining their shape, color, and health.

Indoor Succulents

Place your succulents near a south- or east-facing window where they can receive bright, indirect light for at least 6 hours a day. If natural light is limited, consider using a grow light to supplement.

Outdoor Succulents

Outdoor succulents thrive in bright, direct sunlight. However, if you’re moving a plant from indoors to outdoors, do so gradually to avoid sunburn. Start by placing them in a shaded spot for a few days before exposing them to full sunlight.

Tip: Watch for signs of too much or too little light:

  • Too little light: Stretching (etiolation), pale leaves.
  • Too much light: Scorched or sunburned patches on leaves.

How to Water Succulents Correctly

Watering is often the trickiest part of succulent care — and the number one cause of plant death is overwatering.

General Watering Rule

Let the soil dry out completely between waterings.

Succulents prefer a “soak and dry” method:

  1. Water the soil thoroughly until excess drains out.
  2. Wait for the soil to dry entirely before the next watering.

How Often Should You Water?

This depends on several factors:

  • Season: Succulents need more water in summer and less in winter.
  • Environment: A dry, sunny spot dries out faster than a shaded, humid one.
  • Container Type: Terracotta pots dry faster than plastic ones.

Average Watering Frequency:

  • Indoor: Every 10–14 days in summer; once a month in winter.
  • Outdoor: Every 7–10 days in summer; every 3–4 weeks in winter.

Signs of Overwatering:

  • Mushy, translucent leaves
  • Black spots (rot)
  • Wilting despite wet soil

Signs of Underwatering:

  • Wrinkled, shriveled leaves
  • Dry, brittle stems

Best Soil for Succulents

Succulents hate soggy roots, so good drainage is essential.

Ideal Soil Mix

Use a fast-draining soil mix specifically for cacti and succulents, or make your own:

  • 2 parts potting soil
  • 1 part coarse sand
  • 1 part perlite or pumice

Avoid regular garden soil, which retains too much moisture.


Choosing the Right Pot

The best pots for succulents have:

  • Drainage holes at the bottom.
  • Materials like terracotta or ceramic, which allow the soil to dry faster.

Avoid glass containers or pots without drainage unless you’re experienced in careful watering techniques.


Propagating Succulent Plants

One of the most exciting aspects of succulents is how easy they are to propagate — allowing you to grow new plants from leaves, cuttings, or offsets.

Propagation Methods:

  1. Leaf Cuttings:
    • Gently twist a healthy leaf from the plant.
    • Let it dry for a day or two.
    • Place it on top of soil, mist occasionally.
    • Roots and baby plants will appear in a few weeks.
  2. Stem Cuttings:
    • Cut a healthy stem with a clean, sharp knife.
    • Let it dry for a couple of days.
    • Plant the cutting into soil and water lightly after a week.
  3. Offsets (Pups):
    • Some succulents produce small offshoots.
    • Gently separate these and replant them.

Succulent Plant Care in Different Seasons

Succulents have different needs depending on the time of year.

Summer

  • Increase watering frequency.
  • Watch for sunburn.
  • Fertilize once a month with a diluted, balanced liquid fertilizer.

Winter

  • Reduce watering significantly.
  • Move outdoor plants indoors.
  • Avoid fertilizing during dormancy.

Note: Some succulents like Kalanchoe bloom in winter and may need extra care.


Common Succulent Problems and How to Fix Them

1. Pests

  • Mealybugs, aphids, and spider mites can attack succulents.
  • Use a cotton swab dipped in alcohol or insecticidal soap.

2. Rotting

  • Caused by overwatering or poor drainage.
  • Remove the plant, cut off rotten parts, and replant in dry soil.

3. Stretching (Etiolation)

  • Happens when succulents don’t get enough light.
  • Move them to a brighter spot or use a grow light.

Cleaning and Grooming

Keep succulents dust-free by gently wiping leaves with a soft, damp cloth. Remove dried, dead leaves at the base to prevent pests and rot.


Why You’ll Love Growing Succulents

Succulents offer countless benefits:

  • Low-maintenance care
  • Air-purifying qualities
  • Decorative appeal for homes and offices
  • Fun propagation opportunities
  • Wide variety of shapes, sizes, and colors

Whether you’re placing them on a sunny windowsill, a work desk, or an outdoor patio, succulents are a perfect way to bring a touch of nature into your space.


Final Thoughts

Caring for succulent plants successfully isn’t difficult — it’s about understanding their natural habits and mimicking those conditions. Provide them with plenty of light, allow the soil to dry between waterings, use the right soil mix, and protect them from cold or overwatering.

With just a little attention and the right environment, your succulents will reward you with years of beauty, texture, and charm. So go ahead — start your succulent collection today!