How to Care for a Peace Plant Successfully

How to Care for a Peace Plant Successfully

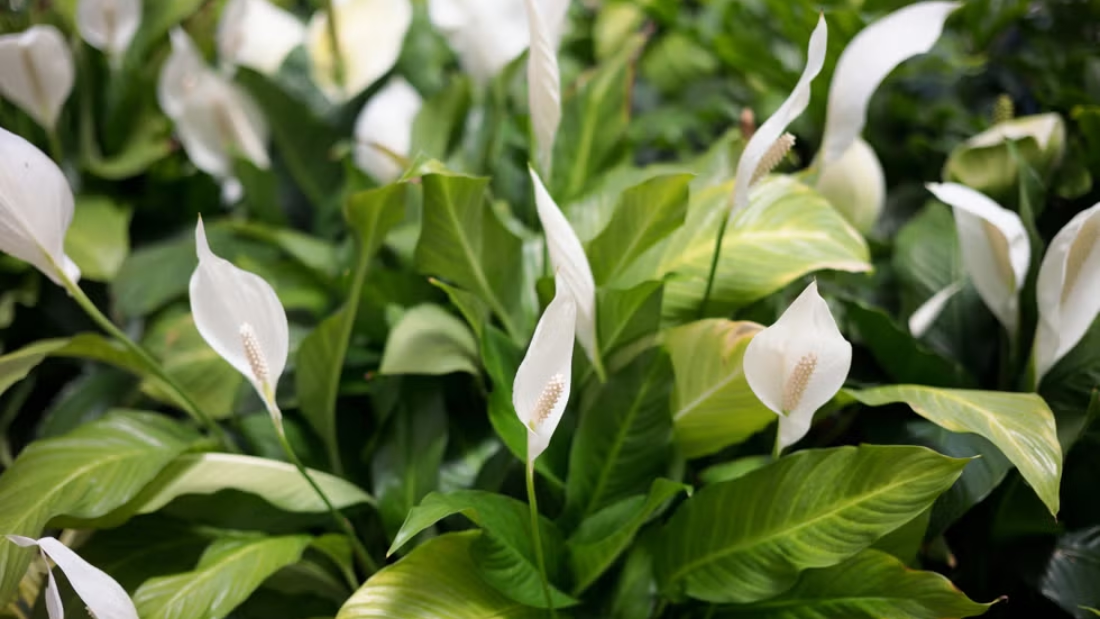
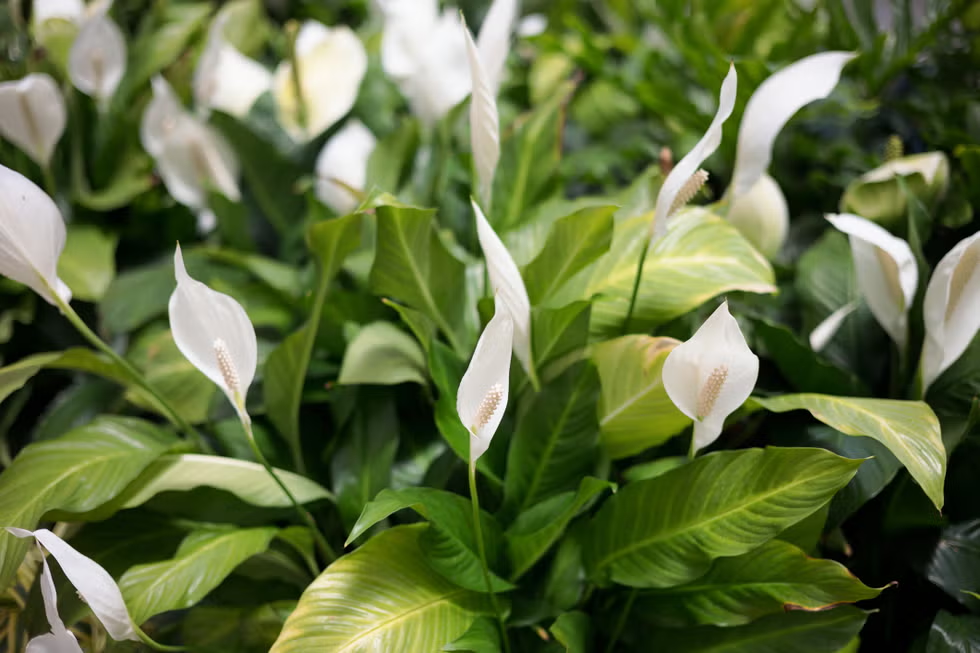
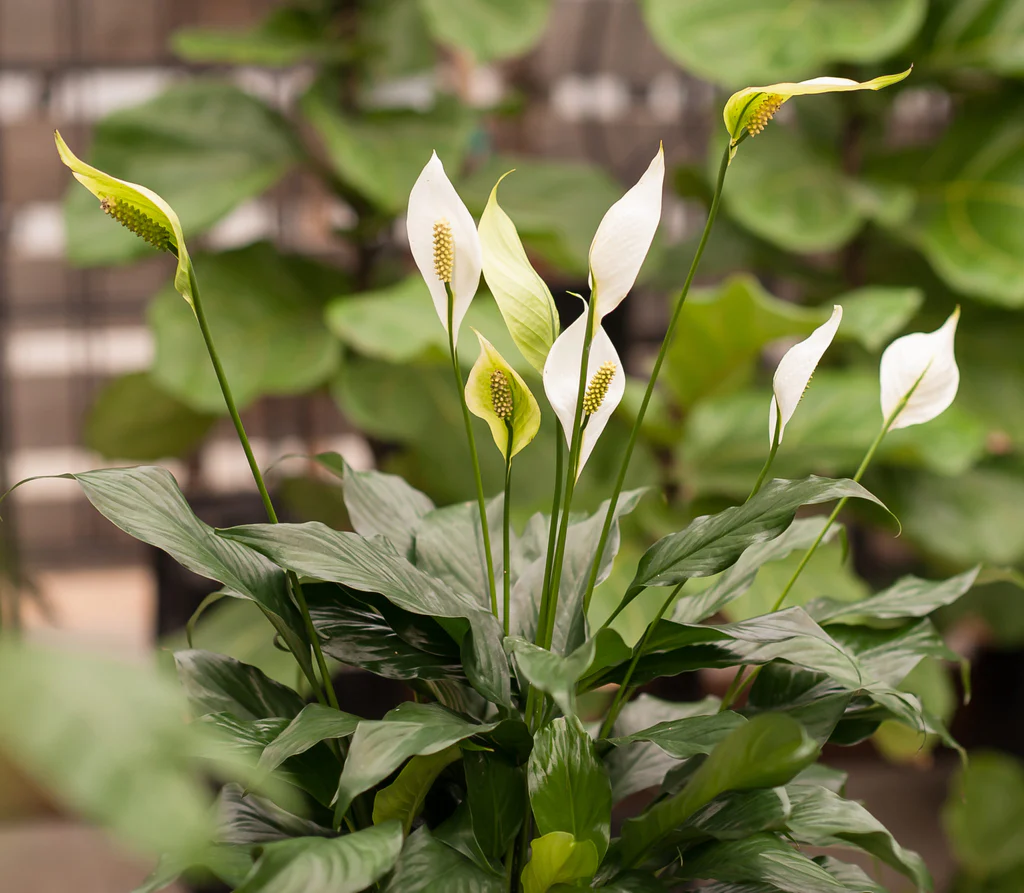
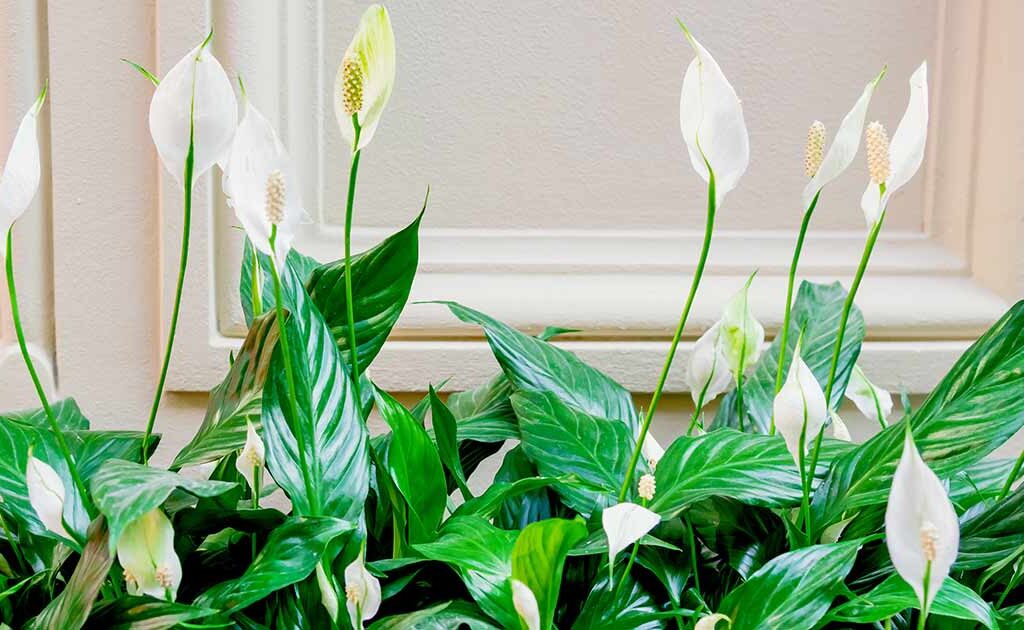
The Peace Lily (Spathiphyllum) is one of the most beloved houseplants around the world. Renowned for its graceful white blooms and lush, dark green foliage, this plant symbolizes peace, tranquility, and purity. Best of all — it’s relatively easy to care for, even for beginners. If you’re looking to add elegance and natural air purification to your home, a peace plant is a perfect choice.

In this guide, we’ll cover everything you need to know to care for your Peace Lily successfully, from light preferences and watering routines to troubleshooting common issues.


What is a Peace Plant?

Before diving into care tips, let’s get familiar with the plant itself.
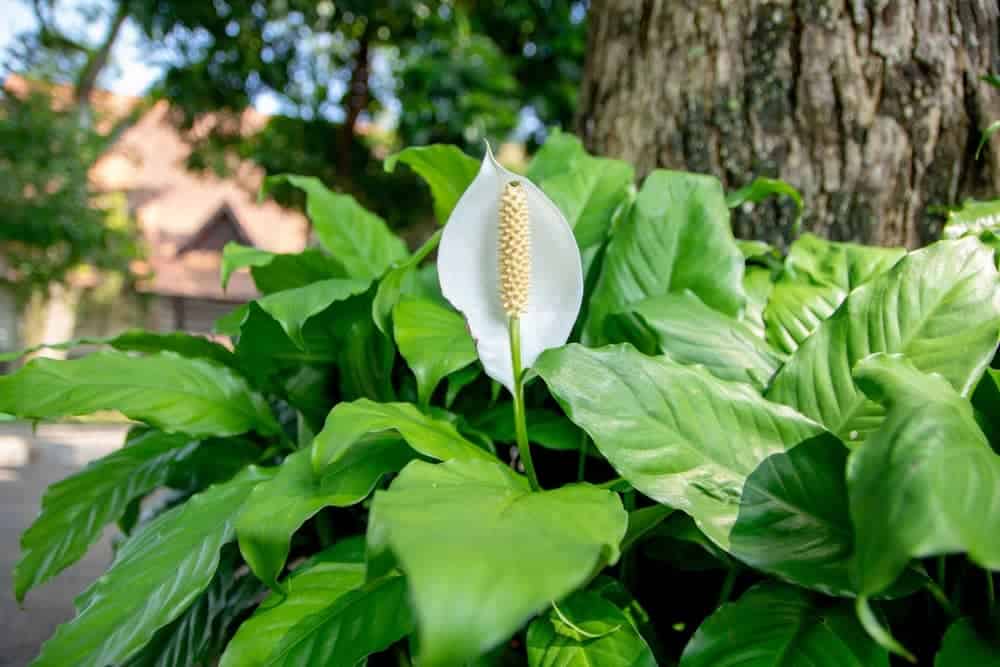
Peace Lilies are native to tropical rainforests of Central and South America. They thrive in warm, humid environments and are part of the Araceae family. The plant produces beautiful white flowers (actually modified leaves called spathes) that elegantly curve around a spadix — a spike covered in tiny flowers.

Besides their aesthetic appeal, Peace Lilies are celebrated for their ability to improve indoor air quality by filtering out toxins like formaldehyde, benzene, and carbon monoxide.


Ideal Growing Conditions for a Peace Plant

Creating the right environment is key to keeping your Peace Lily healthy and happy. Here’s what it needs:

1. Light Requirements

Peace Lilies thrive in bright, indirect light. Direct sunlight can scorch their leaves, while too little light will result in poor growth and no flowers.

Ideal spot:

  • Near a north or east-facing window
  • A few feet away from a bright window in other directions

If your Peace Lily isn’t blooming, it may need a bit more light. But remember — always avoid direct midday sun.

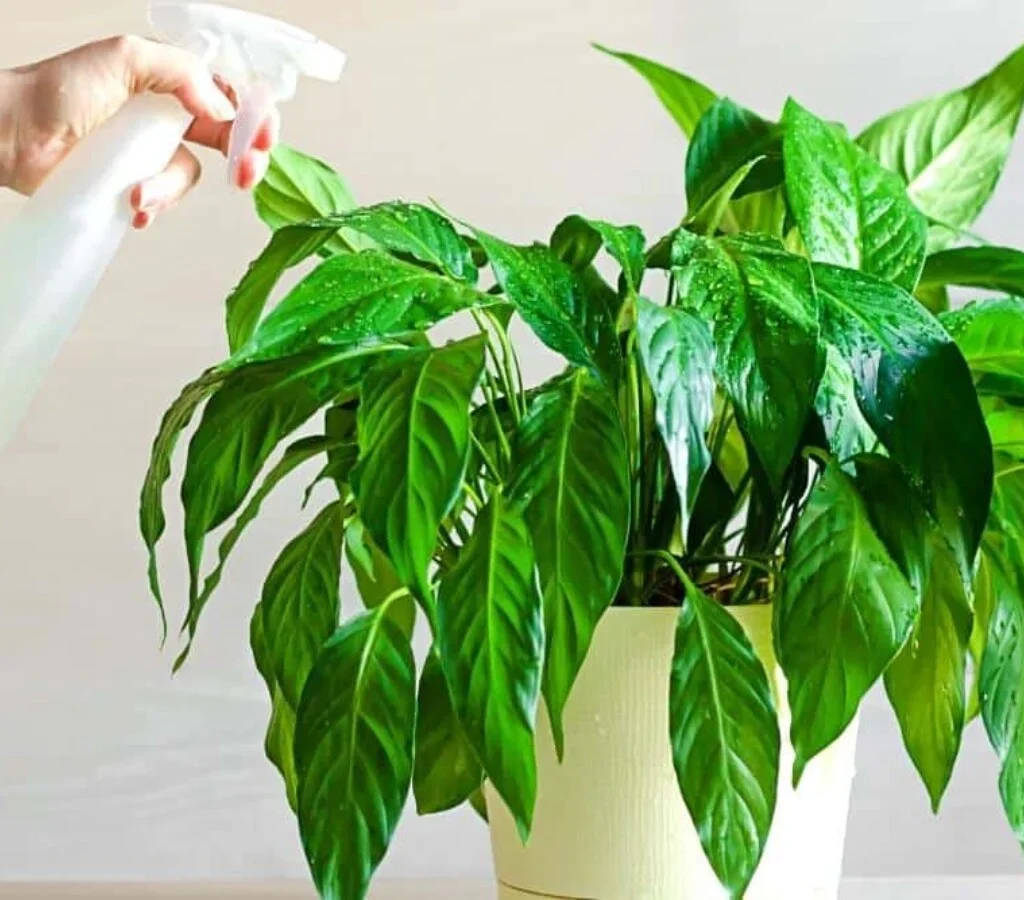
2. Temperature and Humidity

These tropical plants love consistent warmth and high humidity.

  • Ideal temperature: 65°F to 85°F (18°C to 29°C)
  • Avoid: Cold drafts, air conditioners, or heaters

Since they enjoy humid conditions, misting the leaves occasionally or placing the plant on a pebble tray filled with water can help, especially during dry winter months.


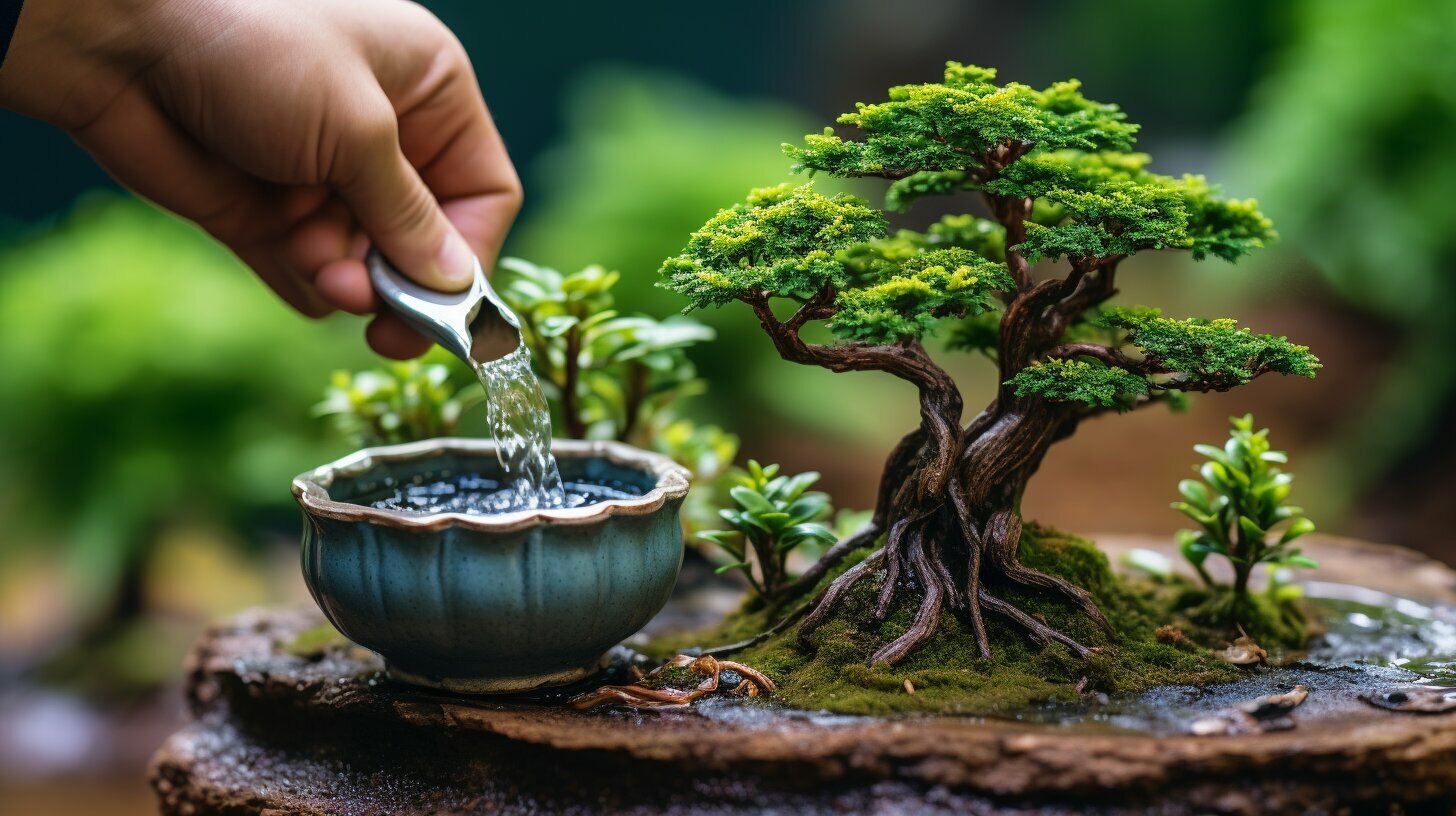
How to Water a Peace Plant

Watering is arguably the trickiest part of Peace Lily care — too much or too little water can both harm the plant. The goal is to keep the soil consistently moist but not soggy.

Watering Guidelines:

  • Check the top inch of soil with your finger; if it feels dry, it’s time to water.
  • Use room temperature, filtered water. Tap water with chlorine and fluoride can cause brown leaf tips.
  • Water thoroughly until it drains from the bottom, then discard excess water to prevent root rot.

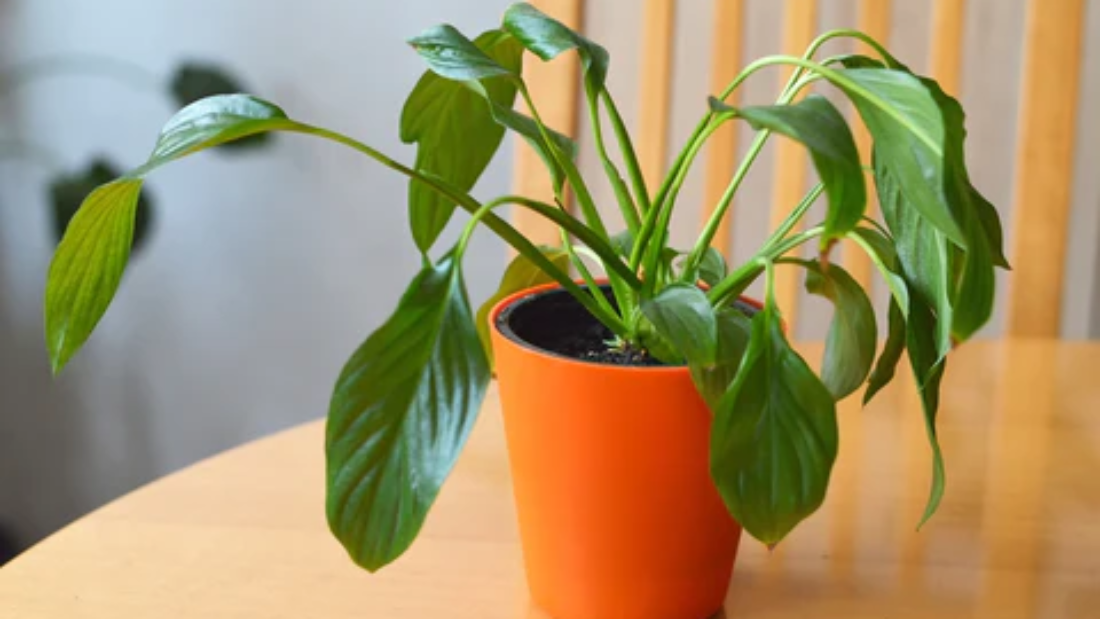
Pro Tip: Peace Lilies are good at letting you know when they need water. Their leaves will droop when they’re thirsty but typically perk back up within a few hours of watering.


Best Soil for Peace Plant

Peace Lilies prefer a well-draining, aerated soil mix. A good potting mix should retain moisture but not become waterlogged.

Recommended mix:

  • 2 parts peat-based potting soil
  • 1 part perlite or coarse sand
  • 1 part orchid bark (optional for added drainage)

This combination ensures roots receive enough air while holding sufficient moisture.


Fertilizing a Peace Plant

Peace Lilies aren’t heavy feeders, but occasional fertilizing will encourage healthy growth and blooms.

Fertilizing Tips:

  • Use a balanced, water-soluble houseplant fertilizer (20-20-20)
  • Apply once a month during the growing season (spring and summer)
  • Avoid fertilizing in fall and winter when the plant’s growth slows

Over-fertilizing can cause brown leaf tips and damage, so always follow label instructions and err on the side of caution.


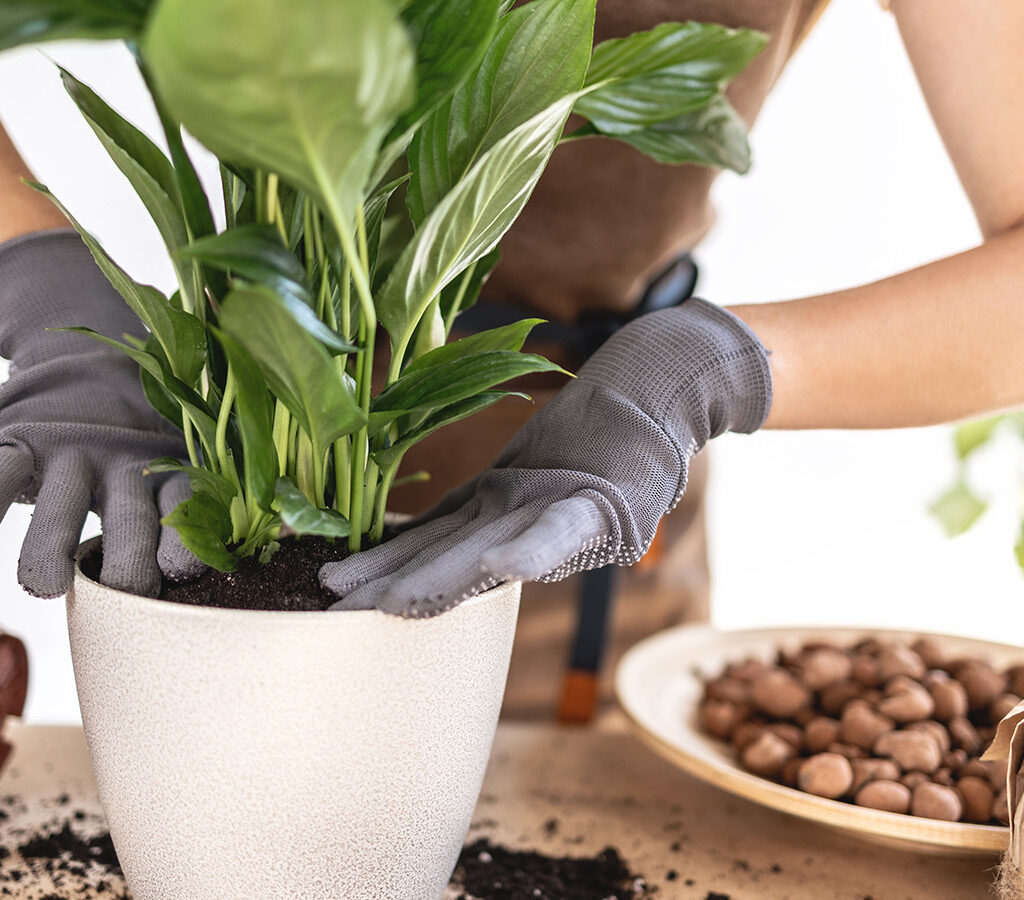
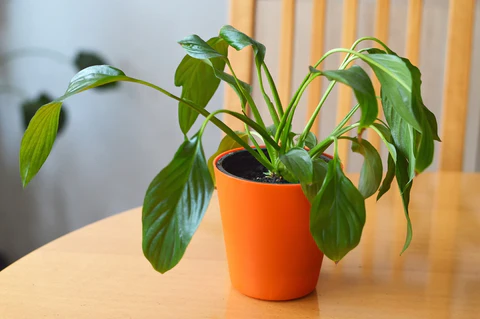
Repotting Peace Lily

As your Peace Lily grows, it may become root-bound — meaning its roots outgrow the pot. Signs of this include roots peeking through the drainage holes or frequent drooping despite regular watering.

Repotting guide:

  • Repot every 1-2 years in early spring
  • Choose a pot 1-2 inches larger in diameter than the current one
  • Use fresh potting mix and gently loosen the root ball before placing it in the new pot

Common Peace Plant Problems and Solutions

Even though Peace Lilies are relatively easy to care for, a few issues can arise. Here’s how to tackle them:
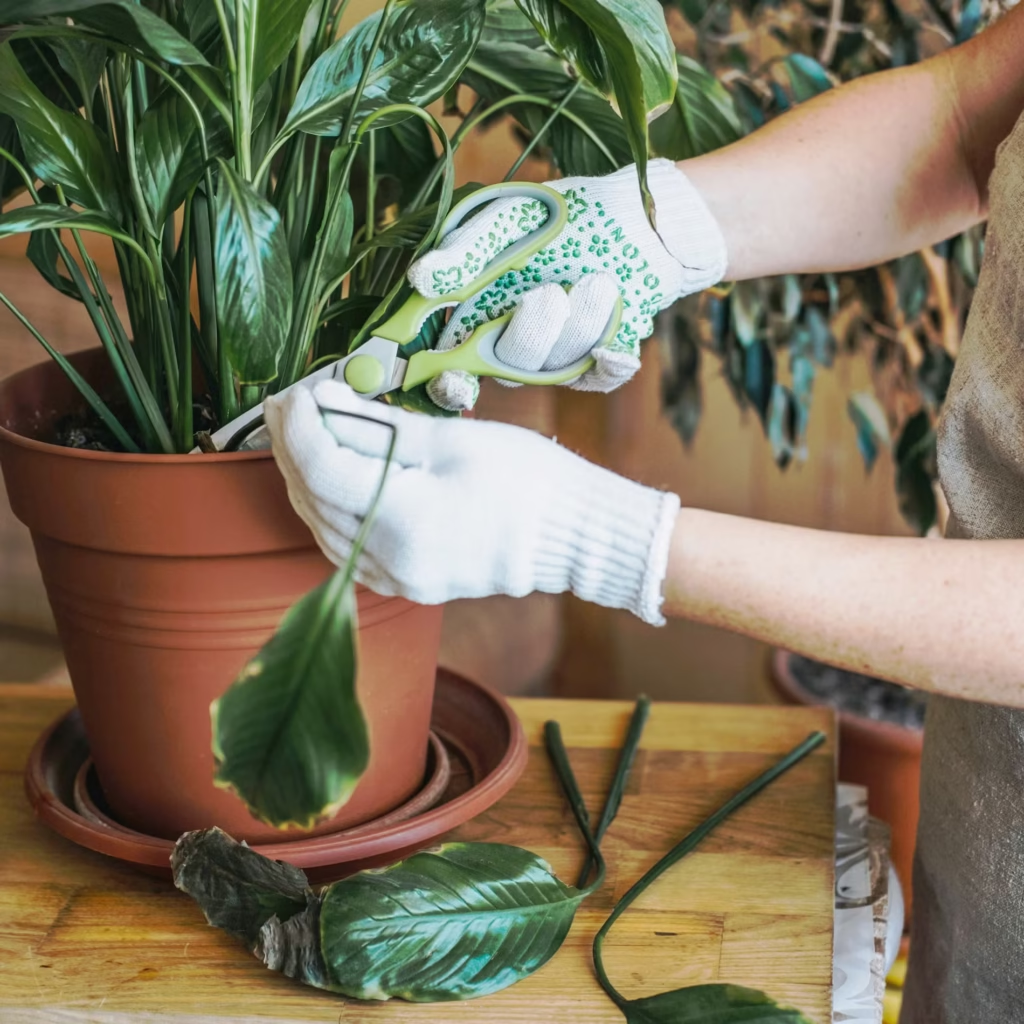
1. Yellow Leaves

Cause: Overwatering, poor drainage, or old age
Solution: Check soil moisture and drainage, remove affected leaves

2. Brown Leaf Tips

Cause: Low humidity, fluoride in tap water, or over-fertilizing
Solution: Increase humidity, use filtered water, and fertilize sparingly

3. Drooping Leaves

Cause: Usually due to underwatering, occasionally overwatering
Solution: Check soil moisture and adjust watering schedule

4. No Flowers

Cause: Insufficient light, poor nutrition, or maturity
Solution: Move plant to a brighter location, fertilize during growing season, or be patient as young plants may take time to bloom


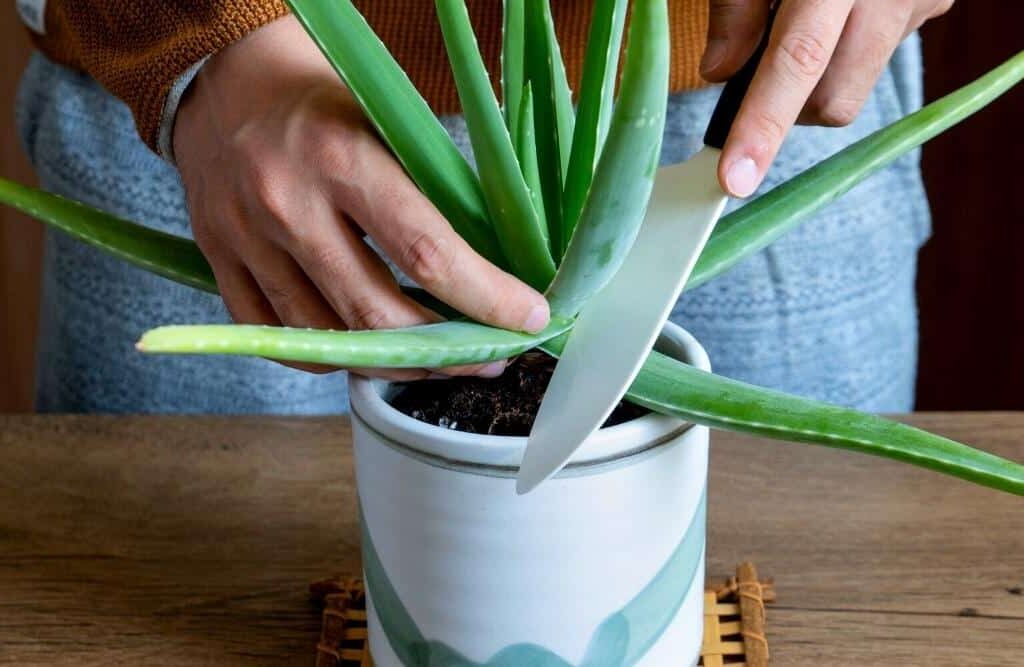
Peace Lily Propagation

If you’d like to expand your collection or share with friends, Peace Lilies are easily propagated through division.

Propagation steps:

  1. Remove the plant from its pot and gently separate sections of the root ball.
  2. Ensure each section has at least 2-3 healthy leaves and a portion of the root system.
  3. Plant each division in a new pot with fresh soil.
  4. Water thoroughly and place in a warm, indirect light spot.

Peace Lily in Home Decor and Feng Shui

Apart from being a low-maintenance houseplant, Peace Lilies are said to bring positive energy and tranquility to your space. In Feng Shui, they’re associated with balance and harmony, making them ideal for bedrooms, offices, and meditation areas.

Their ability to purify indoor air by absorbing harmful toxins also adds practical benefits to their aesthetic and spiritual appeal.


Final Peace Plant Care Tips

To wrap it up, here are some quick care reminders:

  • Keep in bright, indirect light
  • Water when the top inch of soil feels dry
  • Maintain high humidity and avoid cold drafts
  • Fertilize once a month during growing season
  • Repot every 1-2 years
  • Use filtered, room temperature water

Conclusion

Caring for a Peace Plant is a rewarding experience. With its serene white blooms, lush foliage, and air-purifying qualities, it’s a wonderful addition to any home. By following these simple but essential care practices — proper lighting, watering, humidity, and soil — you’ll enjoy a thriving, beautiful Peace Lily for years to come.

Whether you’re a beginner plant parent or a seasoned indoor gardener, the Peace Lily’s elegant beauty and forgiving nature make it an indispensable member of your indoor plant family.

How to Care for a Hibiscus Plant Efficiently

How to Care for a Hibiscus Plant Efficiently

Hibiscus plants are known for their lush, tropical blooms and bold foliage that can instantly brighten up a garden, patio, or windowsill. Whether you’re growing a hardy hibiscus in your backyard or a tropical hibiscus indoors, knowing how to care for this plant efficiently can mean the difference between a short-lived flower and a long-lasting, blooming spectacle.

In this guide, we’ll walk you through everything you need to know about hibiscus care — from choosing the right variety and providing optimal growing conditions to pruning, fertilizing, and managing pests naturally. Follow these practical, efficient tips to keep your hibiscus thriving season after season.


Understanding Hibiscus Varieties

Before you start, it’s essential to identify which type of hibiscus you’re growing since their care needs differ slightly.

1. Tropical Hibiscus (Hibiscus rosa-sinensis)

  • Known for its large, brightly colored blooms in shades of red, orange, yellow, pink, and peach.
  • Prefers warm, humid climates.
  • Typically grown as a potted plant or annual in cooler regions.

2. Hardy Hibiscus (Hibiscus moscheutos)

  • Can survive winter in colder regions (USDA zones 4-9).
  • Produces giant, dinner-plate-sized blooms in summer.
  • Dies back in winter and regrows in spring.

Tip: Check your plant label or consult a local nursery to confirm your plant type for the most efficient care plan.


Ideal Growing Conditions

To grow a thriving hibiscus, you need to replicate its native environment as closely as possible.

Light Requirements

  • Tropical hibiscus: Needs 6–8 hours of direct sunlight daily. Indoors, place it near a south- or west-facing window.
  • Hardy hibiscus: Full sun for at least 6 hours a day for maximum flowering.

If your hibiscus isn’t getting enough light, its blooms may become scarce, and leaves may yellow.

Temperature & Humidity

  • Ideal temperature: 60–85°F (15–29°C)
  • Tropical varieties prefer humidity levels above 50%. Use a humidifier or place a water tray nearby for indoor plants.

Protect your plant from cold drafts, frost, or heatwaves, which can cause stress and affect blooming.


Efficient Watering Practices

Hibiscus plants have specific watering needs that change with seasons.

How to Water Efficiently

  • Check soil moisture before watering. It should be moist but not soggy.
  • Water deeply until it drains from the bottom of the pot or soaks the garden bed.
  • In summer, you may need to water daily for tropical hibiscus, while hardy types need watering every 2–3 days.
  • Reduce watering in winter when growth slows.

Tip: Always water in the morning to let excess moisture evaporate, preventing fungal diseases.


Choosing the Right Soil

An efficient care routine starts with the right soil mix.

  • Tropical hibiscus: Prefers well-draining, slightly acidic soil (pH 6.0–6.5). Use a mix of potting soil, perlite, and peat moss.
  • Hardy hibiscus: Thrives in rich, moist, slightly acidic garden soil.

Add compost or organic matter to improve soil fertility and structure.


Natural Fertilizing for Healthy Growth

Hibiscus plants are heavy feeders and require regular fertilization to produce abundant flowers.

Fertilizing Tips

  • Use a balanced, organic fertilizer (like 10-10-10) during the growing season (spring to early fall).
  • Fertilize every 2 weeks for tropical varieties and once a month for hardy types.
  • In winter, stop feeding your hibiscus to let it rest.

Organic options: Fish emulsion, compost tea, and seaweed extract are excellent natural fertilizers that encourage blooming without harmful chemicals.


Pruning for Better Shape and More Blooms

Regular pruning keeps your hibiscus looking tidy and encourages bushier growth with more flowers.

How to Prune Efficiently

  • Prune in late winter or early spring before new growth begins.
  • Remove dead, weak, or overcrowded branches.
  • Cut back long stems to about a third of their length to promote branching.

Tip: Pinch off faded flowers (deadheading) to redirect energy into new blooms.


Repotting Hibiscus Plants

For potted hibiscus, repotting is vital for root health and sustained blooming.

When to Repot

  • When the plant becomes root-bound (roots circling the bottom of the pot)
  • If soil becomes compacted or water drains too quickly

How to Repot Efficiently

  • Choose a pot one size larger than the current one.
  • Refresh soil with a new organic mix.
  • Water thoroughly after repotting to settle the soil.

Pro tip: Always repot in spring when the plant is actively growing.


Natural Pest and Disease Control

Hibiscus plants can attract aphids, spider mites, mealybugs, and whiteflies.

Natural Solutions

  • Spray with a neem oil solution (1 tsp neem oil + mild soap + 1 liter water) every 7–14 days.
  • Wipe leaves with a damp cloth to remove pests.
  • Encourage beneficial insects like ladybugs in your garden.

Common Diseases

  • Powdery mildew: Avoid overhead watering, improve air circulation.
  • Root rot: Ensure proper drainage and avoid waterlogged soil.

Winter Care for Hibiscus

Tropical hibiscus are sensitive to cold, while hardy types need protection in extremely cold zones.

For Tropical Hibiscus

  • Bring potted plants indoors before the first frost.
  • Place near a sunny window and reduce watering.
  • Expect some leaf drop — it’s normal in winter.

For Hardy Hibiscus

  • Cut back stems to 4–6 inches above ground after the first frost.
  • Mulch heavily around the base to insulate roots.

Encouraging Blooming Efficiently

If your hibiscus isn’t blooming well, review these key factors:

  • Ensure at least 6 hours of sunlight
  • Use a phosphorus-rich fertilizer to boost flowers
  • Keep temperatures steady
  • Avoid over-pruning in summer
  • Regularly deadhead spent flowers

Bloom Boost Tip: Natural banana peel fertilizer, rich in potassium and phosphorus, can stimulate blooming. Bury small pieces around the base of your plant.


Common Problems & Quick Fixes

ProblemSolution
Yellow leavesCheck for overwatering, adjust light
No bloomsIncrease sunlight, use bloom-boosting fertilizer
Drooping foliageCheck for root rot or underwatering
Pest infestationsUse neem oil or insecticidal soap

Conclusion

Caring for a hibiscus plant efficiently doesn’t require complicated steps or chemical treatments. By understanding its natural preferences — sunlight, water, soil, and feeding — and integrating regular pruning, pest management, and seasonal care, you’ll keep your hibiscus healthy, beautiful, and blooming.

Whether you grow a hardy hibiscus by your garden pond or a tropical variety on your sunny patio, these care techniques ensure you’ll enjoy its vibrant flowers and lush foliage for years to come.

How to Care for a Bromeliad Plant Naturally

How to Care for a Bromeliad Plant Naturally

Bromeliads are one of the most visually striking houseplants you can grow. Known for their bright, colorful foliage and unique rosette shape, bromeliads bring a vibrant, tropical feel to any space. Though they might look exotic and delicate, these plants are surprisingly hardy and easy to care for — especially if you lean into natural, organic care methods.

In this article, we’ll explore how to care for a bromeliad plant naturally. From choosing the right placement to watering techniques, natural fertilizing tips, and pest control, we’ll help you grow a healthy, thriving bromeliad without relying on synthetic chemicals.


Why Choose Natural Care for Bromeliads?

Using natural care techniques isn’t just about avoiding harsh chemicals — it’s about creating a healthier indoor environment, preserving soil health, and promoting the plant’s natural growth cycles.

Benefits of natural bromeliad care:

  • Protects indoor air quality
  • Supports organic soil ecosystems
  • Safer for pets and children
  • Encourages long-lasting, healthy plants

Now let’s dive into the natural care essentials for your bromeliad.


Understanding Your Bromeliad

Before you care for your plant, it’s good to know a little about its nature:

  • Family: Bromeliaceae
  • Native Habitat: Tropical and subtropical America
  • Types: Over 3,000 species including popular varieties like Aechmea, Guzmania, Neoregalia, and Tillandsia (air plants)
  • Lifespan: A bromeliad blooms once, then produces offsets or “pups” before the mother plant slowly fades.

Knowing this lifecycle helps you anticipate its care needs and embrace its natural rhythm.


Ideal Light Conditions

Bromeliads love bright, indirect light. Natural sunlight is always better than artificial lighting when possible.

Tips for natural lighting:

  • Place your bromeliad near a south- or east-facing window filtered with a sheer curtain.
  • Avoid direct midday sun, which can scorch the leaves.
  • Rotate your plant every week to ensure even light exposure.

Signs of too much light: Brown, crispy leaf edges
Signs of too little light: Dull, floppy leaves, lack of color

If outdoor temperatures permit, placing your bromeliad in a shady patio corner during warmer months mimics its natural habitat beautifully.


Watering Bromeliads Naturally

Bromeliads are unique in how they absorb water. Many have a central cup (or “tank”) formed by their rosette of leaves, which collects rainwater in nature.

Natural watering guidelines:

  • Fill the central cup with fresh, room-temperature rainwater or distilled water. Avoid tap water if it’s high in chlorine or fluoride.
  • Flush out the cup every 7–10 days to prevent stagnation and bacteria buildup.
  • Water the soil lightly when it feels dry, but never let it stay soggy.
  • Mist the plant occasionally with water to raise humidity naturally.

Pro Tip: Collect rainwater for your houseplants — it’s the most natural, mineral-balanced option you can offer.


Soil and Potting Naturally

Bromeliads prefer light, airy, well-draining soil to prevent root rot. Avoid heavy garden soil or chemical-laden commercial mixes.

Natural soil mix recipe:

  • 1 part organic orchid bark or coconut coir
  • 1 part organic peat moss
  • 1 part perlite or sand

Potting tips:

  • Use unglazed clay or terracotta pots for natural airflow.
  • Ensure proper drainage holes at the base.
  • Avoid overcrowding multiple pups in one pot.

Repot pups once they’re about one-third the size of the mother plant to encourage independent growth.


Natural Fertilizing Techniques

While bromeliads are light feeders, occasional fertilizing encourages healthy growth and vibrant blooms.

Natural fertilizing methods:

  • Use diluted organic liquid fertilizers like seaweed extract, fish emulsion, or compost tea every 4–6 weeks during active growing months (spring-summer).
  • Apply the fertilizer to the soil and central cup at half strength.
  • Stop feeding during fall and winter when growth slows.

Homemade compost tea recipe:

  1. Steep 2 cups of well-aged compost in 1 gallon of rainwater for 24 hours.
  2. Strain and dilute with equal parts water.
  3. Use to lightly water soil or fill the central cup.

Encouraging Natural Blooming

Bromeliads typically bloom once in their lifetime — and though it can take a while, you can gently nudge them with natural methods.

How to naturally stimulate blooming:

  • Place your plant in a loosely sealed plastic bag with a ripe apple or banana for 7–10 days. These fruits release ethylene gas, which triggers blooming.
  • Afterward, return it to its usual bright spot and wait patiently.

Note: Only mature bromeliads (1–3 years old) will respond to this method.


Natural Pest Control

Bromeliads are relatively pest-resistant, but mealybugs, scale, and aphids can occasionally appear.

Natural pest management tips:

  • Wipe leaves with a soft, damp cloth regularly.
  • Spray a mild neem oil solution (1 tsp neem oil + a few drops of liquid soap in 1 liter of water) on infested areas.
  • Introduce natural predators like ladybugs if growing outdoors.

Avoid chemical pesticides which can damage the delicate leaves and disrupt soil health.


Managing Bromeliad Pups

After blooming, bromeliads focus their energy on producing pups — baby plants that grow at the base of the mother plant.

Natural pup care:

  • Let pups grow until they reach one-third to half the height of the mother plant.
  • Gently separate pups with a clean, sharp knife.
  • Plant pups in small pots with fresh, organic soil mix.
  • Water lightly and keep in bright, indirect light.

This natural propagation process ensures you’ll always have new plants to grow or gift.


Seasonal Bromeliad Care

Adjusting your care routine with the seasons ensures your bromeliad stays healthy year-round.

Spring-Summer:

  • Increase watering frequency.
  • Mist leaves and cups regularly.
  • Move outdoors to a shaded, humid patio if possible.

Fall-Winter:

  • Reduce watering.
  • Keep the central cup filled with fresh water but avoid stagnation.
  • Move away from cold drafts and maintain temperatures above 60°F (16°C).

Common Bromeliad Problems & Natural Fixes

IssueNatural Solution
Brown, crispy leavesIncrease humidity with pebble trays or misting
Pale, droopy leavesMove to brighter indirect light
Stagnant cup water smellFlush the cup weekly with rainwater
Mealybugs/ScaleWipe with neem oil or soapy water

Conclusion

Caring for a bromeliad plant naturally is a rewarding, low-maintenance way to enjoy a piece of the tropics in your home. By focusing on organic practices — like using rainwater, natural fertilizers, and non-toxic pest solutions — you nurture not just your plant, but a healthier home and environment.

With patience, the right placement, and a little natural care, your bromeliad will reward you with vivid foliage, striking blooms, and even new generations of pups for years to come.

How to Care for a Bonsai Plant Properly

How to Care for a Bonsai Plant Properly

Bonsai trees, the ancient art form of growing miniature trees in containers, are a symbol of peace, harmony, and patience. Originating from China and later refined in Japan, bonsai trees replicate the shape and style of full-sized trees on a miniature scale, creating stunning living art for your home or garden. While these delicate trees may seem intimidating to care for, with the right guidance, anyone can nurture a thriving, beautiful bonsai plant.

If you’re new to bonsai or looking to improve your care techniques, this comprehensive guide will walk you through everything you need to know about how to care for a bonsai plant properly — from choosing the right species and light conditions to watering, pruning, and seasonal care.


Why Grow a Bonsai?

Before we jump into the care essentials, let’s explore why bonsai plants are so beloved:

  • Aesthetic Beauty: Their sculpted, miniature forms bring a serene, natural elegance indoors.
  • Relaxing Hobby: The act of tending and pruning bonsai fosters mindfulness and patience.
  • Living Art: Each bonsai tree is unique and can be shaped into personal artistic expressions.
  • Longevity: With proper care, bonsai trees can live for decades, even centuries.

Now let’s get into how to care for your bonsai properly and keep it healthy, lush, and beautiful year after year.


Choosing the Right Bonsai Tree

Your bonsai care journey starts with choosing a species suited to your environment and skill level.

Indoor Bonsai Varieties:

  • Ficus Bonsai (best for beginners)
  • Jade Plant
  • Chinese Elm
  • Schefflera Arboricola

Outdoor Bonsai Varieties:

  • Juniper Bonsai
  • Japanese Maple
  • Pine Bonsai
  • Azalea Bonsai

Pro Tip: Indoor bonsai still need plenty of bright, indirect light and fresh air.


Placing Your Bonsai

Light is crucial for a bonsai’s health. Improper placement is one of the most common causes of stress and disease.

Indoor Placement:

  • Place your bonsai near a south- or east-facing window with bright, indirect sunlight.
  • Rotate your tree occasionally to ensure even growth.

Outdoor Placement:

  • Place in a partially shaded area, especially during the intense midday sun.
  • Ensure protection from harsh winds and heavy rain.

Signs of poor light conditions: Drooping, yellowing leaves, weak growth, and bare branches.


Watering Your Bonsai Tree Properly

Watering is the most critical — and often the trickiest — part of bonsai care.

General Watering Rules:

  • Water your bonsai when the topsoil feels dry about half an inch deep.
  • Use a watering can with a fine nozzle or a spray bottle to water gently.
  • Water thoroughly until it runs out of the drainage holes.

Important: Avoid letting your bonsai dry out completely, but also avoid leaving it in soggy soil.

Signs of Overwatering:

  • Yellowing leaves
  • Root rot
  • Mold or fungus growth

Signs of Underwatering:

  • Dry, brittle leaves
  • Wilted appearance
  • Hard, dry soil

Tip: In hotter months, you might need to water daily. In winter, water less frequently.


Soil and Repotting

Bonsai trees need fast-draining soil to prevent root rot while retaining enough moisture to nourish the plant.

Recommended Bonsai Soil Mix:

  • 1 part Akadama (clay granules)
  • 1 part pumice
  • 1 part lava rock or coarse grit

Repotting Frequency:

  • Young bonsai (under 5 years): Every 1–2 years.
  • Older bonsai: Every 3–5 years.

How to Repot:

  1. Carefully remove the tree from its pot.
  2. Trim 1/3 of the root mass.
  3. Replace old soil with fresh bonsai mix.
  4. Water gently and avoid direct sunlight for a few days.

Tip: Always repot in early spring before new growth begins.


Pruning and Shaping

Pruning isn’t just for aesthetics — it’s essential for maintaining the bonsai’s size, shape, and health.

Types of Pruning:

  1. Maintenance Pruning:
    Trim new shoots and leaves to maintain your tree’s shape.
  2. Structural Pruning:
    Remove larger branches to improve the overall structure, best done in early spring.

Tools You’ll Need:

  • Bonsai shears or sharp scissors
  • Root pruning scissors
  • Wire cutters (if shaping with wire)

Wiring for Shape:

Bonsai artists use aluminum or copper wire to bend and train branches.

  • Wrap wire around the branch carefully.
  • Gently bend into desired shape.
  • Remove wire before it starts cutting into the bark (usually within a few months).

Tip: Never prune or wire a sick or stressed bonsai.


Fertilizing Your Bonsai

Because bonsai live in small pots, their soil nutrients deplete quickly, making regular fertilizing essential.

Fertilizer Types:

  • Balanced (NPK 10-10-10) for overall health.
  • Higher nitrogen (N) in spring for leaf growth.
  • Lower nitrogen, higher phosphorus (P) in autumn to harden new growth.

Application Frequency:

  • Growing season (spring and summer): Every 2 weeks.
  • Dormant season (fall and winter): Once a month or stop fertilizing.

Use liquid or slow-release granular fertilizers formulated for bonsai or general-purpose houseplants.


Seasonal Bonsai Care

Your bonsai’s needs shift with the seasons, and adjusting your care routine is essential.

Spring:

  • Increase watering.
  • Prune new growth.
  • Start feeding regularly.
  • Repot if necessary.

Summer:

  • Protect from intense midday heat.
  • Water daily or as needed.
  • Continue pruning and shaping.

Fall:

  • Reduce watering frequency.
  • Stop fertilizing by late fall.
  • Prepare outdoor bonsai for dormancy.

Winter:

  • For indoor bonsai: Move to a brighter, cooler location.
  • For outdoor bonsai: Protect from freezing temperatures using mulch or a cold frame.

Tip: Always check your specific species’ dormancy needs.


Common Bonsai Problems and Solutions

ProblemCauseSolution
Yellowing or dropping leavesOverwatering, poor lightCheck soil moisture, improve lighting
Stunted growthNutrient deficiency, compacted rootsFertilize and repot as needed
Root rotWaterlogged soilRepot, trim rotten roots, reduce watering
Pest infestationsAphids, spider mitesUse insecticidal soap or neem oil

Tip: Regularly inspect leaves, branches, and soil surface to catch issues early.


Conclusion

Caring for a bonsai plant properly is a fulfilling, meditative practice that combines art, horticulture, and patience. While these miniature trees require a bit more attention than your average houseplant, understanding their natural needs makes the task enjoyable and highly rewarding.

By providing the right light, water, soil, and seasonal adjustments — and adding in the creative touch of pruning and shaping — you’ll not only keep your bonsai healthy but also craft a living masterpiece that brings beauty and tranquility to your home for years to come.

How to Care for Aloe Plant Effectively

How to Care for Aloe Plant Effectively

Aloe vera, often called the “plant of immortality,” is one of the most popular houseplants worldwide. Known for its thick, fleshy leaves filled with soothing gel, aloe isn’t just a beautiful succulent — it also serves practical medicinal and cosmetic purposes. The good news is that aloe plants are hardy and forgiving, making them an ideal option for beginners and experienced plant enthusiasts alike.

If you want to enjoy a thriving, healthy aloe plant, it’s essential to understand its natural preferences and unique care requirements. In this detailed guide, we’ll break down everything you need to know to care for an aloe plant effectively, from lighting and watering to soil types, repotting, and common issues.


Why Aloe Vera Makes a Great Indoor Plant

Before diving into care tips, let’s appreciate why so many people choose to grow aloe plants in their homes:

  • Low-maintenance, drought-resistant, and beginner-friendly
  • Visually appealing with its architectural, spiky leaves
  • Air-purifying qualities
  • Natural medicinal uses for burns, cuts, and skin irritation
  • Propagates easily with baby plants (pups)

With a little attention and the right environment, aloe vera can flourish indoors for years.


Choosing the Right Pot and Soil

Aloe vera naturally grows in arid desert conditions, so providing a similar environment is key to effective care.

The Best Pot:

Choose a terracotta, clay, or ceramic pot with a drainage hole at the bottom. These materials allow excess moisture to evaporate and prevent waterlogging, which aloe plants are highly sensitive to.

Avoid glass or plastic containers without drainage holes, as they increase the risk of root rot.

The Ideal Soil:

Aloe vera thrives in loose, well-draining soil. Use a cactus or succulent mix, which typically contains sand, perlite, and small stones to improve aeration and drainage.

DIY Aloe Potting Mix:

  • 2 parts regular potting soil
  • 1 part coarse sand
  • 1 part perlite or pumice

Avoid soils that retain too much moisture, as aloe roots will quickly rot in soggy conditions.


Lighting Requirements

Aloe vera loves bright, indirect sunlight and thrives when placed in sunny spots indoors.

  • Ideal light: 6–8 hours of bright, indirect light daily.
  • Best placement: Near a south- or west-facing window.
  • If your home doesn’t get enough natural light, consider using a full-spectrum grow light to supplement.

Signs your aloe isn’t getting enough light:

  • Leggy, stretched-out leaves leaning towards light sources.
  • Pale or yellowish foliage.
  • Slow, stunted growth.

Pro tip: If moving your aloe to a sunnier spot, do so gradually to avoid leaf sunburn.


How to Water Aloe Vera Effectively

One of the most common mistakes with aloe care is overwatering. These succulents store water in their leaves, so they require far less frequent watering than typical houseplants.

Watering Guidelines:

  • Allow the soil to dry out completely between waterings.
  • Water deeply, ensuring it flows out of the drainage hole.
  • Empty any excess water from saucers or trays.

Typical Watering Frequency:

  • Every 2 to 3 weeks during spring and summer.
  • Once a month or less during fall and winter, when growth slows.

Signs of Overwatering:

  • Soft, mushy leaves
  • Yellow or brown spots
  • Foul-smelling soil

Signs of Underwatering:

  • Wrinkled, curled leaves
  • Thin, brittle foliage

Tip: It’s always better to underwater than overwater an aloe plant.


Temperature and Humidity Needs

Aloe plants prefer warm, dry conditions and don’t fare well in cold or damp environments.

  • Ideal temperature range: 60–80°F (15–27°C)
  • Avoid exposing aloe to temperatures below 50°F (10°C).
  • Keep away from cold drafts, heaters, and air conditioners.

Aloe vera thrives in average indoor humidity and doesn’t require misting. In fact, high humidity can promote fungal growth and rot.


Fertilizing Aloe Plants

Aloe vera doesn’t demand much feeding but benefits from occasional fertilization during the growing season.

  • Use a cactus or succulent fertilizer diluted to half strength.
  • Apply once a month in spring and summer.
  • Avoid fertilizing in fall and winter when growth is minimal.

Tip: Organic fertilizers like diluted compost tea or fish emulsion can also be effective for natural aloe care.


Repotting Aloe Vera

As aloe vera grows, it may become root-bound or produce pups (baby plants). Repotting keeps the plant healthy and provides more space for growth.

When to Repot:

  • Every 2–3 years, or when roots fill the pot.
  • When pups overcrowd the base of the mother plant.
  • If the soil is compacted or no longer drains well.

How to Repot:

  1. Water the plant a day before repotting.
  2. Gently remove the aloe from its pot.
  3. Shake off old soil and trim any dead or mushy roots.
  4. Place in a slightly larger pot with fresh succulent soil.
  5. Wait 3–5 days before watering to let root wounds heal.

Propagating Aloe Vera

Aloe vera is easy to propagate using pups — small offshoots that grow around the base of the mother plant.

How to Propagate:

  1. Remove the plant from its pot.
  2. Separate pups carefully, ensuring each has some roots attached.
  3. Allow pups to dry for a day or two.
  4. Plant each pup in its own small pot with well-draining soil.
  5. Water lightly after a few days.

Within a few months, new plants will take root and thrive.


Common Problems and How to Fix Them

ProblemCauseSolution
Yellow, mushy leavesOverwateringLet soil dry; trim damaged parts
Thin, curled leavesUnderwatering or too much sunAdjust watering; move to filtered light
Leggy, stretched growthInsufficient lightMove to a sunnier spot or use grow lights
Root rotWaterlogged soilRepot in dry, well-draining soil

Tip: Regularly wipe the leaves with a damp cloth to remove dust and allow better light absorption.


Aloe Vera’s Medicinal Benefits

The clear gel inside aloe leaves is a powerful natural remedy with several uses:

  • Soothes minor burns and sunburn.
  • Relieves itching from insect bites.
  • Acts as a skin moisturizer.
  • Treats minor cuts and abrasions.

Important: Always use the clear gel only and avoid ingesting the yellow sap (aloin), which can be toxic in large amounts.


Conclusion

Caring for an aloe vera plant effectively involves providing a balance of bright, indirect light, well-draining soil, and careful watering habits. By understanding its preferences and native conditions, you can enjoy a thriving, beautiful aloe plant that not only enhances your home but also serves as a natural, soothing remedy for minor skin ailments.

With proper care, your aloe vera will reward you with healthy, upright leaves, baby plants for propagation, and years of natural beauty.

How to Take Care of the Aloe Vera Plant Indoors

How to Take Care of the Aloe Vera Plant Indoors

Aloe vera is one of the most beloved houseplants for good reason. Not only is it visually striking with its thick, fleshy leaves, but it’s also a medicinal plant known for its healing, soothing gel. From soothing burns to purifying the air, aloe vera offers both beauty and benefits. Fortunately, it’s also one of the easiest succulents to care for indoors — as long as you understand its needs.

In this complete guide, you’ll discover how to take care of an aloe vera plant indoors, covering everything from ideal lighting and watering habits to soil types, repotting, and common issues to avoid.


Why Choose Aloe Vera as an Indoor Plant?

Before diving into care tips, let’s appreciate why aloe vera makes a perfect houseplant:

  • Low maintenance and drought tolerant
  • Air-purifying qualities
  • Attractive, architectural foliage
  • Medicinal benefits for skin, burns, and minor cuts
  • Propagates easily for more plants

With just a little attention, aloe vera thrives indoors — making it a favorite for beginners and seasoned plant lovers alike.


Choosing the Right Pot and Soil for Aloe Vera

Pot Selection:

Aloe vera hates sitting in water. Choose a terracotta or clay pot with a drainage hole. These materials help wick excess moisture away from the soil and roots.

Avoid: Decorative pots without drainage holes. Excess water will cause root rot, the most common killer of indoor aloes.

Soil Type:

Aloe vera thrives in well-draining soil. Regular potting soil retains too much moisture, so choose a cactus or succulent mix. You can also make your own blend:

  • 2 parts potting soil
  • 1 part coarse sand or perlite
  • 1 part pumice or small gravel

Light Requirements for Indoor Aloe Vera

Aloe vera loves bright light, and this is one of the most important factors for healthy growth indoors.

  • Place your aloe near a south- or west-facing window where it will receive at least 6–8 hours of sunlight per day.
  • If natural light is limited, you can supplement with a grow light.

Signs your aloe needs more light:

  • Stretched, leggy growth
  • Pale or yellowing leaves
  • Leaves bending or leaning toward the light source

Tip: Gradually adjust aloe to direct sunlight if it’s been in shade to avoid sunburn.


Watering Aloe Vera Indoors

Aloe vera is drought-tolerant, and overwatering is the quickest way to kill it.

Watering Frequency:

  • Water deeply but infrequently — typically every 2 to 3 weeks.
  • Allow the soil to dry out completely between waterings.
  • Reduce watering to once a month in winter when growth slows.

How to Water:

  • Water until it flows from the drainage hole.
  • Discard any excess water from the saucer.
  • Never let the plant sit in standing water.

Signs of overwatering:

  • Yellow, mushy, soft leaves
  • Brown, water-soaked spots
  • Foul-smelling soil

Signs of underwatering:

  • Thin, curling, or wrinkled leaves

Temperature and Humidity

Aloe vera prefers warm, dry conditions — similar to its native desert habitat.

  • Ideal temperature: 60–80°F (15–27°C)
  • Avoid exposing it to temperatures below 50°F (10°C).
  • Keep aloe away from cold drafts, heaters, and air conditioning vents.

Humidity isn’t a major concern for aloe. It thrives in average household humidity and doesn’t require misting.


Fertilizing Aloe Vera

Aloe vera doesn’t need heavy feeding. Over-fertilizing can cause leggy growth and weaken the plant.

  • Feed sparingly during the growing season (spring and summer).
  • Use a diluted cactus or succulent fertilizer or a balanced houseplant fertilizer at half strength once a month.
  • Avoid fertilizing in fall and winter.

Repotting Aloe Vera

Aloe vera grows slowly indoors but will eventually outgrow its pot, especially if it produces “pups” (baby offshoots).

When to Repot:

  • Every 2–3 years, or when the plant becomes root-bound.
  • If the soil has become compacted or no longer drains well.

How to Repot:

  1. Water the plant a day before repotting.
  2. Gently remove the aloe from its pot, brushing off excess soil.
  3. Check roots for rot — trim any mushy, brown roots.
  4. Replant in fresh cactus soil in a slightly larger pot.
  5. Wait a few days before watering to allow root wounds to heal.

Propagating Aloe Vera

Aloe vera produces baby plants called pups around its base. These can be separated and potted up for new plants.

How to Propagate Pups:

  1. Gently remove the plant from the pot.
  2. Separate pups from the mother plant, ensuring each has some roots attached.
  3. Let the pups dry for a day to allow cuts to callous.
  4. Plant pups in small pots with well-draining soil.
  5. Water lightly after a few days.

Common Aloe Vera Problems and Solutions

Even though aloe vera is easygoing, a few issues can crop up if care needs adjusting.

ProblemCauseSolution
Yellow, mushy leavesOverwateringLet soil dry; remove damaged leaves
Brown, crispy leavesToo much sun or dry airMove to indirect light, check watering
Leggy, stretched growthNot enough lightMove to a brighter spot
Root rotWaterlogged soilRepot in dry, well-draining soil

Tips for a Healthy Indoor Aloe Vera

  • Rotate your aloe vera occasionally for even growth.
  • Remove dead or damaged leaves at the base.
  • Avoid using tap water if it’s heavily chlorinated; use rainwater or distilled water instead.
  • Don’t mist aloe vera — it prefers dry air.
  • Wipe leaves gently with a damp cloth to remove dust and allow better light absorption.

Medicinal Uses for Aloe Vera

While the gel inside aloe leaves is famously soothing for minor burns, it also offers other home remedies:

  • Treat sunburn, cuts, and skin irritation.
  • Moisturize dry skin.
  • Calm insect bites or rashes.
  • Use in DIY hair masks for scalp hydration.

Important:
Only use the clear gel inside the leaves, and avoid ingesting the yellowish sap (aloin), as it can be toxic.


Conclusion

Aloe vera is the perfect indoor plant for anyone seeking a low-maintenance, attractive, and beneficial addition to their home. With its modest care requirements — bright light, minimal water, and well-draining soil — it’s well-suited for beginners and busy plant parents alike.

By following these simple tips for how to take care of the aloe vera plant indoors, you’ll enjoy a healthy, thriving plant that not only adds beauty to your space but also provides natural medicinal benefits for years to come.

How to Take Care of Strawberry Plants Naturally: A Complete Grower’s Guide

How to Take Care of Strawberry Plants Naturally: A Complete Grower’s Guide

Is there anything better than biting into a freshly picked, sun-ripened strawberry? Sweet, juicy, and packed with flavor, homegrown strawberries are one of the most rewarding fruits to grow in your garden, backyard, or even on a balcony. The good news is — with a little natural care and attention, you can enjoy baskets of fresh strawberries without relying on chemicals or synthetic fertilizers.

If you’ve been dreaming of growing strawberries naturally but aren’t sure where to start, this detailed guide will walk you through every step. From choosing the right variety to organic pest control and harvesting tips, here’s how to care for strawberry plants naturally and keep them thriving season after season.


Why Grow Strawberries at Home?

Homegrown strawberries offer several benefits:

  • Incredible flavor — fresher and sweeter than store-bought varieties.
  • Pesticide-free harvests when grown naturally.
  • Attractive plants with delicate flowers and vibrant red fruits.
  • Compact size — ideal for small gardens, pots, and hanging baskets.
  • Pollinator-friendly blooms that attract bees and beneficial insects.

And best of all, strawberries are relatively easy to grow if you follow a few essential care practices.


Types of Strawberries to Grow

Before planting, it’s important to know there are three main types of strawberry plants:

  • June-bearing: Produce a large, single harvest in early summer.
  • Ever-bearing: Yield two to three smaller harvests in spring, summer, and fall.
  • Day-neutral: Produce berries continuously throughout the growing season, as long as temperatures remain between 35°F and 85°F (1°C and 29°C).

Choose the type that best suits your climate, space, and harvest preferences.


Natural Strawberry Plant Care: A Step-by-Step Guide

Choosing the Right Location

Strawberries thrive in:

  • Full sun: At least 6–8 hours of direct sunlight daily.
  • Well-drained, fertile soil with a slightly acidic pH of 5.5–6.8.
  • A spot sheltered from strong winds, which can dry out leaves and flowers.

If growing in containers, select a pot with good drainage holes and use a light, organic potting mix.


Preparing the Soil Organically

Healthy, nutrient-rich soil is the foundation for productive strawberry plants:

  • Loosen the soil to a depth of 12–15 inches.
  • Mix in compost, well-rotted manure, or leaf mold to improve fertility.
  • Avoid chemical fertilizers — organic amendments like bone meal, kelp meal, or wood ash add natural minerals.
  • Strawberries dislike soggy roots, so amend heavy soils with coarse sand or perlite to improve drainage.

Tip: Rotate strawberry beds every 3–4 years to prevent soil-borne diseases.


Planting Strawberries the Natural Way

When planting:

  • Space plants 12–18 inches apart with rows 2–3 feet apart.
  • Ensure the crown (where the leaves meet the roots) sits at soil level — too deep can rot the crown, too shallow can dry it out.
  • Water thoroughly after planting to settle the soil around the roots.

For containers or hanging baskets:

  • Choose ever-bearing or day-neutral varieties.
  • Use organic potting soil mixed with compost.
  • Water consistently, as containers dry out faster than garden beds.

Watering Strawberries Properly

Strawberries need consistent moisture, especially when setting fruit:

  • Keep soil evenly moist but not soggy.
  • Water deeply once or twice a week, more often during dry spells.
  • Avoid overhead watering — it can promote fungal diseases. Use drip irrigation or water at the base of the plants.

Tip: Mulching helps retain moisture and reduces water evaporation.


Natural Mulching for Healthier Plants

Mulching is one of the best natural care practices for strawberries:

  • Use organic mulch like straw, shredded leaves, pine needles, or grass clippings.
  • Apply a 2–3 inch layer around the base of plants, avoiding direct contact with the crown.
  • Mulch conserves moisture, suppresses weeds, keeps berries clean, and regulates soil temperature.

In winter, mulch also insulates strawberry plants from freezing temperatures.


Natural Fertilizing Tips

Feed strawberry plants naturally with:

  • Compost or aged manure in early spring and after each harvest.
  • Comfrey or seaweed tea as a liquid fertilizer to boost fruiting.
  • Avoid chemical fertilizers, which can damage beneficial soil life and harm pollinators.

Tip: Use organic slow-release pellets or side-dress plants with compost mid-season for extra nutrients.


Natural Pest Control for Strawberries

Common strawberry pests include:

  • Aphids
  • Slugs and snails
  • Spider mites
  • Birds

Natural solutions:

  • Hand-pick slugs and snails in the evening.
  • Use a homemade garlic or neem oil spray for aphids.
  • Encourage natural predators like ladybugs and lacewings.
  • Install bird netting or use shiny objects (like old CDs) to deter birds.

Avoid chemical pesticides — they harm bees and beneficial insects vital for pollination.


Preventing Strawberry Plant Diseases Naturally

Strawberries can be prone to diseases like powdery mildew, botrytis (gray mold), and root rot.

Natural prevention tips:

  • Space plants properly to ensure good airflow.
  • Water at the base to keep foliage dry.
  • Remove and compost any diseased leaves or berries promptly.
  • Rotate strawberry beds and avoid replanting in the same spot for 3–4 years.
  • Sprinkle plants with a natural baking soda spray (1 tsp baking soda in 1 quart of water) to deter fungal infections.

Pruning and Maintenance

Regular pruning keeps plants healthy and productive:

  • Trim off old leaves and runners after the final harvest.
  • Remove damaged or diseased foliage during the growing season.
  • Limit the number of runners (baby plants) if you want to focus energy on fruit production.
  • If expanding your patch, allow runners to root and establish in nearby soil.

Harvesting Homegrown Strawberries

Pick strawberries when:

  • They’re fully red and firm.
  • Leave the green cap (calyx) attached when harvesting to prolong freshness.

Harvest in the morning when berries are coolest and sweetest.

Tip: Check plants daily during peak season — ripe berries don’t last long on the plant.


Winter Care for Strawberry Plants

In colder regions:

  • After the final fall harvest, trim back old leaves and runners.
  • Apply a thick layer of straw mulch or pine needles over the plants.
  • In spring, remove the mulch gradually as temperatures warm.

For container-grown strawberries:

  • Move pots to a sheltered, frost-free area or insulate them with fleece or straw.

Final Thoughts

Caring for strawberry plants naturally is a simple and satisfying way to enjoy fresh, organic berries from your own garden. By using organic soil amendments, natural pest control methods, and thoughtful watering and pruning practices, you can grow healthy, vibrant plants that reward you with an abundance of sweet fruit season after season.

Not only will your strawberries taste better than store-bought varieties, but you’ll also create a safe, chemical-free environment for bees, birds, and other beneficial creatures in your garden.

So grab your gardening gloves, gather some compost, and let the natural strawberry-growing adventure begin — your taste buds will thank you!

How to Take Care of a Basil Plant Properly: A Complete Guide

How to Take Care of a Basil Plant Properly: A Complete Guide

Few herbs are as versatile and aromatic as basil. Whether you’re making a fresh pesto, tossing fragrant leaves into a salad, or garnishing your pasta with a few vibrant green sprigs, basil adds a burst of flavor and freshness to any dish. The best part? This kitchen favorite is surprisingly easy to grow at home — on a sunny windowsill, balcony, or garden bed.

If you’ve ever struggled to keep basil thriving or wondered how to care for it properly, this detailed guide has you covered. From soil tips to harvesting advice, here’s everything you need to know to grow lush, healthy, and flavorful basil plants all season long.


Why Grow Basil at Home?

Before diving into care essentials, let’s talk about why basil deserves a spot in your home or garden:

  • Highly aromatic and flavorful: Ideal for countless recipes.
  • Fast-growing: Provides a continuous supply of fresh leaves.
  • Easy to grow indoors or outdoors.
  • Beautiful and practical: Its bright green leaves and tiny white flowers add charm to any space.
  • Natural insect repellent: Basil helps deter pests like mosquitoes and aphids.

Choosing the Right Variety of Basil

There are several types of basil, each with unique flavors and appearances:

  • Sweet basil: Classic variety for Italian dishes.
  • Thai basil: Spicy, anise-like flavor, ideal for Asian cuisine.
  • Genovese basil: Broad, tender leaves, perfect for pesto.
  • Purple basil: Striking color and slightly peppery taste.
  • Lemon or lime basil: Citrus-scented, refreshing for teas and desserts.

Choose a variety based on your culinary preferences and growing conditions.


How to Plant Basil

Basil can be grown from seeds, cuttings, or nursery transplants. Here’s how to get started:

Planting from Seeds

  • Start seeds indoors 6-8 weeks before the last frost, or sow directly outdoors after the danger of frost has passed.
  • Use seed-starting mix in small pots or seed trays.
  • Sow seeds about 1/4 inch deep and keep the soil moist.
  • Seeds germinate within 5-10 days in warm conditions (70-80°F or 21-27°C).

Planting Cuttings

  • Snip a 4–6 inch cutting from an existing basil plant.
  • Place in a glass of water, changing the water every 2 days.
  • Roots develop in 7–10 days; transplant to soil when roots are 2 inches long.

Planting Nursery Transplants

  • Choose healthy, vibrant plants with no signs of wilting or pests.
  • Plant outdoors after the last frost or keep on a sunny indoor windowsill.

Light Requirements

Basil loves sun. For the healthiest growth:

  • Provide at least 6–8 hours of direct sunlight daily.
  • Indoors, place near a south or west-facing window.
  • In low-light homes, supplement with a grow light for 12–14 hours a day.

Without adequate sunlight, basil becomes leggy, weak, and produces fewer leaves.


Soil and Potting Tips

For thriving basil:

  • Use light, well-draining soil enriched with organic matter.
  • Ideal pH: 6.0–7.5.
  • If growing in containers, choose a pot with drainage holes to prevent waterlogging.
  • Add perlite or coarse sand to potting soil to improve drainage.

Watering Basil Properly

Consistent watering is key to happy basil plants:

  • Keep soil evenly moist, but not soggy.
  • Water when the top 1 inch of soil feels dry.
  • Avoid overhead watering to reduce the risk of fungal diseases.
  • Use room-temperature water to avoid shocking the plant’s roots.

Tip: In hotter weather or dry indoor air, you may need to water daily.


Feeding and Fertilizing

Basil benefits from regular feeding during its active growing season:

  • Use a balanced, organic liquid fertilizer (such as 10-10-10) every 2–3 weeks.
  • Avoid over-fertilizing — too much nitrogen encourages leaf growth but weakens flavor.
  • Reduce feeding frequency in the cooler months when growth slows.

Pruning and Pinching for Bushier Growth

One of the secrets to lush, bushy basil is regular pruning:

  • Pinch off the top 2–4 inches of the plant once it has 6–8 leaves.
  • Always cut just above a pair of leaves to encourage branching.
  • Remove flower buds promptly to prevent bolting and preserve leaf flavor.

Quick Tip: Pruning also stimulates fresh leaf production and helps prevent legginess.


Common Basil Plant Problems (and How to Fix Them)

Even though basil is relatively easygoing, it can encounter a few problems:

Yellowing Leaves

  • Cause: Overwatering, poor drainage, or nutrient deficiency.
  • Solution: Improve drainage, adjust watering, and use balanced fertilizer.

Wilting

  • Cause: Underwatering or root rot from waterlogged soil.
  • Solution: Check soil moisture and watering habits.

Leggy Growth

  • Cause: Insufficient sunlight or lack of pruning.
  • Solution: Move plant to a sunnier location and prune regularly.

Pests (aphids, spider mites, whiteflies)

  • Solution: Spray with neem oil, insecticidal soap, or a strong jet of water.

Fungal Diseases (downy mildew, fusarium wilt)

  • Solution: Provide good air circulation, avoid wet leaves, and remove infected plants promptly.

Harvesting Basil

Frequent harvesting keeps your basil productive and prevents flowering:

  • Begin harvesting when the plant has at least 6–8 leaves.
  • Pick leaves in the morning when their essential oils are most concentrated.
  • Always harvest from the top down, cutting just above a pair of leaves.
  • Avoid removing more than 1/3 of the plant at a time to allow for recovery.

Pro Tip: Store fresh basil in a glass of water on your countertop or refrigerate wrapped in a damp paper towel.


Propagating Basil for More Plants

You can easily propagate basil by:

  1. Taking a 4–6 inch cutting from a healthy plant.
  2. Removing the bottom leaves and placing the cutting in water.
  3. Allowing roots to develop over 7–10 days.
  4. Transplanting into a pot or directly into the garden.

Propagation is a great way to multiply your basil collection for free.


Winter Care for Basil Plants

Basil is a tender annual and won’t survive frost. In colder climates:

  • Bring outdoor basil plants inside before the first frost.
  • Place them in a warm, sunny window.
  • Reduce watering and stop fertilizing in winter.
  • Use grow lights if natural sunlight is scarce.

Alternatively, harvest and dry or freeze basil for off-season use.


Final Thoughts

Caring for a basil plant properly is incredibly rewarding. With a little attention to sunlight, soil, watering, and pruning, you’ll enjoy a continuous supply of fragrant, flavorful leaves for months. Plus, the plant itself adds a touch of greenery and a wonderful aroma to any home or garden.

Whether you’re an experienced gardener or a kitchen counter grower, basil is one of the easiest and most satisfying herbs to cultivate. Follow these tips, and you’ll soon have a thriving plant that elevates your meals and brightens your living space.

Happy planting!

How to Take Care of a Peace Lily Plant Successfully

How to Take Care of a Peace Lily Plant Successfully

The peace lily (Spathiphyllum) is one of the most beloved houseplants worldwide — and it’s easy to see why. With its lush, deep green leaves and graceful white blooms, this elegant plant instantly elevates the look of any space. More than just a pretty face, the peace lily is also known for its air-purifying abilities, making it a favorite in homes and offices alike.

If you’ve recently brought one home or are thinking about adding this beauty to your plant collection, it’s important to know how to care for it properly. In this detailed guide, we’ll walk you through everything you need to know to take care of a peace lily plant successfully — from choosing the right spot to watering, feeding, troubleshooting, and more.


Why Choose a Peace Lily?

Before we dive into care instructions, let’s understand why peace lilies are such a popular choice:

  • Low-maintenance: Ideal for beginners and busy plant parents.
  • Air-purifying: Peace lilies remove toxins like formaldehyde, benzene, and carbon monoxide from indoor air.
  • Year-round beauty: With rich foliage and elegant white blooms.
  • Thrives in low to medium light: Perfect for indoor spaces where direct sunlight is limited.

Understanding the Peace Lily Plant

Native to the tropical rainforests of Central and South America, peace lilies prefer warm, humid conditions and indirect light. The white “flowers” aren’t actually petals but modified leaves called spathes, surrounding a small spike-like structure called a spadix.

Knowing its natural habitat gives you clues about how to care for it successfully indoors.


Choosing the Right Spot

The first step to a thriving peace lily is choosing the ideal location.

Lighting Needs

  • Bright, indirect light is best. Avoid direct sun, which can scorch the leaves.
  • Peace lilies can tolerate low-light conditions, though they may produce fewer flowers.

Tip: Place your peace lily near an east or north-facing window or several feet away from a bright south or west-facing window.


Temperature and Humidity

  • Ideal temperature: 65–85°F (18–29°C).
  • Avoid drafts, sudden temperature changes, and cold windows in winter.
  • Prefers high humidity — you can mimic this by misting the leaves or using a pebble tray with water.

Efficient Care Idea: Group your peace lily with other humidity-loving plants to create a microclimate.


How to Water a Peace Lily Properly

Watering is one of the most crucial parts of peace lily care — and also where many plant owners go wrong.

When to Water

  • Water when the top 1 inch of soil feels dry to the touch.
  • In warmer months, this might be once a week; in cooler months, less frequent.

Pro Tip: Peace lilies will droop dramatically when thirsty — it’s their natural indicator! Don’t let them wilt too often, as it stresses the plant.


How to Water

  • Use room-temperature, filtered, or distilled water.
  • Water thoroughly until it drains from the bottom, then empty the saucer.
  • Avoid letting the plant sit in standing water, as this causes root rot.

Bonus Tip: Peace lilies are sensitive to chlorine and fluoride. If using tap water, let it sit out overnight to allow these chemicals to evaporate.


Soil and Repotting

Peace lilies prefer well-draining, peat-based potting soil.

Best Soil Mix

  • A mix of one part potting soil, one part perlite, and one part peat moss ensures good aeration and moisture retention.

Repotting

  • Repot every 1–2 years in spring when roots become crowded or growth slows.
  • Choose a pot one size larger than the current one.
  • Refresh the soil during repotting to supply new nutrients.

Fertilizing for Healthy Growth

While peace lilies aren’t heavy feeders, occasional fertilizing helps promote vibrant leaves and blooms.

When to Fertilize

  • During active growth in spring and summer, fertilize every 6–8 weeks.
  • Avoid fertilizing in winter when the plant’s growth naturally slows.

What to Use

  • Use a balanced, water-soluble houseplant fertilizer diluted to half strength.
  • Organic options like liquid seaweed or fish emulsion work beautifully.

Warning: Over-fertilizing causes brown leaf tips and salt build-up, so stick to recommended amounts.


Cleaning and Grooming

Keeping your peace lily tidy not only improves its appearance but also its overall health.

Wipe Leaves Regularly

  • Dust accumulates on large leaves, blocking light and reducing photosynthesis.
  • Wipe with a damp, soft cloth every few weeks.

Remove Spent Blooms

  • Snip off faded blooms at the base of the stem to encourage new growth.
  • Trim any yellow, brown, or damaged leaves to maintain a fresh look.

Common Peace Lily Problems (and How to Fix Them)

Even with the best care, you may encounter a few issues. Here’s how to troubleshoot them efficiently:

1. Drooping Leaves

  • Cause: Thirsty or overwatered roots.
  • Solution: Check soil moisture. Water if dry, and adjust watering routine.

2. Brown Leaf Tips

  • Cause: Low humidity, excess fertilizer, or chlorine in water.
  • Solution: Increase humidity, use distilled water, and reduce feeding.

3. Yellow Leaves

  • Cause: Overwatering, underwatering, or poor drainage.
  • Solution: Let soil dry out, check drainage holes, and adjust watering.

4. No Blooms

  • Cause: Insufficient light or overfeeding.
  • Solution: Move to a brighter location with indirect light and reduce fertilizer.

Quick Care Reminder: Inspect your plant regularly for pests like mealybugs and spider mites, and treat them promptly with insecticidal soap or neem oil if needed.


Propagating Your Peace Lily

Want more peace lilies? You can easily propagate them through division:

  1. Remove the plant from its pot.
  2. Gently separate the root clumps into smaller sections, each with several leaves and roots.
  3. Repot divisions into fresh soil and water thoroughly.

This method is best done in spring or early summer.


Peace Lily Care in Winter

Your peace lily’s needs will change slightly in colder months:

  • Reduce watering frequency, but don’t let the soil dry out completely.
  • Hold off on fertilizing until spring.
  • Move the plant away from cold drafts or windows.
  • Maintain humidity with a humidifier or pebble tray.

Final Thoughts

Caring for a peace lily plant successfully doesn’t have to be complicated. With the right lighting, consistent watering, occasional feeding, and a little grooming, your peace lily will reward you with stunning foliage, graceful white blooms, and cleaner indoor air.

Whether you’re a beginner or a seasoned plant enthusiast, peace lilies are one of the most forgiving and rewarding plants to grow. Follow these tips, and you’ll enjoy a healthy, thriving plant that adds elegance and tranquility to your home for years to come.

Happy growing!

How to Care for Tomato Plants Efficiently

How to Care for Tomato Plants Efficiently

Tomatoes are one of the most popular garden crops worldwide — and for good reason. Their rich flavor, versatility in the kitchen, and satisfying growth process make them a favorite for beginner and experienced gardeners alike. But while tomatoes can be easy to grow, getting the best yield and healthiest plants requires a little know-how.

If you’re aiming to grow juicy, flavorful tomatoes while saving time and effort, this guide will walk you through how to care for tomato plants efficiently — from planting to harvest.


Why Grow Tomatoes?

Before diving into care tips, it’s worth noting why so many gardeners love tomatoes:

  • They thrive in small spaces: Perfect for backyards, balconies, or patios.
  • A wide range of varieties: From cherry tomatoes to beefsteaks and heirloom types.
  • Nutrient-rich: Packed with vitamins C and K, potassium, and antioxidants.
  • Fresh taste: Nothing compares to a sun-ripened tomato from your own garden.

Now, let’s explore how to grow them with minimal hassle and maximum success.


Choosing the Right Tomato Variety

Efficient tomato care starts with picking the right type for your space and climate:

  • Determinate (Bush) Varieties: Compact, set fruit all at once, ideal for containers and small gardens. Example: ‘Roma’.
  • Indeterminate (Vining) Varieties: Grow continuously, produce fruit throughout the season, need support. Example: ‘Beefsteak’ or ‘Cherry’.
  • Heirloom Tomatoes: Old-fashioned varieties known for exceptional flavor but may require extra care.

Tip: Check your local plant nursery for varieties that perform well in your region.


Preparing the Planting Site

Tomatoes love sunlight and well-drained, nutrient-rich soil. Follow these steps for an efficient planting site setup:

1. Choose a Sunny Spot

  • Tomatoes need 6-8 hours of direct sunlight daily.
  • Avoid shaded areas or spots prone to strong winds.

2. Prepare the Soil

  • Loosen soil to a depth of 12–18 inches.
  • Mix in organic compost or aged manure.
  • Ensure the soil pH is between 6.0 and 6.8 (you can test this with an inexpensive soil test kit).

Efficient Tip: Add a balanced slow-release fertilizer when planting to reduce the need for frequent feeding later.


Planting Tomatoes the Smart Way

Timing is everything. Wait until the danger of frost has passed and soil temperatures are consistently above 60°F (16°C).

How to Plant:

  • Dig deep holes or trenches. Tomatoes can root along their buried stems, so plant them deep, covering up to the first set of leaves.
  • Space determinate varieties 18–24 inches apart, and indeterminate types 24–36 inches apart.
  • Water thoroughly after planting.

Pro Tip: Place a handful of crushed eggshells or bone meal in the hole to prevent blossom-end rot (a common calcium deficiency issue).


Efficient Tomato Plant Care Tips

Once planted, tomatoes require consistent attention to grow efficiently. Here’s how to streamline their care:

1. Watering Wisely

  • Water deeply and consistently to encourage strong roots.
  • Aim for 1-2 inches per week.
  • Water in the morning to reduce evaporation and prevent fungal diseases.
  • Use drip irrigation or a soaker hose to deliver water directly to the base and keep foliage dry.

Avoid overwatering, which leads to root rot and weak plants.


2. Mulching for Moisture and Weed Control

Applying 2–3 inches of organic mulch (like straw, shredded leaves, or grass clippings) around your tomato plants:

  • Retains soil moisture.
  • Keeps soil temperature stable.
  • Reduces weed growth.
  • Prevents soil-borne diseases from splashing onto leaves.

Time-Saving Tip: Mulch once after planting, and you’ll save hours of weeding and watering.


3. Supporting Your Tomato Plants

Most tomato varieties need support to keep fruits off the ground and improve airflow.

Choose from:

  • Cages: Simple and good for bush types.
  • Stakes: Drive a sturdy stake into the ground and tie plants loosely with soft ties.
  • Trellises: Ideal for vining varieties in larger spaces.

Supporting your tomatoes early prevents damage to branches and makes harvesting easier.


4. Feeding for Growth

Tomatoes are heavy feeders. For efficient care:

  • Apply a balanced fertilizer every 3–4 weeks during the growing season.
  • Use a low-nitrogen fertilizer once fruit starts forming to encourage fruit growth rather than foliage.

Organic options like compost tea or fish emulsion work wonderfully too.


5. Pruning for Health and Production

Regular pruning reduces disease risk and improves airflow and light exposure.

  • Remove suckers (small shoots growing from the junction of stem and leaf) for indeterminate types.
  • Trim lower leaves as plants grow to avoid soil contact.
  • Prune excess foliage for better fruit ripening.

Quick Tip: Prune in the morning on dry days to reduce infection risk.


Identifying and Managing Common Tomato Problems

Even with the best care, tomatoes can face pests and diseases. Here’s how to handle them efficiently:

Common Pests:

  • Aphids: Blast off with water or introduce ladybugs.
  • Tomato Hornworms: Handpick or use Bt (Bacillus thuringiensis).
  • Whiteflies: Use yellow sticky traps and neem oil.

Common Diseases:

  • Blight (early and late): Remove infected leaves immediately. Avoid overhead watering.
  • Powdery Mildew: Increase airflow and use sulfur-based organic fungicides.
  • Blossom-End Rot: Ensure consistent watering and adequate calcium.

Efficient Strategy: Inspect plants twice a week for early signs of trouble. Quick action prevents major outbreaks.


Harvesting Tomatoes for Best Flavor

Tomatoes are best picked when they’re fully colored and slightly soft to the touch.

  • Harvest daily in peak season.
  • Use clean, sharp pruners to avoid damaging the plant.
  • If frost is forecast, pick mature green tomatoes and ripen them indoors.

Pro Tip: Don’t refrigerate tomatoes unless fully ripe — cold temperatures ruin their flavor and texture.


End-of-Season Care

Once temperatures drop consistently below 50°F (10°C):

  • Remove plants and compost healthy foliage.
  • Dispose of any diseased plants to prevent overwintering pests.
  • Clean and store cages or stakes.

Efficient Garden Hack: Add a cover crop (like clover or rye) to enrich soil for the next growing season.


Final Thoughts

Caring for tomato plants efficiently isn’t about cutting corners — it’s about smart, consistent practices that yield healthier plants with less effort. By choosing the right variety, providing proper soil, watering wisely, mulching, supporting, and pruning — you’ll enjoy a bountiful, flavorful harvest without the stress.

Whether you’re growing a few patio tomatoes or a full vegetable patch, these tips will help you make the most of your tomato-growing season.

Happy growing, and here’s to your juiciest, most flavorful tomatoes yet!