Tomato Planting Guide for Small Spaces

Tomato Planting Guide for Small Spaces

Dreaming of homegrown, sun-ripened tomatoes but short on space? You’re not alone. Whether you live in an apartment, have a tiny balcony, or garden on a patio, you can still grow juicy, delicious tomatoes with the right techniques. Tomatoes are one of the most rewarding crops to grow — and yes, they thrive even in containers and compact gardens.

This complete Tomato Planting Guide for Small Spaces covers everything from choosing the right varieties to maximizing yield in tight quarters.


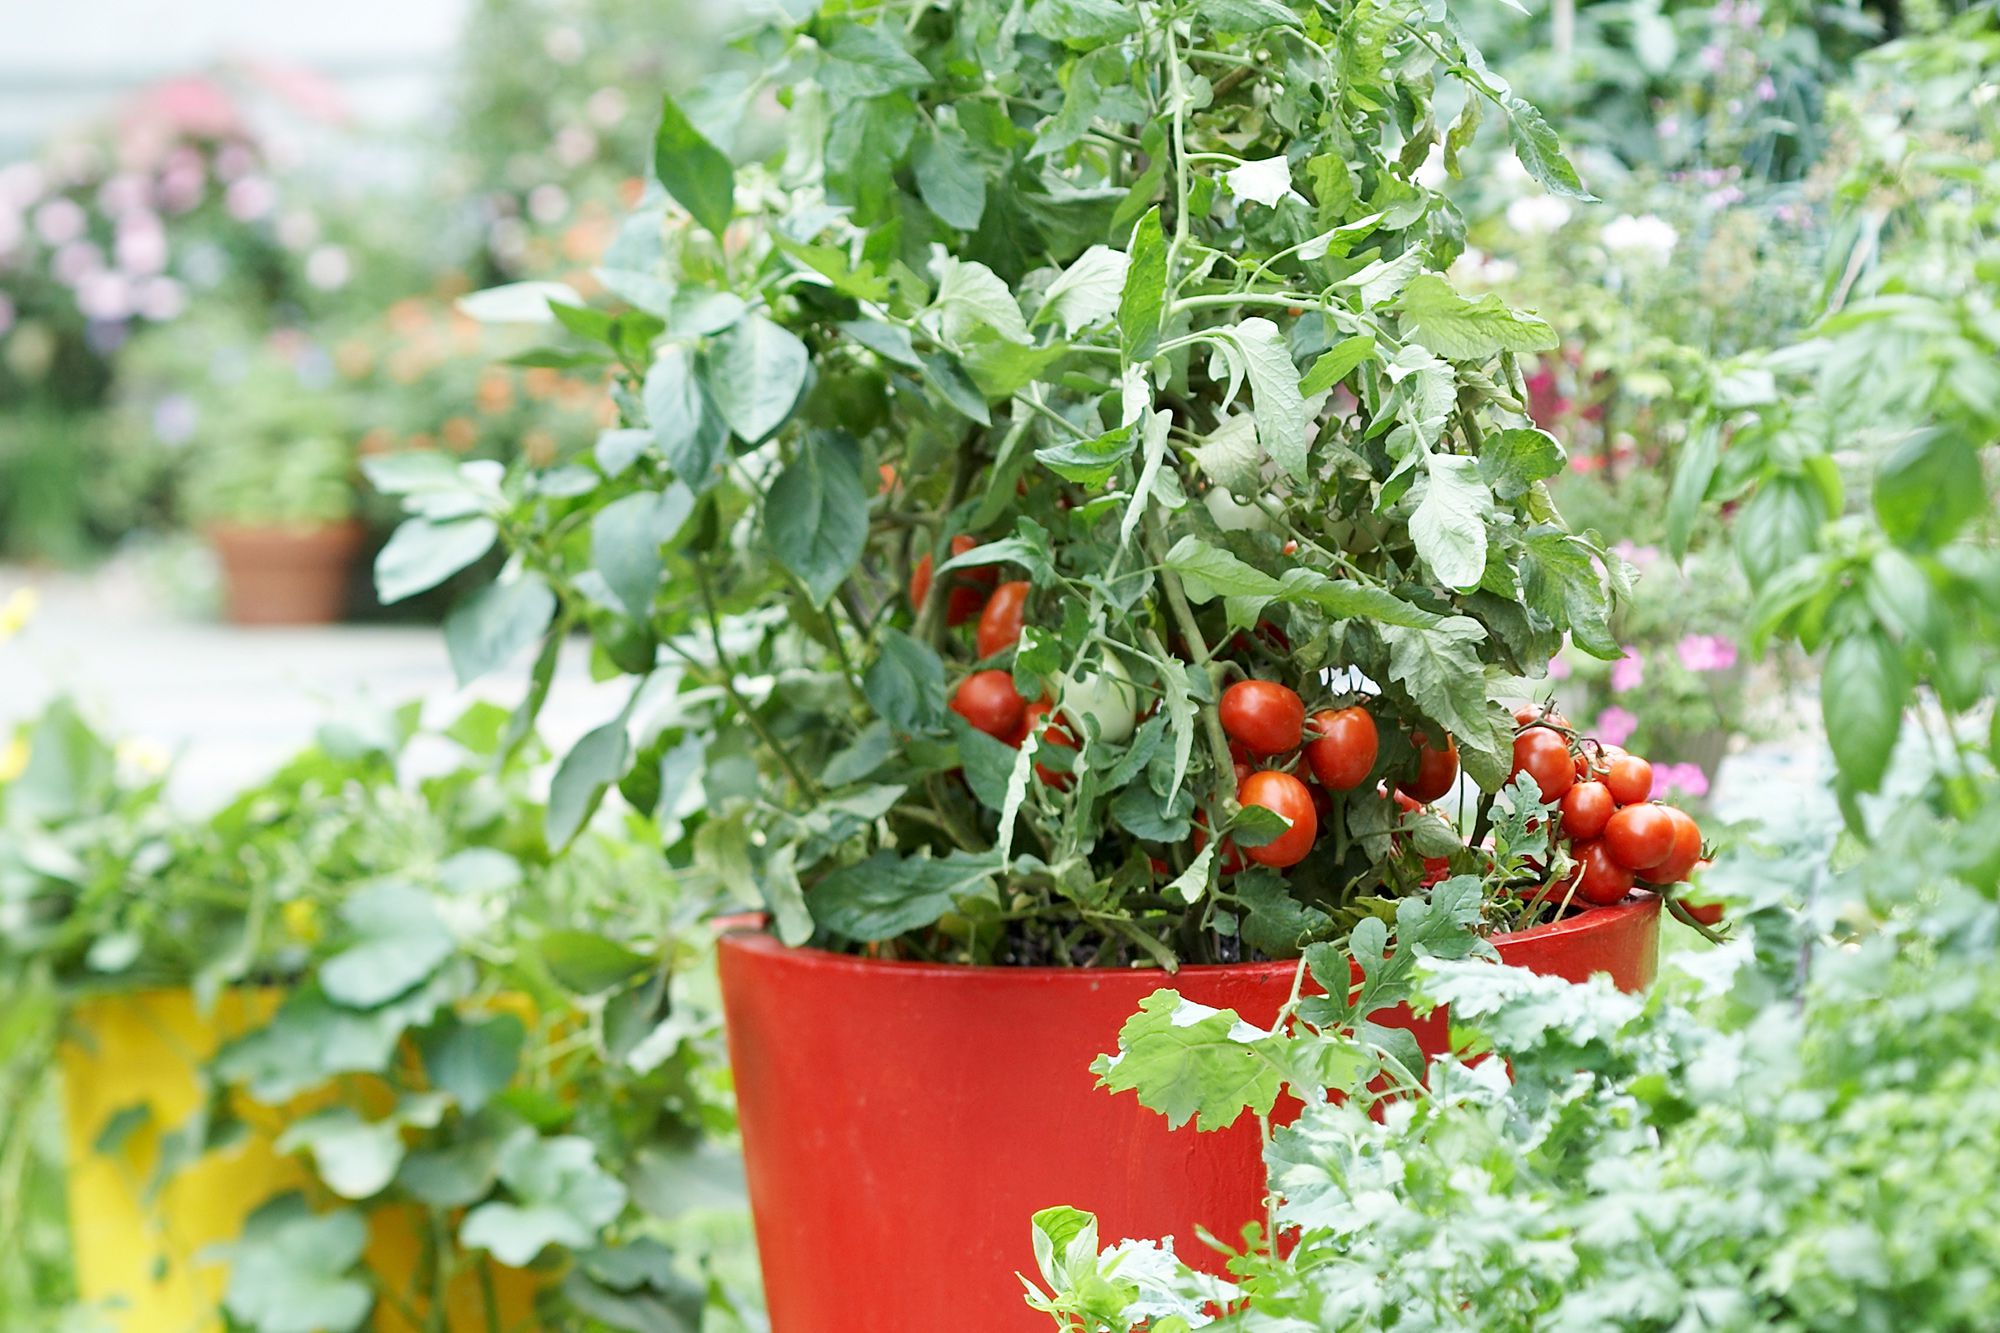
Why Grow Tomatoes in Small Spaces?

Tomatoes are the star of many gardens for good reason:

  • Fresh, flavorful taste — better than store-bought
  • Grows easily in pots, containers, and vertical systems
  • Packed with vitamins A, C, K, and antioxidants
  • Great learning crop for beginner gardeners
  • Adds greenery and charm to balconies and windowsills

And the best part? With as little as 2 square feet of space, you can grow a productive tomato plant!


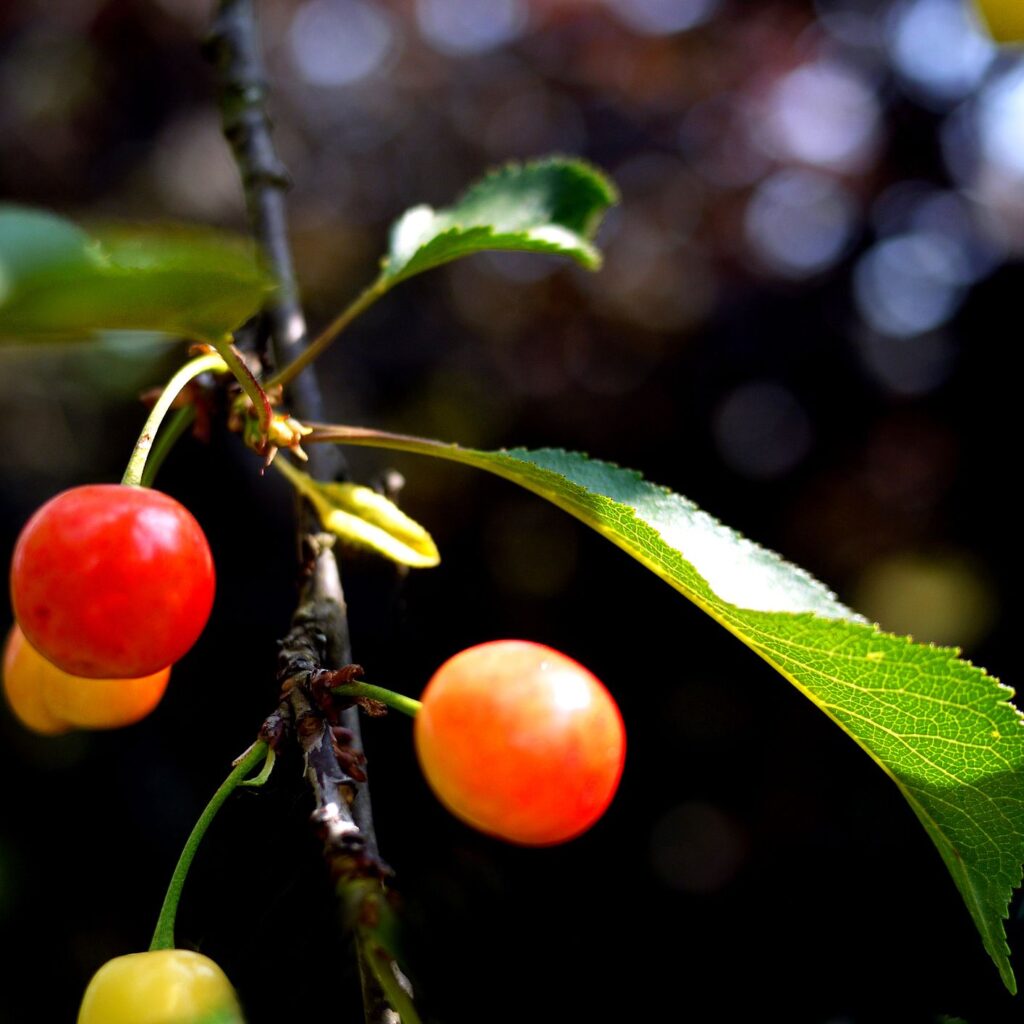
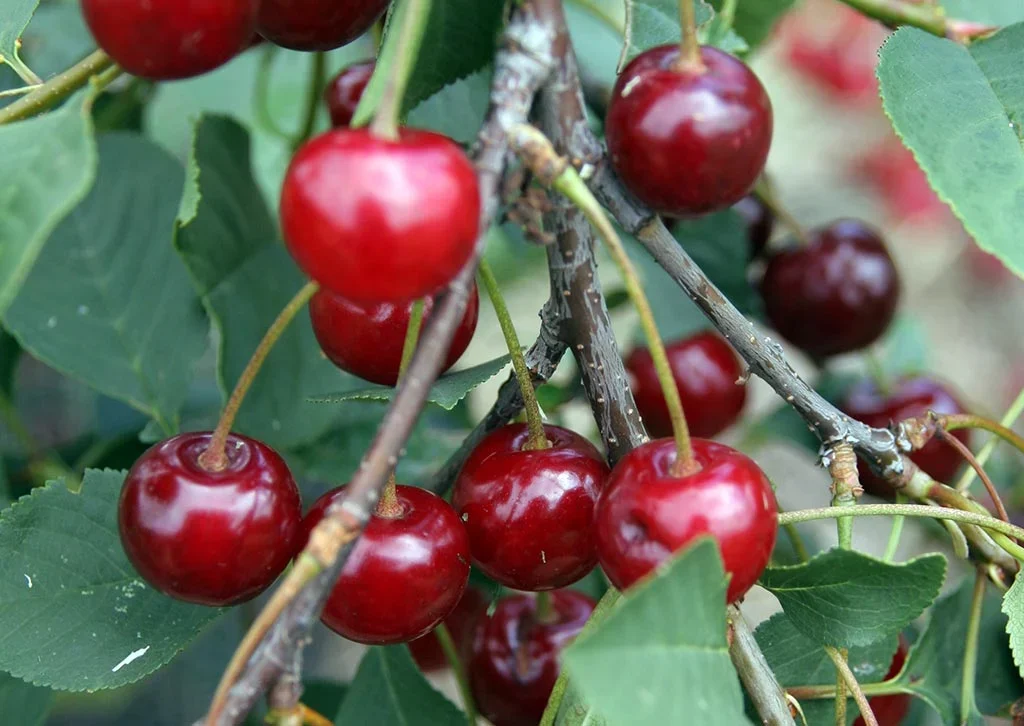
Best Tomato Varieties for Small Spaces

Choosing the right type is the first key to success. Go for compact or dwarf varieties that don’t require sprawling garden beds.

Top Container-Friendly Tomato Varieties:

VarietyTypeGrowth HabitDays to Maturity
Tiny TimCherryDwarf50–60 days
Bush Early GirlSlicingDeterminate54 days
Balcony CherryCherryCompact55–65 days
Patio PrincessCherryBush60–70 days
Window Box RomaRomaDeterminate70–80 days
Red RobinCherryMiniature55–68 days

Tip: Look for keywords like patio, bush, dwarf, or compact when selecting seeds or seedlings.


What You’ll Need

To get started, gather these basic supplies:

Containers:

  • At least 12 inches wide and deep
  • Plastic, ceramic, fabric grow bags, or hanging baskets
  • Drainage holes are essential!

Soil:

  • Use lightweight, nutrient-rich potting mix
  • Avoid garden soil (too dense and may hold too much water)

Sunlight:

  • 6–8 hours of direct sun daily (or use a grow light indoors)

Other Essentials:

  • Tomato stakes, cages, or trellises (even for small plants)
  • Watering can with a narrow spout
  • Organic tomato fertilizer

Step-by-Step Tomato Planting Guide

Let’s break down how to grow tomatoes successfully in your small space:


Step 1: Choose the Right Container

Tomatoes have deep roots, so the bigger the pot, the better.

  • Minimum size: 5-gallon pot (12″ diameter)
  • Hanging baskets: Ideal for trailing cherry varieties
  • Grow bags: Lightweight, affordable, and breathable

Larger containers retain moisture better and support stronger roots.


Step 2: Use the Right Soil

Tomatoes need loose, fertile, and well-draining soil.

Make your own mix:

  • 2 parts organic potting mix
  • 1 part compost
  • 1 part perlite or coco peat for aeration

Add crushed eggshells or bone meal for calcium — helps prevent blossom-end rot.


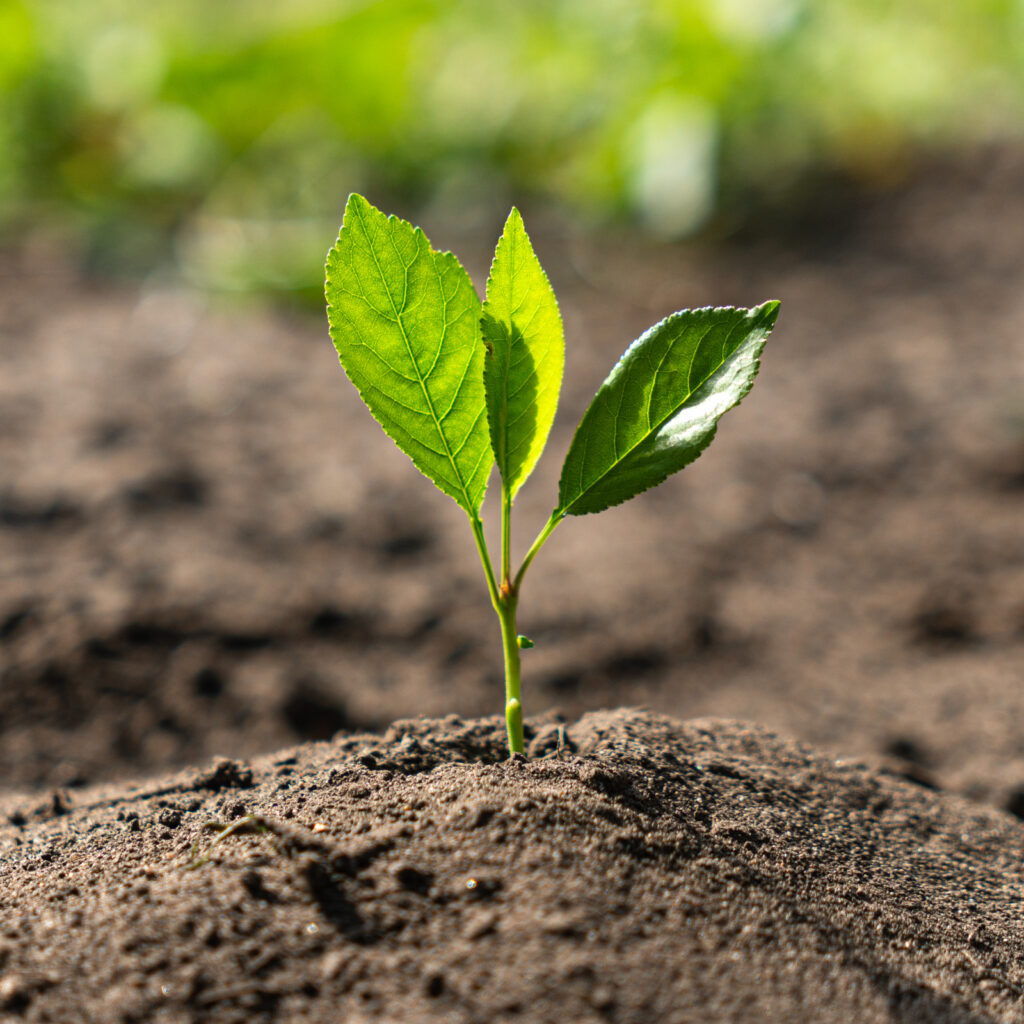
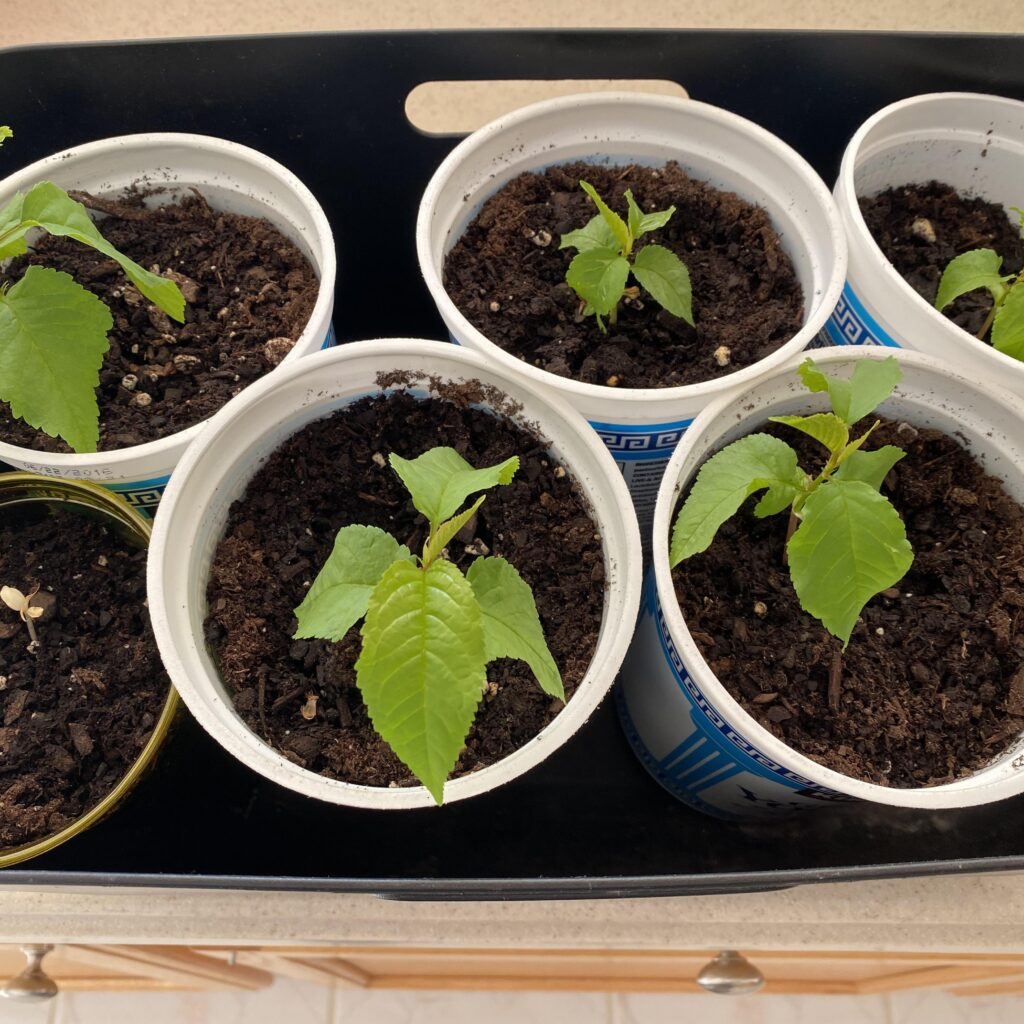
Step 3: Plant the Seedling Deep

Unlike most plants, tomatoes benefit from deep planting.

How to do it:

  • Remove lower leaves from the seedling.
  • Bury two-thirds of the stem — roots will grow from the buried stem.
  • Gently press soil around the base and water thoroughly.

This promotes a stronger root system for healthier growth.


Step 4: Water Consistently

Tomatoes love moisture — but not soggy roots.

Watering tips:

  • Keep soil evenly moist, especially when fruits start forming.
  • Avoid overhead watering — aim for the base.
  • Water early in the morning to reduce evaporation.
  • In hot weather, check soil twice daily.

Warning: Inconsistent watering can cause fruit cracking or blossom-end rot.


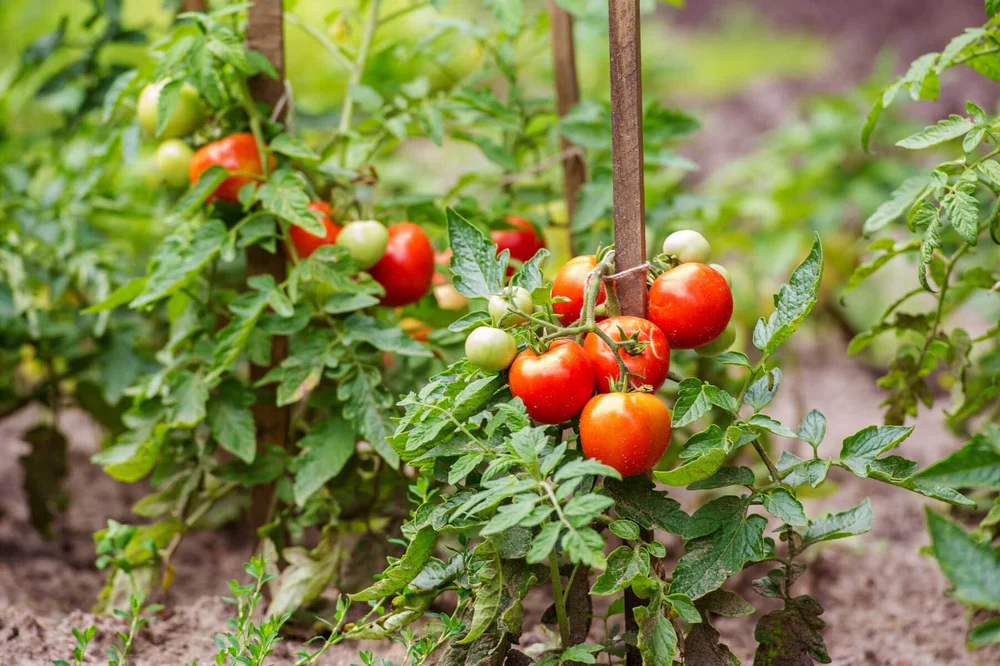
Step 5: Provide Support Early

Even small tomato plants benefit from support.

Options:

  • Tomato cages: Great for bush varieties.
  • Stakes or bamboo sticks: Ideal for single plants.
  • Trellises: Useful for indeterminate varieties in vertical gardens.

Install supports at planting time to avoid damaging roots later.


Step 6: Fertilize Regularly

Tomatoes are heavy feeders. Feed them regularly for a great harvest.

Fertilizer tips:

  • Use a balanced or tomato-specific fertilizer.
  • Start feeding 2–3 weeks after planting, every 10–14 days.
  • Use liquid seaweed or compost tea as a natural boost.

Avoid too much nitrogen — it can lead to leafy plants with little fruit.


Step 7: Prune and Pinch Smartly

Remove suckers (the shoots between the main stem and branches) for better airflow and fruit production — especially for indeterminate types.

Pruning also:

  • Reduces disease risk
  • Directs energy to fruit instead of foliage
  • Helps keep small spaces tidy

Step 8: Maximize Sunlight

Place your containers in the sunniest spot possible — a south-facing balcony or windowsill is ideal.

If indoors, use full-spectrum grow lights for 12–14 hours daily.


Step 9: Keep an Eye on Pests and Diseases

Even in small spaces, pests can find your plants.

Common issues:

  • Aphids: Spray with soapy water or neem oil.
  • Whiteflies: Use sticky traps.
  • Fungal spots: Avoid wetting leaves; improve air circulation.

Inspect plants regularly and act fast to protect your harvest.
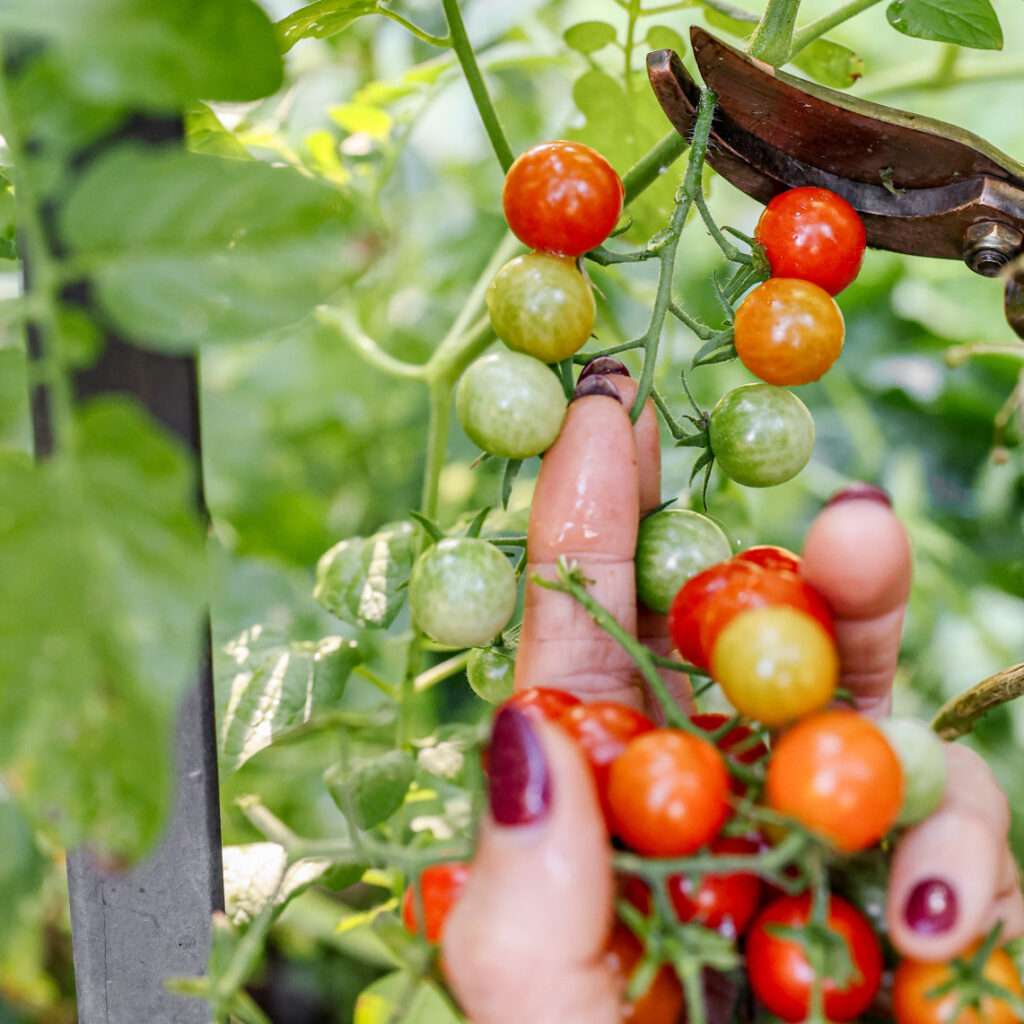
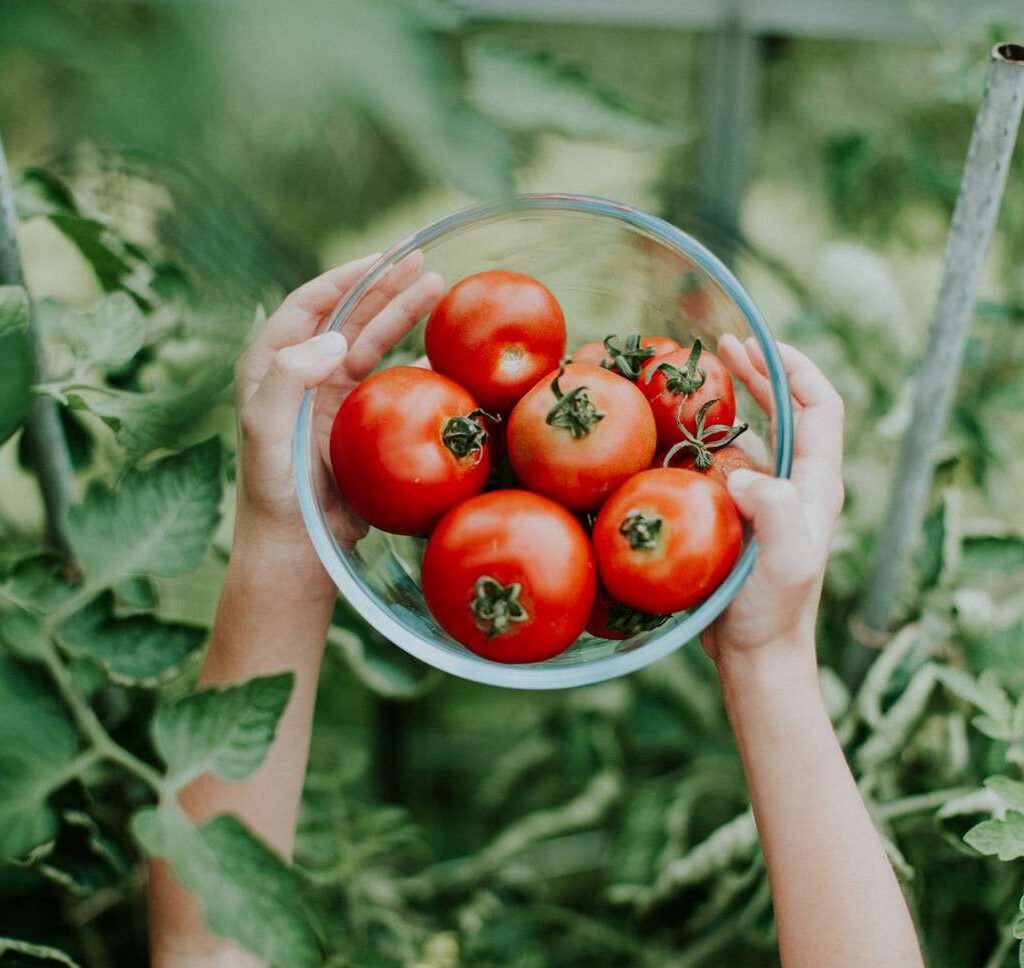

Harvesting Tomatoes

The moment you’ve been waiting for!

  • Tomatoes are ready when they’re fully colored and slightly soft.
  • Twist gently or use scissors to remove from the plant.
  • Keep harvested tomatoes at room temperature — refrigerating dulls their flavor.

Bonus Tips for Small Space Tomato Gardening

  • Grow vertically: Use hanging baskets, railing planters, or wall-mounted shelves.
  • Companion plant: Add basil, marigolds, or chives to deter pests and boost yield.
  • Succession planting: Start new seedlings every 4–6 weeks for continuous harvest.
  • Use mulch (like straw or coco coir) to reduce water loss and keep roots cool.
  • Rotate locations yearly if growing on balconies or decks.

Final Thoughts

Tomatoes are one of the most rewarding crops to grow — even in the smallest spaces. With a container, a sunny spot, and a bit of care, you can enjoy baskets of flavorful, homegrown tomatoes all season long.

Whether you’re growing cherry tomatoes on your windowsill or full-size slicers on your patio, the results are always satisfying. Get creative with your space, stay consistent with care, and you’ll be harvesting your own tomatoes before you know it.

Happy planting!

How to Grow Basil Indoors Year-Round

How to Grow Basil Indoors Year-Round

Few things compare to the fresh, aromatic scent and flavor of homegrown basil. Whether sprinkled over pasta, blended into pesto, or added to salads and teas — this versatile herb is a must-have in every kitchen. And the best part? You don’t need a garden to grow it. With the right care, you can grow basil indoors year-round!

In this detailed guide, we’ll walk you through how to grow basil indoors successfully, from selecting the best variety to keeping it healthy and harvest-ready, no matter the season.


Why Grow Basil Indoors?

Growing basil indoors isn’t just convenient — it’s rewarding and practical. Here’s why:

  • Fresh herbs at your fingertips, anytime
  • A natural air freshener with its sweet, peppery aroma
  • Compact and perfect for small spaces or apartments
  • Pest control is easier indoors
  • Requires minimal tools and space

Best Basil Varieties for Indoor Growing

While basil thrives indoors, some varieties perform better in containers and limited sunlight. Here are popular, indoor-friendly types:

  • Sweet Basil: Classic flavor, perfect for cooking and pesto.
  • Greek Basil: Compact, bushy growth, ideal for pots.
  • Genovese Basil: Large, fragrant leaves, perfect for Italian dishes.
  • Thai Basil: Distinct licorice flavor, used in Asian cuisines.
  • Lemon Basil: Bright, citrusy flavor, great for teas and seafood.

How to Grow Basil Indoors: Step-by-Step

Let’s get into the details of successfully growing lush, flavorful basil inside your home.


Step 1: Choose the Right Pot

Basil loves space to stretch its roots. Choose a container:

  • At least 6–8 inches deep
  • With good drainage holes
  • Made of terracotta, ceramic, or plastic

Tip: If planting multiple seedlings, space them 6 inches apart in a larger container.


Step 2: Use Well-Draining, Nutrient-Rich Soil

Basil thrives in:

  • Light, fluffy, organic potting mix
  • Mixed with perlite or coconut coir for drainage
  • pH level between 6.0–7.5

Avoid garden soil indoors, as it may harbor pests and compacts easily in pots.


Step 3: Planting Basil

You can grow basil:

  • From seeds: Inexpensive and satisfying to watch sprout.
  • From cuttings: Fastest way to multiply basil from store-bought or garden plants.

From Seeds:

  • Fill your pot with soil.
  • Plant seeds 1/4 inch deep.
  • Lightly water to moisten soil.
  • Cover with plastic wrap (optional) to maintain humidity until sprouting.

Seeds usually germinate in 5–10 days.

From Cuttings:

  • Cut a healthy, non-flowering basil stem, 4–6 inches long.
  • Remove lower leaves.
  • Place in a glass of water in indirect sunlight.
  • Roots form in 7–14 days.
  • Once roots are 2 inches long, plant in soil.

Step 4: Provide Plenty of Light

Basil craves sunlight.
Ideal conditions:

  • 6–8 hours of bright, indirect sunlight daily
  • South or west-facing windows are best.

If natural light is insufficient:

  • Use LED grow lights positioned 6 inches above the plant.
  • Keep lights on for 12–14 hours a day.

Step 5: Water Wisely

Basil likes moist, but not soggy soil.

Watering tips:

  • Check soil by inserting your finger 1 inch deep. If dry, water.
  • Avoid overhead watering. Water at the base to prevent mildew.
  • Ensure excess water drains completely.
  • Mist leaves occasionally in dry conditions for humidity.

Step 6: Maintain the Right Temperature and Humidity

Basil thrives in warmth.

Ideal temperature:

  • 18°C–26°C (65°F–80°F)
  • Avoid cold drafts and sudden temperature drops.

For humidity:

  • Group plants together.
  • Place a pebble tray with water nearby.
  • Mist leaves occasionally.

Step 7: Feed for Healthy Growth

Indoor basil benefits from occasional feeding.

Fertilizer tips:

  • Use a balanced liquid fertilizer (10-10-10 or organic options).
  • Feed once every 4–6 weeks during active growth.
  • Avoid over-fertilizing — it can reduce flavor intensity.

Step 8: Regular Pruning and Harvesting

Frequent pruning encourages bushier, healthier growth.

How to prune:

  • Wait until your plant has at least 6–8 leaves.
  • Pinch off the top set of leaves regularly.
  • Remove any flowers promptly to prevent bitterness.

Harvesting:

  • Pick leaves from the top down.
  • Harvest in the morning when oils are most concentrated.
  • Avoid stripping more than 1/3 of the plant at a time.

Troubleshooting Common Basil Problems

ProblemCauseFix
Yellowing leavesOverwatering, nutrient deficiencyCheck soil, adjust watering, fertilize
Leggy, weak stemsNot enough lightMove to a brighter spot or add grow lights
Leaves wiltingUnderwatering or temperature stressWater consistently, maintain warmth
Powdery mildew on leavesPoor air circulation, humidityPrune crowded leaves, improve airflow
Brown leaf edgesLow humidityMist leaves or use a pebble tray

Bonus Tips for Year-Round Indoor Basil

  • Rotate your plant weekly for even light exposure.
  • Clean leaves regularly to prevent dust buildup.
  • In winter, reduce watering as growth slows.
  • Take cuttings before winter to start fresh plants indoors.
  • Use self-watering pots for consistent moisture.

Fun Basil Uses for Families

Once you have fresh basil at home, put it to good use!

  • Make homemade pesto sauce.
  • Add leaves to lemonade or herbal teas.
  • Sprinkle on pizza, salads, or soups.
  • Use leaves in DIY natural air fresheners.
  • Infuse in olive oil for flavored dressings.

Final Thoughts

Growing basil indoors year-round is easier than you might think. With good light, well-drained soil, and regular care, you can enjoy fresh, aromatic basil leaves on demand — whether it’s winter or summer.

From sprouting seeds to snipping fresh leaves for your pasta, the process is both rewarding and relaxing. So, clear a sunny spot on your windowsill, grab a pot and some seeds, and start your indoor basil-growing journey today.

What to Do When Your Indoor Plant Turns Yellow

What to Do When Your Indoor Plant Turns Yellow

There’s nothing quite like the joy of a thriving indoor plant — its lush green leaves adding life and freshness to your living space. But what happens when those beautiful green leaves suddenly start turning yellow?

For many plant owners, yellowing leaves can be both confusing and worrying. The good news is: it’s usually your plant’s way of signaling a problem, and with a little attention, you can often fix it.

In this comprehensive guide, we’ll explore why indoor plant leaves turn yellow, how to identify the cause, and what you can do to revive your plant and keep it healthy.


Why Do Indoor Plant Leaves Turn Yellow?

Yellow leaves, or chlorosis, occur when a plant’s natural chlorophyll production is disrupted. This causes leaves to lose their green pigment and turn yellow.

It can happen for several reasons, including improper watering, poor lighting, pests, or nutrient deficiencies. The key is to identify the cause early and adjust your care routine accordingly.


Common Causes of Yellowing Leaves (And How to Fix Them)

Let’s break down the most frequent reasons why your indoor plant might be turning yellow — and how you can save it.


Overwatering

Overwatering is the most common cause of yellow leaves in houseplants. When the roots sit in soggy soil, they can’t absorb oxygen properly, leading to root rot and yellowing leaves.

Signs:

  • Leaves turn pale yellow.
  • Soil feels wet or waterlogged.
  • Leaves may feel soft or mushy.

What to do:

  • Check soil moisture by inserting your finger or a wooden skewer.
    If it feels damp beyond the top inch, hold off watering.
  • Remove the plant from its pot and check roots for rot (brown, mushy roots).
    Trim damaged roots with clean scissors.
  • Repot in fresh, well-draining soil.
  • Use pots with drainage holes to prevent future water buildup.

Underwatering

Too little water can also cause leaves to yellow and dry out.

Signs:

  • Leaves turn yellow, crispy, or brown at the edges.
  • Soil feels bone dry.
  • Leaves wilt or droop.

What to do:

  • Water thoroughly until excess drains out from the bottom.
  • Adopt a consistent watering schedule based on your plant’s needs.
  • Use a moisture meter for precise readings if unsure.

Incorrect Light Exposure

Plants have different light preferences. Too much or too little light stresses plants, causing yellow leaves.

Signs:

  • Too much light: leaves scorch, turn pale, or yellow with brown spots.
  • Too little light: leaves yellow gradually and drop off.

What to do:

  • Move your plant to a more suitable location:
    • Bright, indirect light for most indoor plants.
    • Avoid placing plants directly in harsh afternoon sunlight.
    • Rotate plants weekly for even light exposure.

Tip: If natural light is limited, consider using grow lights.


Pest Infestation

Tiny pests like spider mites, aphids, or whiteflies suck plant sap, weakening leaves and causing yellowing.

Signs:

  • Yellow, speckled, or curled leaves.
  • Sticky residue or webbing.
  • Visible insects under leaves.

What to do:

  • Inspect plants closely, especially leaf undersides.
  • Wipe leaves with a damp cloth or mild soapy water.
  • Use neem oil spray or insecticidal soap for persistent infestations.
  • Isolate affected plants to prevent spreading.

Nutrient Deficiencies

Lack of essential nutrients like nitrogen, iron, or magnesium can lead to yellow leaves.

Signs:

  • Uniform yellowing of older leaves (nitrogen deficiency).
  • Yellowing between veins of young leaves (iron deficiency).

What to do:

  • Use a balanced liquid houseplant fertilizer every 2–4 weeks during the growing season.
  • Follow label instructions carefully — over-fertilizing can harm your plant.
  • Avoid feeding plants during dormancy (usually in winter).

Poor Soil Drainage

Compact, poorly draining soil holds excess water, suffocating roots and leading to yellowing leaves.

What to do:

  • Repot using light, well-aerated soil mix appropriate for your plant.
  • Add perlite, coarse sand, or coconut coir for improved drainage.
  • Ensure your pot has adequate drainage holes.

Temperature Stress

Indoor plants prefer stable, moderate temperatures. Sudden changes can cause stress and yellow leaves.

Signs:

  • Yellowing after moving plants near air conditioners, heaters, or drafty windows.

What to do:

  • Keep plants away from direct heat, cold drafts, and vents.
  • Maintain room temperatures between 18°C–26°C (65°F–80°F).

When Are Yellow Leaves Normal?

Not all yellow leaves are cause for alarm. Occasional yellowing of older, lower leaves is a normal part of a plant’s life cycle.

What to do:

  • Gently prune yellow or dead leaves to encourage new growth.
  • Focus on overall plant health — if new leaves look vibrant, your plant’s fine.

Indoor Plant Care Tips to Prevent Yellowing

Prevention is better than cure! Here’s how to keep your indoor plants healthy and avoid yellow leaves in the first place:

  • Know your plant’s needs: Light, water, humidity, and soil requirements vary.
  • Water consistently: Check soil moisture before watering.
  • Use good-quality soil: Well-draining, nutrient-rich potting mix is essential.
  • Feed plants during the growing season: Apply diluted liquid fertilizer.
  • Inspect for pests regularly: Early detection makes treatment easier.
  • Clean leaves: Dust blocks light and attracts pests.
  • Rotate plants: For even light exposure and balanced growth.

Quick Troubleshooting Chart

ProblemSignsSolution
OverwateringYellow, soft, mushy leaves, wet soilReduce watering, improve drainage
UnderwateringDry, crispy yellow leaves, dry soilWater thoroughly and consistently
Too Much LightScorched, pale-yellow leavesMove to indirect sunlight
Too Little LightGradual yellowing, leaf dropMove to a brighter location
PestsYellow spots, sticky residue, webbingClean leaves, use neem oil or soapy water
Nutrient DeficiencyYellowing between veins or older leavesApply balanced liquid fertilizer
Temperature StressYellowing after exposure to drafts or heatMove to stable temperature area

Final Thoughts

Seeing your indoor plant’s leaves turn yellow can be disheartening, but in most cases, it’s an easily fixable issue. The key is to observe your plant carefully, understand what it’s trying to tell you, and adjust your care routine accordingly.

With a little attention to watering, lighting, soil, and pests, you can nurse your plants back to health and keep them lush, vibrant, and thriving.

So, don’t panic — grab your watering can, check the soil, and show your plant some love!

Low-Maintenance Gardening for Beginners

Low-Maintenance Gardening for Beginners

Do you dream of a beautiful, thriving garden but worry about the time, effort, and knowledge it takes to maintain one? The good news is — you don’t have to be a seasoned gardener or spend hours every week tending to plants to enjoy a lush, inviting outdoor space. Low-maintenance gardening is perfect for beginners, busy homeowners, and anyone seeking a simple, relaxing way to connect with nature without constant upkeep.

In this detailed beginner’s guide, we’ll explore what low-maintenance gardening means, the easiest plants to grow, and practical tips to design, care for, and enjoy a beautiful garden with minimal work.


What is Low-Maintenance Gardening?

Low-maintenance gardening focuses on creating a beautiful, functional, and sustainable outdoor space that requires minimal watering, pruning, weeding, and fertilizing.

The idea is to choose hardy plants, smart design layouts, and efficient care practices that let you enjoy your garden with less effort.

Key features of a low-maintenance garden:

  • Drought-tolerant, pest-resistant plants.
  • Smart plant placement for natural growth.
  • Mulching to suppress weeds and retain moisture.
  • Minimal pruning and trimming.
  • Simple, easy-care soil and watering systems.

Benefits of Low-Maintenance Gardening

Why choose low-maintenance gardening?
Because it offers more than just convenience:

  • Less time and effort for upkeep.
  • Reduced water consumption.
  • Eco-friendly and sustainable.
  • Supports local wildlife and pollinators.
  • Creates a calming, stress-relieving environment.
  • Adds beauty and value to your home.

Planning Your Low-Maintenance Garden

Before planting, a little thoughtful planning will help you set up a stress-free space that suits your lifestyle.

Choose the Right Location

Identify sunny, shady, and partially shaded spots in your yard or balcony.
Different plants have different light needs, so understanding your garden’s microclimate is crucial.

Start Small

Begin with a modest-sized area or a few container plants.
It’s easier to manage and allows you to learn gradually without feeling overwhelmed.

Group Plants by Water and Light Needs

Planting species with similar care requirements together ensures consistent maintenance and prevents over- or under-watering.


Easy, Low-Maintenance Plants for Beginners

The secret to low-maintenance gardening lies in plant selection. Choose hardy, pest-resistant, and drought-tolerant species that thrive naturally in your region.

Flowering Plants:

  • Marigolds: Bright, cheerful blooms that repel pests.
  • Zinnias: Heat-tolerant, low-care flowers perfect for sunny spots.
  • Lavender: Fragrant and drought-resistant, attracts pollinators.
  • Coneflowers (Echinacea): Hardy perennials loved by butterflies and bees.
  • Petunias: Easy-growing, colorful annuals for containers and borders.

Shrubs and Ground Covers:

  • Bougainvillea: Hardy, low-water climbing plant.
  • Lantana: Heat-loving, colorful flowering shrub.
  • Sedum (Stonecrop): Tough, drought-resistant ground cover.
  • Jade Plant: Succulent shrub requiring minimal care.

Herbs:

  • Basil, mint, and rosemary are perfect for sunny spots and require little upkeep.
  • Aloe Vera: Hardy and medicinal with minimal water needs.

Choosing the Right Soil and Mulch

Good soil preparation saves hours of maintenance down the line.

Use loose, well-draining soil enriched with organic compost or aged manure.
For containers, select a quality potting mix suited to your chosen plants.

Benefits of Mulching:

  • Retains soil moisture.
  • Suppresses weeds.
  • Regulates soil temperature.
  • Adds organic matter as it decomposes.

Use organic mulches like coconut husk, straw, wood chips, or dry leaves.


Simple Watering Tips

A low-maintenance garden should be water-wise.
Drought-tolerant plants and smart watering practices are essential.

Watering Guidelines:

  • Water deeply and less frequently to encourage deep roots.
  • Water early in the morning or late evening to reduce evaporation.
  • Install drip irrigation or soaker hoses for consistent, hands-free watering.
  • Collect rainwater in barrels for eco-friendly irrigation.

Minimal Weeding and Fertilizing

Reduce your garden chores with these easy strategies:

  • Apply mulch generously to block sunlight from reaching weeds.
  • Plant ground covers to naturally crowd out weeds.
  • Use slow-release organic fertilizers twice a year.
  • Choose native plants that thrive in your region’s soil without extra feeding.

Natural Pest and Disease Control

Instead of chemical sprays, opt for eco-friendly pest management:

  • Grow pest-repellent plants like marigolds and lemongrass.
  • Introduce beneficial insects like ladybugs and praying mantises.
  • Remove affected leaves and plants promptly.
  • Use homemade neem oil sprays for common garden pests.

Seasonal Maintenance Tasks

Low-maintenance gardens still need occasional seasonal care, but it’s simple and rewarding:

Spring:

  • Check for plant health.
  • Trim dead branches.
  • Add fresh mulch and compost.

Summer:

  • Deep water during dry spells.
  • Prune lightly to shape plants.

Autumn:

  • Collect fallen leaves for compost.
  • Cut back overgrown perennials.

Winter:

  • Protect tender plants with covers or move containers indoors.
  • Clean up debris to reduce pests.

Low-Maintenance Container Gardening

If space is tight or you’re a total beginner, container gardening is an excellent low-maintenance option.

Advantages:

  • Portable and flexible layout.
  • Control over soil, water, and sunlight exposure.
  • Easier pest control and harvesting.

Great container plants: Petunias, geraniums, succulents, herbs, and dwarf citrus.


Low-Maintenance Garden Design Ideas

Design your garden to require less effort and still look beautiful:

  • Create gravel pathways or stepping stones to minimize weeding.
  • Use raised beds or vertical gardens for easier access.
  • Plant in clusters or borders to simplify watering.
  • Choose perennials over annuals for long-lasting, low-effort blooms.
  • Integrate decorative elements like planters, sculptures, or birdbaths to enhance aesthetics.

Final Thoughts

Low-maintenance gardening for beginners proves that you don’t need to invest endless hours or possess expert skills to enjoy a beautiful, relaxing garden. With thoughtful planning, smart plant choices, and simple care routines, you can transform any yard, balcony, or patio into a thriving green space.

Remember, gardening should be a joy, not a chore. Start small, learn as you grow, and savor the satisfaction of nurturing life around you.

Ready to start your stress-free garden journey? Grab a pot, pick a plant, and let the growing begin!

Proper Snake Plant Watering Techniques

Proper Snake Plant Watering Techniques

Snake plants (Sansevieria trifasciata) are among the most popular indoor plants for good reason — they’re hardy, air-purifying, and strikingly beautiful with their upright, sword-like leaves. But despite their reputation as low-maintenance houseplants, one aspect of their care often trips people up: watering.

Snake plants are naturally adapted to dry, arid environments, and improper watering — especially overwatering — is the leading cause of problems like root rot and leaf damage. Knowing when and how to water your snake plant is essential for keeping it healthy and thriving.

In this detailed guide, we’ll walk you through proper snake plant watering techniques, how to recognize the signs your plant needs water, and common mistakes to avoid.


Why Proper Watering Is Crucial for Snake Plants

Snake plants are succulents, storing water in their thick leaves to help them survive drought-like conditions. This means they’re far more tolerant of underwatering than overwatering. Consistently soggy soil can suffocate the roots, lead to rot, and eventually kill the plant.

Understanding the right watering practices ensures:

  • Healthy, vibrant leaves.
  • Steady, balanced growth.
  • Prevention of diseases like root rot.
  • Prolonged lifespan of your plant.

How Often Should You Water a Snake Plant?

There’s no fixed watering schedule for snake plants because factors like light, temperature, humidity, pot size, and season affect how quickly the soil dries out. However, a general rule is:

  • During Spring and Summer: Water every 2–3 weeks when the top 2–3 inches of soil feel dry.
  • During Fall and Winter: Water once a month or less, as the plant’s growth slows down.

Remember: Snake plants prefer to dry out completely between waterings.


How to Check When Your Snake Plant Needs Water

Never rely on the calendar alone. The best way to determine when your snake plant needs water is to check the soil’s moisture level.

The Finger Test

Insert your finger 2–3 inches into the soil.

  • If it feels dry, it’s time to water.
  • If it’s damp, wait a few more days and check again.

Use a Moisture Meter

For more accuracy, use a soil moisture meter. A reading of 2 or lower indicates the soil is dry enough to water.


Step-by-Step Snake Plant Watering Techniques

Here’s a precise technique to follow when watering your snake plant:

Choose the Right Pot

  • Always use a pot with drainage holes.
  • Avoid decorative pots that trap excess water unless they’re emptied after watering.

Use Well-Draining Soil

Use a cactus or succulent mix or make your own blend with:

  • 2 parts potting soil
  • 1 part coarse sand
  • 1 part perlite or pumice

This allows water to drain quickly, preventing soggy soil.

Water Thoroughly but Infrequently

When it’s time to water:

  • Water at the base of the plant, not over the leaves.
  • Pour water slowly and evenly until it begins to drain from the bottom.
  • Discard any water collected in the saucer after 10–15 minutes to avoid root rot.

Let the Soil Dry Completely

Before watering again, let the soil dry out thoroughly. Snake plants can tolerate being dry far better than being consistently wet.


Best Water Type for Snake Plants

Use room-temperature, filtered, or distilled water if possible. Tap water containing high levels of chlorine, fluoride, or salts can cause leaf tip burn and mineral buildup over time.

If using tap water:

  • Let it sit out overnight to allow chlorine to evaporate before watering.

Seasonal Watering Adjustments

Your snake plant’s water needs change throughout the year.

Spring and Summer

  • Active growing period.
  • Soil dries out faster.
  • Water every 2–3 weeks or when the soil feels dry.

Fall and Winter

  • Plant enters dormancy.
  • Growth slows, and soil retains moisture longer.
  • Water once a month or less.

Always adjust based on your indoor environment.


How Lighting Affects Watering Frequency

The amount of light your snake plant receives impacts how quickly the soil dries.

  • Bright indirect light: Soil dries faster. Water more frequently.
  • Low light: Soil stays damp longer. Water less often.

Avoid direct, harsh sunlight as it can scorch the leaves.


Common Snake Plant Watering Mistakes to Avoid

To keep your snake plant healthy, steer clear of these common watering errors:

Overwatering

This is the number one killer of snake plants. Excess moisture leads to root rot and fungal diseases.

Solution:
Always let the soil dry out completely before watering again.

Watering on a Fixed Schedule

Conditions like temperature and humidity vary, affecting how quickly soil dries.

Solution:
Check soil moisture before every watering.

Using Heavy, Dense Soil

Heavy potting mixes retain too much moisture.

Solution:
Use a fast-draining, gritty soil mix designed for succulents.

Watering the Leaves

Getting water on the leaves can lead to rot, especially where leaves meet the soil.

Solution:
Water at the soil line, directly around the base.


Signs of Overwatering and Underwatering

Proper watering is about balance. Here’s how to recognize if you’re over or underdoing it.

Signs of Overwatering

  • Yellowing leaves
  • Mushy, soft, or drooping leaves
  • Foul-smelling soil
  • Roots turning brown or black (root rot)

Signs of Underwatering

  • Wrinkled, shriveled leaves
  • Brown, crispy leaf tips
  • Soil pulling away from pot edges
  • Slow growth during active growing season

Quick Watering Reference Chart

ConditionWatering FrequencyMethod
Bright indirect lightEvery 2–3 weeks (summer)Water thoroughly when dry
Low lightEvery 4 weeks or lessCheck soil before watering
Winter monthsEvery 4–6 weeksMinimal water needed
Dormant, cool locationsOnce a month or lessLet soil dry completely

Final Thoughts

Proper watering is the cornerstone of healthy snake plant care. While these hardy plants are forgiving of occasional neglect, consistently wet soil is their downfall. By understanding how often to water, checking soil moisture, using well-draining soil, and adjusting for seasonal changes, you’ll help your snake plant thrive.

Remember — when it comes to snake plants, less is more. It’s better to let them go a little dry than to overwater. With the right watering techniques, your snake plant will reward you with bold, upright leaves and cleaner, fresher air for years to come.

Create a Sleep-Friendly Space with Plants

Create a Sleep-Friendly Space with Plants

A good night’s sleep is essential for your health, energy, and overall well-being. While most people focus on soft bedding, blackout curtains, or soothing music for better sleep, one of the simplest and most natural ways to improve your sleeping environment is by adding the right indoor plants to your bedroom.

Plants not only beautify a space but also purify the air, reduce stress, increase oxygen levels, and promote a calming atmosphere — all vital for deep, restful sleep. In this guide, you’ll discover how to create a sleep-friendly space with plants, which species to choose, how to arrange them, and tips to care for them so they thrive while you snooze.


Why Plants Are Perfect for Your Sleep Environment

Before diving into plant options, let’s understand how plants help you sleep better:

  • Purify indoor air: Many plants naturally filter out toxins like formaldehyde, benzene, and carbon monoxide.
  • Release oxygen: Certain species release oxygen at night, improving air quality and aiding better breathing during sleep.
  • Increase humidity: Plants raise humidity, easing dry skin, respiratory irritation, and sinus problems.
  • Reduce stress: Greenery has a proven calming effect on the mind, lowering anxiety and promoting tranquility.
  • Create a peaceful aesthetic: A room filled with nature-inspired elements feels serene, relaxing, and perfect for unwinding.

10 Best Plants for a Sleep-Friendly Bedroom

Not every plant is ideal for the bedroom. Here’s a curated list of air-purifying, oxygen-producing, and stress-relieving plants perfectly suited for your sleep space:


1. Snake Plant (Sansevieria trifasciata)

Why It’s Great:
Releases oxygen at night while filtering out toxins like formaldehyde and benzene. Hardy, stylish, and practically indestructible.

Care Tips:

  • Tolerates low to bright indirect light
  • Water every 2–4 weeks
  • Prefers well-draining soil

Best Spot: Beside your bed or near a window.


2. Aloe Vera

Why It’s Great:
A natural healer and air purifier, aloe vera releases oxygen at night, improving air circulation in your bedroom.

Care Tips:

  • Needs bright, indirect sunlight
  • Water when soil is dry
  • Avoid overwatering

Best Spot: On a windowsill or dresser.


3. Peace Lily (Spathiphyllum)

Why It’s Great:
Filters ammonia, benzene, and other indoor pollutants while increasing humidity and adding elegant white blooms to your room.

Care Tips:

  • Thrives in low to medium light
  • Keep soil slightly moist
  • Wipe leaves regularly

Best Spot: Bedroom corner or side table.


4. Areca Palm (Dypsis lutescens)

Why It’s Great:
Acts as a natural humidifier and oxygen booster. It removes airborne toxins while creating a tropical, spa-like atmosphere.

Care Tips:

  • Prefers bright, indirect light
  • Keep soil evenly moist
  • Mist occasionally

Best Spot: A bedroom corner or near a window.


5. Lavender (Lavandula)

Why It’s Great:
Known for its calming fragrance, lavender lowers heart rate, reduces stress, and improves sleep quality.

Care Tips:

  • Needs bright, direct light
  • Water when soil feels dry
  • Avoid overly moist soil

Best Spot: Near a sunny window.


6. Spider Plant (Chlorophytum comosum)

Why It’s Great:
Absorbs carbon monoxide, formaldehyde, and toxins while releasing oxygen, making it ideal for bedrooms.

Care Tips:

  • Prefers bright, indirect light
  • Water when topsoil feels dry
  • Trim brown leaves

Best Spot: Shelf, windowsill, or hanging basket.


7. Valerian (Valeriana officinalis)

Why It’s Great:
The root of valerian is famous for its sleep-inducing properties, but the plant itself also releases a gentle, calming fragrance.

Care Tips:

  • Loves full sun
  • Keep soil slightly moist
  • Needs good air circulation

Best Spot: Near a sunny window or balcony access.


8. Gerbera Daisy (Gerbera jamesonii)

Why It’s Great:
One of the few flowering plants that releases oxygen at night. Its colorful blooms brighten the bedroom while purifying the air.

Care Tips:

  • Needs bright, indirect light
  • Water when soil feels dry
  • Remove faded flowers

Best Spot: Bedside table or windowsill.


9. English Ivy (Hedera helix)

Why It’s Great:
Excellent for removing airborne mold and toxins — great for allergy sufferers.

Care Tips:

  • Prefers bright, indirect light
  • Keep soil moist
  • Trim regularly

Note: Toxic to pets, so place it out of reach.


10. Tulsi (Holy Basil)

Why It’s Great:
Releases oxygen continuously, absorbs carbon dioxide and pollutants, and its calming aroma reduces stress and anxiety.

Care Tips:

  • Requires 4–6 hours of direct sunlight
  • Keep soil slightly moist
  • Prune regularly

Best Spot: Near a sunny window or on a balcony.


How to Arrange Plants for Maximum Sleep Benefits

To create a peaceful, plant-filled bedroom:

  • Position oxygen-producing plants like snake plant and aloe vera on bedside tables
  • Use tall plants like areca palm or peace lily in room corners
  • Keep flowering plants like lavender and gerbera daisy near windows
  • Avoid over-cluttering — 2–5 plants are ideal for a medium-sized room
  • Combine hanging plants (like spider plants or ivy) with floor-standing options for balance
  • Use decorative pots to complement your room’s color palette and mood

Simple Plant Care Tips for Sleep-Friendly Bedrooms

To keep your bedroom plants thriving:

  • Rotate them every 2–4 weeks for even growth
  • Wipe leaves with a damp cloth to remove dust
  • Check soil moisture before watering — most plants dislike soggy soil
  • Ensure drainage holes in pots to prevent root rot
  • Mist tropical plants or use a small humidifier in dry seasons
  • Avoid over-fertilizing — a monthly dose during spring and summer is enough

Additional Sleep-Enhancing Tips

Pair your plant-friendly bedroom with other natural sleep aids:

  • Dim lights in the evening to signal bedtime
  • Use calming essential oils like lavender or chamomile
  • Maintain a cool room temperature (around 65°F or 18°C)
  • Keep electronic devices out of reach at bedtime
  • Listen to nature-inspired ambient sounds or soft instrumental music

Final Thoughts

Creating a sleep-friendly space with plants is one of the simplest, most rewarding ways to transform your bedroom into a calm, healthy retreat. These oxygen-boosting, air-purifying, stress-reducing plants not only improve your environment but also promote deeper, more restorative sleep.

Whether you’re a seasoned plant parent or a beginner, these easy-care bedroom plants are perfect for nurturing your well-being, night after night.

So why wait? Bring a few of these natural sleep aids into your bedroom today and enjoy cleaner air, reduced stress, and better sleep — naturally.

A Beginner’s Guide to Snake Plant Maintenance

A Beginner’s Guide to Snake Plant Maintenance

If you’re new to houseplants and want something stylish, air-purifying, and nearly impossible to kill, the snake plant (Dracaena trifasciata, formerly Sansevieria) is the perfect choice. Its bold, upright leaves and easygoing nature make it a favorite for plant lovers of all experience levels — especially beginners.

Whether you just brought home your first snake plant or are thinking about adding one to your space, this beginner’s guide to snake plant maintenance will cover everything you need to know to keep your new green friend healthy and thriving. From light and water needs to soil selection and common care mistakes, let’s walk through the basics of this resilient plant together.


Why Choose a Snake Plant?

Snake plants, also known as Mother-in-Law’s Tongue, are popular because they:

  • Tolerate neglect
  • Thrive in low to bright light
  • Survive with minimal water
  • Help purify indoor air by removing toxins like formaldehyde and benzene
  • Look modern and stylish with their striking, upright leaves

They’re a smart choice for:

  • Beginners
  • Busy people
  • Apartments with limited light
  • Offices
  • Anyone prone to forgetting to water their plants!

Understanding Your Snake Plant’s Natural Needs

Native to West Africa, snake plants are hardy, drought-resistant plants that naturally grow in dry, rocky soils and can endure long periods without water. They’re adaptable to a wide range of indoor conditions, but understanding their preferred environment will help them thrive in your home.


Basic Snake Plant Maintenance: What You Need to Know

Let’s break down the essentials of snake plant care for beginners.


Light Requirements

Ideal:

  • Bright, indirect sunlight.

Tolerates:

  • Low-light corners
  • Artificial office lighting
  • Partial direct sun for a few hours

Avoid:

  • Harsh, direct afternoon sunlight (can scorch leaves)

Pro Tip:
If your snake plant’s leaves start to lose their vibrant color or grow slower, it might need a little more light.


Watering Needs

This is where most plant owners struggle, but snake plants are famously drought-tolerant.

Watering Frequency:

  • Spring & Summer: Every 2–3 weeks
  • Fall & Winter: Every 4–6 weeks

How to Check:
Stick your finger into the soil up to your second knuckle. If it feels dry, it’s time to water. If it’s damp, wait a few more days.

How to Water:

  • Water thoroughly until water drains from the pot’s bottom.
  • Discard any excess water in the saucer.
  • Never let your plant sit in water — it’s prone to root rot.

Pro Tip:
It’s safer to underwater than overwater a snake plant.


Best Soil Type

Snake plants need fast-draining soil.

Ideal mix:

  • Cactus or succulent potting mix
    OR
  • Regular potting soil mixed with perlite or coarse sand (2:1 ratio)

Why it matters:
Fast-draining soil prevents root rot by quickly moving excess water away from the roots.


Pot Selection

Choose a pot with drainage holes — this is non-negotiable.
Without good drainage, water can collect at the bottom and rot the roots.

Material:
Terracotta or ceramic pots are best as they allow the soil to dry more evenly.


Temperature and Humidity

Ideal temperature: 60°F–85°F (15°C–29°C)

Tolerates:

  • Normal indoor humidity
  • Dry air (great for heated homes in winter)

Avoid:

  • Cold drafts
  • Temperatures below 50°F (10°C)

Pruning and Cleaning Your Snake Plant

Pruning isn’t often needed, but it keeps your plant looking neat and healthy.

When to prune:

  • Remove dead, yellowing, or damaged leaves at the base.
  • Trim leaves that have brown tips or are misshapen.

Cleaning:
Wipe dust off the leaves every month or two with a soft, damp cloth to help them photosynthesize better.


Fertilizing Snake Plants

Snake plants don’t need much fertilizer.

When to Fertilize:

  • During the growing season (spring & summer), every 2–3 months
  • Use a diluted, balanced houseplant fertilizer

No need to fertilize in fall and winter when the plant naturally slows its growth.


Repotting Your Snake Plant

Snake plants are slow growers and enjoy being a little root-bound.

Signs it’s time to repot:

  • Roots growing out of drainage holes
  • Pot cracking or bulging
  • Water running straight through the pot too quickly

When to repot:
Every 2–3 years, ideally in spring.

How to repot:

  1. Choose a new pot 1–2 inches larger in diameter.
  2. Fill with fresh, well-draining soil.
  3. Gently loosen the root ball and place it in the new pot.
  4. Water lightly.

How to Propagate Snake Plants (Optional Bonus)

If you’d like to create new plants from your existing snake plant, propagation is easy.

Methods:

  • Leaf cuttings in water
  • Leaf cuttings in soil
  • Dividing the plant at the roots

Water Method:

  1. Cut a healthy leaf into sections.
  2. Place bottom ends in a glass of water.
  3. Change water every few days.
  4. Wait 3–5 weeks for roots to appear.
  5. Plant in soil.

Common Snake Plant Issues & Fixes

ProblemCauseSolution
Yellow, mushy leavesOverwateringCut off affected leaves, reduce watering, repot if necessary
Brown leaf tipsDry air, low humidity, inconsistent wateringTrim tips, mist occasionally or adjust watering
Leaning leavesOverwatering, insufficient lightAdjust watering, provide more light
Slow growthLow light or cold temperatureMove to a brighter, warmer spot

Beginner Snake Plant Care Mistakes to Avoid

  1. Overwatering:
    The most common cause of death for snake plants. Let soil dry out fully before watering.
  2. Poor Drainage:
    Always use a pot with drainage holes. Soggy soil leads to root rot.
  3. Too Much Direct Sun:
    While snake plants tolerate some sun, harsh midday rays can scorch leaves.
  4. Fertilizing in Winter:
    Snake plants rest in fall and winter. Skip feeding during these months.

Final Thoughts: Snake Plants Are the Ultimate Beginner Houseplant

If you’re just starting your indoor gardening journey, snake plants are one of the best choices you can make. They thrive on neglect, survive a variety of conditions, and make any space look fresher and more modern.

By following this beginner’s guide to snake plant maintenance — offering bright indirect light, occasional watering, well-draining soil, and minimal attention — you’ll enjoy a thriving, air-purifying houseplant that’s as easy to care for as it is beautiful.

So go ahead, bring home that snake plant and watch it grow with ease.

Avocado Growing Timeline from Seed to Tree

Avocado Growing Timeline from Seed to Tree

Growing an avocado tree from a simple seed is one of the most satisfying gardening projects you can take on. Not only is it a fun and eco-friendly way to repurpose kitchen scraps, but it also offers the rewarding experience of nurturing a tree from its earliest days to its leafy maturity. While growing avocados from seed takes time and patience — and fruiting isn’t guaranteed — watching your pit transform into a beautiful plant is a gratifying process on its own.

In this comprehensive guide, we’ll break down the complete avocado growing timeline from seed to tree, outlining what you can expect at every stage, how long it typically takes, and tips for ensuring your avocado thrives at every phase.


Why Grow an Avocado Tree from Seed?

Avocado trees (Persea americana) are beautiful, lush plants with shiny, deep-green leaves and a tropical vibe. Even if your seed-grown tree never bears fruit, it makes a striking houseplant or garden feature. Here’s why so many people love growing avocado trees from seeds:

  • It’s a fun, affordable, and beginner-friendly project.
  • A creative way to recycle avocado pits.
  • Adds natural beauty to homes, patios, or balconies.
  • A rewarding long-term hobby for plant lovers.

Avocado Growing Timeline from Seed to Tree

Let’s walk through the typical growth stages of an avocado seed, from pit to full-grown tree, including time estimates, care tips, and what to expect along the way.


Stage 1: Preparing the Pit (Day 1)

After enjoying a ripe avocado, remove the pit carefully without damaging it. Rinse it under lukewarm water to remove any fruit residue. Keep the brown outer skin intact, as it helps protect the seed.

Time: Same day

Tip: Use a fresh, ripe, untreated avocado pit for the best chance of sprouting.


Stage 2: Sprouting the Seed (Weeks 2-8)

The most popular method for sprouting an avocado pit is by suspending it in water.

How to do it:

  • Identify the top (pointy end) and bottom (flat, wider end).
  • Insert 3-4 toothpicks into the sides of the pit.
  • Suspend it over a glass of water, ensuring the bottom is submerged.
  • Place the glass in a warm, bright location, out of direct midday sun.
  • Change the water every 2-3 days to prevent mold and bacteria.

What Happens:
In 2 to 8 weeks, the pit will:

  • Crack open.
  • Send a root downward.
  • Push a sprout upward.

Tip: If no sprout appears after 8 weeks, try a new, fresher pit.


Stage 3: Root and Stem Growth (Weeks 4-12)

Once the pit cracks and the root appears, it will gradually lengthen. Soon after, a sprout will emerge from the top.

Care Tips:

  • Maintain water level so the root stays submerged.
  • Ensure the sprout receives indirect sunlight.
  • If the stem reaches 6-8 inches, trim it to about 3 inches to encourage stronger, bushier growth.

Timeframe:
This stage typically occurs between weeks 4-12.


Stage 4: Transplanting to Soil (Weeks 8-16)

Once the roots are well-developed and the stem has grown leaves, it’s time to move your avocado pit to a pot of soil.

How to transplant:

  • Use a 10-12 inch pot with drainage holes.
  • Fill it with light, well-draining potting soil.
  • Plant the pit so the top half remains above the soil line.
  • Water thoroughly.
  • Place the pot in a warm, sunny spot.

Timeframe:
Usually ready for transplanting around weeks 8-16.


Stage 5: Young Plant Growth (Months 4-12)

During this stage, your avocado plant will establish itself in soil and develop more leaves.

Care Tips:

  • Keep soil consistently moist but not soggy.
  • Ensure 6-8 hours of bright, indirect sunlight daily.
  • Fertilize every 4-6 weeks during the growing season.
  • Pinch back the top leaves to encourage bushier growth.

Timeframe:
Your plant will start to resemble a young tree within 4-12 months.


Stage 6: Mature Tree Development (Years 1-3)

As your plant matures, it will grow stronger stems, larger leaves, and a more defined tree shape. It may require repotting into a larger container every 12-18 months as it outgrows its pot.

Care Tips:

  • Continue pruning to shape the tree.
  • Move outdoors in warm weather if possible.
  • Protect from frost and cold temperatures.
  • Fertilize during spring and summer.

Timeframe:
Your plant will develop into a small indoor or patio tree within 1-3 years.


Stage 7: Potential Flowering and Fruiting (Years 5-13+)

One of the most common questions is whether a seed-grown avocado tree will ever bear fruit. The reality is:

  • It can take 5 to 13 years (or more) for a seed-grown avocado to produce fruit.
  • Indoor container-grown trees rarely fruit without grafting.
  • Outdoor trees grown in ideal climates (USDA Zones 9-11) have a better chance.

Signs of readiness:
When the tree reaches 10-15 feet tall (if unpruned) and produces flowers, there’s potential for fruit.

Tip: Even if fruit doesn’t appear, your tree will remain a stunning, lush addition to your home or garden.


Avocado Growth Timeline Summary

Time PeriodGrowth Stage
Day 1Pit prepared and placed in water
Weeks 2-8Pit cracks, root and sprout emerge
Weeks 4-12Root grows, stem and leaves appear
Weeks 8-16Transplant to soil
Months 4-12Young plant establishes, leaf growth
Years 1-3Plant matures into a small tree
Years 5-13+Potential flowering and fruiting

Common Growing Issues and Solutions

ProblemCauseSolution
No sprouting after 8 weeksOld or damaged pit, cold environmentTry a fresh pit, ensure warm and bright spot
Root rotConstant soggy soilUse well-draining soil and pot with drainage
Yellowing leavesOverwatering or poor drainageLet topsoil dry before watering
Drooping leavesUnder or overwatering, low lightAdjust watering, increase sunlight exposure
Stunted growthSmall pot, poor soil, lack of nutrientsRepot, use rich soil, and fertilize monthly

Final Thoughts: A Journey of Patience and Beauty

Growing an avocado tree from seed isn’t a quick project — it’s a long, beautiful journey that teaches patience, care, and an appreciation for nature’s pace. Even if you never harvest fruit from your seed-grown tree, you’ll have a striking, tropical plant that started as a simple kitchen scrap.

The avocado growing timeline from seed to tree may span over a decade, but every stage — from that first tiny sprout to a leafy houseplant or backyard tree — is rewarding in its own way.

So next time you slice into a ripe avocado, save that pit. It might just become your next favorite houseplant — and a daily reminder of the simple magic of growing things.

DIY Cherry Tree: How to Grow from Seeds (Complete Step-by-Step Guide)

DIY Cherry Tree: How to Grow from Seeds (Complete Step-by-Step Guide)

There’s something magical about planting a seed and watching it grow into a tree — especially when that tree one day blooms with beautiful blossoms and sweet, juicy cherries. If you’ve ever savored a cherry and thought about what might happen if you planted its seed, you’re in for a fun and rewarding gardening project. Growing a cherry tree from seed is possible, and while it takes time and care, it’s a fantastic DIY project for any plant lover.

In this detailed guide, you’ll learn how to grow a cherry tree from seeds (pits) right from your kitchen counter to your backyard. Let’s get started!


Why Grow a Cherry Tree from Seeds?

While most cherry trees you buy at nurseries are propagated by grafting, growing one from seed can be a fulfilling and educational experience. Here’s why many gardeners love this DIY project:

  • It’s cost-effective — no need to buy expensive nursery plants.
  • A fun and hands-on family project — kids love seeing a seed become a tree.
  • Adds beauty to your garden with its blossoms and leafy canopy.
  • Connects you to nature through a slow, rewarding growth process.

Do note, however, that cherries grown from seed may not produce fruit identical to the parent tree, especially if the fruit came from a hybrid variety. But whether or not you harvest fruit, you’ll have a gorgeous, flourishing tree to enjoy.


Types of Cherry Trees You Can Grow

Before you start, it’s helpful to understand the two main types of cherry trees you might grow:

Sweet Cherries (Prunus avium)

  • Typically enjoyed fresh.
  • Varieties like Bing, Rainier, and Stella.
  • Require mild summers and cold winters.
  • Usually need two trees for cross-pollination.

Sour Cherries (Prunus cerasus)

  • Commonly used in pies, jams, and preserves.
  • Varieties like Montmorency and North Star.
  • More cold-hardy and often self-pollinating.

Depending on your climate, you can choose a suitable type or experiment with both.


Step-by-Step: How to Grow a Cherry Tree from Seeds

Growing a cherry tree from seed isn’t difficult, but it does involve several steps to mimic the tree’s natural life cycle. Here’s exactly how to do it:


Step 1: Gather Fresh, Organic Cherries

Start by choosing fresh, organic cherries. Store-bought cherries are often treated with chemicals that can affect seed viability. If possible, pick cherries from a local farm or organic market.


Step 2: Clean and Dry the Pits

After enjoying the cherries, collect the pits (seeds) and clean them thoroughly:

  • Rinse pits in lukewarm water.
  • Scrub off any fruit residue using a soft brush or cloth.
  • Let them dry on a paper towel for 3-5 days.

Pro Tip: Drying the pits helps to remove remaining pulp and prepares them for cold stratification.


Step 3: Stratify the Seeds

Cherry seeds need to experience a cold, moist period (like winter) before they’ll germinate — a process known as cold stratification.

How to Stratify Cherry Seeds:

  1. Place the dried seeds in a small container or ziplock bag filled with moist (not wet) peat moss, sand, or a paper towel.
  2. Seal the container or bag and store it in the refrigerator at 34°F to 40°F (1°C to 4°C).
  3. Keep them refrigerated for 8 to 12 weeks.

Check periodically to ensure the medium remains moist and there’s no mold. Replace the paper towel or moss if necessary.


Step 4: Plant the Seeds in Pots

After 8-12 weeks, some seeds may begin to crack open or sprout tiny roots — this means they’re ready for planting.

How to Plant Cherry Seeds:

  • Use small pots with well-draining potting mix.
  • Plant each seed about 1 to 2 inches deep.
  • Water the soil lightly to make it evenly moist.
  • Place the pots in a sunny indoor location like a bright windowsill.

Step 5: Caring for Seedlings

Seedlings typically emerge in 2-4 weeks, depending on conditions.

Light:

Cherry seedlings need 6-8 hours of sunlight daily. A south-facing window or grow light works well.

Watering:

Keep the soil consistently moist but avoid overwatering. Water when the top inch of soil feels dry.

Temperature:

Maintain temperatures between 65°F and 75°F (18°C to 24°C).


Step 6: Transplanting Outdoors

After one full year of container growth or once seedlings are 8-12 inches tall, they’re strong enough to transplant outdoors.

When to Transplant:

In early spring (before bud break) or fall (after the leaves drop).

How to Choose a Planting Spot:

  • Full sun exposure (at least 6 hours a day).
  • Well-draining soil with a pH between 6.0 and 7.0.
  • Avoid low-lying areas where water collects.

Transplanting Process:

  • Dig a hole twice as wide and deep as the seedling’s root ball.
  • Place the seedling gently in the hole.
  • Backfill with soil and water deeply.
  • Add a 2-3 inch layer of mulch around the base to retain moisture and suppress weeds.

Step 7: Long-Term Care and Maintenance

Once established, your cherry tree will need regular care to thrive.

Watering:

  • Water weekly during the growing season.
  • Deep, infrequent watering encourages deep root systems.
  • Reduce watering in fall and winter.

Pruning:

  • Prune in late winter or early spring before new growth begins.
  • Remove dead, diseased, or weak branches.
  • Shape the tree for better light penetration and air circulation.

Fertilizing:

  • Feed young trees in early spring with a balanced, slow-release fertilizer.
  • Avoid over-fertilizing, especially nitrogen, as it promotes excessive leaf growth at the expense of flowers and fruit.

When Will a Seed-Grown Cherry Tree Bear Fruit?

Be patient — cherry trees grown from seed typically take 5 to 10 years to produce fruit. Factors like growing conditions, care, and whether the tree is from a hybrid variety can affect fruit production.

Even if your tree never bears cherries, it will still reward you with beautiful spring blossoms and lovely shade for years to come.


Common Issues & Troubleshooting

ProblemLikely CauseSolution
No germinationInsufficient stratificationEnsure 8-12 weeks of cold, moist storage in fridge
Mold during stratificationExcess moisture in the mediumReplace paper towel or peat moss; dry seeds slightly
Drooping seedlingsOverwatering or poor drainageReduce watering, improve drainage
Yellowing leavesToo much water or lack of nutrientsAdjust watering; fertilize as needed

Final Thoughts

Growing a cherry tree from seed is a wonderful, hands-on DIY project that teaches patience and an appreciation for nature’s cycles. While it may take years before you see fruit, the experience of nurturing a plant from pit to tree is its own sweet reward.

With the right steps — from stratifying seeds to planting and caring for seedlings — anyone can successfully grow a beautiful cherry tree from a simple pit. Whether you’re a hobby gardener or just love trying new plant projects, this cherry tree journey is well worth the wait.

Best Way to Keep Money Trees Thriving: A Complete Care Guide

Best Way to Keep Money Trees Thriving: A Complete Care Guide

The Money Tree (Pachira aquatica) has long been celebrated for its striking appearance, low-maintenance nature, and the good fortune it’s believed to bring to homes and businesses. With its braided trunk and lush, glossy green leaves, this plant adds a beautiful tropical touch to any indoor space. But like all houseplants, it thrives best when given the right care.

If you’ve recently added a Money Tree to your collection—or plan to—it’s essential to understand how to keep it healthy, vibrant, and flourishing. In this detailed guide, we’ll explore the best ways to keep Money Trees thriving, covering everything from ideal lighting and watering practices to soil, humidity, and troubleshooting common issues.


A Quick Overview of the Money Tree

Native to Central and South America, particularly swampy areas in countries like Mexico, Brazil, and Costa Rica, the Money Tree naturally grows in humid, tropical conditions. Indoors, it can grow up to 6-8 feet tall with proper care, though in the wild it can reach an astonishing 60 feet.

Aside from its ornamental appeal, the plant is also steeped in symbolism. According to Feng Shui principles, Money Trees attract positive energy, financial prosperity, and good luck.


Provide the Perfect Light Conditions

Light plays a crucial role in a Money Tree’s health. While this plant is relatively adaptable, it has its preferences:

Ideal Light: Bright, Indirect Sunlight

Money Trees thrive in bright, indirect light. Place them near an east or south-facing window where they can enjoy filtered light for most of the day. A sheer curtain works well to soften direct sun exposure.

Avoid Harsh Direct Sun

Prolonged exposure to strong, direct sunlight—especially from west-facing windows—can scorch the leaves, leaving them dry and brown at the tips.

Can They Survive in Low Light?

Yes, Money Trees can tolerate lower light, but growth may slow, and leaves could become sparse. If natural light is insufficient, consider using a full-spectrum grow light to supplement.

Pro Tip:

Rotate your Money Tree by a quarter turn each week to ensure balanced growth on all sides.


Master the Art of Watering

Watering is one of the most common areas where plant owners struggle with Money Trees. Overwatering or underwatering can both lead to problems.

How Often Should You Water a Money Tree?

  • Spring & Summer: Water every 7-10 days, or when the top 1-2 inches of soil feels dry.
  • Fall & Winter: Water less frequently, about every 2-3 weeks, since growth slows during these months.

How to Water Properly

  • Water deeply until excess drains from the pot’s bottom.
  • Always empty the drainage tray to prevent root rot.
  • Avoid letting the soil stay consistently soggy.

Watch for Signs of Overwatering:

  • Yellowing leaves
  • Soft, mushy stems
  • Foul-smelling soil

If you notice these, reduce watering immediately and check for root health.

Signs of Underwatering:

  • Crispy, dry leaf edges
  • Drooping leaves
  • Soil pulling away from the pot’s sides

In this case, water thoroughly and increase humidity around the plant.


Use Well-Draining Soil

The right soil type is essential for preventing water-related issues. Money Trees prefer a well-draining, slightly acidic to neutral soil mix.

Ideal Soil Mix:

  • Potting soil mixed with sand and perlite or orchid bark
  • A cactus or succulent mix can also work well when blended with regular potting soil

Ensure your pot has drainage holes at the bottom to allow excess water to escape.


Keep It Warm and Humid

Being a tropical plant, the Money Tree loves warmth and humidity.

Ideal Temperature Range:

65°F to 80°F (18°C to 27°C)

Preferred Humidity Levels:

50% or higher. If your home has dry air (especially during winter), you can:

  • Use a humidifier
  • Group plants together to create a microclimate
  • Place the pot on a pebble tray filled with water (ensuring the pot isn’t sitting directly in the water)

Avoid:

  • Cold drafts
  • Air conditioning vents
  • Radiators or heating units

All of these can cause stress and leaf drop.


Regular Pruning for Health and Shape

Pruning helps maintain the plant’s shape and encourages bushier growth.

How to Prune a Money Tree:

  • Use sterilized, sharp scissors or pruning shears.
  • Trim off yellow, brown, or damaged leaves.
  • Cut back leggy stems to encourage denser foliage.

You can also prune the top of the plant if it becomes too tall for your space.


Fertilizing for Healthy Growth

Money Trees aren’t heavy feeders, but a little boost now and then can help.

Best Fertilizer Type:

A balanced, water-soluble houseplant fertilizer (10-10-10 or 20-20-20)

When to Fertilize:

  • During the growing season (spring & summer): Once a month
  • During fall & winter: Hold off, as the plant’s growth naturally slows

Repotting When Necessary

Money Trees typically need repotting every 2-3 years.

Signs It’s Time to Repot:

  • Roots are growing out of the drainage holes.
  • The plant dries out quickly after watering.
  • It seems top-heavy or growth has stalled.

When repotting:

  • Choose a container 1-2 inches larger in diameter.
  • Refresh the soil with a well-draining mix.
  • Water thoroughly after repotting and give it a week or so to adjust.

Pests and Problems: Stay Watchful

Money Trees are generally pest-resistant, but can occasionally attract:

  • Spider mites
  • Mealybugs
  • Scale insects

How to Manage Them:

  • Wipe leaves with a damp cloth.
  • Spray with insecticidal soap or neem oil.
  • Quarantine affected plants to prevent spreading.

Troubleshooting Quick Reference

ProblemPossible CauseSolution
Yellowing leavesOverwateringReduce watering; check soil moisture
Brown leaf tipsLow humidity or underwateringIncrease humidity; water consistently
Drooping leavesToo much or too little waterAdjust watering schedule
Sparse, leggy growthInsufficient lightMove to brighter location or add a grow light
Leaf scorch or brown patchesDirect sun exposureRelocate to area with filtered light

Final Thoughts

Keeping a Money Tree thriving isn’t difficult once you understand its specific care preferences. By providing the right combination of bright, indirect light, moderate but thorough watering, well-draining soil, and a warm, humid environment, your Money Tree will not only survive but flourish for years to come.

Whether you’re growing it for its beauty or its legendary symbolism of prosperity, with these tips in hand, you’re well on your way to mastering the art of Money Tree care.