How to Grow Peaches in a Small Garden: A Complete Guide

How to Grow Peaches in a Small Garden: A Complete Guide

Who wouldn’t love the idea of plucking a sun-ripened, juicy peach from their own garden? While peaches are often associated with sprawling orchards, the good news is — you don’t need acres of land to grow this luscious fruit. Even if you have a small garden, with a little creativity and care, you can successfully grow peach trees and enjoy their sweet rewards.

This guide will walk you through everything you need to know about growing peaches in a small garden, from choosing the right variety to harvesting your homegrown fruits.


Why Grow Peaches in a Small Garden?

Growing your own peaches comes with several benefits:

  • Freshness: Homegrown peaches taste far better than store-bought ones.
  • Control: You can choose organic, pesticide-free growing methods.
  • Aesthetic Appeal: Peach trees, with their delicate blossoms and lush foliage, enhance the beauty of any garden.
  • Compact Varieties Available: Thanks to dwarf and semi-dwarf cultivars, even tiny spaces can accommodate a peach tree.

Choosing the Right Peach Variety

Selecting the right variety is crucial when space is limited. Look for dwarf or semi-dwarf cultivars that thrive in containers or small plots.

Best Compact Peach Varieties:

  • Bonanza: A popular dwarf variety ideal for pots, reaches about 5-6 feet tall.
  • Pix Zee: Compact tree with medium-sized, sweet fruits.
  • El Dorado: Semi-dwarf tree with excellent flavor and disease resistance.
  • Garden Gold: Another dwarf option with yellow-fleshed, freestone peaches.

Tip: Make sure the variety you choose is suitable for your local climate and USDA hardiness zone.


Ideal Growing Conditions for Peaches

To produce healthy, sweet fruits, peach trees require specific growing conditions.

1. Sunlight

Peach trees love the sun. Ensure they receive at least 6-8 hours of direct sunlight daily. Full sun exposure is essential for fruit development and disease prevention.

2. Soil

  • Well-draining soil is a must to prevent root rot.
  • A slightly acidic to neutral pH (around 6.0-7.0) is ideal.
  • Enrich the soil with organic matter or compost to enhance fertility.

3. Climate

Peaches need a certain number of chilling hours (between 32°F and 45°F) during winter for proper flowering and fruiting. Check your local average chilling hours and select a variety accordingly.


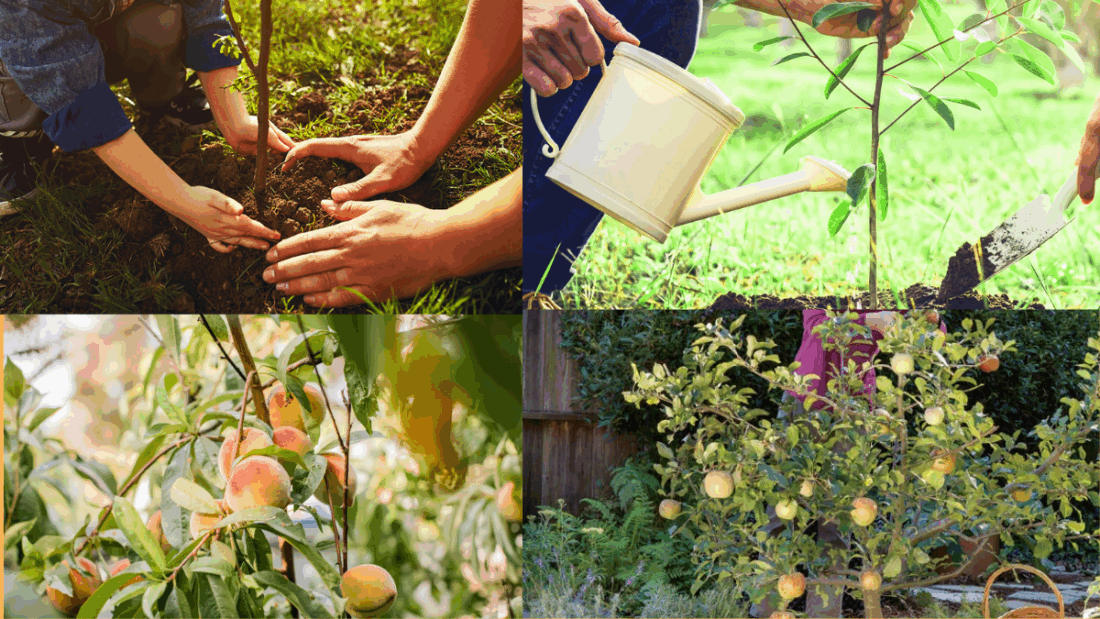
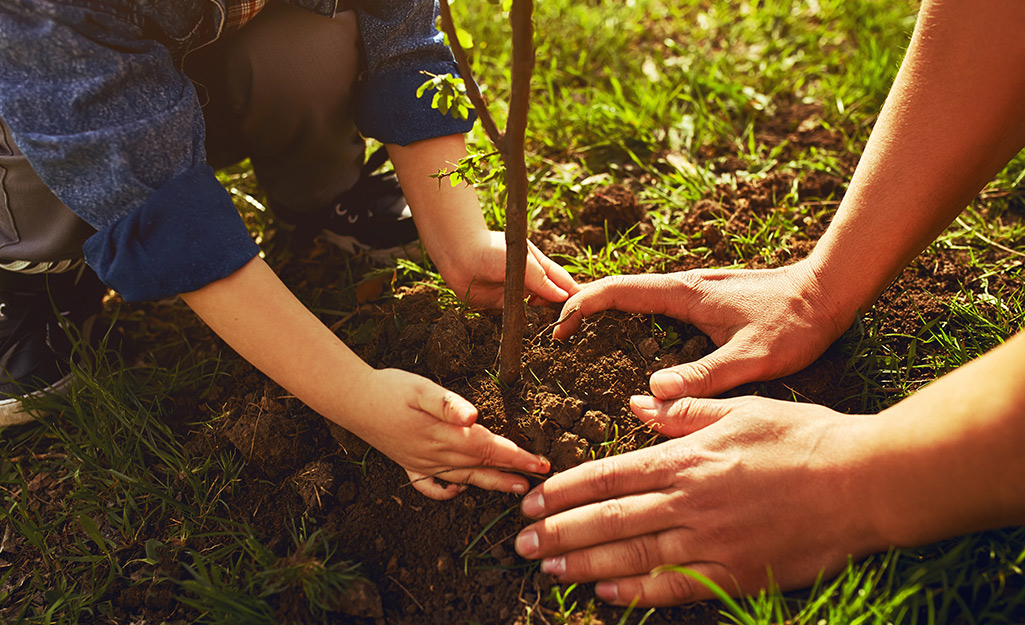
Planting Peaches in a Small Garden

Depending on your available space, you can plant peach trees directly in the ground, in containers, or as espaliered trees against a wall or fence.

1. In the Ground

  • Dig a hole twice the width of the root ball and just as deep.
  • Mix compost into the excavated soil.
  • Place the tree in the hole, spread out the roots, and backfill.
  • Water thoroughly and mulch around the base to retain moisture.

2. In Containers

  • Choose a container at least 18-24 inches in diameter with drainage holes.
  • Use a lightweight, well-draining potting mix.
  • Place the tree at the same depth it was growing in its nursery pot.
  • Keep the container in a sunny spot.

3. Espalier

This space-saving technique involves training the tree along a wall or trellis in a flat, two-dimensional shape.

  • Select a young, flexible tree.
  • Attach horizontal wires to a wall at intervals.
  • Prune and tie branches to the wires to create a fan or horizontal pattern.

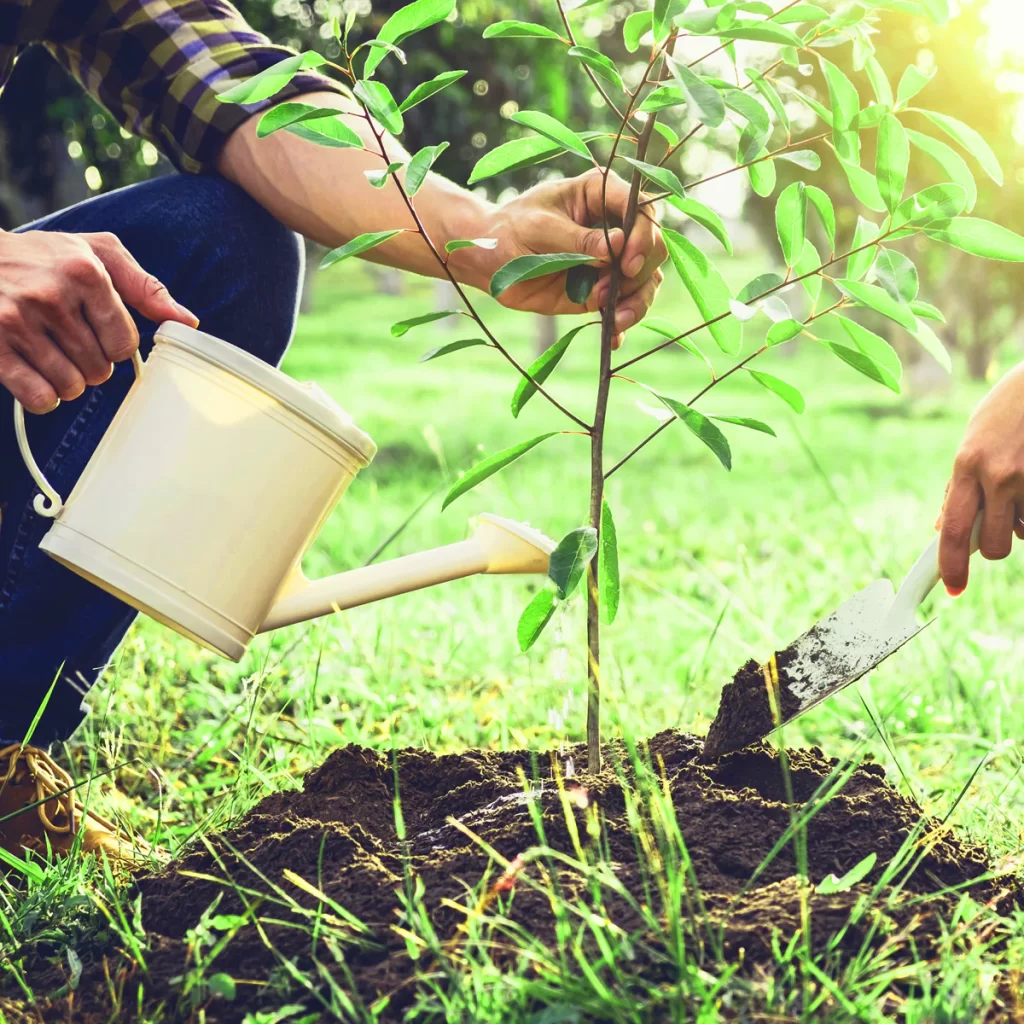
Caring for Your Peach Tree

Proper care ensures healthy growth and bountiful harvests.

1. Watering

  • Keep the soil consistently moist but not soggy.
  • During dry spells, water deeply once or twice a week.
  • Avoid wetting the foliage to prevent fungal diseases.

2. Feeding

  • Apply a balanced, slow-release fertilizer in early spring.
  • Avoid high-nitrogen fertilizers, which encourage leafy growth over fruit production.
  • Top-dress with compost annually.
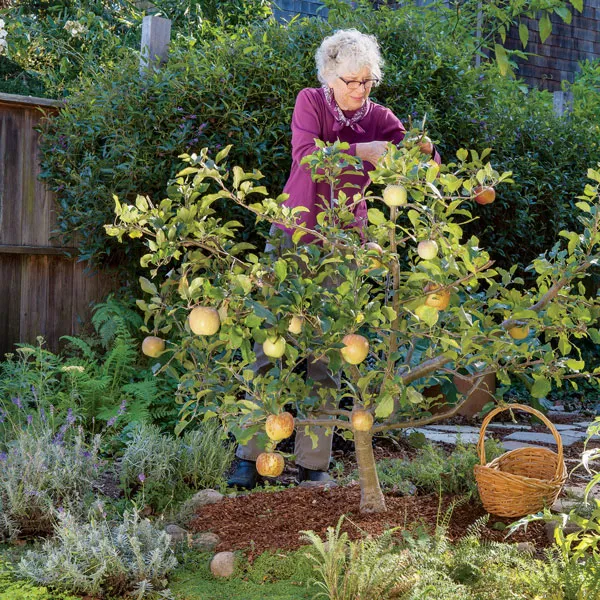
3. Pruning

  • Prune peach trees in late winter before new growth begins.
  • Remove dead, damaged, or diseased branches.
  • Thin out crowded areas to improve airflow and sunlight penetration.
  • Maintain an open-center or vase shape for optimal fruiting.

Tip: Container-grown trees may require more frequent pruning to manage their size.


Dealing with Pests and Diseases

Peach trees can be susceptible to certain pests and diseases, but with early intervention and care, you can keep them healthy.

Common Issues:

  • Peach Leaf Curl: Causes leaves to become distorted and discolored. Treat with a dormant-season fungicide.
  • Aphids and Mites: Control with neem oil or insecticidal soap.
  • Fruit Borers: Inspect regularly and remove affected fruits.
  • Brown Rot: A fungal disease affecting fruit. Remove infected fruit and improve air circulation.

Pollination Needs

Most peach varieties are self-pollinating, which means a single tree can produce fruit. However, having another peach tree nearby can sometimes improve yield.

For container or espalier trees, hand pollination with a soft brush during the flowering period can also enhance fruit set.


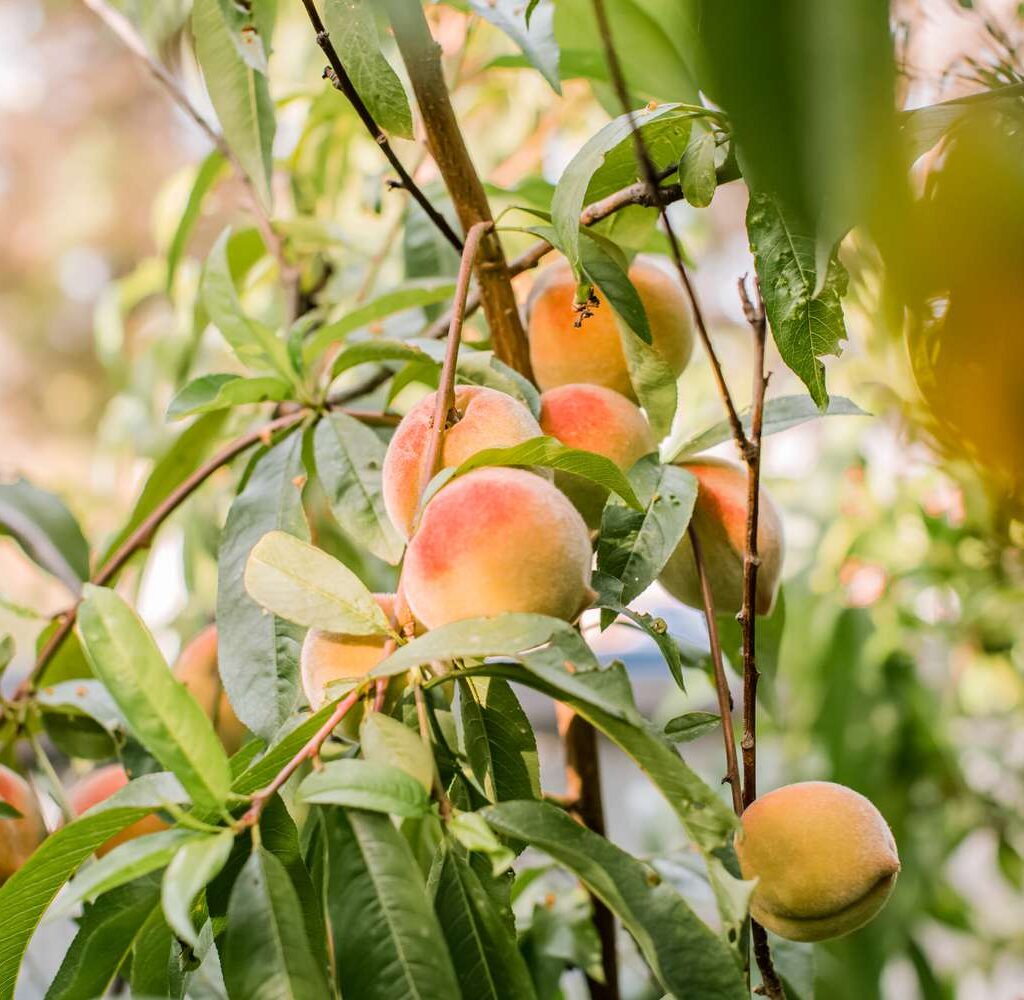
Harvesting Your Peaches

Peach trees usually start bearing fruit within 2-4 years of planting, depending on the variety and growing conditions.

How to Know When Peaches Are Ready:

  • Fruits develop a rich color and lose their green undertones.
  • They yield slightly when gently pressed.
  • They emit a sweet, fruity aroma.

Tip: Harvest carefully to avoid bruising, and handle them gently. Peaches are best eaten fresh but can also be canned, frozen, or made into jams.


Overwintering Peach Trees in Small Gardens

If you live in a region with harsh winters, container-grown peach trees should be protected from extreme cold.

  • Move containers to a sheltered spot like a garage or greenhouse.
  • Mulch heavily around the base.
  • Water sparingly during dormancy.

Ground-planted trees should be mulched and, if young, can be wrapped with burlap for insulation.


Final Thoughts

Growing peaches in a small garden is a rewarding and achievable endeavor. With the right variety, careful planting, and dedicated care, even the tiniest of gardens can offer the pleasure of sun-warmed, homegrown peaches. Whether you plant one in a pot on your patio or train it elegantly against a garden wall, a peach tree will not only bear delicious fruit but also add charm and vitality to your space.

So why wait? Pick your favorite variety and start growing your own little slice of orchard magic today!

How to Grow Strawberries Year-Round: A Complete Guide for Continuous Harvests

How to Grow Strawberries Year-Round: A Complete Guide for Continuous Harvests

Who can resist the sweet, juicy taste of fresh-picked strawberries? Imagine having these vibrant red berries at your fingertips all year long — not just during summer months. While most people think of strawberries as a seasonal treat, with the right setup and care, you can grow strawberries year-round, indoors or outdoors.

In this comprehensive guide, we’ll cover everything you need to know to enjoy continuous harvests of luscious strawberries. From choosing the right varieties and setting up indoor systems to managing light, temperature, and care routines — here’s how to keep your strawberry patch thriving, no matter the season.


Why Grow Strawberries Year-Round?

Besides their irresistible flavor, growing strawberries year-round offers several benefits:

  • Fresh organic fruit whenever you want it
  • Greater control over plant health and pest management
  • Adds a pop of green indoors during colder months
  • Saves money on out-of-season berries
  • Makes an attractive, edible indoor or balcony plant

With a little planning, you can easily transition from seasonal growing to harvesting strawberries 12 months a year.


Step 1: Choose the Right Strawberry Variety

Not all strawberries are created equal when it comes to continuous harvests. Some are naturally better suited for extended or indoor growing.

The Three Main Types:

  1. June-Bearing
    • Produces one large harvest in early summer.
    • Not ideal for year-round growing.
  2. Ever-Bearing
    • Yields two to three harvests (spring, summer, fall).
    • Suitable for extending the harvest season but not truly continuous.
  3. Day-Neutral
    • Produces fruit steadily as long as conditions remain favorable.
    • Best choice for year-round cultivation.

Recommended Day-Neutral Varieties:

  • Albion – Large, flavorful, disease-resistant.
  • Seascape – Sweet berries with high yields.
  • Evie-2 – Excellent for indoor and container growing.
  • Mara des Bois – Highly aromatic, gourmet flavor.

Step 2: Decide Between Indoor and Outdoor Growing

Outdoor Year-Round Growing:

Possible in regions with mild winters (USDA Zones 8–11). In colder areas, you’ll need to overwinter plants indoors or use protective setups like greenhouses or cold frames.

Indoor Growing:

Ideal for colder climates or when you want total control over growing conditions. Strawberries adapt well to containers, vertical planters, hanging baskets, and hydroponic systems.


Step 3: Preparing the Right Growing Environment

Whether indoors or outdoors, strawberries have specific environmental needs:

Temperature:

  • Optimal: 60°F–80°F (16°C–27°C)
  • Keep indoor temperatures stable; avoid drafts and overheating.

Light:

  • Strawberries require 10–14 hours of bright light daily.
  • Place them near a south-facing window or use grow lights in winter.
  • LED or fluorescent grow lights work well, positioned 6–8 inches above plants.

Humidity:

  • Maintain moderate humidity (around 50–70%).
  • Use a humidity tray or mist plants occasionally in dry indoor conditions.

Step 4: Planting Strawberries for Year-Round Growth

Containers:

  • Use containers with good drainage.
  • Minimum size: 8–12 inches deep.
  • Hanging baskets, vertical planters, and hydroponic setups work great indoors.

Soil:

  • Well-draining, slightly acidic soil with a pH of 5.5–6.5.
  • Use a mix of high-quality potting soil, compost, and perlite.

Planting Tips:

  • Space plants 8–10 inches apart.
  • Bury roots, leaving the crown (top of the root system) at soil level.
  • Mulch with straw, pine needles, or shredded leaves to retain moisture.

Step 5: Watering and Feeding

Watering:

  • Keep soil consistently moist but not soggy.
  • Water when the top inch feels dry.
  • Avoid overhead watering to prevent mold and rot.

Fertilizing:

  • Use a balanced liquid fertilizer (10-10-10) every 2–3 weeks.
  • Switch to a bloom-boosting fertilizer (high in potassium) when flowers appear.

Organic options: Fish emulsion, seaweed extract, or compost tea.


Step 6: Pollination for Indoor Strawberries

Unlike outdoor gardens where bees and insects assist with pollination, indoor plants rely on you.

Pollination Techniques:

  • Use a small soft brush or cotton swab to gently transfer pollen from flower to flower.
  • Do this daily during flowering for better fruit set.
  • Or lightly shake plants to help spread pollen.

Step 7: Managing Pests and Diseases

Even indoors, strawberries can face pest and disease challenges.

Common Pests:

  • Aphids
  • Spider mites
  • Whiteflies

Solutions:

  • Inspect plants regularly.
  • Wipe leaves with a damp cloth or insecticidal soap.
  • Introduce natural predators (ladybugs) if growing outdoors or in a greenhouse.

Common Diseases:

  • Powdery mildew
  • Botrytis (gray mold)
  • Root rot

Prevention:

  • Ensure good air circulation.
  • Avoid waterlogged soil.
  • Remove any dead or diseased leaves immediately.

Step 8: Harvesting Strawberries Year-Round

Strawberries are ready to pick 4–6 weeks after flowering. Harvest berries when:

  • They’re fully red (no green or white spots)
  • Slightly soft to the touch
  • Easily detach with a gentle twist

Harvest daily during peak production to encourage more flowers and fruit.


Step 9: Propagating New Plants for Continuous Production

To maintain year-round harvests, propagate new strawberry plants regularly.

How to Propagate:

  • Use runners (small offshoot plants).
  • Once runners have developed small roots, plant them in their own containers.
  • Or buy bare-root plants and stagger plantings every few months for uninterrupted harvest cycles.

Step 10: Overwintering Outdoor Plants

In cold regions, protect outdoor strawberries in winter.

Tips:

  • Cover plants with straw or frost blankets.
  • Move container plants to an unheated garage, basement, or cold frame.
  • Water sparingly during dormancy to keep roots from drying out.

Bonus: Hydroponic Strawberry Growing

For serious year-round production, consider a hydroponic system. Strawberries thrive in nutrient-rich water systems and produce clean, pesticide-free berries indoors.

Benefits:

  • Faster growth and fruiting
  • Space-saving vertical setups
  • No soil-borne pests or diseases
  • Higher yields in controlled environments

Hydroponic kits are available for home use and can produce berries within 60–90 days.


Final Thoughts

Growing strawberries year-round isn’t just a gardener’s fantasy — it’s entirely possible with the right varieties, conditions, and care. Whether you’re tending a sunny balcony, an indoor windowsill garden, or a hydroponic tower in your kitchen, the joy of harvesting sweet, homegrown berries every season is well within your reach.

By choosing day-neutral varieties, providing consistent light, temperature, and moisture, and staying attentive to plant needs, you can enjoy a steady supply of fresh strawberries whenever the craving strikes.

How to Grow Blueberries in Containers: A Complete Guide

How to Grow Blueberries in Containers: A Complete Guide

Imagine stepping onto your patio or balcony and picking fresh, juicy blueberries right from your very own container garden. It’s easier than you might think! Blueberries are not only delicious and packed with antioxidants, but they’re also well-suited for container growing — perfect for small gardens, balconies, and urban spaces.

In this detailed guide, we’ll cover everything you need to know to successfully grow healthy, productive blueberry plants in containers. From choosing the right variety to soil preparation, watering, and harvesting, let’s turn your outdoor space into a fruitful blueberry haven.


Why Grow Blueberries in Containers?

Container gardening offers unique advantages, especially for blueberry plants:

  • Control over soil pH and quality (essential for blueberries)
  • Easier to move plants to ideal sun positions
  • Manageable pest and disease control
  • Great for small spaces, patios, balconies, and decks
  • A decorative and edible plant with beautiful spring blossoms and vibrant fall foliage

With the right care and a little patience, your container-grown blueberries can yield delicious berries for years to come.


Step 1: Choosing the Right Blueberry Variety

Not all blueberry varieties are the same, especially when it comes to container growing. Some types stay compact and thrive in confined spaces, while others may be too vigorous.

Best Blueberry Varieties for Containers:

  • Top Hat – A dwarf variety ideal for pots, growing up to 2 feet tall.
  • Sunshine Blue – Semi-dwarf, self-pollinating, with excellent yields.
  • Jelly Bean – Compact, with sweet berries and attractive foliage.
  • Patriot – Cold-hardy and suitable for larger containers.
  • Peach Sorbet – Known for its colorful leaves and flavorful berries.

Pro Tip:
Although some varieties are self-pollinating, having at least two different blueberry varieties nearby improves pollination and increases fruit yield.


Step 2: Selecting the Perfect Container

Your container’s size and material are crucial for healthy root development and long-term growth.

Container Requirements:

  • Minimum size: 16-20 inches in diameter and depth
  • Material: Plastic, ceramic, or wooden planters work well
  • Drainage: Must have ample drainage holes to prevent waterlogging

Bonus Idea:
Consider using decorative pots or whiskey barrels for a rustic, aesthetic touch on patios and balconies.


Step 3: Preparing the Right Soil Mix

Blueberries are acid-loving plants, thriving in soils with a pH of 4.5 to 5.5. Regular garden soil won’t work well in containers.

Ideal Soil Mix for Blueberries:

  • 50% peat moss
  • 30% pine bark fines
  • 20% perlite or coarse sand

Alternatively, you can use a commercial acid-loving plant mix formulated for azaleas, rhododendrons, or camellias.

Pro Tip:
Test your soil’s pH using a simple home kit. If needed, lower the pH with elemental sulfur or an acidifying fertilizer.


Step 4: Planting Your Blueberries

Planting blueberries in containers is straightforward, but attention to detail ensures their success.

Planting Instructions:

  1. Fill the container with your prepared acidic soil mix, leaving about 2 inches below the rim.
  2. Remove the plant from its nursery pot, gently loosening the root ball.
  3. Place the blueberry plant in the center of the container at the same depth it was growing previously.
  4. Backfill with soil mix and gently firm it down.
  5. Water thoroughly until water drains out of the bottom.

Add a 1-2 inch layer of pine bark mulch or pine needles on top to help retain moisture and maintain soil acidity.


Step 5: Watering and Feeding

Blueberries have shallow roots and are sensitive to dry soil, especially in containers.

Watering Tips:

  • Keep soil consistently moist but not waterlogged.
  • In hot weather, you may need to water daily.
  • Avoid using hard water with high pH; rainwater or distilled water is ideal.

Fertilizing:

Use a fertilizer specifically made for acid-loving plants.

  • Apply an acid fertilizer in early spring, just as new growth starts.
  • Feed again in late spring or early summer.
  • Avoid over-fertilizing, as it can damage sensitive roots.

Organic options like fish emulsion or cottonseed meal work beautifully for container-grown blueberries.


Step 6: Providing Adequate Sunlight

Blueberries love the sun! For healthy growth and maximum fruit production:

  • Place containers in a spot with at least 6–8 hours of direct sunlight daily.
  • In very hot climates, some afternoon shade may be beneficial.
  • Containers are portable — move them to track the sun’s position through the seasons.

Step 7: Pruning and Maintenance

Pruning keeps your blueberry plants compact, productive, and encourages new growth.

Pruning Guidelines:

  • Remove any weak, dead, or crossing branches in late winter or early spring.
  • After fruiting, prune lightly to maintain a balanced, open shape.
  • Remove older, unproductive canes after 3–4 years to promote younger shoots.

Container Tip:
Dwarf varieties typically require less pruning than full-sized bushes.


Step 8: Managing Pests and Diseases

Container-grown blueberries are easier to monitor and manage for pests and diseases.

Common Issues:

  • Birds: Net your plants during ripening season to protect your berries.
  • Aphids: Wash off with water or use insecticidal soap.
  • Fungal diseases: Prevent by avoiding overhead watering and ensuring good air circulation.

Regularly inspect your plants and remove any diseased or damaged leaves and stems.


Step 9: Overwintering Your Container Blueberries

In colder climates (USDA zones 3–7), container blueberries need extra care in winter.

Overwintering Tips:

  • Move containers to a sheltered, unheated garage, shed, or basement during severe freezes.
  • Water occasionally to prevent roots from drying out.
  • Alternatively, wrap the container in bubble wrap or burlap and mulch heavily around the base.

Once the risk of frost passes, move the plant back to its sunny outdoor spot.


Step 10: Harvesting Your Blueberries

The best part of growing blueberries is enjoying the harvest!

How to Know When Blueberries Are Ripe:

  • Fully blue with no green or red tinges.
  • Slightly soft to the touch.
  • Easily detach from the plant with a gentle tug.
  • Allow berries to stay on the bush for a few extra days after turning blue for peak sweetness.

Harvest Tip:
Pick berries in the cool morning hours for the best flavor and storage life.


Final Thoughts

Growing blueberries in containers is a fun, rewarding project that offers fresh, healthy fruit right at your fingertips. By choosing the right variety, maintaining acidic soil, providing ample sunlight, and consistent care, you’ll enjoy bountiful harvests of sweet, antioxidant-rich berries year after year.

Whether you have a sprawling backyard or a modest balcony, container-grown blueberries are a beautiful, productive, and healthful addition to any home garden.

How to Grow Apples in Your Backyard Orchard

How to Grow Apples in Your Backyard Orchard

Nothing tastes quite as satisfying as a crisp, sweet apple picked fresh from your own tree. Growing apples in your backyard orchard not only rewards you with fresh, organic fruit but also adds beauty, shade, and value to your landscape. Whether you have a small suburban yard or a larger property, it’s entirely possible to cultivate healthy, productive apple trees with the right planning and care.

In this detailed guide, we’ll walk you through everything you need to know about growing apples at home — from selecting the right variety to planting, pruning, and harvesting your very own apples.


Why Grow Apples in Your Backyard?

Before we dive into the how-to, let’s explore the reasons why backyard apple trees are worth your time:

  • Fresh, organic fruit free from chemicals and preservatives.
  • Save money on store-bought apples.
  • Variety control — grow unique heirloom or specialty apples unavailable in stores.
  • Beautiful spring blossoms that attract pollinators.
  • Adds ornamental charm and shade to your garden.
  • Fun and educational family project.

Now, let’s get started on how to make your backyard orchard dream a reality.


Step 1: Choosing the Right Apple Varieties

One of the most important decisions you’ll make is choosing the right type of apple tree. Not all apple trees grow well in every climate or soil condition. Also, different varieties produce different flavors, harvest times, and uses (eating fresh, baking, or making cider).

Consider Your USDA Hardiness Zone

Apple trees typically grow best in USDA zones 3-8. Before selecting a variety, find your hardiness zone to determine which types will thrive in your region.

Popular Apple Varieties for Backyard Orchards:

  • Honeycrisp – Crisp, sweet-tart apples. Cold hardy.
  • Gala – Sweet and juicy. Good for eating fresh.
  • Granny Smith – Tart flavor, ideal for pies and baking.
  • Fuji – Sweet, firm, excellent storage.
  • McIntosh – Juicy with a tart flavor. Best for sauces and cider.
  • Golden Delicious – Sweet and versatile.

Pro Tip: Most apple trees require cross-pollination with another compatible variety. Plant at least two different varieties with overlapping bloom times to ensure good fruit production.


Step 2: Preparing the Planting Site

Apple trees need plenty of sunlight and well-drained soil to thrive. Pick a location in your yard that receives at least 6-8 hours of full sun per day.

Ideal Soil Conditions:

  • Slightly acidic to neutral pH (6.0–7.0)
  • Well-drained loamy soil
  • Avoid areas with heavy clay or poor drainage
  • Keep trees away from large trees or structures that may shade them

Before planting, test your soil’s pH with a simple home test kit. If needed, amend your soil with organic matter, compost, or adjust pH using lime or sulfur.


Step 3: Planting Your Apple Trees

You can plant apple trees either in early spring or late fall when the tree is dormant.

Planting Process:

  1. Dig a hole twice as wide and as deep as the tree’s root ball.
  2. Loosen the soil at the bottom of the hole to encourage root penetration.
  3. Position the tree so the graft union (the bulge near the base of the trunk) sits 2–4 inches above the soil line.
  4. Backfill the hole with a mix of native soil and compost.
  5. Water thoroughly after planting.
  6. Add a 2-3 inch layer of mulch around the base, keeping it a few inches from the trunk to prevent rot.

Spacing Tip:
Standard apple trees need 20–30 feet of space between trees, while dwarf or semi-dwarf varieties require 8–15 feet.


Step 4: Watering and Feeding

Newly planted apple trees require regular watering to establish strong roots.

  • Water deeply once a week for the first growing season.
  • In hot, dry weather, increase to twice weekly.
  • Mature trees typically need an inch of water per week through rainfall or irrigation.

Fertilizing:

Use a balanced fertilizer like 10-10-10 or a fertilizer specifically formulated for fruit trees. Apply in early spring before new growth appears, and again in late spring if necessary. Avoid over-fertilizing as it may promote excessive leaf growth at the expense of fruit production.


Step 5: Pruning for Shape and Health

Proper pruning is essential for healthy, productive apple trees. It improves air circulation, sunlight penetration, and encourages strong branch structure.

Pruning Tips:

  • Prune during late winter or early spring when the tree is still dormant.
  • Remove any dead, diseased, or crossing branches.
  • Maintain an open-center or central leader shape depending on tree variety.
  • Shorten overly vigorous branches to maintain a balanced shape.

Tools You’ll Need:

  • Sharp pruning shears
  • Loppers for thicker branches
  • A pruning saw for large limbs

Step 6: Managing Pests and Diseases

Apple trees can be prone to pests and diseases like aphids, apple scab, fire blight, and codling moths.

Preventive Care:

  • Keep the area around trees free of fallen fruit and leaves.
  • Use disease-resistant apple varieties when possible.
  • Apply dormant oil spray in late winter to control overwintering pests.
  • Consider organic options like Neem oil or insecticidal soap.

Regularly inspect your trees for signs of trouble and act promptly.


Step 7: Pollination Essentials

Since most apple trees are not self-pollinating, planting two or more compatible varieties improves fruit yield.

Pollination Options:

  • Plant two different apple varieties that bloom around the same time.
  • Invite natural pollinators like bees by planting nectar-rich flowers nearby.
  • If space is limited, consider grafting multiple varieties onto a single tree or growing a “family tree” with different varieties on one rootstock.

Step 8: Harvesting Your Apples

Patience pays off — most apple trees start bearing fruit 3–5 years after planting. Harvest time depends on the variety and local climate, typically from late summer to early fall.

How to Tell When Apples Are Ripe:

  • The background color changes from green to yellowish or red.
  • Apples come off the branch easily with a slight twist.
  • Taste-test an apple for sweetness and texture.
  • Seeds inside should be dark brown.

Storage Tip:
Store apples in a cool, humid environment. Some varieties like Fuji or Granny Smith can last for months in proper conditions.


Final Thoughts

Creating a backyard orchard filled with healthy, productive apple trees is a rewarding project that offers beauty, fresh fruit, and a deeper connection to nature. By choosing the right varieties, providing proper care, and keeping an eye on pests and diseases, you’ll be well on your way to harvesting crisp, homegrown apples for years to come.

Whether you want to enjoy them fresh off the tree, baked into pies, or made into homemade cider, there’s something truly special about growing your own apples. Start planting today and transform your backyard into a fruitful oasis!

10 Rare Flowering Indoor Vines to Transform Your Living Space

10 Rare Flowering Indoor Vines to Transform Your Living Space

If you love filling your home with lush greenery and vibrant flowers, flowering indoor vines are a stunning way to add a romantic, exotic vibe to your interiors. While trailing houseplants like pothos and philodendron are common, there’s a world of rare and beautiful indoor vines that produce delightful blooms too. These enchanting climbers are perfect for brightening up windows, shelves, and hanging baskets, bringing color, fragrance, and life to your home. Discover these 10 rare flowering indoor vines and elevate your living space with their irresistible charm.


1. Wax Plant (Hoya carnosa)

The Wax Plant is a true gem among indoor flowering vines. Known for its thick, glossy leaves and clusters of star-shaped, sweetly scented blooms, this vine adds both texture and fragrance to your space. Hoyas thrive in bright, indirect light and love being root-bound, making them perfect for small pots or hanging baskets. Their waxy pink or white flowers often appear in late spring or summer, filling the room with a subtle, honey-like scent. Easy to care for, they’re ideal for busy plant lovers craving something a little different.

2. Black-Eyed Susan Vine (Thunbergia alata)

This cheerful vine boasts bright, daisy-like flowers with a dark center hence the name Black-Eyed Susan. While often grown outdoors, it can thrive indoors in a sunny spot, climbing trellises or cascading from hanging planters. Its vivid orange, yellow, or white blooms bring a burst of color to any room. It prefers consistently moist soil and bright light, rewarding you with continuous blooms from spring to fall. This lively vine turns any window or sunroom into a warm, inviting retreat.

3. Bleeding Heart Vine (Clerodendrum thomsoniae)

The Bleeding Heart Vine is a striking indoor plant, featuring heart-shaped white bracts that cradle deep red flowers a dramatic, romantic pairing. Native to tropical Africa, it flourishes in warm, humid environments with bright, indirect light. Given the right conditions, it blooms profusely in late spring and summer. It can be trained onto trellises or allowed to trail from hanging baskets. Regular pruning keeps it manageable indoors while promoting fuller, more abundant flowering.

4. Passionflower (Passiflora caerulea)

One of the most exotic-looking flowering vines, Passionflower dazzles with its intricate, otherworldly blooms in shades of blue, purple, and white. While often an outdoor plant, it can be grown indoors in a sunny room or conservatory. Passionflowers need bright, direct light and consistent moisture. Their flowers not only look extraordinary but also attract pollinators if you open a window or have a garden-facing balcony. This vine adds an artistic, tropical feel to any interior space.

5. Jasmine (Jasminum polyanthum)

Famed for its intoxicatingly sweet scent, Jasmine is a flowering vine that transforms your living space with both fragrance and delicate white-pink blooms. This variety is especially suited for indoor growing, as it remains compact while producing a profusion of flowers in late winter and spring. It loves bright, indirect light and thrives in well-draining soil. Jasmine vines look beautiful trained on a hoop or trellis or trailing from a high shelf, creating a romantic, cozy atmosphere.

6. Canary Creeper (Tropaeolum peregrinum)

A rare and whimsical vine, Canary Creeper charms with its frilly, canary-yellow flowers and delicate, lobed foliage. This plant is an indoor-friendly relative of the nasturtium and thrives in bright, indirect light with moderate watering. It blooms prolifically from late spring into fall, making it a joyful addition to any home. The flowers and young leaves are even edible, adding a peppery note to salads. Let it trail from shelves or climb a miniature trellis for a playful, airy look.

7. Rangoon Creeper (Combretum indicum)

This tropical stunner is known for its clusters of tubular, star-shaped flowers that shift in color from white to pink to deep red as they mature. Rangoon Creeper thrives in bright, sunny rooms and adds a bold, exotic statement to any space. It prefers slightly moist soil and enjoys a bit of humidity, making it ideal for sunrooms or bathrooms with natural light. Its cascading blooms and sweet fragrance turn any indoor corner into a lush, vibrant retreat.

8. Mandevilla (Mandevilla sanderi)

Mandevilla vines are known for their trumpet-shaped, vibrant pink, red, or white flowers and glossy, deep green foliage. Indoors, they thrive in bright, direct light and benefit from regular watering during the growing season. These fast-growing climbers look stunning when trained on a small trellis or allowed to trail from a high shelf or hanging planter. Mandevilla’s bold, tropical flowers create a warm, resort-like vibe inside your home, especially during the blooming months of spring and summer.

9. Flame Vine (Pyrostegia venusta)

For those craving drama, the Flame Vine delivers with cascades of bright orange, trumpet-shaped blooms. Native to South America, this rare flowering vine can be grown indoors in a bright, sunny location. It blooms during the cooler months, bringing color and warmth to your home when most plants are dormant. Flame Vines require regular watering and occasional pruning to maintain shape. Their vibrant flowers attract hummingbirds and make a stunning addition to any indoor plant collection.

10. Madagascar Jasmine (Stephanotis floribunda)

Madagascar Jasmine, also known as Bridal Wreath, is a romantic, rare vine famed for its pure white, waxy, star-shaped flowers and enchanting fragrance. It thrives in bright, indirect light and moderate humidity, blooming primarily in spring and summer. The glossy, dark green leaves provide a beautiful contrast to its delicate blooms. This vine is perfect for wrapping around an indoor trellis or arch, adding elegance and a gentle floral aroma to living rooms, bedrooms, or even bathrooms.

10 Stunning Tropical Air Plants to Elevate Your Terrarium Style

10 Stunning Tropical Air Plants to Elevate Your Terrarium Style

Air plants are the ultimate no-fuss tropical beauties, perfect for adding life, color, and elegance to your terrarium displays. With no soil required and endless styling possibilities, these epiphytic wonders are ideal for both seasoned plant lovers and beginners. From bold blooms to exotic forms, tropical air plants instantly elevate your home’s green corners. In this article, we’ll explore 10 gorgeous tropical air plants that thrive in terrariums and transform any space into a lush, natural sanctuary.


1. Tillandsia ionantha

One of the most beloved air plants, Tillandsia ionantha is a compact beauty known for its dramatic color changes. Its soft, silvery-green leaves blush shades of bright red and pink when it blooms, topped with vivid purple flowers. This plant thrives in bright, indirect light with good air circulation and loves regular misting. Its petite size makes it perfect for hanging globes or glass terrariums, adding a burst of tropical charm to small spaces and modern interiors.

2. Tillandsia xerographica

Often called the “Queen of Air Plants,” Tillandsia xerographica steals the show with its stunning, silvery-green leaves that gracefully curl at the edges. This larger air plant is a statement piece in any terrarium or open display. It loves bright, indirect light and infrequent watering, thriving in well-ventilated environments. Its dramatic form pairs beautifully with driftwood, stones, or hanging planters, offering a sculptural, tropical focal point that’s both low-maintenance and endlessly elegant.

3. Tillandsia caput-medusae

Named for its snake-like leaves, Tillandsia caput-medusae boasts an exotic, otherworldly shape perfect for creative terrarium designs. Its thick, twisting leaves are covered in soft trichomes that help absorb moisture and nutrients. When in bloom, it produces a tall, vibrant flower spike with purple blossoms. This unique air plant prefers bright, filtered light and regular misting. Its quirky form adds texture and movement to displays, making it a favorite for adding a bold, tropical accent.

4. Tillandsia stricta

Tillandsia stricta is prized for its slender, upright leaves and showy pink or purple flower bracts that emerge quickly in the right conditions. This fast-growing air plant adapts well to terrariums and hanging displays, thriving in bright, indirect light with regular misting. Its soft, feathery leaves add a lush texture to tropical arrangements, and it multiplies easily by producing offsets after flowering. It’s perfect for anyone wanting a fuss-free, blooming plant that brightens up small indoor gardens.

5. Tillandsia bulbosa

With its wild, tentacle-like leaves and glossy, dark green color, Tillandsia bulbosa makes a striking addition to tropical terrariums. Its bulbous base stores moisture, making it drought-tolerant and forgiving for beginners. When it blooms, it sends up a vibrant red or purple flower spike, adding dramatic color to its quirky shape. Bulbosa thrives in bright, indirect light and benefits from occasional soaking. Its sculptural appearance makes it ideal for pairing with moss, bark, and natural stones.

6. Tillandsia brachycaulos

Known for its vivid red hue during blooming, Tillandsia brachycaulos is a show-stopping air plant that adds bold color to any display. Its soft, broad leaves arch outward in a beautiful rosette form. This plant loves bright, indirect light and regular misting or occasional soaking. When it flowers, it produces small, tubular blossoms in purple or violet shades. Brachycaulos pairs wonderfully with decorative terrarium elements like crystals or driftwood, offering both color and tropical flair.

7. Tillandsia harrisii

Soft to the touch, Tillandsia harrisii features silvery-gray leaves with a velvety texture, thanks to its dense trichomes. This air plant’s gentle coloring makes it a soothing addition to neutral-toned terrariums and minimalist spaces. It blooms with a bright red spike topped by violet flowers, creating a beautiful contrast against its muted foliage. Harrisii prefers bright, filtered light and consistent misting. Its soft appearance and easy-going nature make it an ideal pick for beginners and design enthusiasts alike.

8. Tillandsia tectorum

If you love soft, cloud-like textures, Tillandsia tectorum is a must-have. Native to the Andes, this air plant boasts fuzzy, silvery leaves that give it a frosted appearance. It’s highly drought-tolerant, needing only occasional misting or soaking, and prefers bright, indirect sunlight. Tectorum adds an ethereal touch to terrariums and open-air planters, pairing beautifully with delicate stones and natural woods. Its airy structure and unique texture make it an eye-catching, low-maintenance tropical treasure.

9. Tillandsia fasciculata

Known for its bold, upright form and striking red or pink flower spikes, Tillandsia fasciculata is one of the most vibrant air plants you can grow. Its stiff, green leaves radiate in a rosette, and it thrives in bright, indirect light with regular misting. This plant’s larger size makes it ideal for centerpiece terrariums or standalone displays. When in bloom, its colorful bracts and violet flowers provide a dramatic tropical accent that instantly elevates your indoor garden’s style.

10. Tillandsia cyanea (Pink Quill Plant)

While technically an epiphyte, Tillandsia cyanea is a stunning air plant often grown potted in loose, well-draining media. Its signature pink, paddle-shaped bract resembling a feather or quill lasts for months and produces delicate violet flowers. This plant enjoys bright, indirect light and moderate misting or occasional soaking. Its colorful blooms and elegant shape make it a standout in terrariums or tabletop displays, bringing a touch of the tropics to any room with minimal care.

10 Loofah Plants You Can Grow for Natural Sponges

10 Loofah Plants You Can Grow for Natural Sponges

If you’re searching for a sustainable, eco-friendly alternative to synthetic sponges, growing your own loofah plants might be the perfect solution. Loofah, also spelled luffa, is a member of the gourd family and produces fibrous fruits that, when dried, can be used as natural exfoliating sponges. Not only are they great for skincare routines, but they’re also useful for household cleaning. Plus, these fast-growing vines bring lush greenery and bright yellow flowers to your garden. Here are 10 types of loofah plants you can grow for natural sponges!


1. Smooth Luffa (Luffa aegyptiaca)

Also known as the Egyptian cucumber, this is the most popular loofah variety for sponge-making. Smooth luffa produces elongated, ridgeless fruits that can grow up to 2 feet long. When young, the fruits are tender enough to eat like zucchini. Left to mature, their fibrous interiors dry into perfect natural sponges. This vigorous vine loves full sun, warm temperatures, and plenty of space to climb. It’s an excellent choice for gardeners in USDA zones 7-11 or those with long, hot summers.

2. Ridged Luffa (Luffa acutangula)

Ridged luffa, sometimes called angled luffa or Chinese okra, features distinct ridges along its fruit. While it’s edible when young and often used in Asian cuisine, the mature fruits develop a fibrous texture ideal for natural scrubbing sponges. The ridged exterior makes for a slightly coarser sponge, perfect for tougher cleaning jobs. This variety grows best in warm, humid climates and needs a sturdy trellis to support its vigorous vines, which can quickly cover fences, pergolas, or arbors.

3. Vietnamese Luffa (Luffa cylindrical ‘Vietnamese’)

A favorite in Southeast Asian home gardens, the Vietnamese luffa is known for its fast growth and prolific fruiting. It produces long, slender fruits that dry into excellent bath sponges with a soft, flexible texture. Gardeners love this variety for its resilience in hot, tropical climates and its ability to grow in nutrient-poor soils. Its pale yellow flowers attract pollinators, adding beauty and biodiversity to your garden while supplying you with plenty of natural sponges.

4. Indian Sponge Gourd (Luffa cylindrica ‘India’)

The Indian sponge gourd is highly prized in South Asia for both culinary and household uses. When harvested young, it’s cooked in curries and stir-fries. Left on the vine, the fruits grow into natural loofahs perfect for body exfoliation and dishwashing. This variety is particularly tolerant of heat and monsoon-like rains, making it a reliable option for tropical and subtropical gardens. Its dense foliage also offers natural shade and privacy when grown along fences or trellises.

5. Thai Luffa (Luffa acutangula ‘Thai’)

Thai luffa is celebrated for its tender, edible fruits, but it also produces one of the most durable loofahs when left to mature. The sponges are slightly firmer, making them ideal for scrubbing garden tools, countertops, and tougher surfaces. Gardeners appreciate this variety for its rapid growth, drought tolerance, and resistance to common gourd pests. Plant it in full sun with regular watering, and you’ll be rewarded with both edible gourds and plenty of natural sponges by season’s end.

6. Chinese Loofah (Luffa cylindrica ‘Chinese’)

Popular throughout China for its mild-tasting young fruits, the Chinese loofah also yields soft, high-quality natural sponges. The fruits are typically cylindrical and can grow up to 20 inches long. Once dried and peeled, the fibrous interior is used in everything from personal care to cleaning delicate surfaces. This variety grows best in consistently warm temperatures and benefits from rich, well-drained soil. Its yellow blossoms are also a magnet for bees, making it a beneficial addition to pollinator-friendly gardens.

7. Malaysian Luffa (Luffa acutangula ‘Malaysian’)

Known for its slightly ridged, elongated fruits, the Malaysian luffa is a versatile plant cherished both in kitchens and homes. When dried, its fibrous core makes a medium-textured sponge ideal for personal care. Gardeners love this plant’s fast growth and low-maintenance nature, requiring little more than sunlight, occasional feeding, and a sturdy support system. It thrives in humid climates and can be grown from late spring to early fall for a steady supply of loofahs and edible gourds.

8. Japanese Luffa (Hechima)

In Japan, the loofah plant—called hechima—is a summer staple. The young gourds are enjoyed in soups and stir-fries, while mature fruits are dried and used as exfoliating sponges. Japanese gardeners favor this variety for its compact, manageable growth and high yield. It’s especially well-suited for small urban gardens where vertical space is maximized. The dried sponges are traditionally used in skincare and household cleaning, and their soft, flexible fibers make them a gentle, natural alternative to synthetic sponges.

9. Philippine Luffa (Patola)

The Philippine luffa, known locally as patola, is a garden favorite for both its culinary and practical uses. Young fruits are added to stews and soups, while mature ones turn into fibrous sponges. This variety thrives in tropical conditions and produces fruits with a medium-coarse texture, suitable for everything from exfoliating skin to scrubbing dishes. The plant grows quickly in well-drained, fertile soil with ample sun and benefits from trellising to keep the gourds off the ground.

10. Wild Luffa (Luffa graveolens)

A lesser-known relative of the common loofah, wild luffa grows in untamed regions of Southeast Asia and India. It produces smaller, tougher fruits that dry into coarse, durable sponges ideal for heavy-duty cleaning. While not typically grown for culinary use, it’s valued for its resilience and ability to thrive in poor soils and challenging conditions. This makes it a great option for gardeners seeking a hardy, low-maintenance plant that still delivers useful natural sponges for household chores.

10 Eucalyptus Plants That Smell Heavenly Outdoors

10 Eucalyptus Plants That Smell Heavenly Outdoors

When it comes to plants that captivate both the eyes and the senses, few can rival eucalyptus. Known for its refreshing, minty, and slightly sweet fragrance, eucalyptus is a favorite in both home gardens and landscapes. Not only do these plants release a calming, spa-like aroma, but they also offer striking silvery-blue foliage and attractive growth habits. From towering trees to compact shrubs, eucalyptus varieties bring beauty, fragrance, and even insect-repelling benefits to your outdoor space.

If you’re looking to add heavenly scents to your garden, here are 10 eucalyptus plants that smell incredible outdoors and elevate the ambiance of your home landscape.


1. Eucalyptus globulus (Blue Gum)

One of the most iconic eucalyptus species, Eucalyptus globulus is famous for its bold menthol aroma. Native to southeastern Australia, this fast-growing tree can reach impressive heights but can be maintained as a smaller ornamental with pruning. Its blue-green, lance-shaped leaves emit a strong, clean scent that’s instantly refreshing. Often used in essential oils and natural remedies, Blue Gum’s scent is known to clear sinuses and create a serene atmosphere in the garden. Perfect for larger landscapes or grown in large containers when young.

2. Eucalyptus citriodora (Lemon-Scented Gum)

If you love citrusy fragrances, Eucalyptus citriodora is a must-have. Its tall, slender form and bright green leaves release a potent lemony scent, especially after rainfall or when the leaves are brushed. Popular in both residential and public landscapes in warmer climates, this species is prized not only for its fragrance but also for its smooth, pale bark that peels attractively. The lemon scent also acts as a natural mosquito repellent, making it both a beautiful and practical choice for outdoor relaxation areas.

3. Eucalyptus nicholii (Narrow-Leaved Peppermint)

With its slender leaves and weeping habit, Eucalyptus nicholii is an attractive small tree or large shrub that fills the air with a delicate peppermint aroma. Its fine-textured foliage is a striking blue-green, and when crushed or swayed by the breeze, it releases a gentle, sweetly minty fragrance. This hardy species is drought-tolerant once established and thrives in full sun. Its pleasant scent, combined with its graceful appearance, makes it a fantastic ornamental feature for driveways, patios, or garden borders.

4. Eucalyptus radiata (Narrow-Leaved Peppermint Gum)

Known for its invigorating, crisp aroma, Eucalyptus radiata offers a subtler, softer scent than some of its relatives. The long, narrow leaves release a lovely menthol and peppermint fragrance when touched or crushed, making it a favorite for garden paths and seating areas where its scent can be enjoyed up close. This medium-sized tree is often used in aromatherapy and natural wellness products, thanks to its therapeutic oil. Its fast growth and resilience make it a versatile, low-maintenance addition to temperate gardens.

5. Eucalyptus gunnii (Cider Gum)

A charming and highly fragrant eucalyptus, Eucalyptus gunnii is beloved for its rounded juvenile leaves that shift to a more elongated shape as it matures. Its foliage releases a fresh, slightly sweet scent reminiscent of menthol and honey, especially noticeable during the evening hours. This cold-hardy species tolerates light frost and grows well in both large containers and open landscapes. Its beautiful silvery-blue leaves also make it a favorite for floral arrangements and garden décor, combining beauty with captivating fragrance.

6. Eucalyptus polyanthemos (Silver Dollar Gum)

The distinctive round, silvery-blue leaves of Eucalyptus polyanthemos are as visually striking as they are aromatic. Often called Silver Dollar Gum, this eucalyptus variety emits a light, clean, and subtly minty fragrance that freshens the surrounding air. It’s a popular pick for modern gardens and Mediterranean-style landscapes, offering both form and function. This species grows to a manageable size for suburban gardens and is excellent for cut foliage in vases, where its scent continues to perfume indoor spaces as well.

7. Eucalyptus camaldulensis (River Red Gum)

A majestic species native to Australia, Eucalyptus camaldulensis thrives along riverbanks and wetlands but adapts well to home gardens with ample space. Its long, narrow leaves give off a bold, camphoraceous eucalyptus scent that’s invigorating and cleansing. The tree’s attractive peeling bark reveals streaks of cream, gray, and brown, adding year-round visual interest. The heady fragrance, especially after rain, makes it a wonderful specimen for large properties and countryside retreats where its shade and scent can be fully appreciated.

8. Eucalyptus pulverulenta (Baby Blue)

Compact and highly decorative, Eucalyptus pulverulenta is best known for its rounded, silvery-blue leaves arranged along slender stems. It’s widely used in floral arrangements but also makes an excellent garden plant where its soft, cool-toned foliage contrasts beautifully with flowering plants. Its leaves emit a sweet, clean, menthol aroma, particularly noticeable when warmed by the sun. Ideal for smaller gardens or grown in large pots, Baby Blue is both ornamental and wonderfully fragrant, offering that unmistakable eucalyptus scent in a more manageable size.

9. Eucalyptus macrocarpa (Mottlecah)

For gardeners seeking something unique and boldly fragrant, Eucalyptus macrocarpa is an excellent choice. This small, shrubby tree produces enormous crimson flowers and large, waxy, blue-gray leaves with a potent, aromatic scent. The fragrance is intense, combining eucalyptus’s signature menthol freshness with a slightly earthy undertone. Native to Western Australia, it thrives in dry, sandy soils and adds a dramatic, scented focal point to drought-tolerant or Mediterranean gardens. Its striking foliage and unforgettable fragrance make it a conversation-starting plant.

10. Eucalyptus leucoxylon (Yellow Gum)

A highly versatile species, Eucalyptus leucoxylon is valued for its clusters of pink, cream, or red flowers and its light, clean scent that gently perfumes the air. Its aromatic, slender leaves release a refreshing eucalyptus fragrance, particularly noticeable in the warmth of summer evenings. The tree’s graceful form and colorful blooms attract nectar-feeding birds and pollinators, making it both a sensory and ecological asset in the garden. It’s perfect for mixed native plantings or as a lightly shaded canopy in informal outdoor spaces.

10 Catnip Plants Your Furry Friend Will Love

10 Catnip Plants Your Furry Friend Will Love

If you’re a cat owner, you probably know the magical effects of catnip. Scientifically known as Nepeta cataria, catnip belongs to the mint family and contains a natural oil called nepetalactone. This compound acts as a feline attractant, triggering playful, euphoric, and sometimes downright silly behavior in cats. While the classic catnip plant is the most famous, there’s a wonderful variety of other Nepeta species and relatives with similar appeal.

In this article, we’ll introduce you to 10 catnip plants your furry friend will love — each offering unique scents, textures, and garden value.


1. Nepeta cataria (Common Catnip)

The classic and most famous catnip, Nepeta cataria is the go-to plant for every cat lover. Its soft, gray-green leaves release an intoxicating scent when crushed or brushed, making it irresistible to most cats. Whether you grow it in your garden or keep it in a pot indoors, this hardy perennial thrives in full sun and well-drained soil. Besides entertaining your pets, it also produces small, white to pale lavender flowers that attract pollinators, making it both a pet treat and a garden-friendly plant.

2. Nepeta faassenii (Catmint)

Often confused with common catnip, Nepeta faassenii or Catmint offers a similar appeal with a slightly milder effect on cats. This low-growing, mound-forming perennial features silvery-green foliage and masses of small, lavender-blue flowers. Its fragrance is more subtle than catnip, making it perfect for gardeners who enjoy the look and scent without overwhelming their feline friends. Catmint is drought-tolerant, deer-resistant, and attracts bees and butterflies, making it a multifunctional addition to flower beds and herb gardens.

3. Nepeta racemosa (Dwarf Catmint)

For those with limited space, Nepeta racemosa is a compact, cat-attracting alternative. This smaller species still produces plenty of soft, aromatic leaves and dense spikes of bluish-purple flowers. It grows beautifully in containers or small garden beds, offering your cat an enticing spot to rub, roll, and nibble. The plant’s neat, tidy growth habit makes it ideal for edging pathways or borders. It blooms from spring through summer and pairs well with roses, ornamental grasses, and other sun-loving perennials.

4. Nepeta ‘Walker’s Low’

A hybrid catmint cultivar, ‘Walker’s Low’ is adored by cats and gardeners alike. Despite its name, it grows into a generous, sprawling mound covered in bluish-purple flowers from early summer to fall. The aromatic, gray-green foliage offers a mild catnip effect, enticing your pet to lounge and play around its base. It’s also a favorite for pollinators like bees and butterflies. Hardy, heat-tolerant, and low-maintenance, this plant is ideal for cottage-style or Mediterranean-themed gardens where both you and your cat can relax.

5. Nepeta grandiflora (Giant Catmint)

If you’re looking for a bold, fragrant feature in your garden that your cat will adore, Nepeta grandiflora is an excellent choice. Known for its larger leaves and flowers, this vigorous perennial releases a strong, sweet scent that’s highly attractive to felines. It forms an upright, bushy clump of foliage topped with clusters of violet-blue flowers in early to mid-summer. Perfect for larger garden spaces, it also makes an effective pest deterrent as its aromatic oils naturally repel aphids and mosquitoes.

6. Nepeta sibirica (Siberian Catmint)

Known for its cold-hardiness and tall, elegant spikes of lavender-blue flowers, Nepeta sibirica is a beautiful, functional plant that cats enjoy. Its aromatic leaves provide the classic catnip experience, while its more upright growth habit and showy blooms make it an attractive addition to mixed borders. Cats love lounging under its leafy stems and nibbling on its foliage. Blooming from late spring to early fall, it’s also a magnet for bees, adding a lively, buzzing element to your garden sanctuary.

7. Nepeta mussinii (Persian Catmint)

Another favorite in both traditional and modern gardens, Nepeta mussinii boasts a neat, clumping growth habit and abundant, tubular, bluish-lavender flowers. Its soft, grayish-green leaves release a potent scent that most cats find irresistible. Compact and resilient, this plant performs well in rocky soils, herb gardens, and as a fragrant border along paths. It’s drought-tolerant and deer-resistant, offering low-maintenance beauty with the added bonus of feline-approved foliage for rolling and chewing.

8. Nepeta ‘Six Hills Giant’

As its name suggests, ‘Six Hills Giant’ is one of the tallest and most robust catmints available. Reaching up to 3 feet in height, this showy plant features dense spikes of lavender-blue flowers and highly aromatic leaves. The potent scent attracts cats from across the yard and invites them to lounge in its shade or nibble the leaves. A long-lasting bloomer, it flowers from late spring through early fall and thrives in full sun, creating a paradise for both cats and pollinators.

9. Nepeta subsessilis (Japanese Catmint)

With slightly larger, brighter flowers than many other species, Nepeta subsessilis is a lush, upright-growing catmint with a mild catnip effect. Native to Japan, it prefers moist, well-drained soil and partial shade, making it suitable for areas that might be too cool or shady for other varieties. Cats enjoy brushing against its soft, aromatic leaves and lounging beneath its stems. Its eye-catching blooms and feline appeal make it a perfect choice for shady patios or mixed perennial beds.

10. Nepeta x faassenii ‘Junior Walker’

A compact, low-growing cousin of the popular ‘Walker’s Low’, ‘Junior Walker’ offers the same silvery-green foliage and clouds of soft lavender-blue flowers in a smaller package. Perfect for container gardens, small patios, and border edges, this resilient plant emits a sweet, mild scent that your cat will adore. It’s long-blooming and drought-tolerant, providing months of fragrant flowers and fun for your pet. Plus, its neat form and versatility make it an easy addition to both traditional and contemporary landscapes.

10 Milkweed Plants That Attract Butterflies

10 Milkweed Plants That Attract Butterflies

Butterflies are one of nature’s most enchanting pollinators, adding beauty and movement to any garden. If you’re hoping to turn your yard into a butterfly haven, planting milkweed is one of the best things you can do. Known scientifically as Asclepias, milkweed plants serve as the primary food source for monarch butterfly caterpillars and a nectar-rich stopover for adult butterflies of all kinds.

With over 100 species to choose from, milkweed isn’t just great for wildlife it also adds color, texture, and resilience to your garden beds. Below, you’ll discover 10 milkweed plants that attract butterflies and transform your outdoor space into a pollinator paradise.


1. Asclepias tuberosa (Butterfly Weed)

Bright and cheerful, Butterfly Weed is one of the most popular milkweed varieties for attracting butterflies. Its vivid orange flowers bloom from early summer to fall and provide abundant nectar for monarchs, swallowtails, and other pollinators. Unlike other milkweed species, Asclepias tuberosa has little to no milky sap, making it less messy and easier to maintain. It thrives in full sun and well-drained soil, tolerating drought and poor conditions with ease. This native perennial is also deer-resistant and a stunning addition to sunny borders and wildflower gardens.

2. Asclepias syriaca (Common Milkweed)

Perhaps the most famous milkweed species, Common Milkweed is crucial to the monarch butterfly lifecycle. Its large, ball-shaped clusters of soft pink flowers emit a sweet fragrance that attracts a variety of pollinators. The broad, velvety leaves serve as essential food for monarch caterpillars. Hardy and low-maintenance, Asclepias syriaca spreads by rhizomes, making it ideal for naturalized areas and meadows. It performs best in full sun and adapts well to various soil types, making it a staple in pollinator-friendly landscapes.

3. Asclepias incarnata (Swamp Milkweed)

Perfect for damp or poorly drained areas, Swamp Milkweed thrives near ponds, rain gardens, and low-lying spots. Its clusters of pink to mauve flowers bloom in mid-to-late summer, offering rich nectar for butterflies, bees, and hummingbirds. Monarch caterpillars happily feast on its slender, lance-shaped leaves. Asclepias incarnata is more refined in appearance compared to Common Milkweed and is well-behaved in garden beds. It prefers full sun to part shade and moist soil but can tolerate brief dry spells once established.

4. Asclepias curassavica (Tropical Milkweed)

A favorite in warmer regions and container gardens, Tropical Milkweed offers eye-catching clusters of bright red and yellow flowers that bloom nearly year-round in frost-free areas. Its rich nectar attracts butterflies like a magnet, and its foliage serves as a monarch caterpillar host plant. While beautiful, Asclepias curassavica should be cut back in late fall in mild climates to prevent disrupting monarch migration patterns. It thrives in sunny locations with well-drained soil and works wonderfully in butterfly gardens, borders, or patio pots.

5. Asclepias speciosa (Showy Milkweed)

With its large, pale pink flower clusters and velvety, silver-green leaves, Showy Milkweed lives up to its name. This North American native blooms in early to mid-summer, offering nectar for butterflies and essential foliage for monarch caterpillars. It’s especially well-suited for prairie plantings, meadows, and native plant gardens. Asclepias speciosa prefers full sun and tolerates drought conditions, making it a hardy option for eco-friendly landscapes. Its striking appearance and ecological value make it a must-have for butterfly enthusiasts.

6. Asclepias viridis (Green Milkweed)

Also known as Green Antelopehorn Milkweed, this species features unique greenish-white flowers with purple highlights. It’s an early bloomer, often flowering in late spring before many other milkweed species, providing an essential nectar source for migrating butterflies. Its broad, lance-shaped leaves make a tasty treat for monarch caterpillars. Asclepias viridis thrives in dry, sandy, or rocky soils in sunny locations, making it perfect for xeriscapes and wildflower gardens in southern and central U.S. regions.

7. Asclepias asperula (Antelope Horn Milkweed)

With its fascinating, horn-like seed pods and striking flower clusters of pale green petals with maroon centers, Antelope Horn Milkweed is both visually intriguing and butterfly-friendly. Native to the southern United States, it provides nectar for adult butterflies and serves as a critical host plant for monarch caterpillars. Asclepias asperula prefers dry, well-drained soils and full sun and often thrives in prairies, open fields, and roadside areas. Its unique aesthetic adds a wild, naturalistic touch to pollinator-friendly gardens.

8. Asclepias fascicularis (Narrowleaf Milkweed)

Ideal for western U.S. gardens, Narrowleaf Milkweed boasts slender, upright stems adorned with narrow leaves and delicate clusters of pale pink to lavender flowers. It blooms from late spring through summer, attracting swarms of butterflies and pollinators. Monarch caterpillars eagerly munch on its foliage, making it a vital part of their breeding habitat. Asclepias fascicularis adapts to dry, sandy soils and thrives in sunny areas, offering gardeners a drought-tolerant, low-maintenance plant with ecological benefits.

9. Asclepias perennis (Aquatic Milkweed)

If you have a pond, streamside, or consistently wet area in your garden, Aquatic Milkweed is the perfect choice. This lesser-known milkweed species produces clusters of delicate white to soft pink flowers from spring to summer. It attracts butterflies, especially monarchs, which lay eggs on its leaves. Asclepias perennis prefers part shade to full sun and moist, fertile soils, making it an excellent addition to rain gardens or water-wise landscapes with intermittent flooding.

10. Asclepias humistrata (Sandhill Milkweed)

A standout species for sandy, well-drained soils, Sandhill Milkweed dazzles with large, pale pink flower clusters and broad, pale green leaves tinged with purple. It blooms in early summer and serves as both a nectar plant for butterflies and a host for monarch caterpillars. Native to the southeastern United States, Asclepias humistrata thrives in dry, open woodlands, sandhills, and scrub habitats. It’s an ideal choice for native plant enthusiasts and wildlife gardeners looking to diversify their butterfly-friendly plant palette.