
Growing sweet potatoes at home is not only fun and rewarding but also a great way to enjoy a nutritious and versatile crop straight from your garden or container. One of the most effective methods to grow sweet potatoes is by using “slips”—the shoots that sprout from a mature sweet potato. In this guide, you’ll learn exactly how to grow sweet potatoes from slips, step-by-step, with expert tips to ensure success whether you’re gardening in a backyard, balcony, or kitchen window.
What Are Sweet Potato Slips?
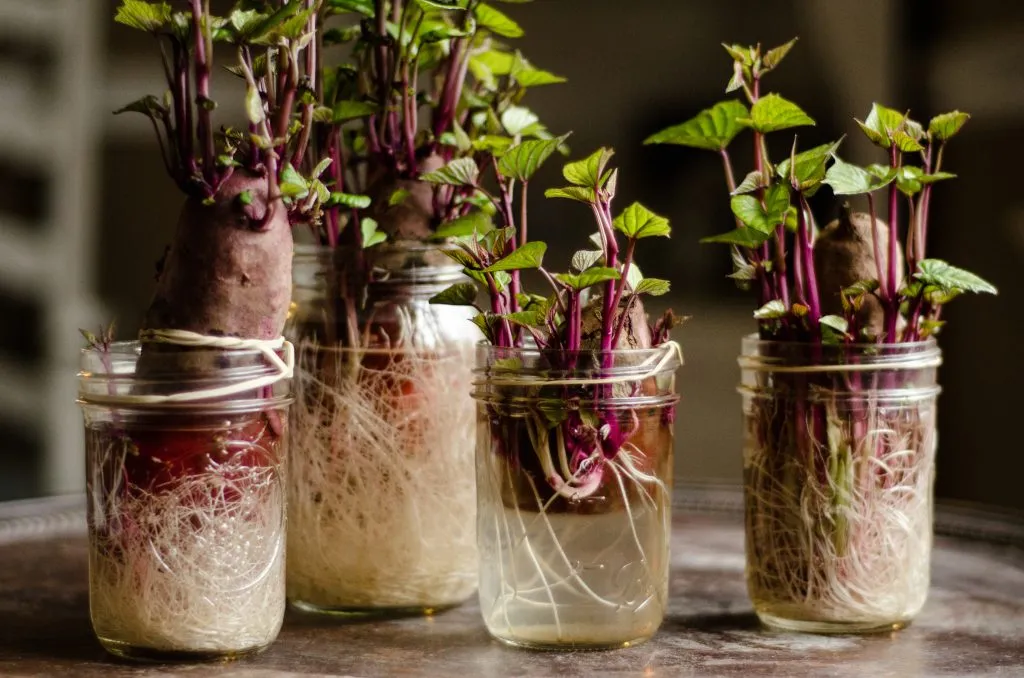
Sweet potato slips are vine-like sprouts that grow from the eyes of a mature sweet potato. Unlike regular potatoes, sweet potatoes don’t grow from seeds or tubers directly placed in the soil. Instead, they grow from these slips, which are cuttings with leaves and a bit of the sprout stem. Once rooted, these slips can be planted to grow a new sweet potato plant.
Step 1: Selecting the Right Sweet Potato
Start with a healthy, organic sweet potato. Organic is recommended because many non-organic sweet potatoes are treated with sprout inhibitors that prevent slip formation. Choose a firm, unblemished sweet potato, ideally one that is plump and has several small “eyes” or buds, which are indicators of where slips will form.

Pro Tip:
Look for varieties suited to your region. Popular types include ‘Beauregard’, ‘Georgia Jet’, and ‘Centennial’—these are known for producing well even in short growing seasons.
Step 2: Sprouting the Slips
There are two popular methods for sprouting slips: in water and in soil. Both methods are effective, but water is the most beginner-friendly and allows for easy observation.
In Water:
- Cut the sweet potato in half.
- Insert 3–4 toothpicks around the middle.
- Place the cut side down into a glass of water so that half is submerged.
- Set the glass on a sunny windowsill or under a grow light.
- In 1–2 weeks, you’ll notice green shoots sprouting from the top.
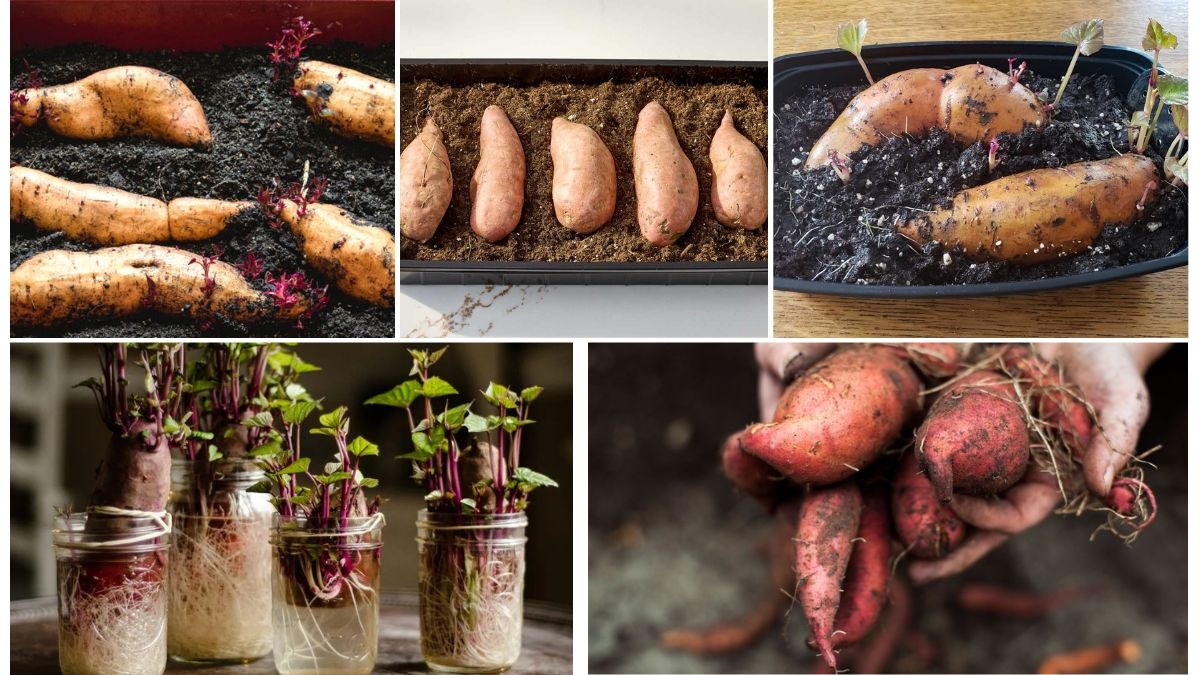
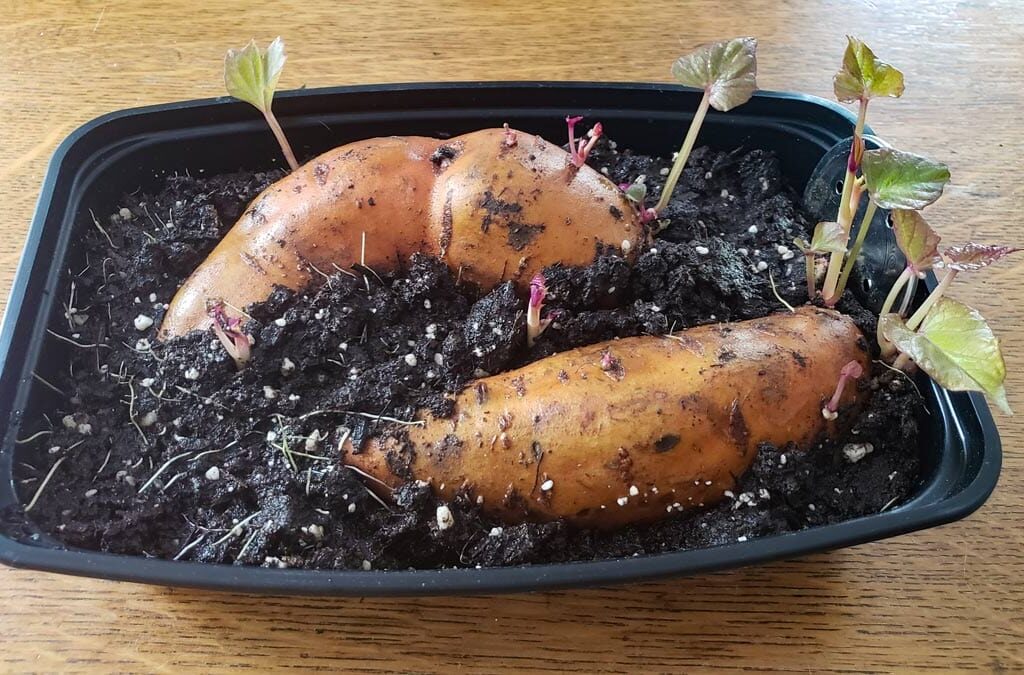
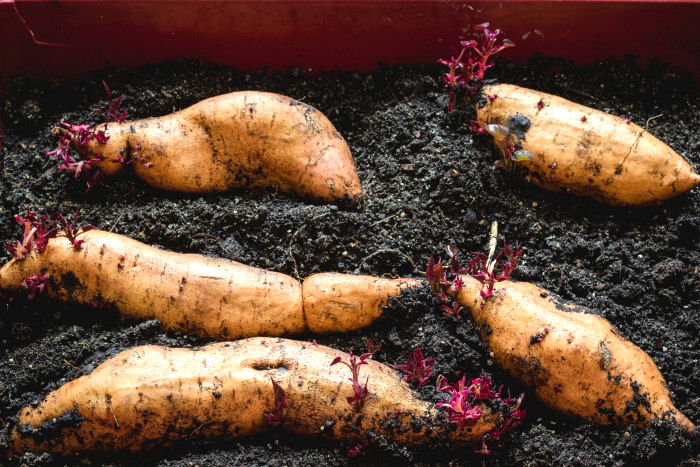
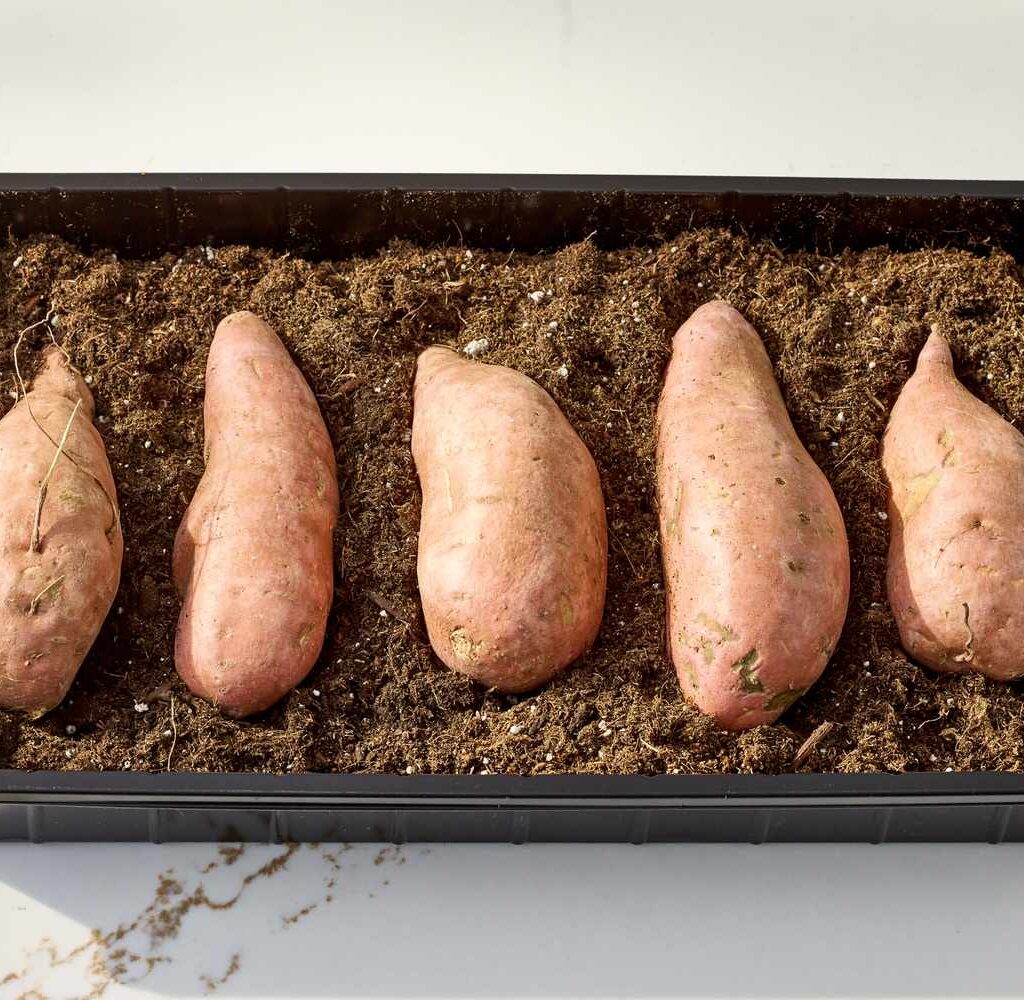
In Soil:
- Lay the whole sweet potato or cut halves in a shallow tray filled with potting mix.
- Cover lightly with soil and keep moist.
- Place in a warm area (75–85°F or 24–29°C) with indirect sunlight.
- Shoots will start emerging in 2–3 weeks.
Step 3: Removing and Rooting the Slips
Once the slips are about 5–6 inches long and have at least a few leaves, they’re ready to be removed and rooted.

How to Remove:
- Gently twist or cut the slips off where they attach to the potato.
- Remove the bottom leaves to expose 1–2 inches of stem.
How to Root:
- Place the slips in a glass of water so the stem is submerged but leaves stay dry.
- Change the water every 2 days to prevent rot.
- Roots will appear within a week.
Once the roots are 1–2 inches long, they’re ready for planting.
Step 4: Preparing to Plant
Sweet potatoes need warm soil, full sun (at least 6–8 hours a day), and plenty of space to grow. You can plant them outdoors, in raised beds, or in large containers.
Soil Requirements:
- Well-drained, loose soil.
- Slightly acidic to neutral pH (5.5 to 6.5).
- Enriched with compost or organic matter.
Container Growing:
- Use a container at least 18 inches deep and wide.
- Ensure proper drainage.
- Plant 1–2 slips per container for best results.
Step 5: Planting the Slips
Plant slips after the last frost date in your region when soil temperatures are consistently above 60°F (16°C).
How to Plant:
- Make a small hole 4–6 inches deep.
- Place the rooted slip in the hole, covering the roots and lower stem with soil.
- Space slips about 12 inches apart in rows 3 feet apart.
- Water thoroughly after planting.
Step 6: Caring for Your Sweet Potato Plants
Watering:
- Keep the soil consistently moist, especially during the first month.
- Avoid overwatering—sweet potatoes hate soggy soil.
Fertilizing:
- Use a balanced fertilizer (low in nitrogen) every 4–6 weeks.
- Too much nitrogen will cause lush foliage but fewer tubers.
Mulching:
- Apply a layer of straw or compost to retain moisture, suppress weeds, and regulate temperature.
Support:
- Sweet potatoes are vining plants. If you’re short on space, consider using trellises or letting vines trail over containers.
Step 7: Pest and Disease Management
Sweet potatoes are fairly pest-resistant but not immune. Common issues include:
- Wireworms and Root-Knot Nematodes: Use crop rotation and healthy soil practices.
- Aphids and Whiteflies: Use neem oil spray or insecticidal soap.
- Fungal Diseases: Ensure proper drainage and avoid overhead watering.
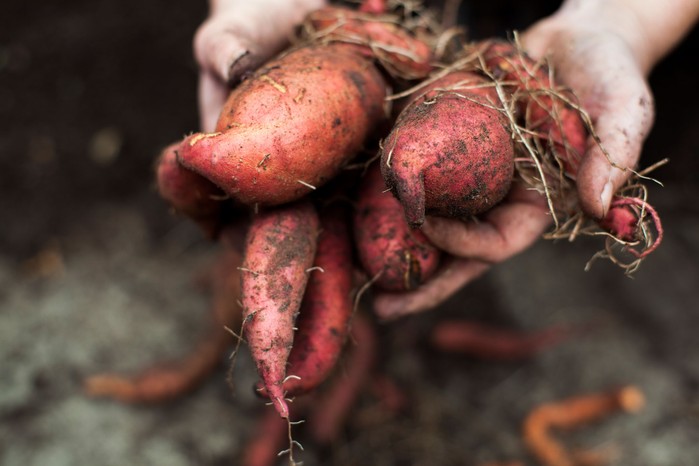
Step 8: Harvesting Sweet Potatoes
Sweet potatoes are usually ready for harvest 90–120 days after planting, depending on the variety.
Signs They’re Ready:
- The plant’s leaves start turning yellow.
- Skin toughens up and resists easy scraping.
- Tubers are full-sized and fill the planting area.
How to Harvest:
- Use a garden fork or your hands to carefully dig around the plant.
- Lift the tubers gently to avoid damage.
- Leave them to cure for 1–2 weeks in a warm, dry place to sweeten the flavor and toughen the skin.
Bonus: Storing and Reusing Tubers
- Store sweet potatoes in a cool (55–60°F), dark, and ventilated area.
- Avoid refrigerating—they develop a hard core and lose flavor.
- You can save some tubers to sprout slips again next season!
Conclusion
Growing sweet potatoes from slips at home is a fulfilling and surprisingly easy project, even for beginners. Whether you have a garden bed, a patio, or just a sunny window, you can enjoy this tropical treat with a little planning and care. From choosing the right sweet potato to sprouting slips, rooting them, planting, and eventually harvesting a bountiful crop—each step is a testament to how resourceful and enjoyable home gardening can be.

So grab that leftover sweet potato, start those slips, and let your garden (or balcony!) overflow with delicious homegrown sweet potatoes!
Leave A Comment