
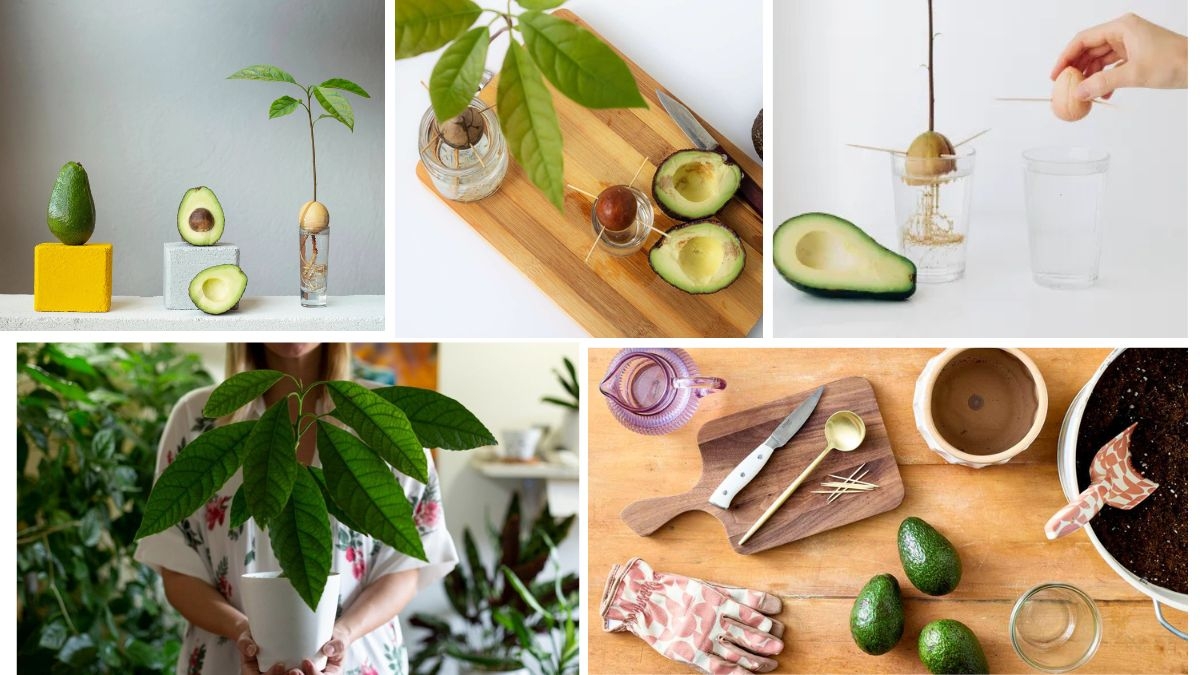
Growing your own avocado tree at home can be a rewarding and surprisingly simple gardening activity. Whether you’re a green thumb or a curious beginner, propagating an avocado from a pit (seed) is a fun, educational, and environmentally friendly process. In this guide, we’ll walk you through each step, from pit preparation to sprouting, planting, and care, so you can grow your very own avocado tree right from your kitchen.
Why Grow Avocados from a Pit?
Avocados are not only delicious and packed with nutrients like healthy fats, potassium, and fiber, but their trees are also beautiful tropical houseplants. Here’s why growing one at home is worth it:
- Cost-effective: It’s free—just use the seed from a store-bought avocado.
- Sustainable: Reduces waste and promotes green living.
- Educational: A great project for kids and adults alike.
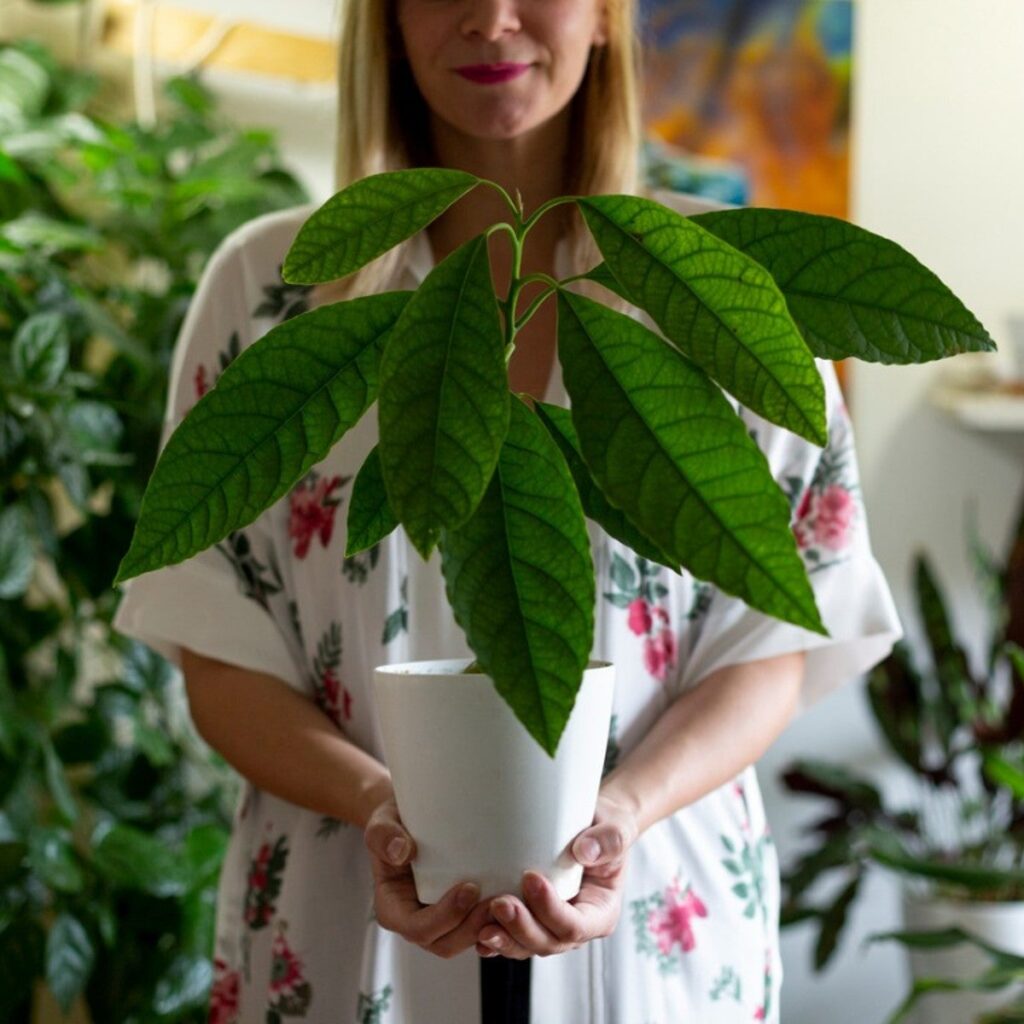
- Aesthetic: Avocado trees have glossy green leaves and an exotic appearance.
However, do note that avocado trees grown from pits may take several years (5–13) to produce fruit, and in some cases, may not bear fruit at all. Still, they make great ornamental plants.
What You’ll Need

To get started, gather the following:

- 1 ripe avocado
- A small glass or jar
- 3–4 toothpicks
- Water
- A sunny windowsill
- A pot with drainage holes
- Well-draining potting soil (cactus or citrus mix works well)
Step-by-Step Guide to Propagate Avocado from a Pit
Step 1: Remove and Clean the Pit
After enjoying your avocado:
- Carefully remove the pit without cutting or damaging it.
- Rinse it under warm water to remove any leftover fruit flesh.
- Gently scrub with your fingers (avoid using soaps or chemicals).
Let the pit dry for a few hours or overnight. This helps prevent mold and allows you to identify the top (pointy end) and bottom (flat, root end).
Step 2: Identify Top and Bottom
To successfully propagate the seed:
- Top (pointy end): This is where the stem will emerge.
- Bottom (flat end): This is where the roots will sprout.
It’s essential to orient the seed correctly in water so the bottom stays submerged.

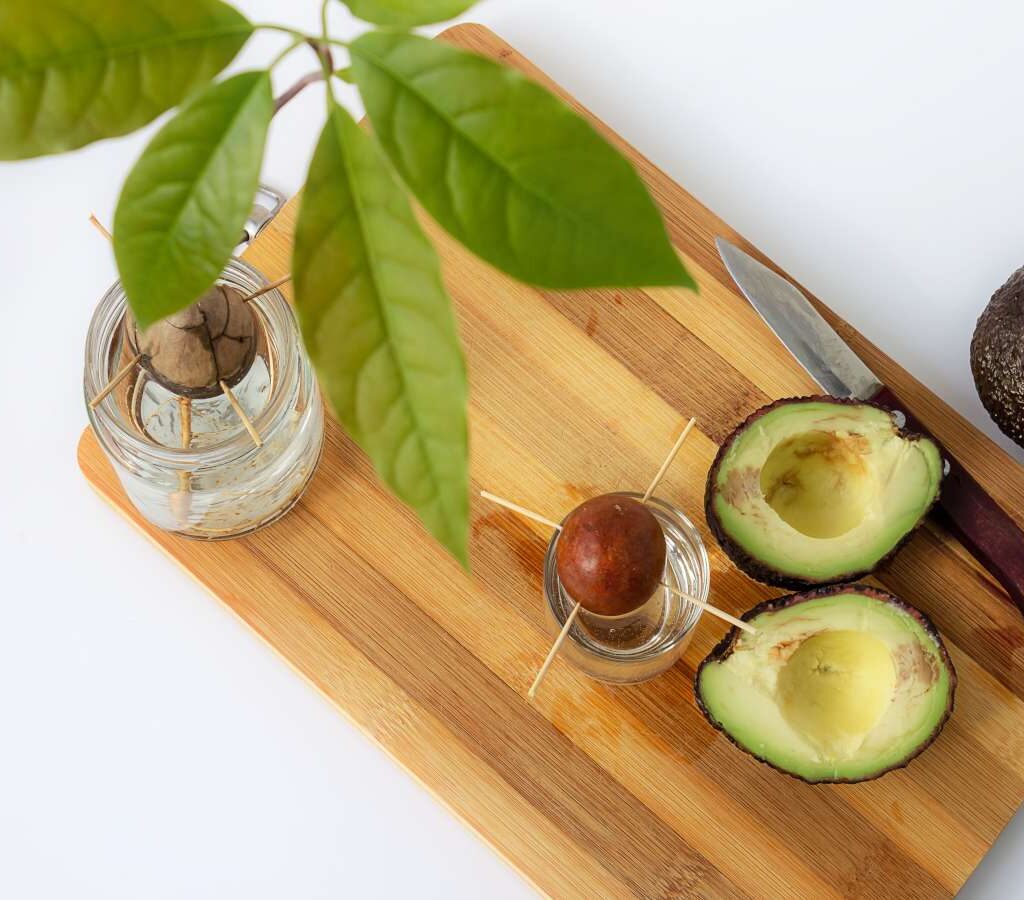
Step 3: Insert Toothpicks
Stick 3 to 4 toothpicks into the seed at a slight downward angle, spaced evenly around the circumference. These toothpicks will suspend the seed over a glass of water.
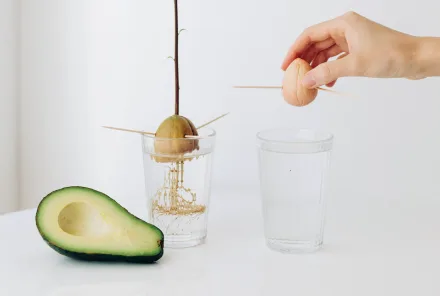
Step 4: Suspend in Water
Place the seed in a glass of water, wide-end down. Only the bottom third of the seed should be submerged. Position the glass in a warm, bright area—ideally near a sunny window.
Tip: Change the water every 3–5 days to prevent bacteria and mold.
Step 5: Wait for Sprouting
This part requires patience. Germination can take anywhere from 2 to 8 weeks. Here’s what you can expect:

- Week 2–4: The seed may crack, and the brown skin may peel.
- Week 4–6: A small root will emerge from the bottom.
- Week 6–8: A shoot will grow from the top.
Important: Don’t let the root dry out at any stage. Keep the water level consistent.
Step 6: Transfer to Soil
Once the stem reaches 6–7 inches tall, trim it back by half to encourage root growth. When it grows back and the roots are well established, it’s time to pot it.
Potting Instructions:
- Choose a 6–10 inch pot with drainage holes.
- Fill it with well-draining potting soil.
- Plant the seed in the soil with the top half exposed.
- Water thoroughly after planting.
Step 7: Light and Water Requirements
- Light: Avocados love sunlight. Place your plant in a location with at least 6 hours of sunlight per day.
- Water: Keep the soil moist but not soggy. Water when the top inch of soil feels dry.
- Humidity: Mist occasionally to mimic its native tropical environment.
Step 8: Ongoing Care and Maintenance
- Pruning: Pinch back the top leaves regularly to encourage bushier growth.
- Repotting: As the tree grows, you’ll need to repot into larger containers every 12–18 months.
- Fertilizing: Use a balanced fertilizer during spring and summer every 4–6 weeks.
- Pests: Watch out for spider mites or aphids. Neem oil or insecticidal soap can help.
Common Problems and How to Fix Them

| Problem | Cause | Solution |
|---|---|---|
| Drooping leaves | Overwatering | Let soil dry before next watering |
| Brown leaf tips | Dry air or salt buildup | Increase humidity and flush soil |
| No root or shoot growth | Cold conditions or bad seed | Move to warmer spot; try a fresh seed |
| Mold on seed | Water not changed often enough | Clean seed and glass, refresh water |
Will It Bear Fruit?
Yes—but it may take 5 to 13 years, and there are a few caveats:
- Trees grown from seed may not produce the same quality fruit as the parent.
- Cross-pollination may be required.
- Optimal fruiting requires tropical to subtropical climates.
If your goal is fruit, consider buying a grafted tree from a nursery. But if you’re in it for fun and greenery, home propagation is perfect.
Fun Tips and Facts
- You can also grow avocados hydroponically or in water-filled jars permanently (though they won’t fruit).
- Avocado trees can grow 15–35 feet tall in ideal conditions.
- Avocados are native to Central America and Mexico, dating back to 5000 BC.
Final Thoughts
Propagating an avocado from a pit at home is a delightful mix of science experiment and gardening. It’s a low-cost, rewarding activity that brings nature indoors and teaches patience. Even if it doesn’t bear fruit, the lush foliage and vibrant green leaves make for a beautiful indoor or patio plant.
So next time you enjoy an avocado, don’t toss the pit—grow it instead!
Leave A Comment