
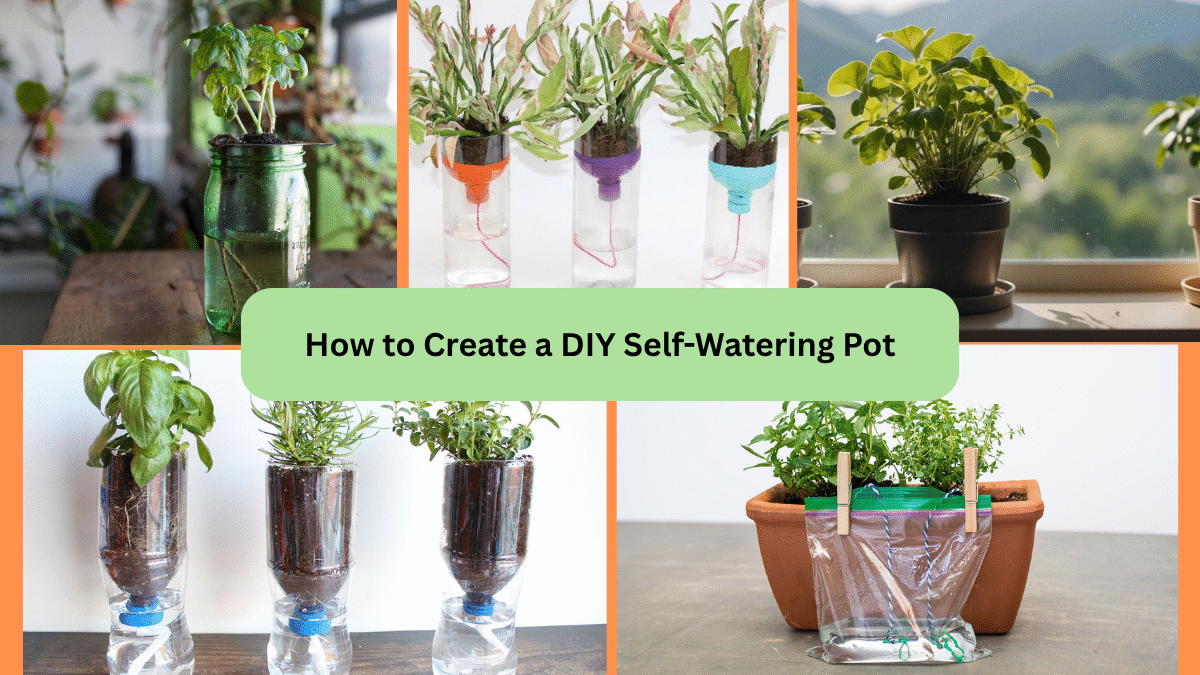
If you love plants but often forget to water them — or travel frequently — a self-watering pot might be your new best friend. These clever containers help regulate soil moisture, delivering just the right amount of water to your plants over time without overwatering or drying out.
And the best part? You don’t have to spend extra money on expensive store-bought versions. With a few simple materials, you can easily create your own DIY self-watering pot at home!
In this detailed guide, you’ll learn what a self-watering pot is, why it’s useful, and how to build one yourself step by step. Let’s get started!
What is a Self-Watering Pot?

A self-watering pot is a container designed with a built-in water reservoir at the bottom. The plant’s roots draw water through a wick or capillary action, ensuring consistent hydration without the risk of overwatering.
Why it works:
The plant takes in water as it needs it, keeping the soil moist but not waterlogged. It reduces the frequency of watering and prevents root rot — perfect for forgetful or busy plant owners!
Benefits of Using Self-Watering Pots
✔ Prevents overwatering and underwatering
✔ Reduces plant care time and effort
✔ Maintains steady moisture levels
✔ Helps plants survive during vacations or busy weeks
✔ Improves plant health by reducing stress
✔ Perfect for indoor and balcony gardening
What You’ll Need for a DIY Self-Watering Pot
You don’t need fancy equipment — most of these items are already in your home:
Materials:
- Two plastic containers or bottles (one slightly smaller than the other, or a bottle cut into two parts)
- Cotton rope, fabric strip, or thick yarn (for the wick)
- Sharp scissors or a utility knife
- Drill or nail (for making holes)
- Potting mix
- Your plant of choice
Optional:
- Decorative stones or pebbles for the top layer
- Paint or markers to customize your pot
How to Make a DIY Self-Watering Pot: Step-by-Step
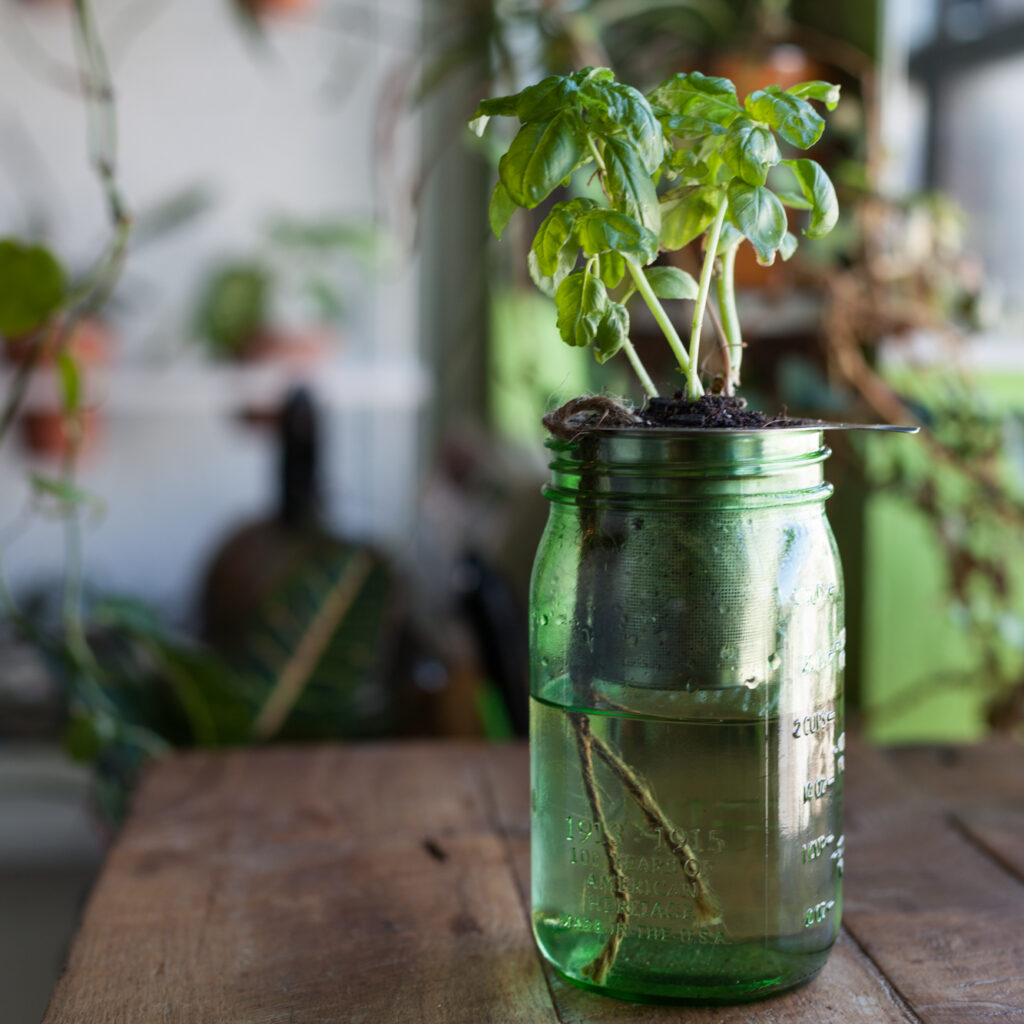
Step 1: Choose Your Containers
You’ll need:
- A plant container (with drainage holes)
- A water reservoir container (slightly bigger to fit beneath or hold the plant container)
Tip: Old yogurt containers, water bottles, or leftover plastic pots work great for this project.
Step 2: Cut and Prepare the Containers
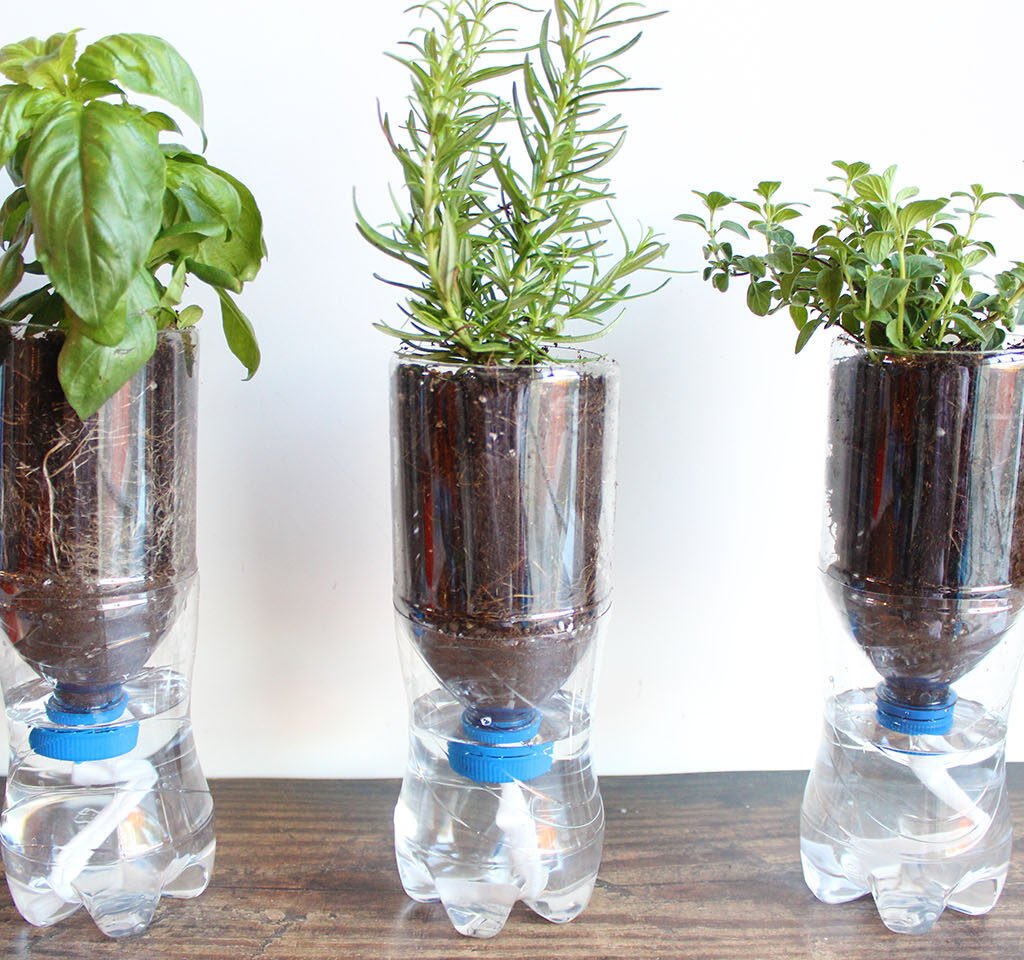
If using a plastic bottle:
- Cut the bottle about ⅓ from the bottom.
- The top half will hold the plant and soil.
- The bottom half will act as the water reservoir.
If using two separate containers:
- Ensure one can nest inside the other, leaving space at the bottom for water storage.
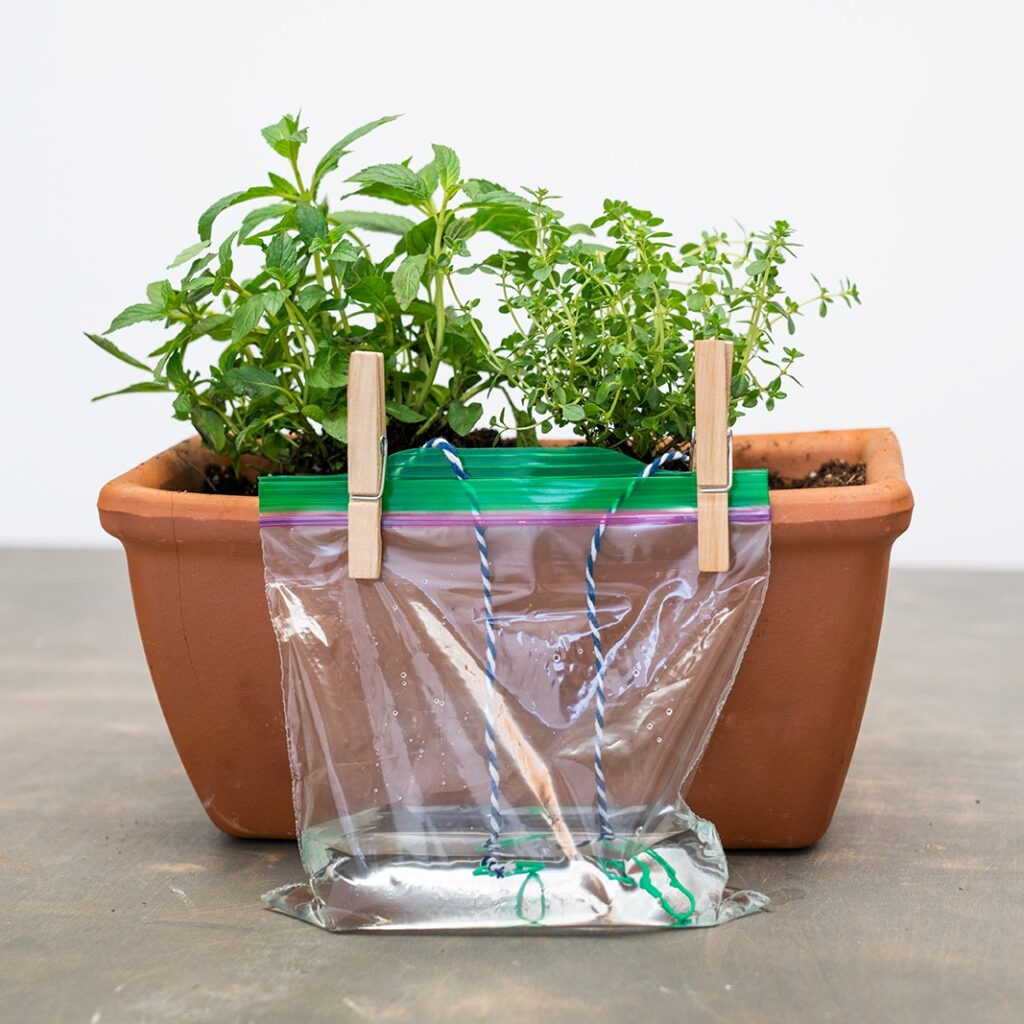
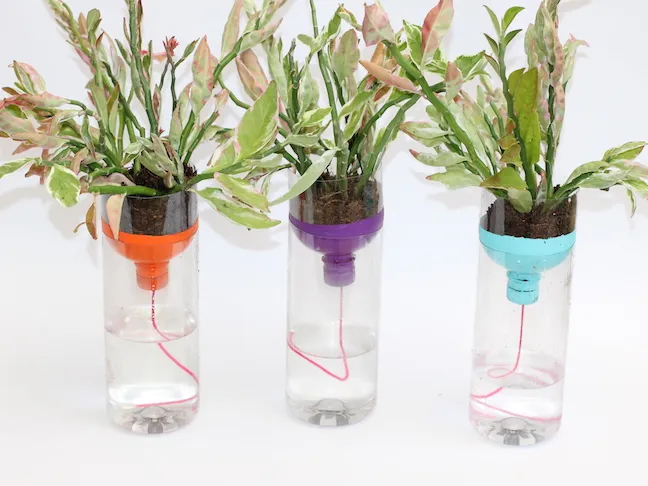
Step 3: Create a Wick System
- Cut a length of cotton rope, thick yarn, or fabric strip about 6–8 inches long.
- Insert it through a hole in the base of the plant container so that about 2–3 inches of the wick hangs into the water reservoir below.
- The rest of the wick will stay in the soil, pulling water up through capillary action.
Pro tip: Make two or more wicks for larger pots or thirstier plants.
Step 4: Add Potting Mix and Plant
- Place a small layer of soil over the wick inside the plant container.
- Add your plant and fill with potting mix, ensuring the wick stays vertically in the soil.
- Lightly press the soil down.
Optional: Add decorative stones or mulch on top to help retain moisture and prevent algae in indoor settings.
Step 5: Assemble the Self-Watering System
- Place the plant container over or inside the water reservoir.
- Fill the reservoir with fresh, clean water.
Ensure the wick is submerged in the water for proper absorption.
Step 6: Monitor and Maintain
- Top up the reservoir as needed — usually once every few days.
- Clean the container and wick every few weeks to prevent mold or bacteria buildup.
- Check the soil moisture occasionally, especially during hot weather.
Pro tip: Use a transparent or semi-clear reservoir to easily see water levels.
Best Plants for Self-Watering Pots
Not all plants have the same water needs. These plants thrive in self-watering systems:
Indoor Plants:
- Pothos
- Peace Lily
- Spider Plant
- Snake Plant
- Philodendron
Herbs:
- Basil
- Mint
- Parsley
- Cilantro
Small Vegetables:
- Lettuce
- Spinach
- Cherry Tomatoes (for larger systems)
Avoid succulents and cacti — they prefer dry soil and don’t perform well with constant moisture.
Tips for Successful Self-Watering
✔ Use lightweight, well-draining potting mix — heavy soils can retain too much moisture.
✔ Clean the wick and container every 4–6 weeks to prevent odor and algae.
✔ Place in a bright, indirect sunlight spot for best growth.
✔ Adjust wick length based on plant water needs — longer for thirsty plants, shorter for drought-tolerant ones.
✔ Use rainwater or filtered water if your tap water is high in minerals.
Creative DIY Self-Watering Pot Ideas
- Paint and decorate your containers to match your home décor.
- Hang small self-watering pots from windows or balcony railings.
- Use colored glass bottles for an elegant, upcycled look.
- Create a herb wall with multiple bottle-based self-watering planters.
Common Mistakes to Avoid
Using non-absorbent synthetic ropes as wicks
Forgetting to clean water reservoirs regularly
Using soil that holds too much water
Leaving succulents or drought-loving plants in constant moisture
Overfilling the reservoir without checking soil dampness
Final Thoughts
A DIY self-watering pot is a brilliant, easy-to-make solution for anyone who wants healthy, low-maintenance plants at home. Whether you’re a beginner, a frequent traveler, or simply someone who forgets to water on time, this clever system ensures your plants get exactly the moisture they need.
Plus, it’s eco-friendly, cost-effective, and a great weekend DIY project. So gather your materials, get creative, and start making your own self-watering pots today — your plants (and your schedule) will thank you!
Leave A Comment