Growing your own vegetables is not only satisfying but also a great way to reduce waste and make the most of what you have in your kitchen. One surprisingly easy and rewarding plant to regrow from kitchen scraps is celery. With just a few simple steps, you can transform the base of a celery stalk into a flourishing plant, creating a sustainable supply of fresh greens for soups, salads, and garnishes.
In this guide, we’ll cover how to plant celery from kitchen scraps, including step-by-step instructions, tips for soil, light, and water, as well as advice for harvesting and maintaining a healthy plant.
Why Grow Celery from Kitchen Scraps?
Celery is an excellent candidate for regrowth for several reasons:

- Cost-effective: Instead of buying a new bunch every time, you can keep regrowing celery from the base of your previous stalks.
- Sustainable: Reduce kitchen waste by reusing vegetable scraps.
- Freshness: Homegrown celery is crisp, flavorful, and free from chemical treatments often found in store-bought varieties.
- Educational: It’s a fun and educational project for kids or beginners, showing the power of regrowth and plant care.
Step 1: Selecting the Celery Base
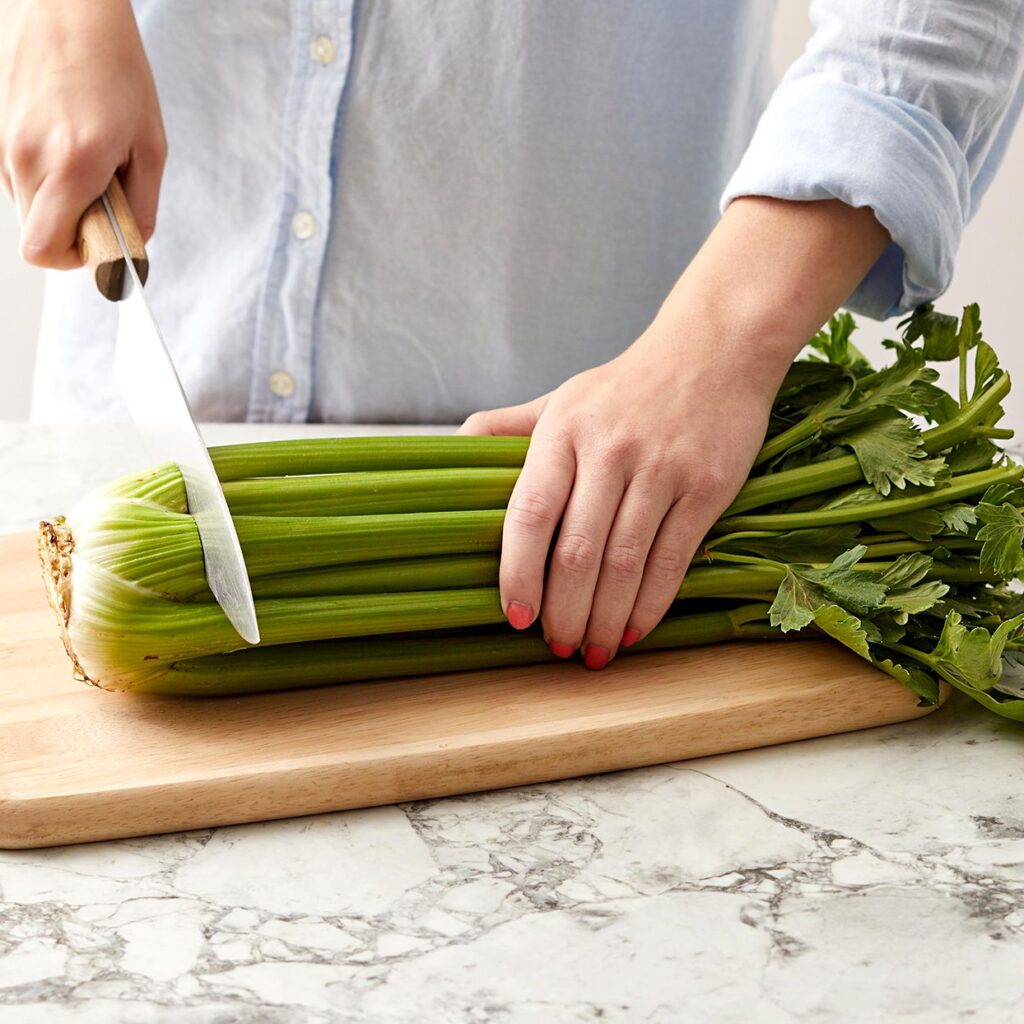
To start celery from scraps, choose the right portion of the plant:
- After using celery for cooking, keep the base (the root end) intact, approximately 2–3 inches tall.
- Make sure the base is fresh and healthy, without signs of rotting or discoloration.
- Stalks that have been stored too long may not regrow effectively, so using a fresh bunch is ideal.
Step 2: Preparing the Base for Regrowth
- Trim the Stalks: Remove any leaves or stalks above the base to focus the plant’s energy on regrowing roots and new shoots.
- Inspect for Damage: Ensure the base has no mold or soft spots, as these can prevent regrowth.
- Optional Pre-Soak: Soaking the base in a cup of water for a few hours can encourage faster root development, though this step is optional.
Step 3: Choosing a Container

You don’t need a large garden bed to regrow celery:
- Small Bowl or Shallow Container: A dish, small bowl, or jar works perfectly for initial regrowth.
- Water or Soil: Celery can initially sprout roots in water before transplanting into soil. This makes it easy to monitor growth and ensures success before planting outdoors.
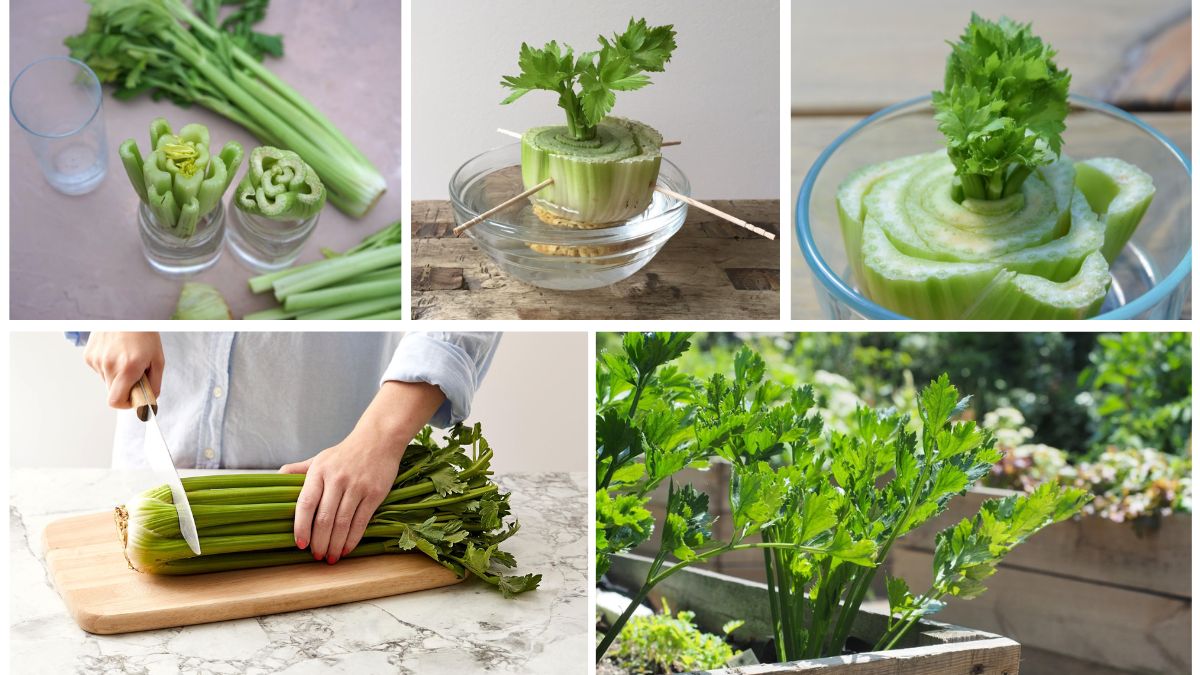
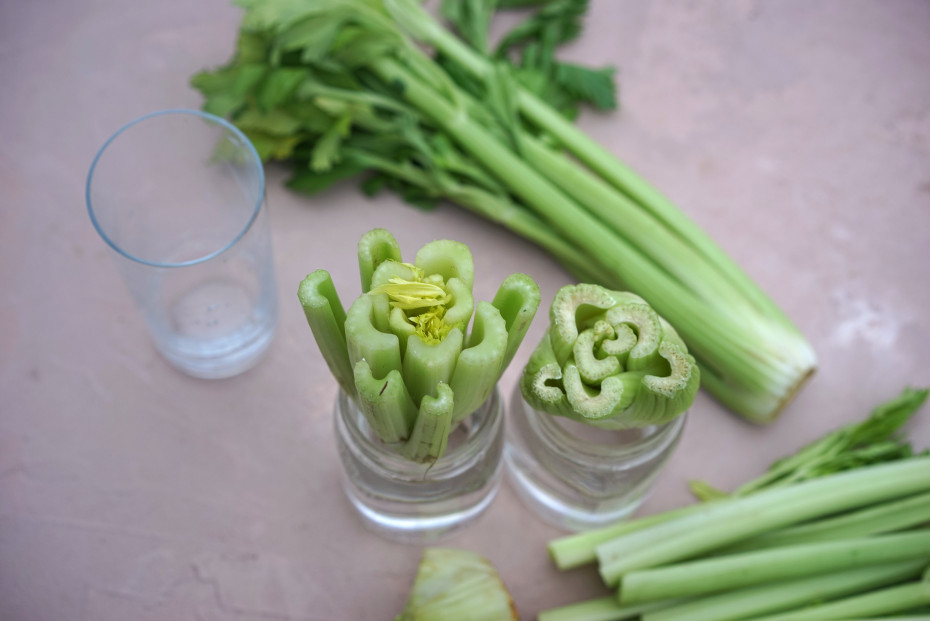
Step 4: Regrowing Celery in Water
Regrowing celery in water is a simple and popular method:

- Add Water: Fill a small bowl or cup with about 1–2 inches of water.
- Place Celery Base: Put the root end of the celery base in the water, stalk-side up.
- Sunlight: Place the bowl on a sunny windowsill where it will receive indirect light.
- Change Water: Refresh the water every 1–2 days to prevent bacteria growth.
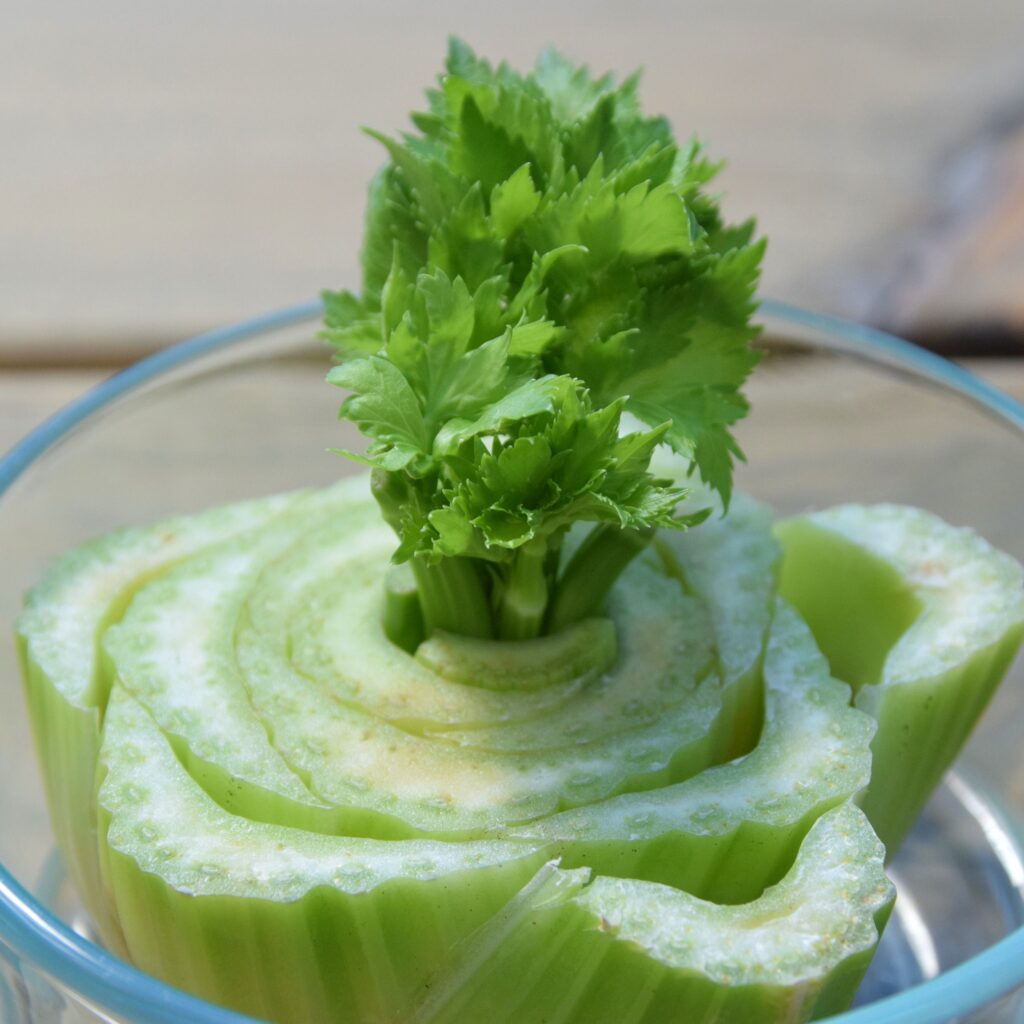
- Watch for Roots: Within 5–10 days, small roots will start to appear from the base, along with tiny new leaves emerging from the center.
Step 5: Transplanting Celery into Soil
Once the celery base has developed roots and visible shoots, it’s time to plant it in soil for long-term growth.
Choosing the Right Soil and Container
- Soil: Use a well-draining, nutrient-rich potting mix. Celery prefers slightly acidic to neutral soil (pH 6.0–7.0).
- Container: A pot at least 6–8 inches deep is ideal to accommodate root growth. Ensure it has drainage holes.
Planting Steps
- Fill the pot with moist potting mix, leaving space for the base.
- Make a small hole in the soil, place the celery base with roots facing down.
- Cover roots with soil and gently press to secure the plant.
- Water thoroughly to help the soil settle around the roots.
Step 6: Caring for Your Celery Plant
Celery requires consistent care to thrive and produce fresh stalks.
Sunlight
- Celery grows best with 6–8 hours of sunlight daily.
- For indoor growing, place near a sunny window or supplement with grow lights if sunlight is insufficient.
Watering
- Celery requires constant moisture to stay crisp and tender.
- Water regularly to keep soil evenly moist but avoid waterlogging.
- Mulching around the base can help retain moisture and prevent soil drying.
Fertilizing
- Celery is a heavy feeder. Use a balanced liquid fertilizer every 2–3 weeks or incorporate compost into the soil for nutrients.
- Avoid over-fertilizing with nitrogen, which encourages leafy growth at the expense of strong stalks.
Step 7: Maintaining Healthy Growth
Pruning and Harvesting
- Leaf Pruning: Trim any yellow or damaged leaves to encourage healthy growth.
- Harvesting Stalks: You can start harvesting once stalks are 6–8 inches tall. Pull outer stalks first, leaving inner stalks to continue growing.
Pest and Disease Management
- Celery can be prone to aphids, slugs, and fungal diseases.
- Keep plants well-spaced for good airflow.
- Use natural remedies like neem oil, insecticidal soap, or manual removal for pests.
- Avoid overhead watering to reduce fungal issues.
Step 8: Extending Your Celery Harvest
With proper care, celery can provide multiple harvests from the same base:

- Regrow Multiple Times: After harvesting stalks, allow the plant to continue growing and produce more.
- Indoor Winter Growth: Celery can thrive indoors over winter with adequate light and moisture.
- Successive Planting: Keep a few bases in water at different stages to ensure a constant supply of fresh celery.
Extra Tips for Success
- Rotate Containers: Avoid planting celery in the same soil repeatedly to reduce disease risk.
- Companion Planting: Celery grows well with tomatoes, leeks, and beans.
- Temperature: Celery prefers cool weather (55–70°F). Extreme heat can cause bitterness.
- Container Size: Celery’s roots need space—don’t use too small a pot.
- Patience: Celery grows slowly compared to other vegetables; consistent care is key.
Why Regrowing Celery is Worth It
Growing celery from kitchen scraps is not only economical and sustainable, but it also provides:
- Fresh, flavorful stalks year-round.
- Educational experience for kids and beginners.
- Satisfaction of self-sufficiency—turning what would be discarded into a productive plant.
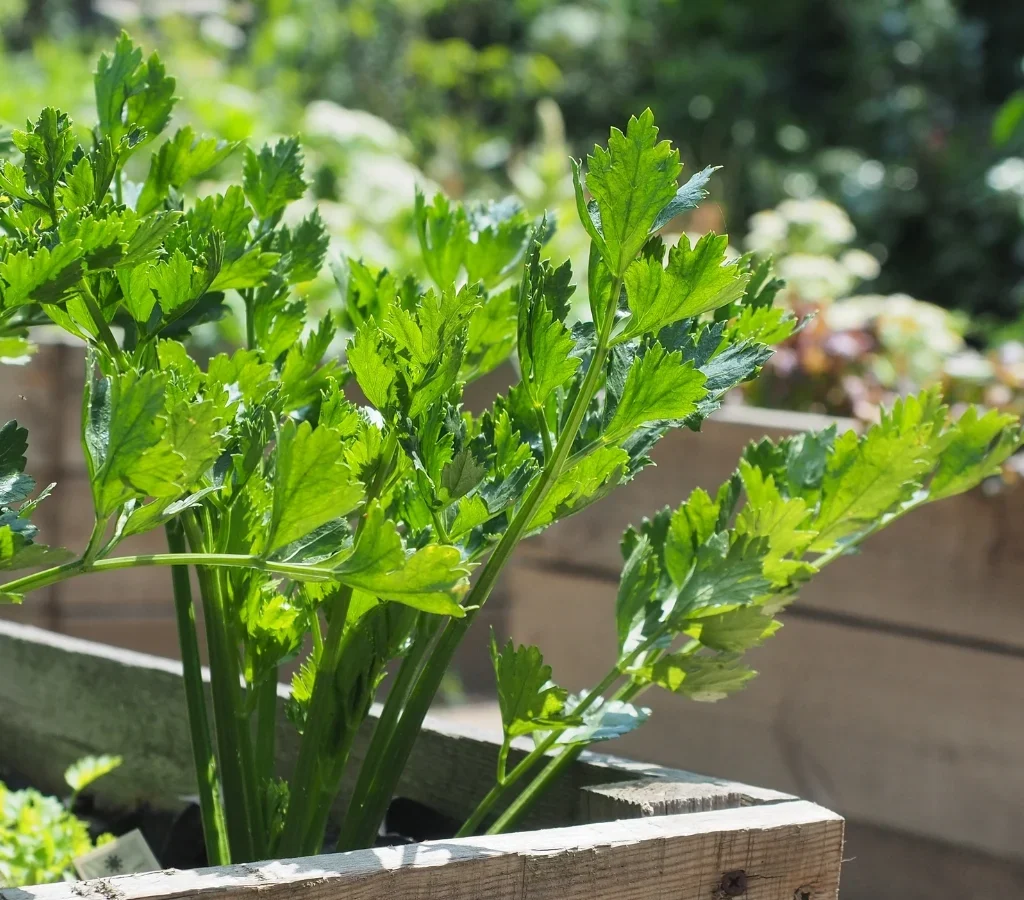
- A visually appealing plant with tall, elegant stalks and lush green leaves.
With a little care and attention, a simple celery base can become a thriving indoor or outdoor plant, supplying fresh stalks for soups, salads, and cooking for weeks or even months.
Final Thoughts
Planting celery from kitchen scraps is a fun, easy, and sustainable gardening project. From selecting the right base to regrowing in water, transplanting into soil, and nurturing the plant with sunlight, water, and nutrients, you can enjoy a constant supply of fresh, crunchy celery without ever buying a new bunch.

Whether you’re a beginner gardener or an experienced grower, this method demonstrates the power of regrowth, waste reduction, and sustainable living. With patience, care, and a sunny windowsill or garden spot, you’ll soon have a thriving celery patch right from your kitchen scraps, offering delicious, homegrown flavor with every harvest.